A hard drive is one of the most common hardware components to store all your personal files and folders, and sometimes, even the Operating System itself. So when the computer fails to recognize a hard drive, it goes without saying that the system cannot access its files and folders.
Furthermore, if you have the O.S. installed on this hard drive, you will get a boot device not found error during boot. There are several reasons a computer fails to recognize a hard drive. One of the major reason being the storage device not showing up in BIOS.
Besides this, anything from hardware issues, like a faulty cable, to software issues, like driver errors, there is a multitude of things that might be stopping the P.C. from recognizing a hard drive.
Why Is My Computer Not Recognizing Hard Drive?
If you have an internal or external hard drive that is not showing up, in brief, the issue could be a damaged component, faulty device driver, or some software/O.S. complication.
- Hard drive disabled from BIOS.
- Conflicting drive letters
- Faulty hard disk cable
- Damaged hard drive
- Insufficient power
- Outdated hard disk driver
- Damaged hard drive port on the motherboard
- Outdated Windows
How to Fix Computer Not Recognizing Hard Drive?
Before jumping into solutions, you first need to ensure whether the BIOS is detecting the hard drive. If the system is not detecting the hard drive, the issue is likely with the hard drive, its cable, or the motherboard itself.
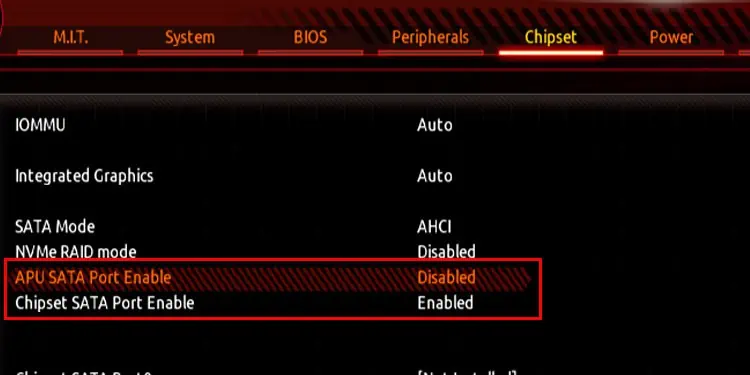
Enable Hard Drive from BIOS
The BIOS (Basic Input Output System) has details about all the internal hardware components connected to the system. Besides this, you can enable or disable specific devices according to your choice. If the hard drive is disabled from the BIOS, the Operating System cannot access it.
You will need to enable the hard drive from BIOS for the O.S. to detect it.
- Repeatedly press the BIOS key during startup to Enter BIOS. BIOS key could be any of the function keys or the delete key, depending on your P.C./Laptop.
- Once in BIOS, search for configurations related to Storage, System Configuration, SATA, or Storage Configuration settings.

- Here, enable any storage device that is currently disabled.
Check Disk Management
Hard drive showing up in BIOS means that the system is detecting the hard drive, but some complication stops the device from showing up in the O.S. If that’s the case, you can check disk management.
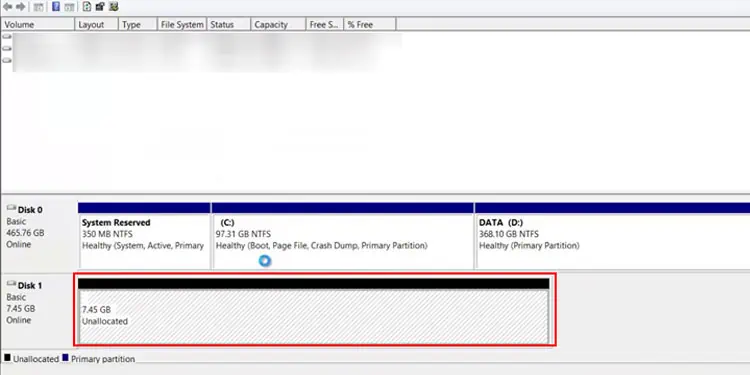
Disk Management keeps the record of all the storage devices that the O.S. detects, their storage, and allocated and unallocated space. The O.S. will not display the storage device with unallocated space.
If you have connected the hard drive for the first time, all its storage space will be unallocated. Therefore, it may seem like the computer is not detecting the hard drive. Follow the steps below to set up a new drive.
- Press the Windows + X and select Disk Management.
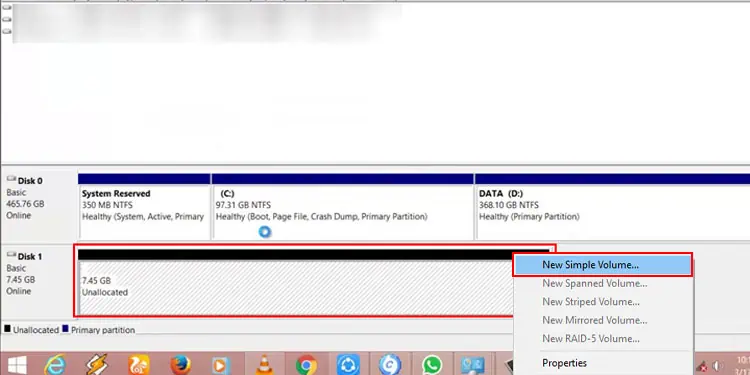
- Right-click on the storage device that indicates Unallocated.

- Select New Simple Volume.

- Select Next.
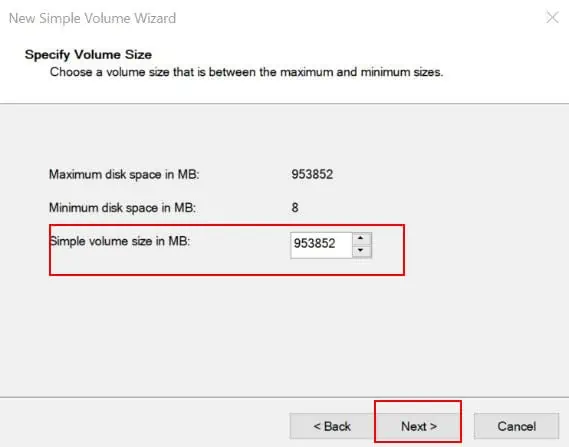
- Set the size of the sample volume and click Next.

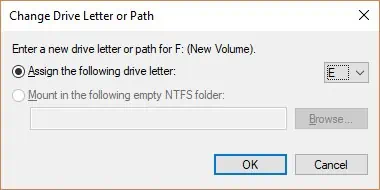
- Set a Unique drive letter, one that is not assigned yet. Then, click Next.

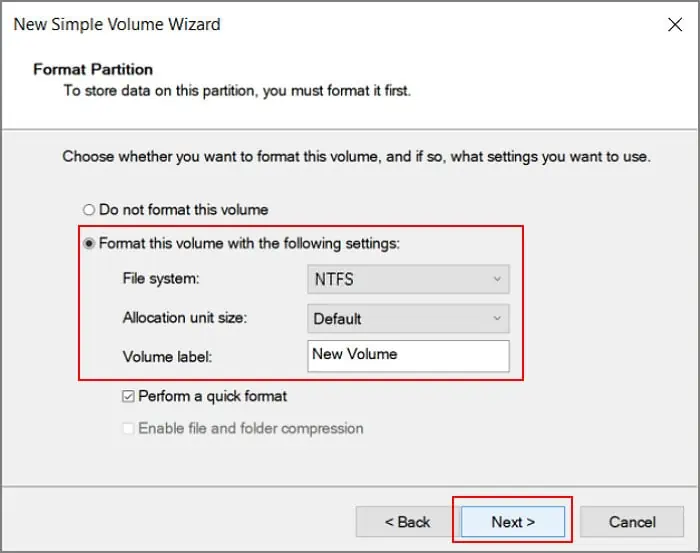
- Check Format this volume with the following settings and set File system and Volume label. Click Next.

- Select Finish.
- Now open This P.C. to check if it detects the hard drive.
Check Hard Disk Status
If the BIOS and Disk Management detect the hard drive but you cannot see the partition on This P.C., we recommend checking the drive status. Windows uses the hard disk’s S.M.A.R.T. feature to get its current status.
- Press Windows + R to open Run.
- Type
cmdand press Enter to open the command prompt. - Copy the code
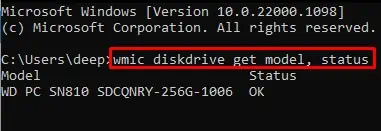
wmic diskdrive get model, status, and press Enter.
- All the storage devices should indicate OK.
Switch AHCI/IDE Mode
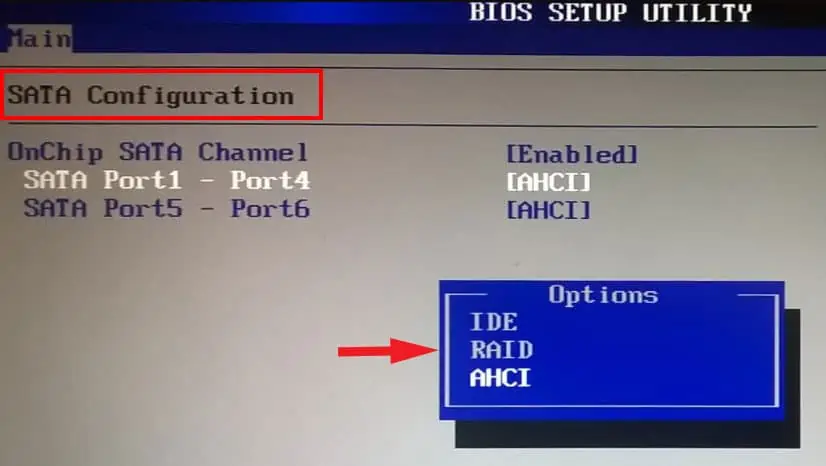
Operating System uses a certain SATA configuration, AHCI, IDE or RAID, to communicate and store data within its storage devices connected with SATA cable. Most OS now a days uses AHCI (Advanced Host Controller Interface) is the latest one, and IDE is fairly older interface.
If one configuration is causing issue you can switch between the AHCI or IDE to see if it fixes the issue.
- Repeatedly press the BIOS key to enter your system BIOS. BIOS key could be any of the function key or the Delete key depending on your PC.
- Once in BIOS, navigate to System Configuration.
- Search for settings named Storage Configuration.
- Here set Configure SATA as AHCI or IDE.

- Save and exit the BIOS
- Once the PC restart, check if the OS detects the hard drive.
Note: Depending on the device you use, you might need to navigate the BIOS to find correct settings
Change Drive Letter
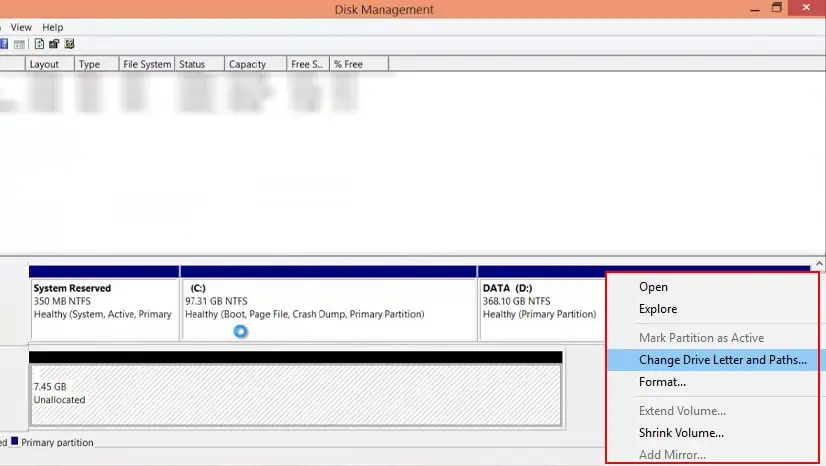
If you can see the hard disk status indicates OK, but you cannot access the drive, there could be letter assignment issues. Windows may face issues displaying a hard drive if it does not have a dedicated letter. To assign a drive letter,
- Press the Windows + X key and select Disk Management.
- Right-click on the faulty storage device drive and select Change Drive Letter and Paths.

- Select Change.
- Select a new letter from the drop-down menu and click OK.
- Open This P.C. to check if the hard disk shows up.
Re-seat Hard Disk Cable
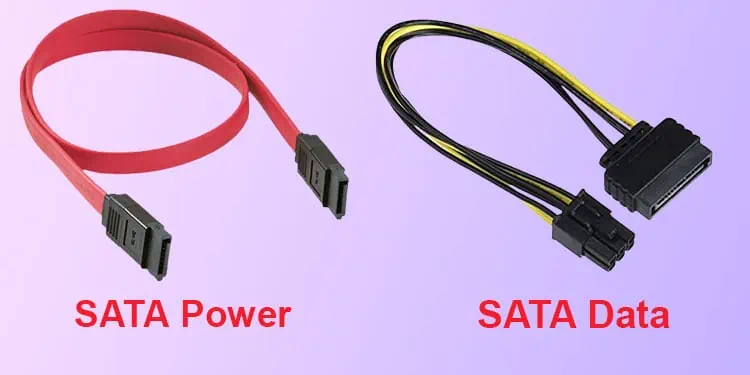
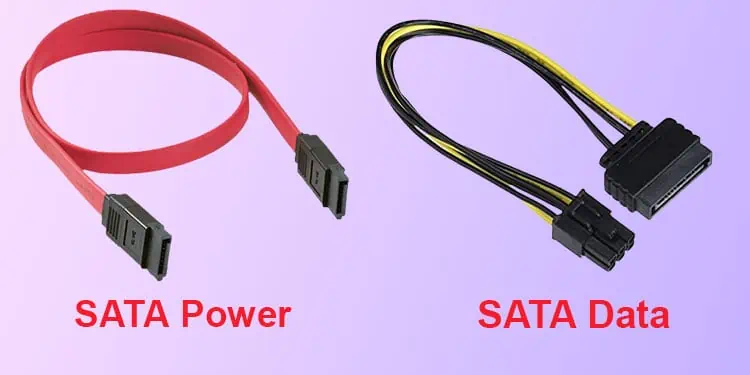
Inside a Desktop P.C., two wires connect to the hard drive, SATA, and the power cable. The SATA cable connects the hard disk to the motherboard, and the power cable connects the hard disk to the power supply.
These cables have a lock mechanism. The computer may not detect the hard drive if these cables are not secured.
To reset your hard drive cable,
- Turn off your P.C.
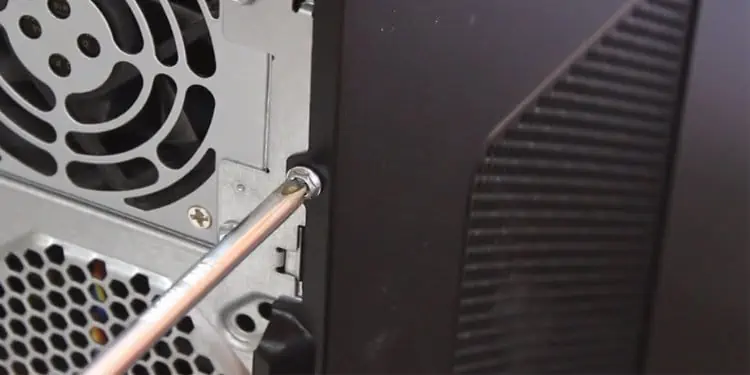
- Open your P.C.s side panel by removing all the screws on the right side of the motherboard.

- Gently take the side panel out of the CPU case. You can now access the internal component of your P.C.
- Locate the two cables that connect the motherboard to the hard drive and the power supply to the hard drive.

- Remove and reconnect all these cables one at a time.
- Turn on your P.C. before closing the side panel.
- If the system detects the hard drive, close the side panel.
- If the system does not detect the hard drive, turn off your system.
- Remove the motherboard side of the SATA cable. And check the SATA port from which you removed the SATA cable.
- Search your motherboard for another SATA port and connect the SATA cable to this port.
- Turn on your system and check if the P.C. detects the hard drive.
Replace Data and Power Cable
Sometimes the issue may not be with the port, but with the cable that is damaged. Damages due to wear and tear of the cable or a faulty SATA cable itself could be why the computer is not detecting the hard drive.
In that case, replacing the cable should fix the unrecognized hard disk issue. To replace the hard disk cable,
- Unscrew all the screws on the right side of the CPU case, and gently remove the side panel.
- Remove the existing cable and replace it with a new pair of cables.

- Connect one end of the SATA cable to the motherboard and the other to the hard drive.
- Connect one end of the power cable to the P.S.U. and another to the power port on your hard drive.
- Turn on the P.C.
- Enter the BIOS to check if the system detects the hard drive
Check Power Supply
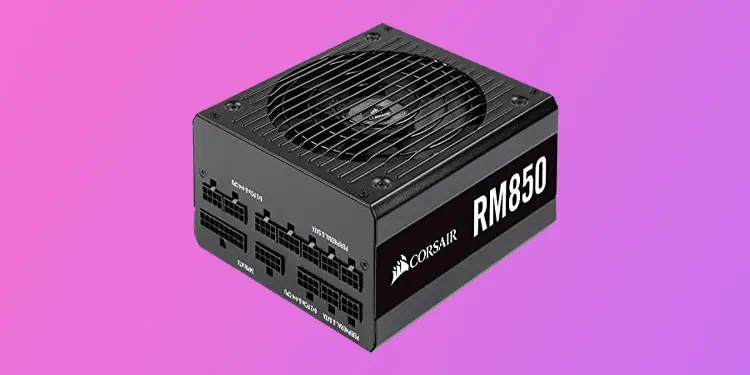
Another reason the computer fails to detect the hard disk is if the hard disk does not turn on. This could happen on many occasions. One of them being P.S.U. not supplying enough power to the hard drive.
Suppose you have a power-demanding computer but the P.S.U. cannot supply enough power to it, internal hardware components will suffer. And this includes the hard disk as well.
To fix this, make sure that you use a power supply that meets the minimum power requirement for your P.C.
You can find several websites that calculate the power supply for your system on the internet. Use them to determine your PC’s minimum P.S.U. voltage.
USB Power Suspend Feature
Computer may also have issues detecting an external hard drive if USB power suspend setting is enabled. What USB selective suspend setting does is, it stops power supply to USB port that is idle.
The system usually detects the external hard drive connected to a USB port. However, if the device is idle for a long time, OS might mistake it for an unused ideal USB port. And if you have enabled power suspend feature, the OS may not detect the hard drive.
In order to fix this, you will need to disable USB selective suspend.
- Press the Windows + R key to open Run.
- Type
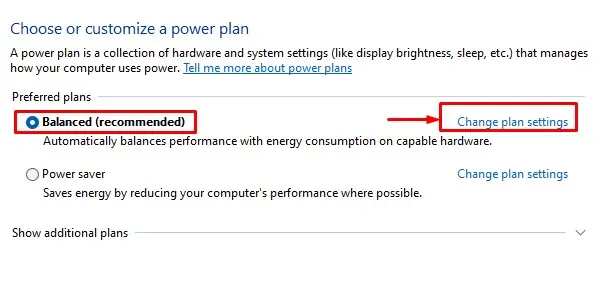
powercfg.cpland press Enter to open Power options. - Click on Change plan settings on the selected power plan.

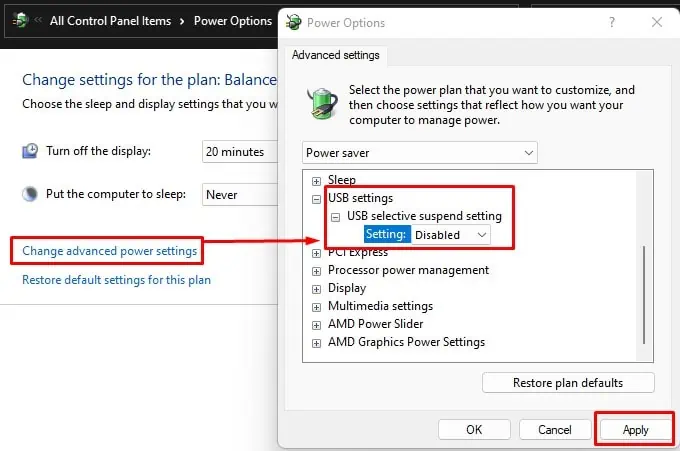
- Click in Change advanced power settings.
- Expand USB settings, and then expand USB selective suspend Settings.

- Set it to Disabled.
Update Necessary Drivers
The device driver acts as an interface through which the Operating System and the device exchange information. A corrupted driver will cause complications between the two when communicating with each other.
In the case of a hard drive, you will need to update the necessary driver to repair corrupted drives.
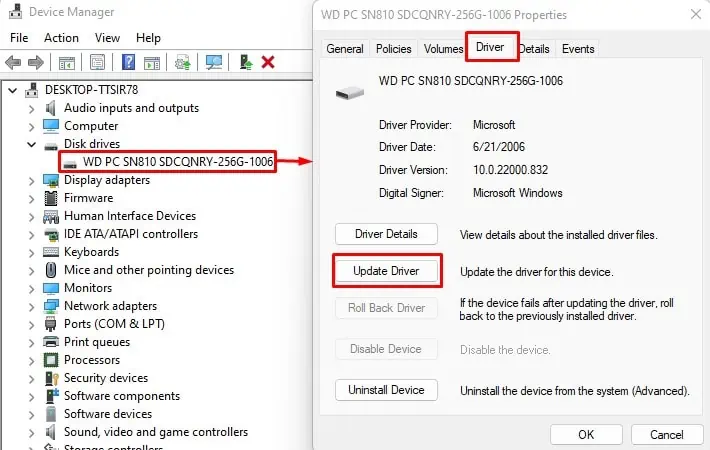
- Press the Windows + X key and select Device Manager.
- Expand Disk Drives to list all the storage devices connected to the computer.
- Double-click on the drive that is causing the issue.
- Go to the Driver tab and select the Update driver.

- Click on Search automatically for drivers.
- Once the update is complete, check if the P.C. detects the hard drive.
Recover Files from Hard Drive
If none of the solutions work, you should try and recover files and folders from the hard drive. Hard drives or any storage device will eventually fail after prolonged use. A failing hard drive will cause multiple issues, one of them being the P.C. not recognizing the drive.
If you have a relatively older hard drive, we recommend recovering the drive. However, recovering files from a drive is a complex process. Therefore, you can refer to our article to format and recover data that explains each step in detail

