CRC or Cyclic Redundancy Check is a self-occurring storage test within Windows that spoofs out any potential issues in your hard or optical disks. Its purpose is to run a data verification test that ensures the data on your drives is accurate and that there are no bad sectors.
If it finds critical spots in your storage media then you’ll get the “Data error (cyclic redundancy check)” message preventing you from properly accessing your drives. This can happen while you’re trying to copy or move some files between multiple drives, trying to install a program, or just trying to open a file.
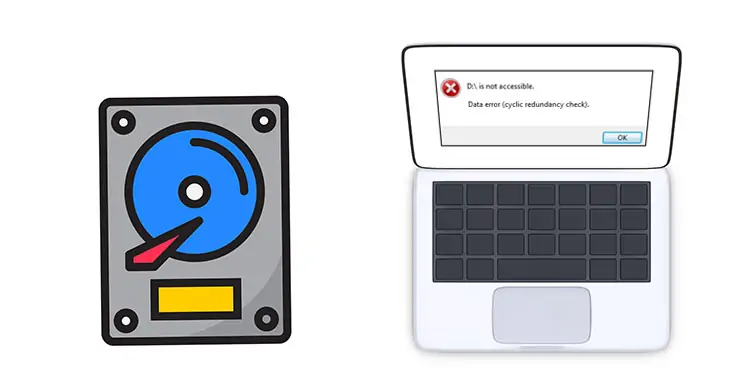
When you see the “Drive Is Not Accessible Data Error (Cyclic Redundancy Check)” pop-up, it indicates that there is something wrong with your drives so they need to be instantly repaired or salvaged.
Failure to sort out the CRC Data Error can lead to further damage or even permanent data loss. Therefore, it’s crucial to find a solution and fix the drive before any further damage is done.
Why Does The CRC Data Error Happen?
It can happen due to various factors, such as corrupted files, third-party app interference, malware, or just a dying drive showing its age. Many times an incomplete program installation can cause issues. Other times, registry files can get corrupted, making your drive malfunction.
At first, though, it’s important to identify whether the problem is stemming from the drive itself or a particular file you’re trying to maneuver.
The easiest way to find this out is to try to copy/move a different file in the same place as before. So, for instance, from Local Disk (D:) to USB Drive (F:). Then re-do the original file transfer that gave you the CRC Data Error in the first place.
If the transfer with the different file succeeds and the re-transfer with the original file subsequently fails, then you can be sure it’s the file that’s the issue and not the drive. However, if both transfers fail then it’s a drive issue and you need to follow along to find a fix that works for you.
Note: You should always copy important data in a safe place so it stays backed up. The following troubleshooting steps put strain on the drive so there’s a chance that the drive might not survive the following scans so a backup is imperative here.
How To Fix Data Error (Cyclic Redundancy Check)
Run CHKDSK Scan
Check Disk Scan (CHKDSK) is the most basic step in driver repair. It’s a built-in utility tool in Windows that helps you check a certain disk for errors, bad sectors, or any other problems. It then tries to repair the drive if issues are found.
- Press the Windows key
- Type “cmd”
- Right-click on “Command Prompt” and select “Run as administrator”
- Type “chkdsk /f x:” – replace the “x” with the letter of your drive, such as “chkdsk /f D:”

- Press Enter
- If Command Prompt displays the following message: “Chkdsk cannot run because the volume is in use by another process. Would you like to schedule this volume to be checked the next time the system restarts? (Y/N).” Press “Y” and then Enter.
Restart your PC after the scan and repair is complete.
Tip: Check out Microsoft’s guide on different options for the Check Disk scan to troubleshoot even more in-depth. There’s more than just the “/f” option that repairs errors in the drive.
Run SFC Scan
Where the CHKDSK scan examines the entire drive in question, the SFC, or System File Checker scan checks important Windows system files to see if any of them have become corrupt and need repairing.
After initiating the scan, if the SFC scan finds any corrupt registry files, DLLs or even executables, it will either fix it or replace it with a new one.
- Press Windows key
- Type “cmd”
- Right-click on Command Prompt and select “Run as Administrator”
- Type “sfc/scannow”

- Press Enter
Let the test scan run for a while and restart your system after it’s done. Open File Explorer to see if the problem still persists, if yes then move along to the next step.
Delete Temporary Files
A CRC Data Error can be caused by old temporary files taking up unnecessary space on your drive and clogging it. Deleting these does no harm and won’t affect your data in any way.
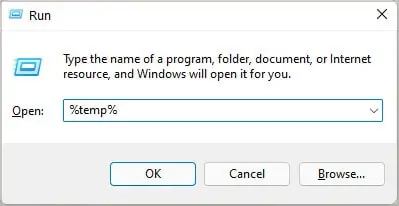
- Press and hold the Windows key and press R
- Type “%temp%”

- Press Enter
This will open the Temp folder in File Explorer. From here, you can select whichever temporary data you want to delete. An ever-green suggestion is to leave the (sub-)folders and only delete the temporary files you see in the root of the folder.
Boot into Safe Mode
If a certain app or file is giving you the CRC Data Error then booting into Safe Mode can solve the issue. For instance, if you’re trying to install an app but it keeps showing the error message, or if you’ve downloaded a file but upon opening it you keep getting the CRC Data Error.
In both of these cases, simply re-download the file. But, if the problem keeps persisting then you need to boot into Safe Mode.
- Press the Windows key
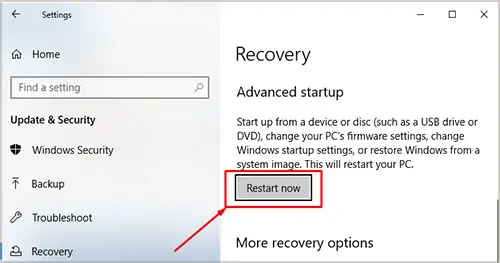
- Type “Advanced startup” and select the first option
- Under Advanced startup, select “Restart now”

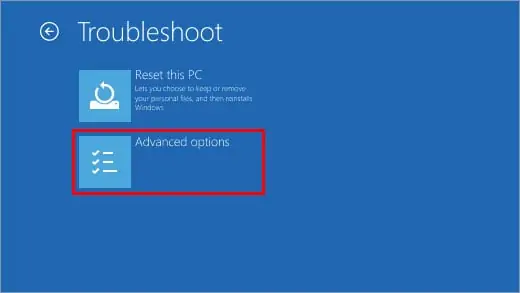
- Your PC will now restart and a new menu will pop up. Select “Troubleshoot” here.
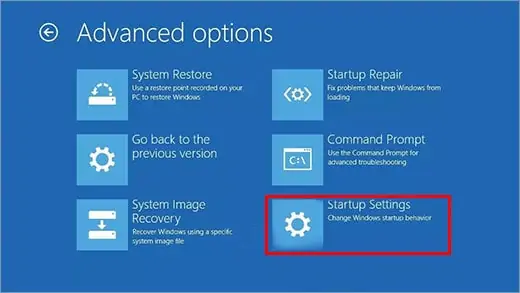
- Select “Advanced options”

- Select “Startup Settings”

- Press the “Restart” button

Your PC should restart once again and a new screen will show up. Press 4 or F4 to boot into normal Safe Mode, press 5 or F5 if you want networking capabilities (internet) while in Safe Mode.
You should now boot inside Safe Mode where everything should still look and feel normal. Here, you should delete and reinstall the apps that are giving you trouble. Same goes for any other file.
Check for Third-Party Interference
Sometimes, improper installation of an app can cause problems behind the scenes resulting in strange bugs, like the CRC Data Error.
Therefore, you need to delete these apps and reinstall them. You can try the Safe Boot method listed above, but often third-party interference is so deep-rooted that it can’t be manually solved by you. This is where an antivirus program comes in.
An antivirus program will thoroughly scan any app, file or drive on your behalf to spoof out malware or bloatware that is interfering with your storage media. You can download any antivirus program you like or just scan with Windows Defender as that’s sufficient, too.
- Press the Windows key
- Type and search “virus”
- Click on the first option to open Windows Defender
- Under Current threats, click “Quick scan”

Alternatively, to scan a particular file, app, folder, or drive, simply right-click on it within File Explorer and select “Scan with Microsoft Defender”. Follow on-screen instructions and wait for the scan to finish.
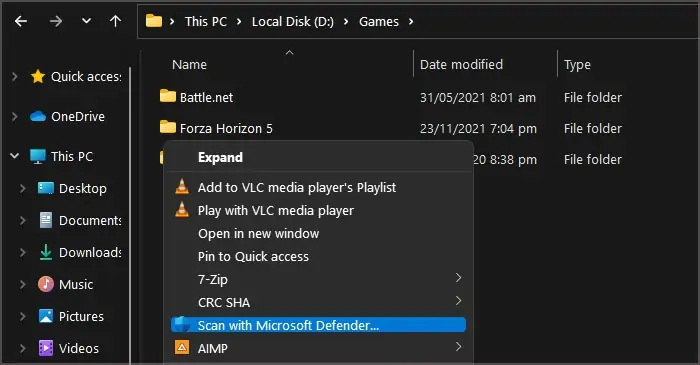
Any hidden or underlying artifact constituting third-party interference should get identified and dealt with accordingly this way.
But, if you know a certain app is the culprit, for example you installed it recently and Data Errors started popping up afterwards, then you don’t want to repair or scan it for viruses, and instead just want to delete it then.
- Press the Windows key
- Type and search “Remove”
- Click on the first option to open Settings
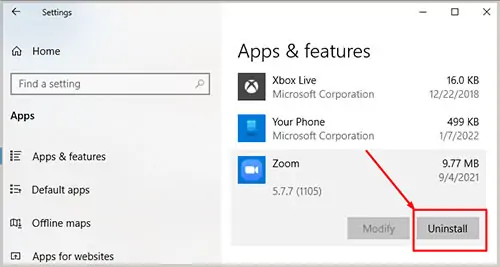
- Select whichever app you want to uninstall and click on “Uninstall”

- Follow on-screen instructions to complete the un-installation.
Use A Disk Utility Software
Most often, third-party disk management programs also help you solve critical problems.
There are countless disk utility softwares out there and most of them do the same thing with different gimmicks. Almost all of these softwares are paid with a free version that is limited in functionality.
Open the disk utility and scan the drive or file in question. After the scan is complete, select the option to repair it and leave it as this is a time-taking process. However, if the process exceeds 4 hours in runtime then it’s a sign of a dying drive.
Tip: Make sure to not download any disk or system cleaners, especially from disreputable sources as they’re likely to worsen your situation. Look for only disk utilities, data recovery software, and disk management tools that have good reviews and widespread acclaim.
Perform A Quick Format
If absolutely nothing works for you, then this is the last resort, short of buying a new drive. Unlike a proper format, a quick format only erases the data on the surface-level and does not overwrite it.
It’s best to back up the data elsewhere in a safe place before you proceed with the format, if possible.
With all that said, here’s how to format the drive:
- Open File Explorer
- Right-click on the drive you want to format
- Select “Format” from the context menu
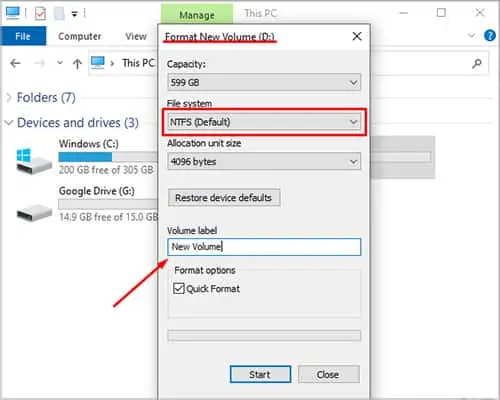
- Make sure “Quick format” checkbox is checked off
- Select NTFS file format in every case except for USB drives or SD Cards. For those, select FAT32.

- Click “Start” once everything is in order
The drive should get formatted rather quickly. As a safety measure, restart your computer after the format and voila, your drive should now be as good as new.
Tip: You can also use a disk recovery program to recover as much data as possible from a newly-formatted drive as long as you don’t copy anything new on it as that would overwrite the old data structures.
Related Questions
I Have Tried Everything but the CRC Data Error Still Keeps Coming Up, What Should I Do?
Check for physical damage by getting the drive seen by a repairman. If it can be salvaged then you should get it repaired. Otherwise, buying a new drive is your only option. If the data is important to you then you should consult an expert to make sure it’s transferred securely to the new drive.
I Have an Optical Disk (CD/DVD-Drive) With a Program That Won’t Install Due to CRC Data Error, What Should I Do?
Disable all Services in System Configuration and disable all Startup items in Task Manager. Then boot into Safe Mode, take out and re-insert the disk (make sure it’s not scratched or damaged). Open the root folder of the executable, right-click and run it as administrator.
Let the installation complete and boot back into normal mode. Your issue should now be resolved.
Which Data Recovery Tool/Disk Management Utility Is the Best?
Recuva is the best free option for almost everyone. It includes the most amount of functionality in its free version. Puran and MiniTool are also solid free tools with similar features. Apart from that, EaseUS, Stellar, and DiskDrill are all very potent options if you are willing to spend extra for the paid version.
What if Only a Particular File Is Bringing Up the CRC Data Error?
In this case, you can either delete the file or repair it. If the file was downloaded from the internet then simply re-download it. If it was sent by someone then ask them for another copy.
However, if the file cannot be reacquired, then your best bet is a data recovery tool that can repair the file for you. But, a Check Disk scan should still be the first thing you try, as it checks every file in a drive and tries to repair it.
I Can’t See My Drive Letter in File Explorer, How Do I Perform the CHKDSK Scan Without It?
Open Device Manager and scan for hardware changes. Then right-click on your drive under “Disk drives” and update its driver, or simply uninstall it and restart the system. Open Run and type “diskmgmt.msc” to open Disk Manager and you should be able to see the drive letter there.

