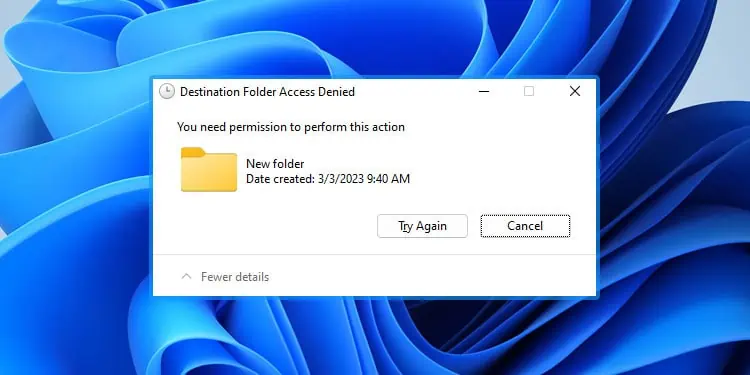
Whenever you try copying or moving a file to a folder when your current user account or computer does not have the write permissions, you will encounter the Destination Folder Access Denied error. It can happen on a local, external, or even a network shared drive/folder.
Apart from the usual write permissions of a folder, some group policy settings can also impose write restrictions on removable storage, resulting in this error.
Provide Permissions for a User Account
The NTFS drives (local or external) in Windows have a security feature called Access Control Lists (ACLs), which determines the owner of a file/folder and the user permissions for the file/folder.
The write permissions of a folder specify whether a user account or group can copy/move an item into the folder or modify its contents. If the current user does not have such permission, you will get this error if you attempt to write to the folder.
You need to change the permissions for the user account through an administrator account in order to resolve the issue.
Note:
Here, we are only providing full access to the Users group (which includes all user accounts) or only your user account. But if you need to provide access for other user groups as well (for instance network groups), you need to give full permissions to the group, Everyone.
For root directory inside external drives, it’s best to select Everyone instead of just Users or an user account.
First, log in with an admin account. Then, you need to check whether the admin account or Administrators user group (that includes all admin accounts) is the current owner.
- Navigate to and right-click on the Destination folder or drive.
- Select Properties.
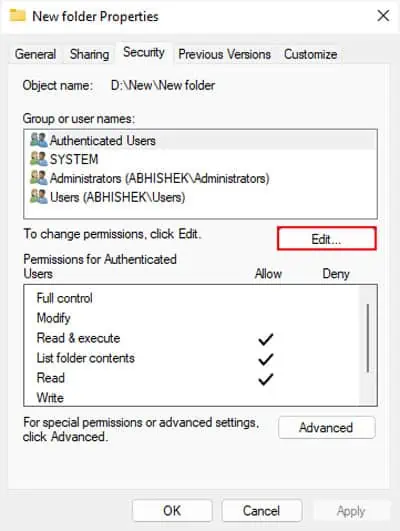
- Go to the Security tab and click on Edit.

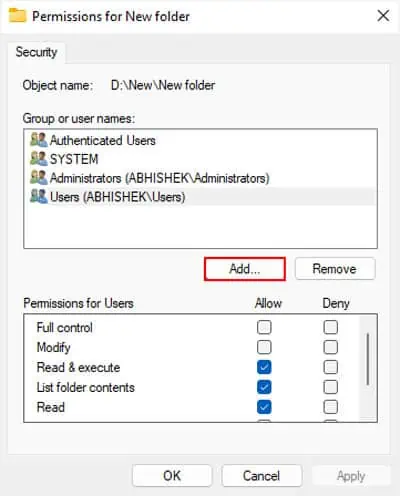
If one of the above is the current owner, the Add icon or the permission checkboxes are not grayed out. So you can directly edit the permission settings.
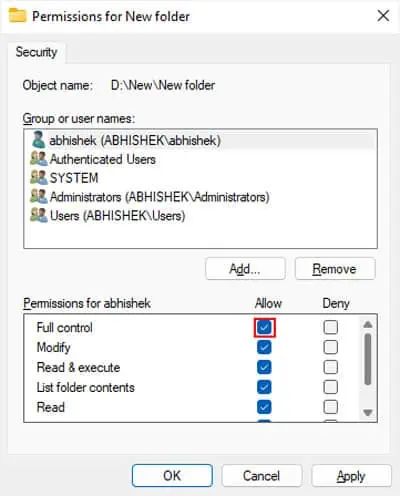
- Select Users or the user account where you need to provide access.
- If the account is not there, you need to add it first.
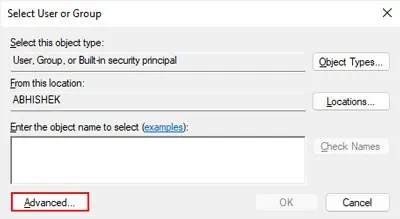
- Click Add > Advanced.

- Select Object Types and check all options. Click OK.
- Hit Find Now.
- Search for and select the user account or Users and click OK > OK.
- Click Add > Advanced.
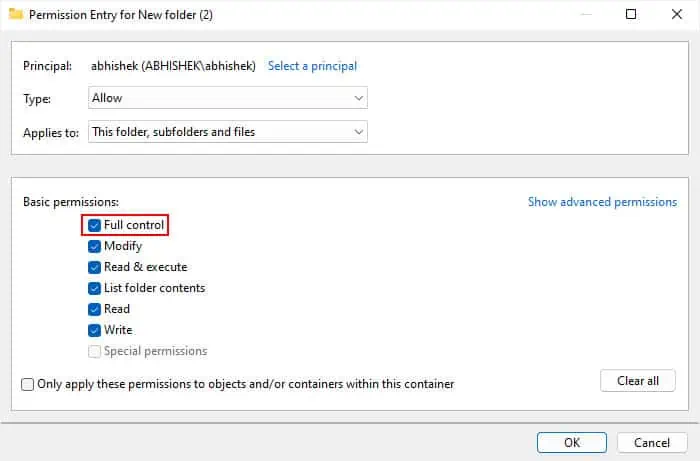
- Check Allow next to Full control and click OK > OK.

If the icons are grayed out, the current owner is some other group or account. So, you need to change the owner to the admin account or Administrators first and then change the permissions.
- Click Cancel to get back to the Security tab.
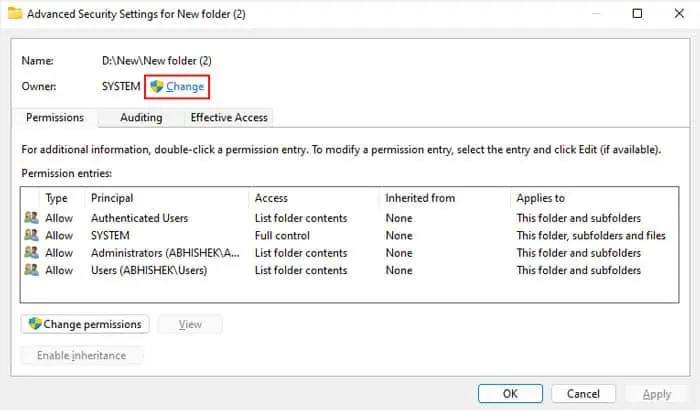
- Select Advanced and click on Change next to Owner.

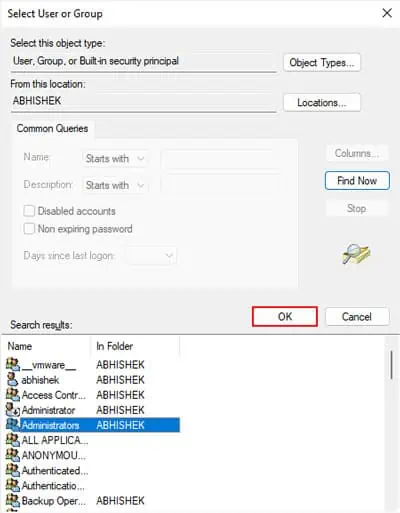
- Click Add > Advanced.
- Select Object Types and make sure to check all options.
- Click OK and then Find Now.
- Search for and select the admin user account or Administrators.
- Click OK > OK.

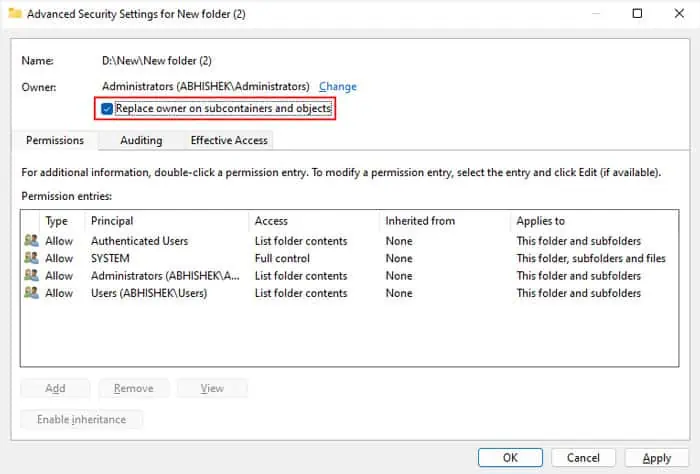
- Check Replace owner on subcontainers and objects.
- Click on Apply and OK.

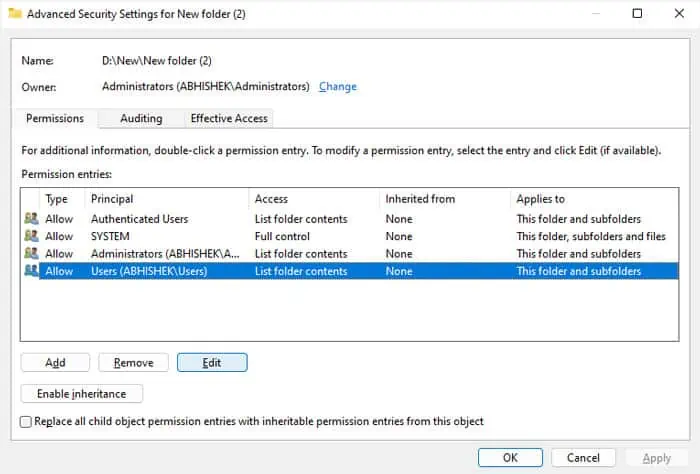
- Select Advanced again and then click on Users or the user account where you need to provide write access.
- Click on Edit. If Edit is not there, click Change permissions before selecting the user account.

- Check Full control and click OK.
- If the user account are not available, you need to similarly add them.
- Click on Add and then Select a principal.
- Go to Advanced and click Object Types.

- Check all options and click OK.
- Hit Find Now and search for the necessary user account or Users.
- Click OK > OK.
- Check Full Control and choose OK.

- Click OK > OK.
Provide Permissions for User Account using Command Prompt
You can also perform the above process using Command Prompt. It may be easier than the graphical method above if you are familiar with using command-line interfaces.
Also, it does the same task as the graphical method. So you can skip it if you have already performed the above solution.
- Log in using an admin account.
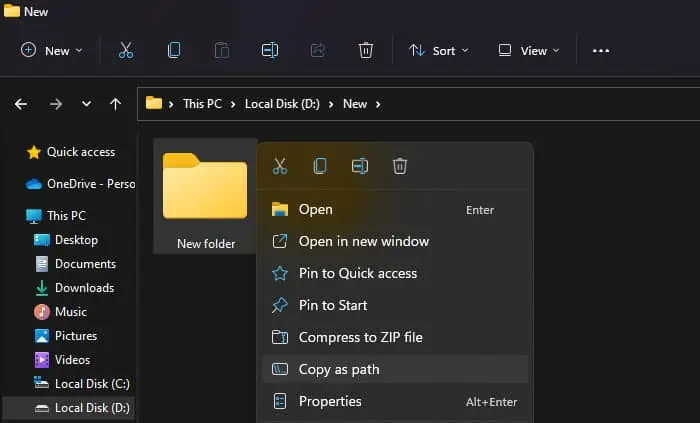
- Go to the folder showing this error and right-click on it.
- Select Copy as path. It will copy the full path of the folder, which you will need to paste in the Command Prompt. If you are getting this error on the root directory of the external drive, you need to use the drive letter only (e.g., C:) instead of the full path.

- Open Run by pressing Windows + R.
- Type
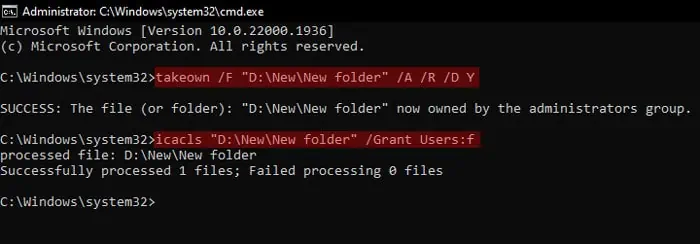
cmdand press Ctrl + Shift + Esc to launch the Elevated Command Prompt. - Enter the following commands one after another. Make sure to press Enter after both commands.
takeown /F "paste the full path here" /A /R /D Yicacls "paste the full path here" /Grant Users:f
- For an external drive, replace the second command with
icacls "paste the full path here" /Grant Everyone:f
Provide Permissions for Network Share
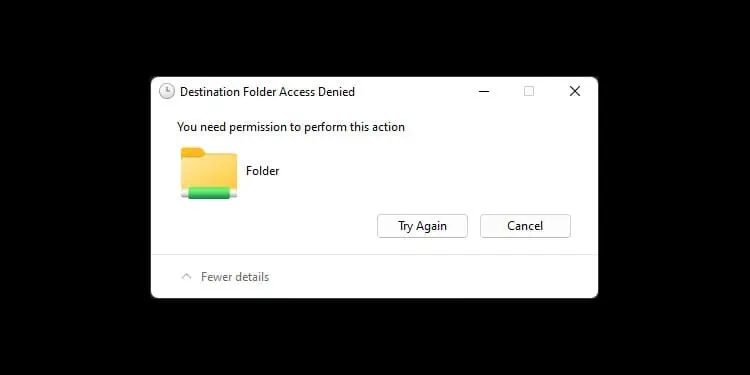
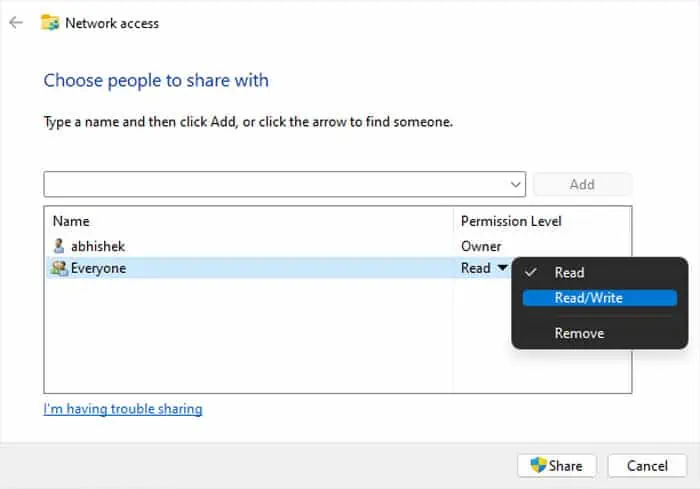
Network shares use a different level of permissions that exist separately than the ACL permissions on a device. Usually, you need to add the group “Everyone” on the shared list so that the remote devices can access it. The shared folder also needs to have both read/write permissions, so that the device can write or make some changes to the folder.
- Navigate to the shared folder in its source device.
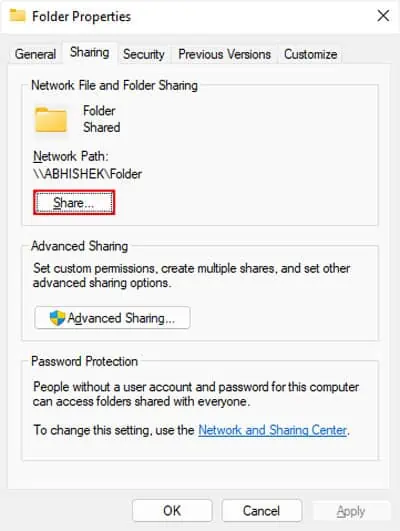
- Right-click on it and select Properties.
- Go to the Sharing tab.
- Click on Share.

- Look for Everyone on the list. If it’s not there, type Everyone on the drop-down box and click Add.
- Set the Permission Level of Everyone to Read/Write.

- Click Share > Done.
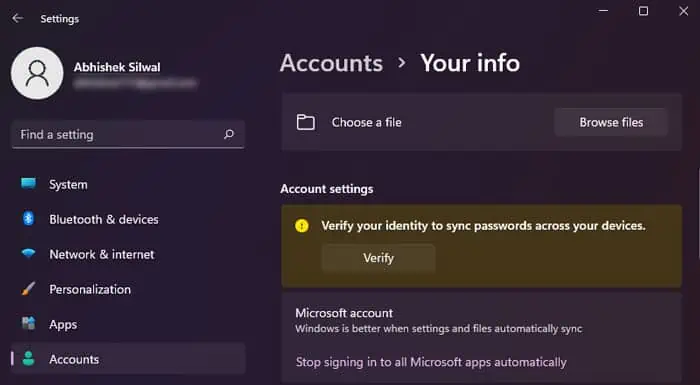
If you had changed your Microsoft Account password without verifying it, the changes in the permissions might not apply to the network share. In such cases, you need to verify your account as well.
- Press Windows + I to open Settings.
- Go to Accounts > Your Info.
- Click on Verify and follow the on-screen instructions.

Check Storage Access Group Policies
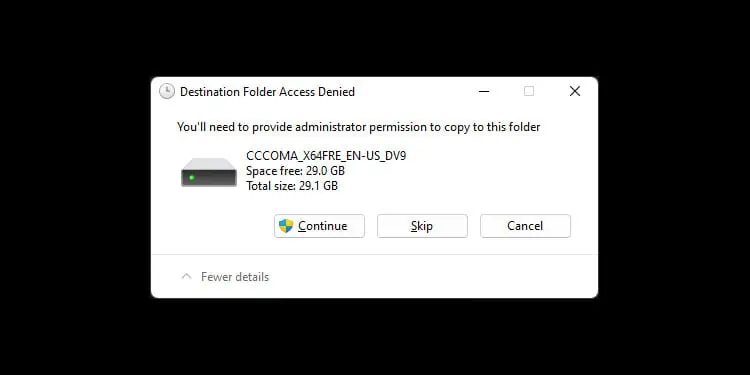
If you are encountering this issue while copying or moving a file/folder to an external drive and changing the permissions does not help, it’s likely because of your group policy configuration.
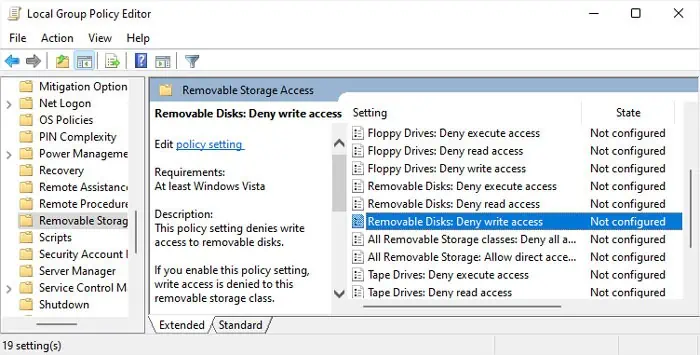
The group policy configuration in Windows also includes some policies regarding the read/write access of various removable storage devices. If the “Deny write access” policy is enabled for the relevant removable drives, you won’t be able to write or move/copy any data to this category of removable devices.
You must disable all relevant policies using the Local Group Policy Editor to resolve the issue.
- Press Windows key + R to launch Run.
- Type
gpedit.mscand click OK. It will load the Local Group Policy Editor. - Navigate to Computer Configuration > Administrative Template > System > Removable Storage Access.
- Make sure that the State of all the Policies inside (specifically, Deny write access or Deny all access) is Not Configured.

- To modify a policy, double-click it, tick Not Configured and hit OK.
