Unlike other applications, Discord’s desktop app automatically updates itself each time you launch it. Generally, Discord checks for updates, then download and install any new ones. Once it’s done, you can use the Discord app as usual.
However, some users have experienced issues like Discord stuck at displaying “Checking for updates.” When this happens, the update process takes forever to complete, and sometimes the app even crashes after the update.
Considering a minor glitch case, refreshing the app by pressing Ctrl/Command + R might work for some users. But, if the problem persists, you may require further troubleshooting.
How to Fix Discord Stuck at “Checking for Updates”?
From a bad network connection to a firewall, several factors can cause the above issue. But before you move on to the fixes below, check if Discord servers are down.
Although the Discord support team tries to keep the Discord services up and running 24 hours a day, they can sometimes suffer outages. These events occur rarely, but when this happens, their services go down for some time.
While you can only wait for them to get online again, you can check the Discord status site to know when they are operational. Once you are sure there are no issues from the Discord side, you can apply other solutions listed in the article.
Check Your Network Connection
The Discord app requires an active internet connection to download and install updates. So, if your Wi-Fi is too slow or you have network issues, you can get stuck at the startup.
To check if you have network issues, open a browser and see if a web page is loading smoothly. If not, restart the router and check if Discord loads normally. Or switch to another network if possible.
On the other hand, connecting to the Internet through a proxy server can prevent Discord from updating. So, disconnect any VPN connection before you launch Discord and disable using proxy as follows.
On Windows
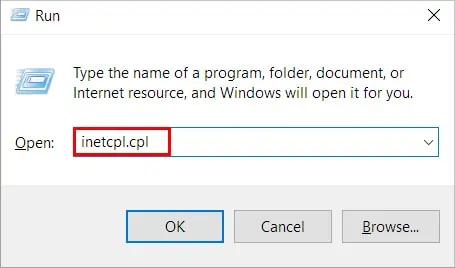
- Press Windows + R to open the Run.
- Type
inetcpl.cpland click OK.
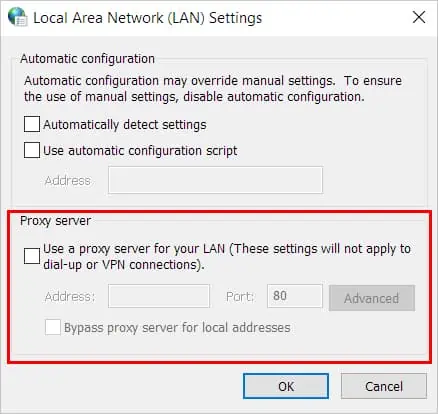
- Select the Connections tab and click LAN settings.
- Uncheck all the checkboxes under the Proxy server section.

On Mac
- Click the Apple icon and select System Preferences.
- Then, choose Network.
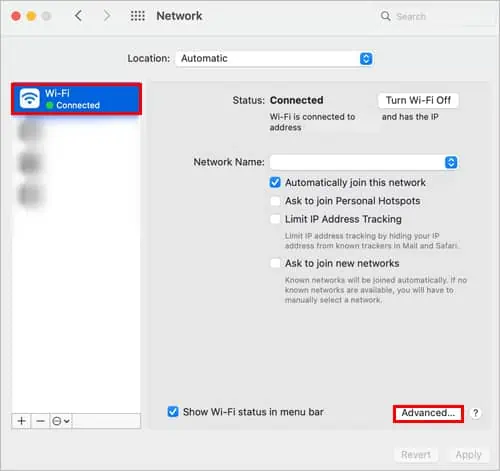
- Select the network you are currently using.
- On the right pane, click the Advanced button.

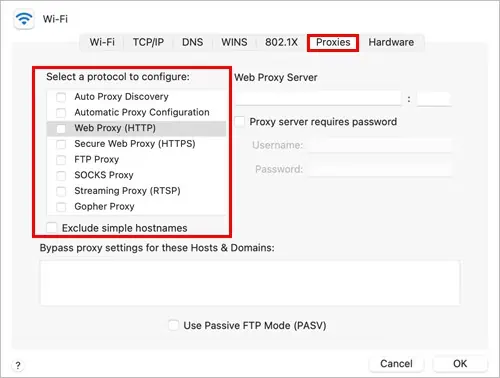
- Select the Proxies tab and uncheck all the options under the Select a protocol to configure section.

- Click OK.
Delete the Discord Cache
Each time you open and use Discord, a cache is collected inside the Discord cache folder. While its primary purpose is to help load Discord faster, it can end up being corrupt as it accumulates over time. This can result in various issues like the update error.
Therefore, you have to delete all its cache and relaunch the program. Don’t worry; cache files are temporary files, and they don’t delete your actual Discord data.
On Windows
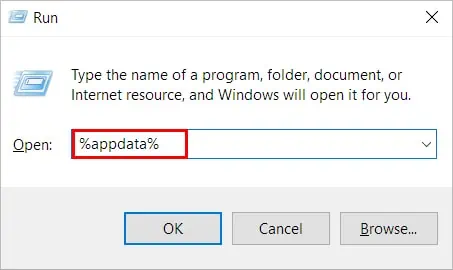
- Press Windows + R to open the Run command.
- Type the command
%appdata%and press Enter.
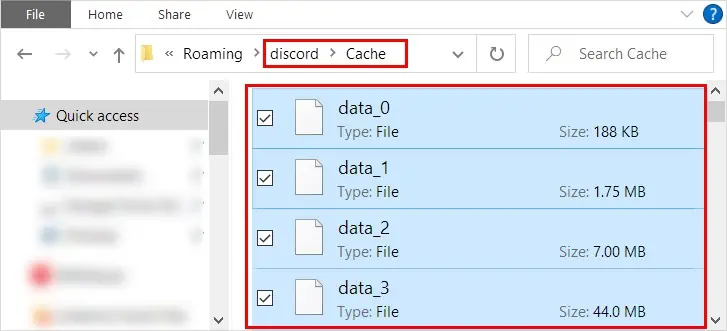
- Open the folder named “discord.”
- Now, look for the Cache folder and delete everything inside it.

- Additionally, delete everything inside the Code Cache and GPUCache folders too.
- Restart your PC and relaunch Discord to see if it works.
On Mac
- Open the Finder app.
- Then, click the Go menu and select the Go to Folder option.
- Now, type the following and press Enter.
~/Library/Application Support/discord
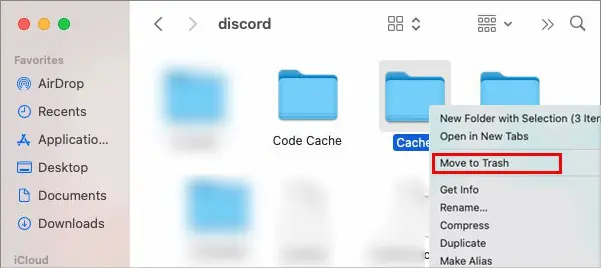
- Open the Discord folder. Then, delete the Cache, Code Cache, and the GPUCache folder.
Launch Discord with Administrator Privileges
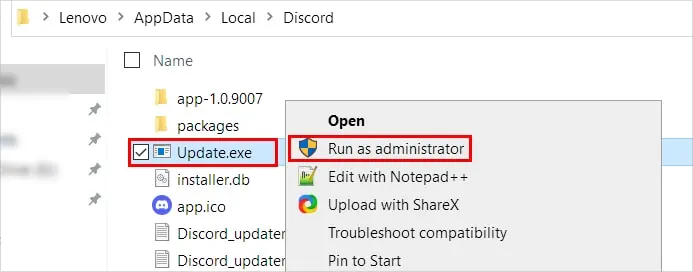
Every time you launch Discord, it executes its Update.exe file to get the latest updates. It happens even before Discord loads up and opens completely. Sometimes, it may fail to execute without administrator privileges. Therefore, try running the updater as an administrator to solve the update problem.
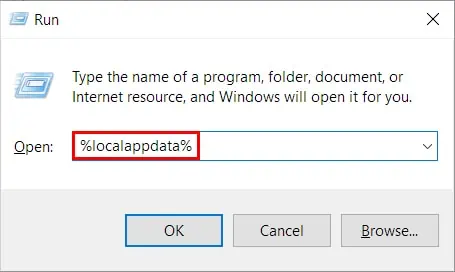
- Open the Run command (Windows + R)
- Type
%localappdata%and press Enter.
- Open the Discord folder.
- Right-click on the Update.exe file and select Run as administrator.

- On the UAC prompt, choose Yes to run it as admin.
Turn Off Firewall
While firewalls are supposed to protect your system from various malicious threats, they sometimes have false positives. When this happens, they treat Discord as a threat and can prevent it from launching. So, you have to disable the firewall to let Discord launch successfully.
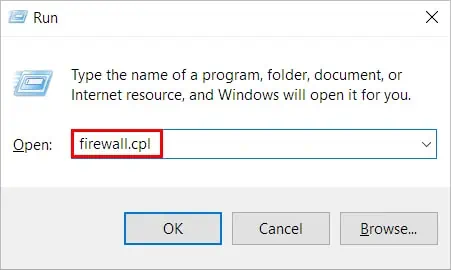
- Press Windows + R, type the command
firewall.cpland click OK.
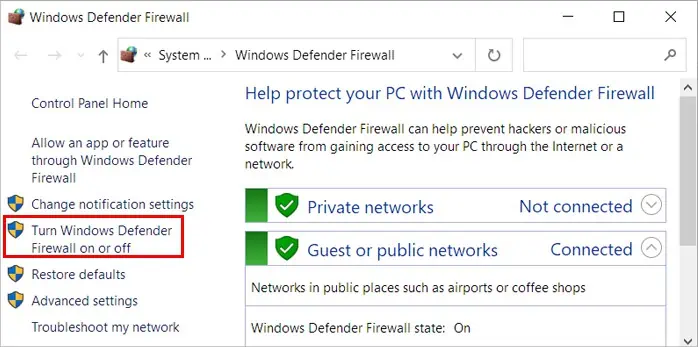
- Then, select Turn Windows Defender Firewall on or off from the left sidebar.

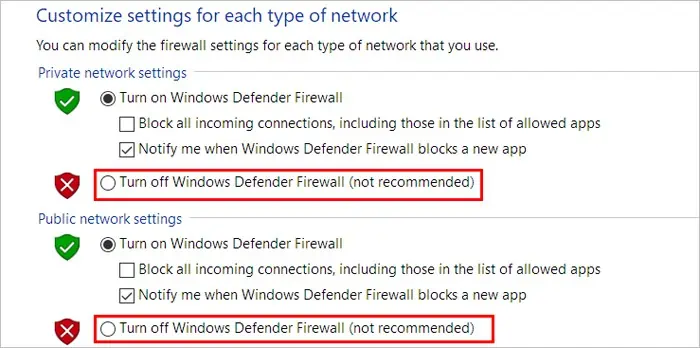
- Now, select the Turn Off Windows Defender Firewall option. You can disable the firewall on either of your networks (public, private) or both.

- Click OK.
- Open Discord and see if it’s working now.
Reinstall the Discord App
If you are still facing issues with the Discord app, you can reinstall the app. Doing so overwrites the old application and installs the latest Discord app on your system. To reinstall the app, you first have to uninstall the app and then run the latest Discord installer.
On Windows
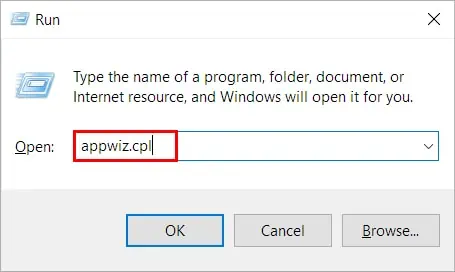
- Press Windows + R, type
appwiz.cpl, and press Enter.
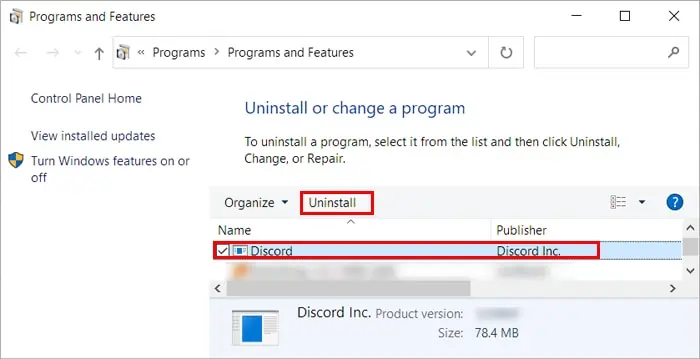
- Select Discord from the applications list and click Uninstall.

- To completely uninstall Discord, clear its cache, as mentioned in the above section.
Additionally, clear its temporary files and old settings as follows:
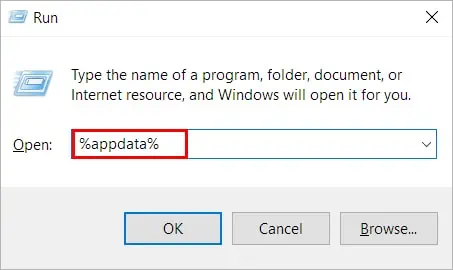
- Press Windows + R, type
%appdata%, and press Enter.
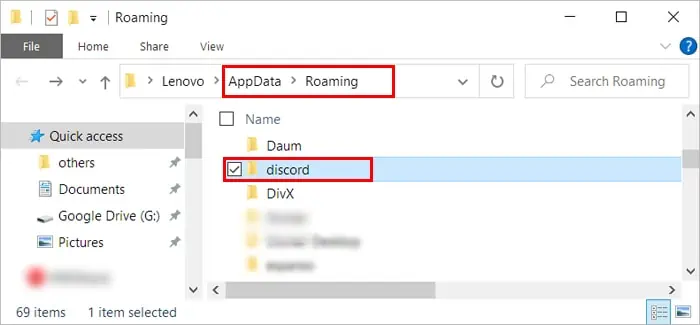
- Then, look for the “discord” folder and delete all its contents. If you don’t want to delete them, you can copy and move them to a different location on your system.

On Mac
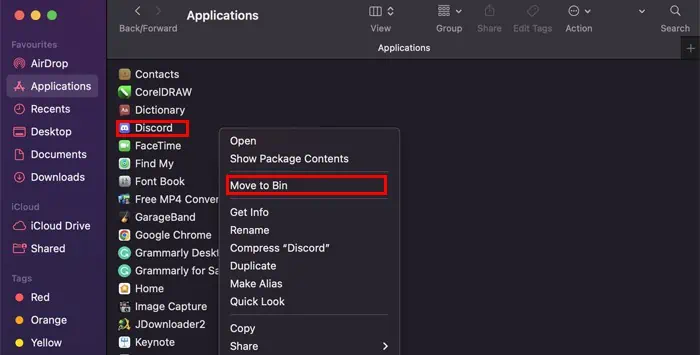
- Open the Finder app from your bottom dock.
- Then, select Applications from the sidebar.
- Right-click on Discord and click Move to bin.

- Additionally, delete the Discord cache, as mentioned in the above section.
Once you have completely uninstalled Discord from your respective systems, download the latest installer from the Discord official site.

