“Access denied” error occurs when users try to access the contents of a drive or volume in the device. This essentially stops users from reading, writing, or making modifications to the data inside the affected disk.
The error occurs when there is any logical error on the drive or due to restrictions set by the administrator of the system. Another cause for this error to appear is due to corrupt files and folders stored in the drive or in the case of a newly purchased storage device, an uninitialized disk.
Causes for Drive is Not Accessible “Access Denied” Error
Here listed are some common causes for the “Access Denied” error to appear. However, the error can also occur due to some underlying system problems as well.
- Modified disk permissions
- Changed ownerships
- Logical errors
- Uninitialized drive
- Out-of-date drivers
- Password/Encryption protected drive
- Corrupt files and/or folders in drive
Methods to Fix Drive is Not Accessible “Access Denied”
To fix this error, the most effective method would be to perform a disk scan for logical errors and change the disk properties for changing permission settings.
For other general fixes and to perform the above-mentioned solutions, the steps are described in detail below
Modify Drive Permission
Note: To perform this fix, users will need to have logged-in from an administrator account.
The first fix for this problem is to change the permission settings and take ownership of the drive. Sometimes this error occurs when an administrator changes the drive permission, denying access to the user. To fix this, you will need to perform the following fix
- Press the Windows key + E to open the File Explorer
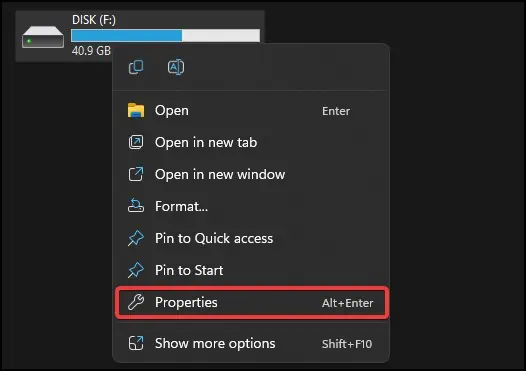
- Right-click on the affected drive and click on Properties

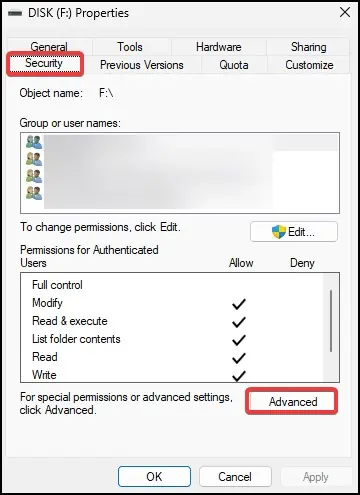
- On the Disk properties window, click on the Security tab and click on Advanced

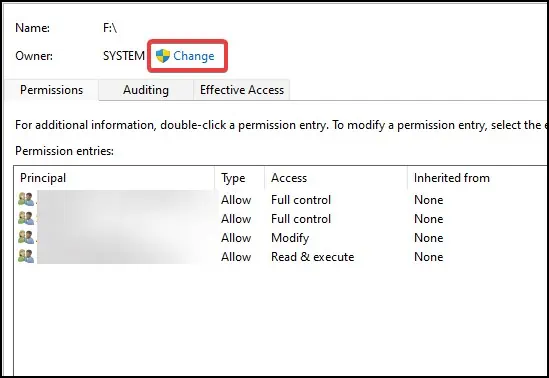
- On the new window, click on Change located above the Permissions tab

- On the new window Click on Advanced > Find Now.

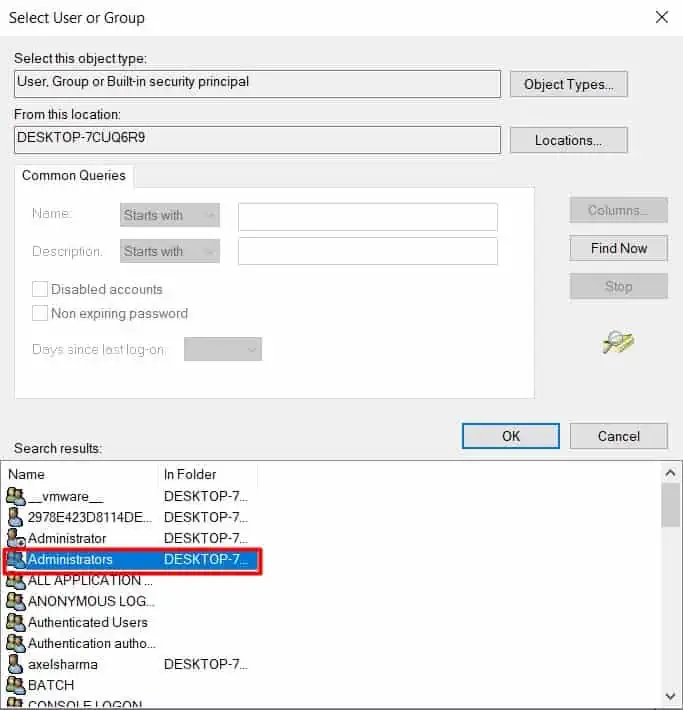
- From the presented list, Select Administrators and click OK.

- On the next window, checkmark the Replace owner on sub containers and objects. Click on OK to proceed

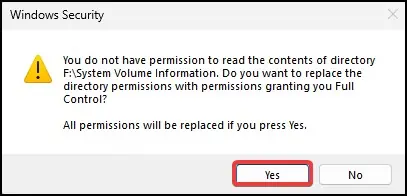
- Select Yes on the Windows Security dialogue box

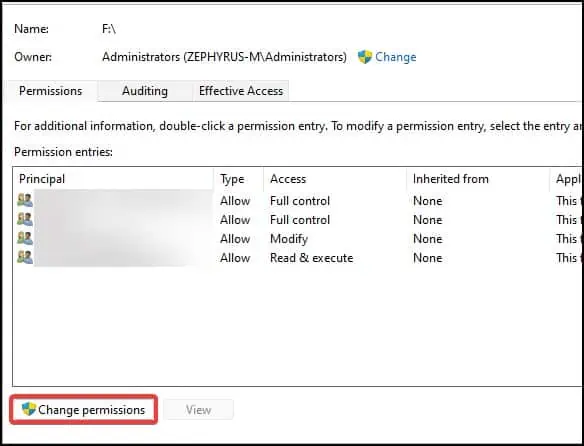
- Click on Advanced again and click on Change Permissions

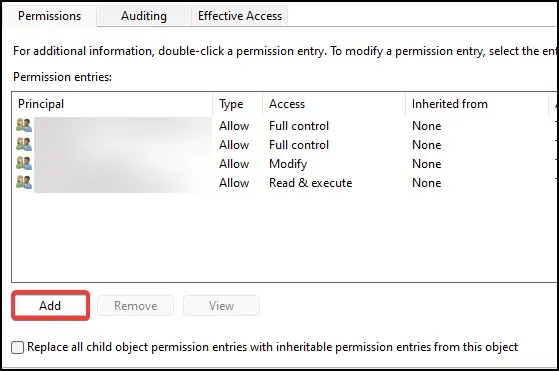
- On the new window, click on Add

- On the Permission Entry window, click on Select a principal

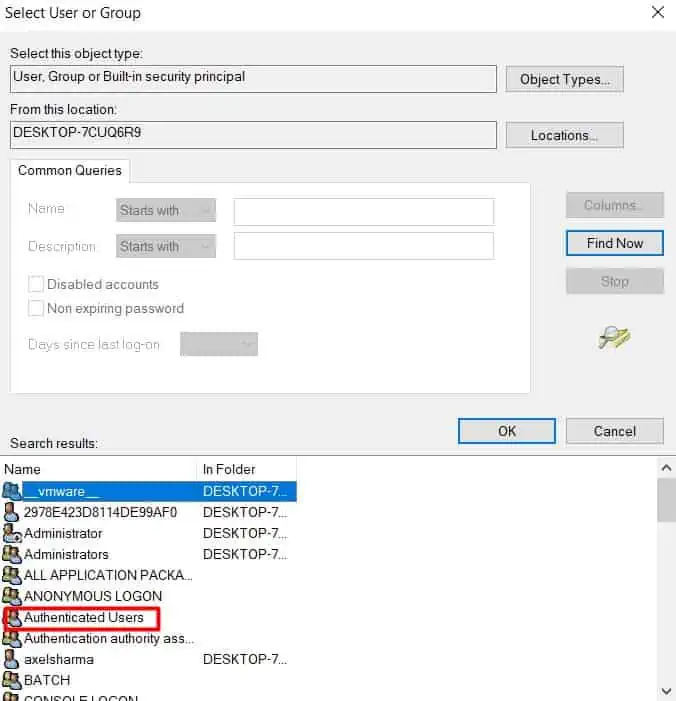
- Again, as in steps 5 and 6, Select Authenticated Users from the list

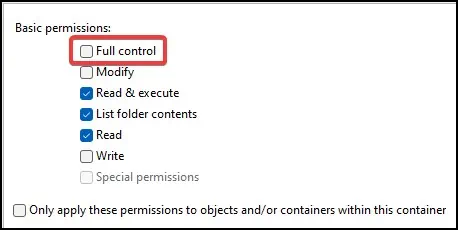
- On the basic permissions check mark the Full control button and click on OK

Check to see if the drive is now accessible
If the drive is still not accessible, add another principal labeled Everyone and then allow full control in permission to solve the issue.
Disk Scan
Another solution for this problem is to perform a disk scan. Sometimes this error can occur due to logical errors in the disk. By performing a scan, users can repair the disk error and gain access to the drive. To perform a scan
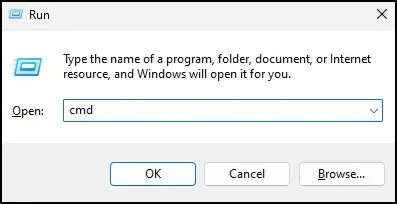
- Press the Windows key + R to open Run and type
cmdin the dialogue box
- Press the Ctrl + Shift + Enter keys to open command prompt with elevated access
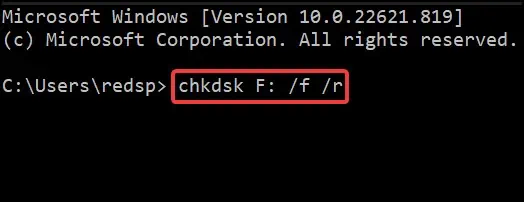
- On the console type
chkdsk <disk name>: /f /rto perform a scan
- Let the process complete and then try accessing the drive again
Disable BitLocker Encryption
Note: This fix does not apply for users running Windows Home edition
Another reason that may be causing the error to appear is due to BitLocker encryption that is present in the drive. If the protection is enabled or if the BitLocker encounters some errors, the user may not gain access to the drive.
To solve this, users will need to disable the BitLocker encryption. To do this
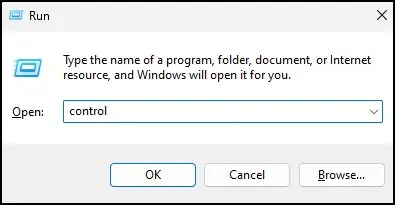
- Open Run and type
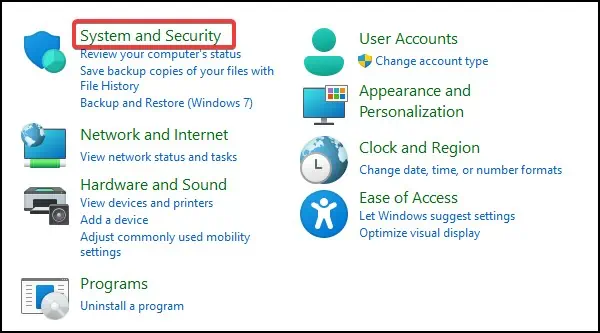
controlto open the Control panel
- Click on System and security

- Scroll down and click on BitLocker Drive Encryption
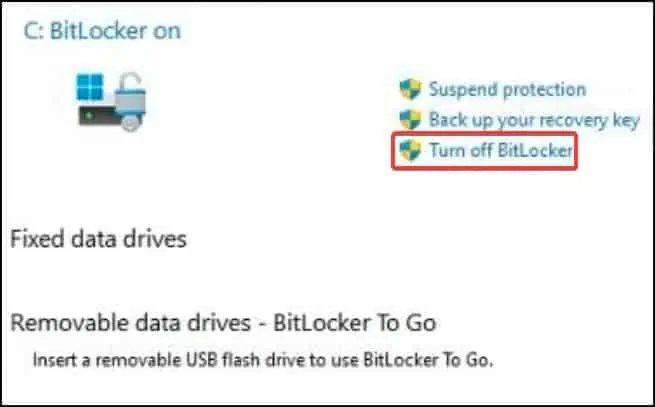
- Select the drive you wish to disable the BitLocker

- Here, click on Turn off BitLocker, and again on another window, select Turn off BitLocker
- Try accessing the drive again and see if the solution works
Initialize the Disk
If you recently purchased and installed a new disk in the system, you may encounter this error while trying to access the disk. Windows first needs to initialize, allocate and then partition the disk in order to carry out read and write activities.
Only then the drive becomes accessible. To initialize the disk
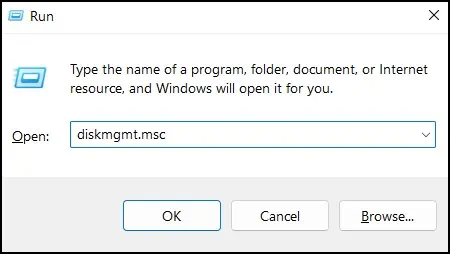
- Open Run and type
diskmgmt.mscto open the Disk management window
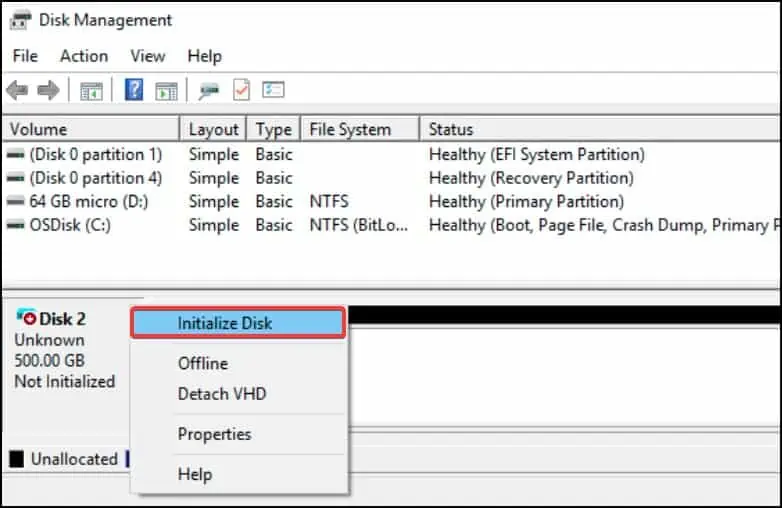
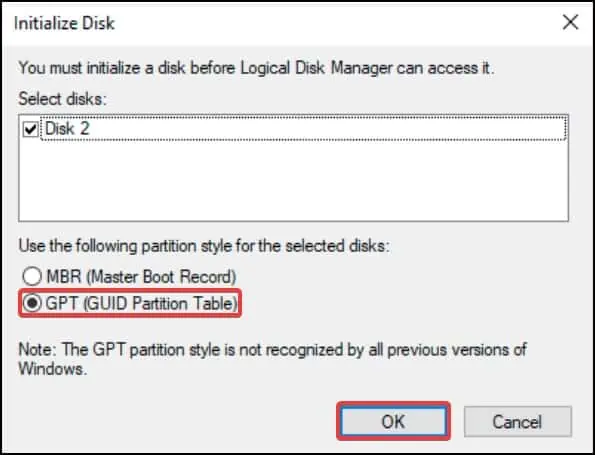
- Right-click on the volume labeled Unallocated and select Online, right-click again and select Initialize Disk

- In the new window, choose a partition style (GPT is recommended)

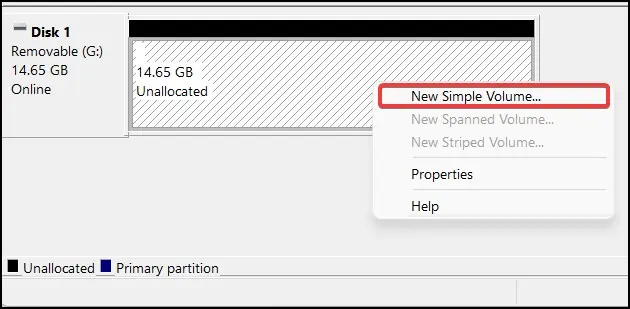
- After initializing, right-click on the unallocated disk and select New Simple Volume

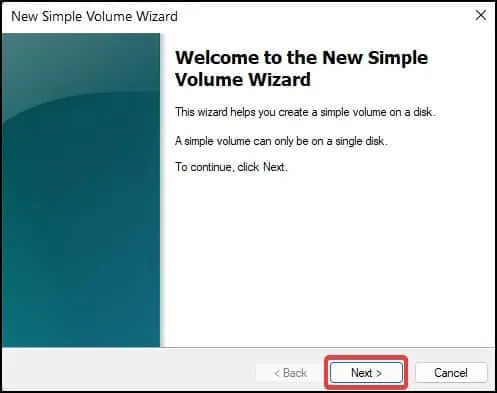
- On the Volume Wizard, click on Next

- Assign the amount of space you want to allocate and click on Next
- If you choose to allocate only a portion, the remaining space on the drive will be labeled as unallocated
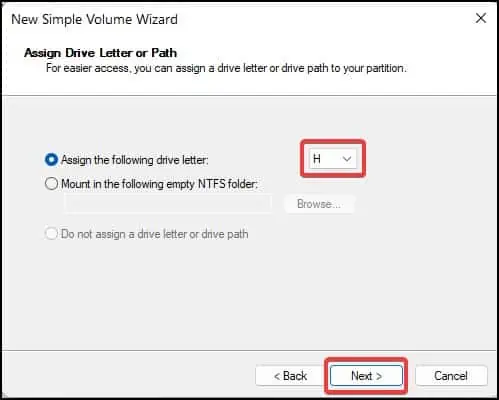
- Assign a letter to the drive and then click on Next

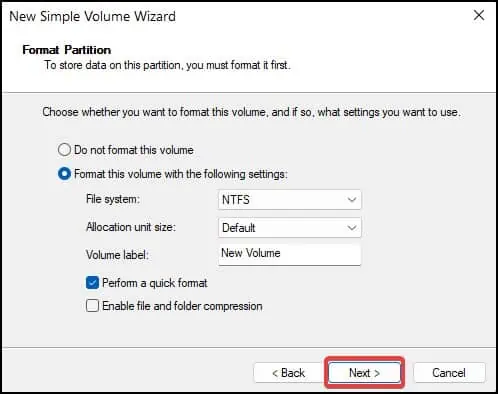
- Choose either to format the volume or not and click on Next

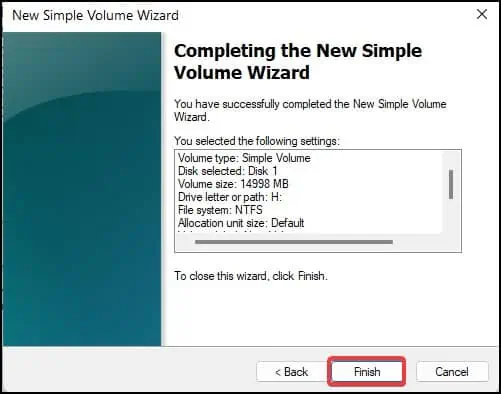
- Click on Finish to complete the setup

Format Drive
The final solution would be to format the drive to get access. Formatting resets the drive configurations and removes all files and folders from it. Therefore we suggest users to backup any important data before attempting this fix.
Note: Installing Linux on a bootable drive and then accessing the contents of the drive from Linux can help users perform a workaround fix. We suggest using this workaround to perform backups only.
To format the drive in Windows
- Open the File manager
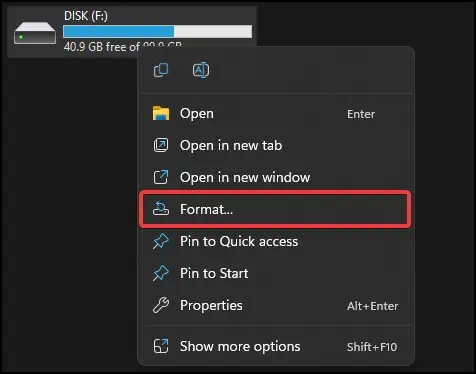
- Right-click on the drive and select Format

- If any drive protection or encryption is enabled, disable it
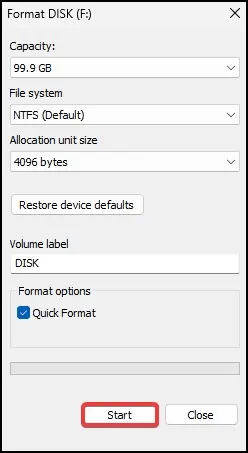
- On the format window, checkmark the Quick Format box and select Start

- On the caution window, click on OK to proceed
- Let the process finish and check if the drive is accessible now
Your drive should be accessible after performing the above fixes.

