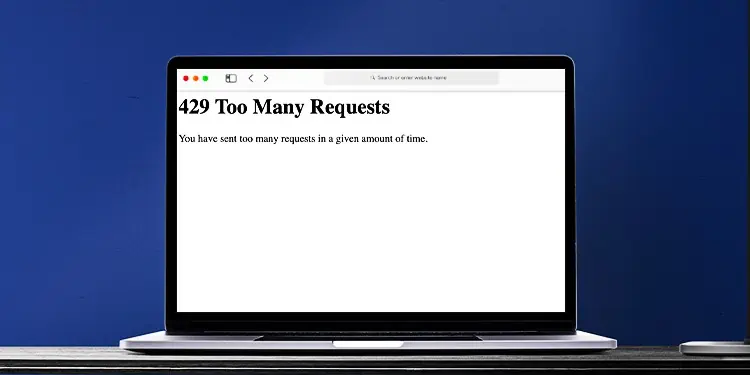
The web works in the form of a transaction. Whenever you visit any website, you make a request to the site’s server, and in return, it will send you the necessary data to consume. But sometimes, this same request can get overloaded. As a result, you’ll see an error code like 429 “Too many requests.”
But instead of an error, it’s particularly an HTTP status code. As the name suggests, it simply means that there are a lot of requests from the user’s end. When the requests are beyond capacity for the web servers, your browser will crash and display the code.
In such cases, simply waiting for the code to disappear on its own can be a viable option. But there are other effective solutions as well.
How to Fix Error Code 429 “Too Many Requests”?
Most website servers have a certain rate limit for requests. Its purpose is to better manage the network traffic. This means you can only perform or repeat a single action or, in this case, send requests within a set limit. Meanwhile, if you’re normally surfing, there can be other underlying causes for the error code, like potential viruses, VPN, DNS server issues, or faulty add-ons.
Here are some of the remedies you can try to resolve the error code 429.
Use Incognito Mode
If you have multiple tabs open on your browser, there can be a lot of processes going on in the background. Additionally, your browser and data also constantly get refreshed or saved. This can result in too many requests for the site server.
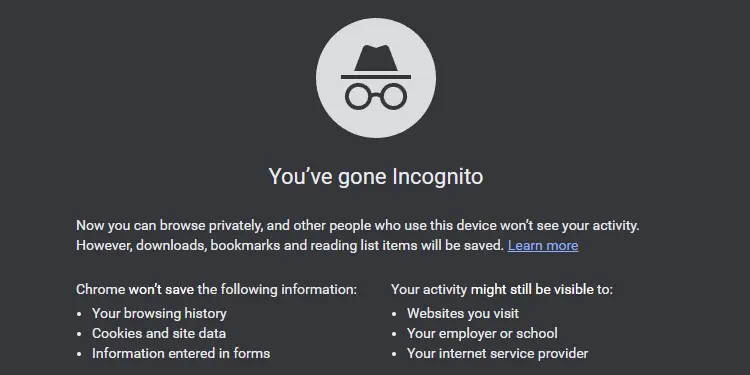
One simple temporary fix is simply using the Incognito Mode on your browser. This mode is like using the browser as a guest. So, your browsing data, like history and such, won’t get saved or updated. Doing so can be less taxing for the server. So, there’s a high chance you’ll dodge this error.
Alternatively, you can also connect to a different Wi-Fi network or join a new hotspot if your internet connection is to blame.
Clear Browser Cache
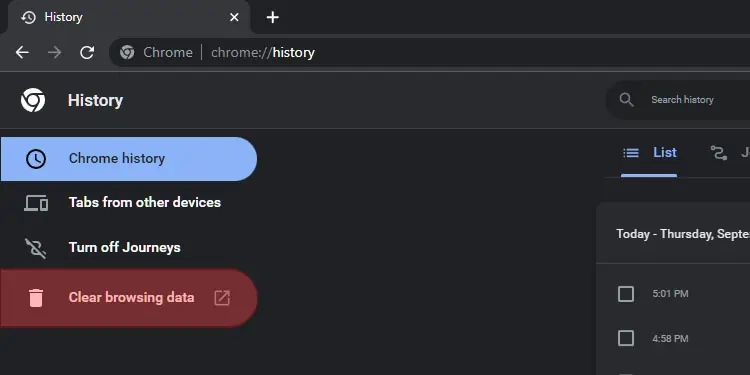
The 429 error code can also be due to common glitches caused by the browser’s corrupted cache data. This is especially true if it’s been a long time since you last cleared your browser’s cache. If you use Google Chrome, here’s how you can clear its cache data.
- Click on the three-dotted menu from the top-right corner and go to Settings.
- Then, select Privacy & Security.
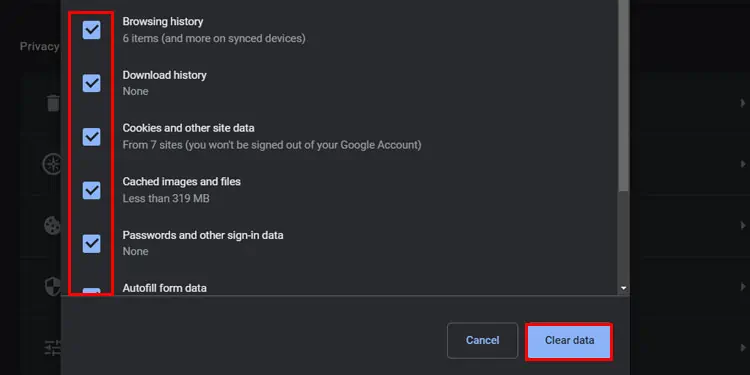
- Go to Clear Browsing Data and select the Time Range for your data.

- Lastly, click on Clear Data.

Turn Off Ad Blockers and Extensions
If you have additional tools on your browser, like ad blockers or extensions, they can be another reason for the 429 error code. This is because they are constantly running and refreshing information in the background while you’re surfing. This process will add to the number of requests being sent to the web servers.
So, it’s helpful to try turning off ad blockers and extensions and seeing if it helps get rid of the error.
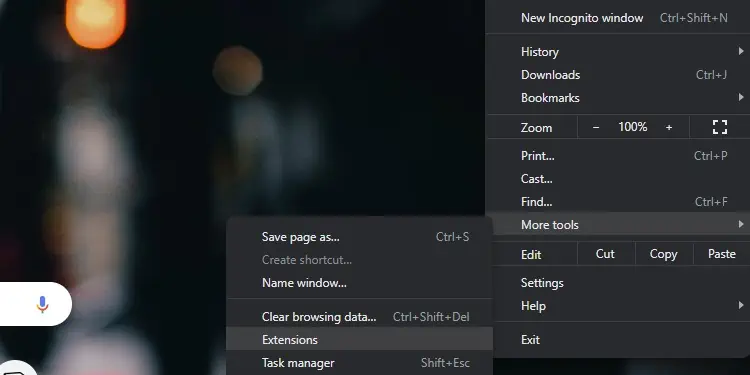
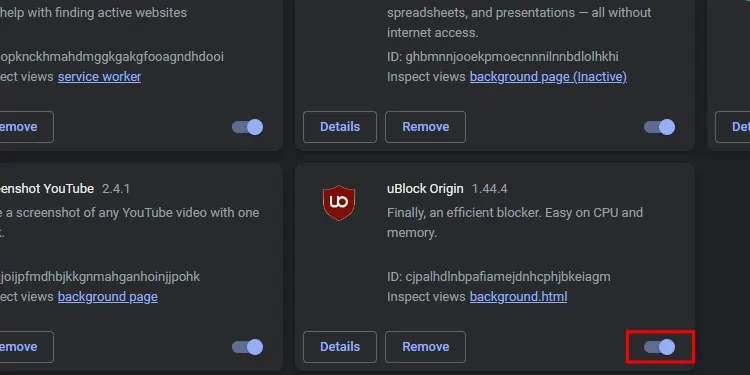
- If you use Chrome, go to the three-dotted menu in the top-right corner.
- Click on More Tools and then go to Extensions.

- Slide the toggle to turn off the extension.

Scan for Viruses
If there are viruses present on your PC, they can make unauthorized changes to your data and send multiple requests to the server. So, we recommend scanning for viruses. If you want a free alternative for anti-virus software, you can use Defender on Windows. Here’s how you can turn it on:
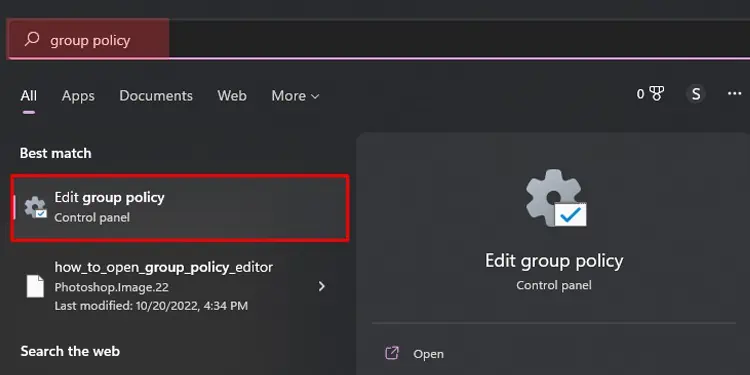
- Click on the Start menu.
- Enter Group Policy in the search bar.
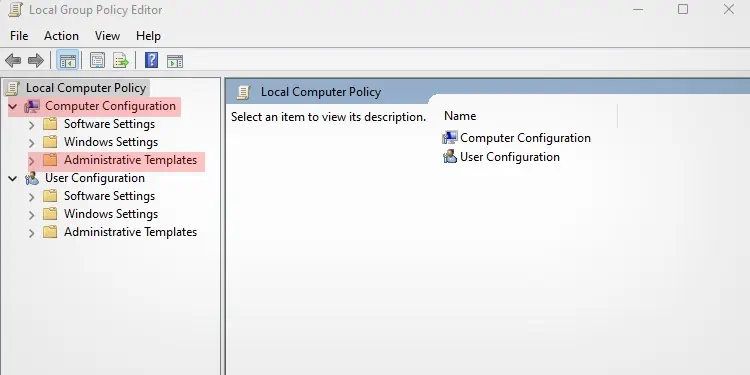
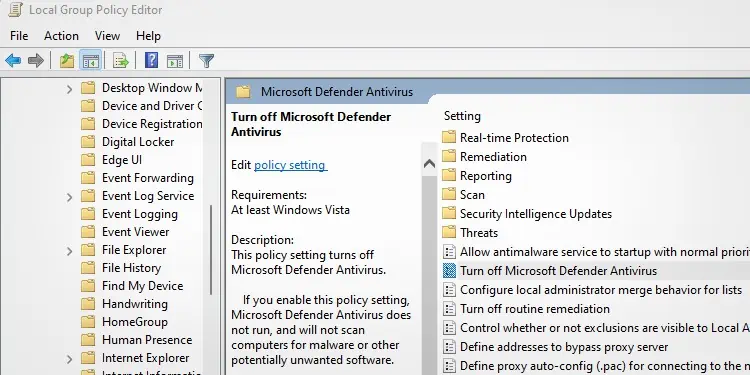
- Click on Edit Group Policy settings from the results. Doing so will open the Local Group Policy Editor pop-up window.

- Click on Computer Configuration.

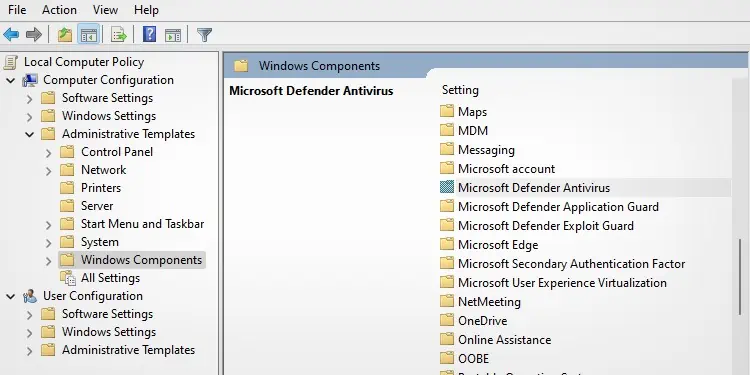
- Then, go to Administrative Templates and then Windows Components.

- Click on Microsoft Defender Antivirus.
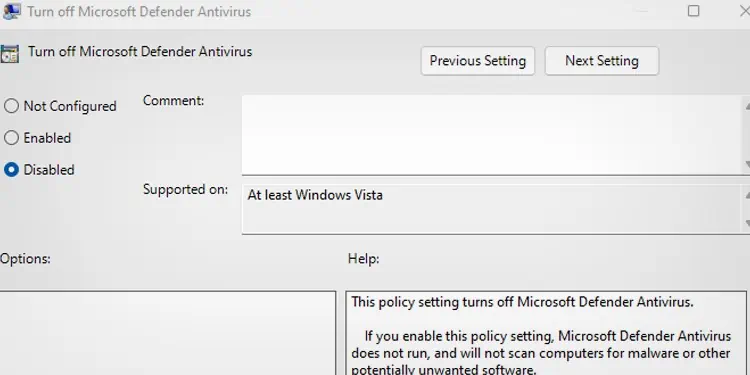
- Scroll down and click on Turn Off Microsoft Defender Antivirus. Even though it seems like an option to turn the antivirus off, it is indeed the way to turn it on.

- Select the Disabled option from the left.

- Click on Apply and then OK.
Turn Off VPN
VPNs are useful in certain situations. However, they can be heavy on the browser and eventually slow it down. In these cases, you might get the 429 error code. So, it’s best to turn off your VPN temporarily.
Change DNS Server
Browsers like Chrome closely work with the DNS server to exchange information with websites. However, if there are errors within the DNS server, your browser may fail to load the requests. In such a case, you can try changing the DNS server itself. Here’s what you’ll need to do:
- Go to Settings and then select Network & Internet.
- Click on Wi-Fi/Ethernet.
- Select Change Adapter options.
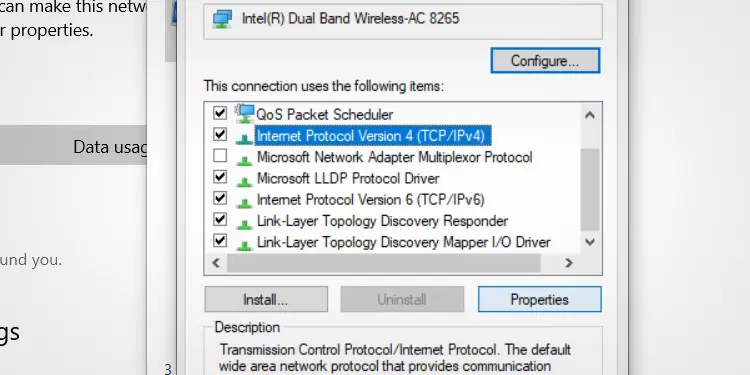
- Right-click Network adapter and select Properties.
- Select Internet Protocol Version 4(TCP/IPv4).

- Click on Properties.
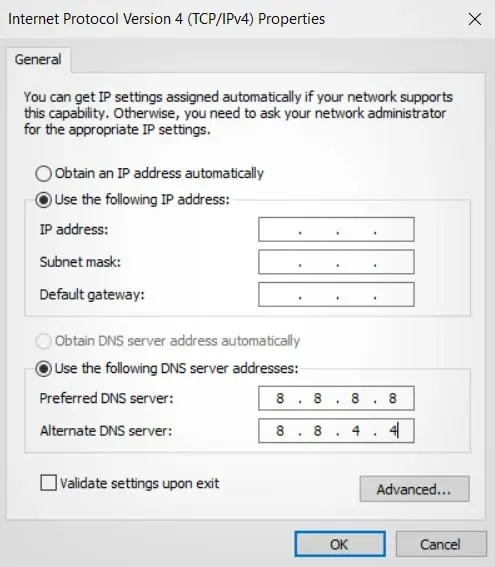
- Enable the option to Use the following DNS server addresses.
- You can use the following DNS address.
- Preferred DNS Server: 8.8.8.8
- Alternate DNS Server: 8.8.4.4

- Click OK.

