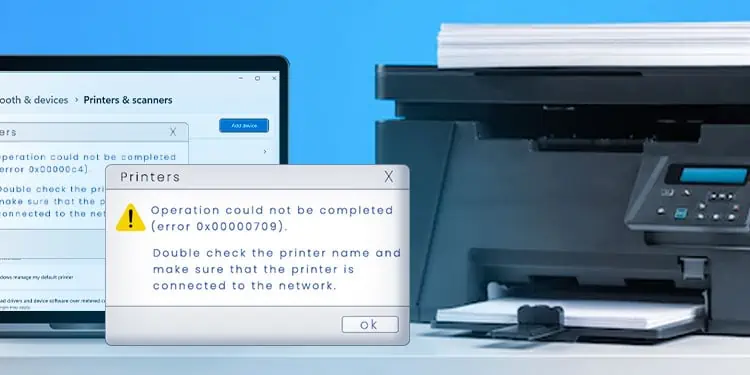
As the error message implies, 0x00000709 usually occurs if the printer name is invalid. If this is due to DNS problems, simply connecting using the printer’s IP address can resolve the error. But things are usually not that simple.
To start with, most users started facing this error after installing Windows Updates meant to patch the PrintNightmare vulnerability in the print spooler service. The causes ranged from incorrectly configured communication protocols to incompatible drivers.
Depending on what specifically caused this error in your case, the resolution will vary as well. As such, we recommend trying out the fixes in the order listed here to cover all possibilities.
Basic Troubleshooting
It’s best to try some device and networking-related troubleshooting steps before starting with the main fixes. Check if the error is resolved after each step.
- Restart the computer, printer, and router.
- Press Win + R and enter
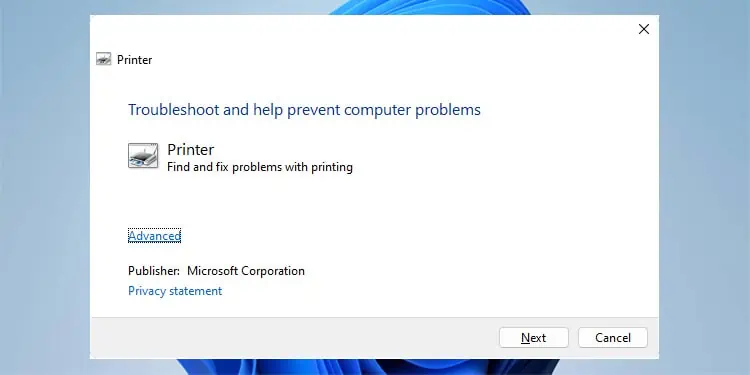
msdt.exe /id PrinterDiagnosticto run the printer troubleshooter. - Ping the printer. If pinging fails, run a tracert. The problem here is likely with your firewall, or the printer or print server’s IP/gateway/subnet configuration.
- Connect using the printer/print server’s IP address instead of the hostname.
- Log in to a different user account and try connecting.
Setup Printer Sharing
If the printer spooler on your device is unable to connect to the spooler service on the client machine running the Print Management Console (often a print server), that can result in error 0x00000709. Usually, this happens because the client doesn’t have a DNS record. To resolve this, you can try setting up printer sharing once again:
- Press Win + I on the primary PC that’s connected to the printer.
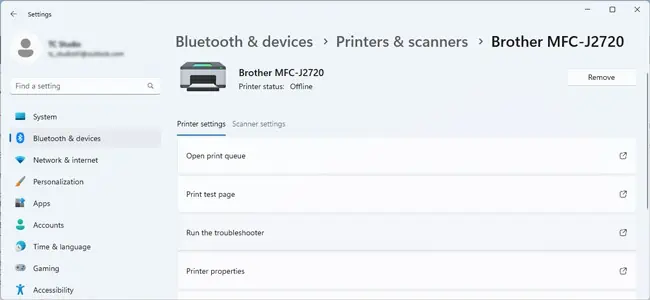
- Select Bluetooth & devices > Printers & scanners.
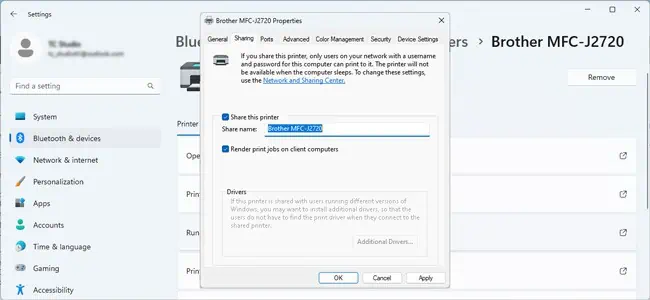
- Click on the printer and select Printer Properties.

- On the Sharing tab, select Share this printer.

- On the secondary PC, press Win + I and go to Bluetooth & devices > Printers & scanners as well.

- Click on Add device > Add manually.
- Use your preferred method to add the printer.
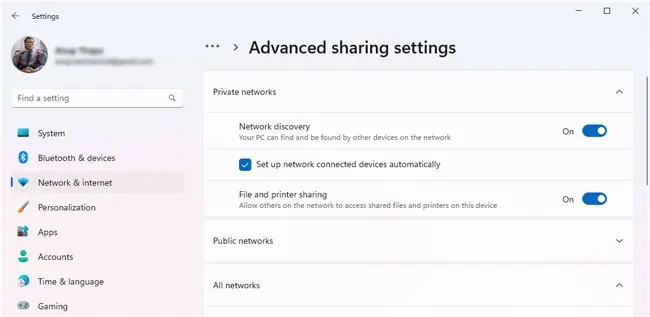
If you’re unable to add the printer, ensure sharing is enabled on both PCs. To do this,
- Press Win + R and enter:
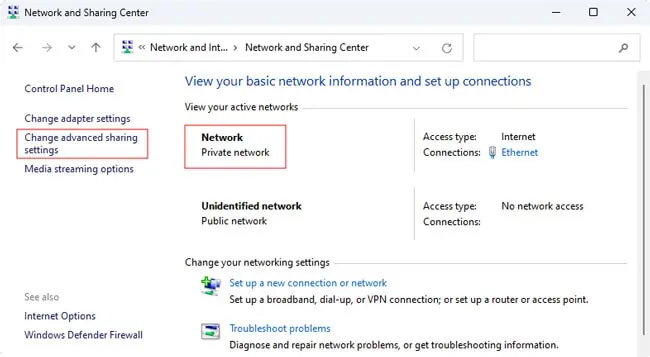
control /name Microsoft.NetworkAndSharingCenter - Note the network profile type and click on Change advanced sharing settings.

- Under your current profile, enable the Network Discovery and File Sharing options and save the changes.

Change Default Printer
Setting the printer you’re currently unable to connect to as default has resolved this error for many users. But some users also encounter error 0x00000709 when trying to set a printer as default. The latter case typically happens due to permission issues. Either way, here’s what we recommend:
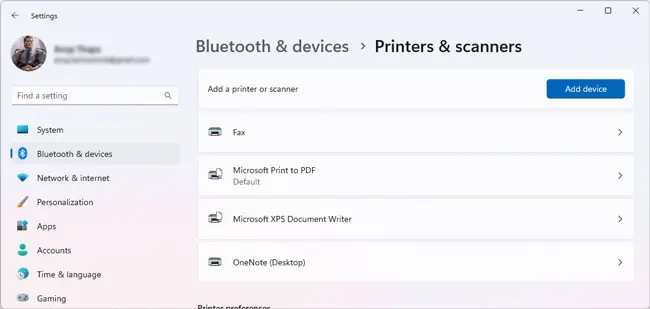
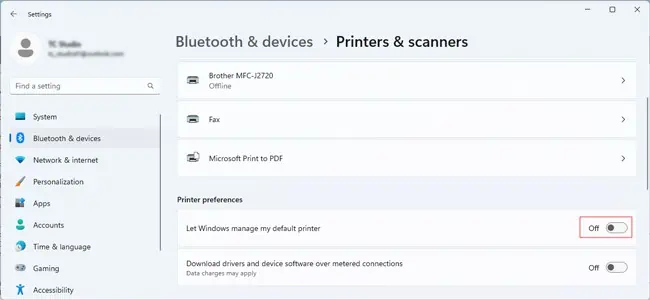
- Press Win + I and select Bluetooth & devices > Printers & scanners.
- Toggle off the Let Windows manage my default printer option.

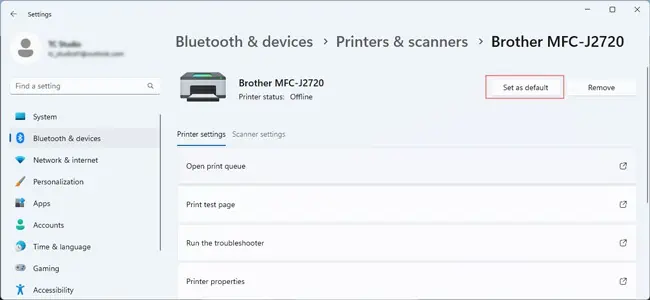
- Click on the problematic printer and select Set as default.

- Check if you can connect to it now.
If you’re unable to set it as default, use the steps shown below to fix any permission issues, then return back and set it as default afterward. We recommend backing up your registry before making the changes shown below.
- Press Win + R, type
regedit, and press Enter. - Navigate to:
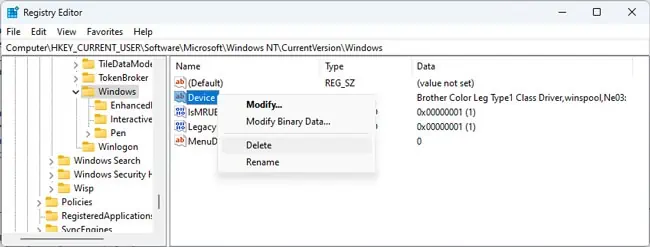
Computer\HKEY_CURRENT_USER\Software\Microsoft\Windows NT\CurrentVersion\Windows - Delete the Device value here and check if you can set the default printer now.

- If you still can’t do it, delete the LegacyDefaultPrinterMode and UserSelectedDefault values as well (if they exist).
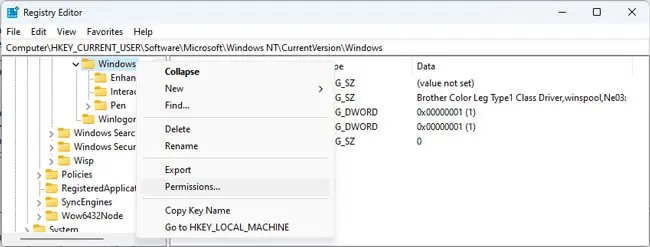
- If you encounter a permission error when making these changes, right-click the Windows key from the left pane and select Permissions.

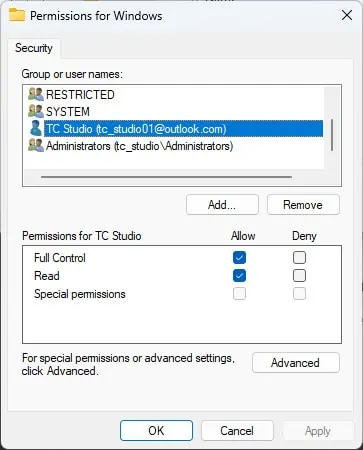
- Select your user entry from the list. If it’s not there, add it manually.
- Then, set the permissions to Full Control and press Ok to apply the changes. Finally, repeat Steps 2-4.

Resolve Update Issues
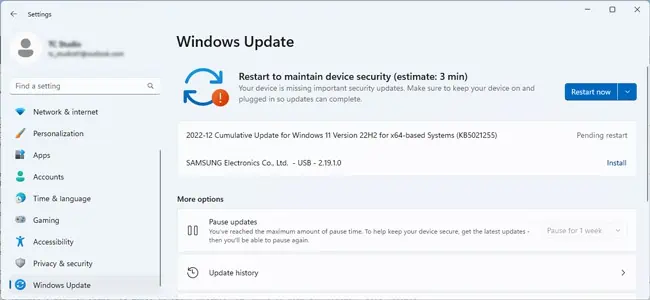
There have been numerous cases in the past where systems that were working fine started experiencing the 0x00000709 error after a Windows Update. Specifically, KB5005565 and KB5006670 are the usual culprits.
If the problem started after you installed these or other updates, it would be best to uninstall said updates.
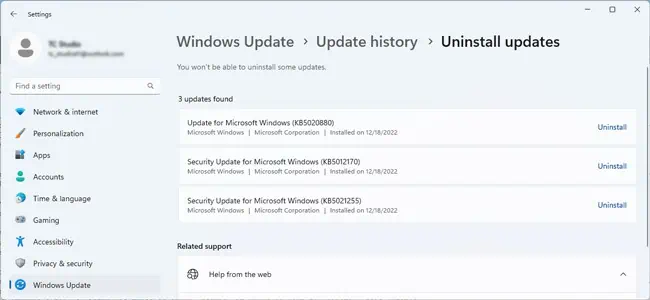
- Press Win + I and select Windows Update > Update history > Uninstall updates.
- Click on Uninstall to remove the recent update.

Microsoft also released patches for 0x00000709 and other printer-related errors in Dec 2021. Some of the errors still persisted, but Microsoft has been working to patch those as well. As such, an alternative way to fix this error is to keep Windows updated.
- Press Win + I and select Windows Updates.
- Click on Check for updates, then download and install any available ones.

Resolve Driver Issues
After installing update KB5005010, users sometimes encountered the 0x00000709 error if their printer drivers were unsigned, or the signatures expired. You could fix this error in such cases by uninstalling the problematic update, or updating to a patched version, as covered in the previous section.
Another way to fix the issue is by updating the drivers themselves.
- Press Win + R, type
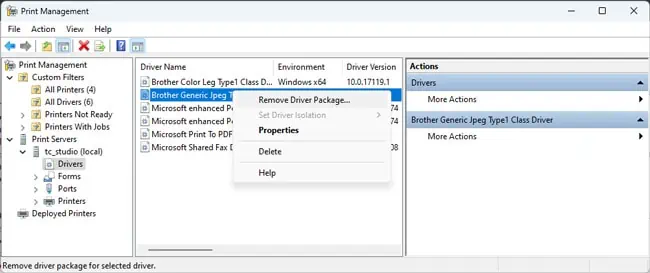
printmanagement.msc, and press Enter. - In the Print Servers section, select your Print Server and click on Drivers.
- Right-click the printer’s driver entry and select Remove Driver Package.

- If you find any old drivers here that are no longer used, you can also consider removing those to account for any driver conflicts.
- Restart your PC and try connecting now. If the error persists, you’ll need to try updating the driver manually.
- Press Win + R, type
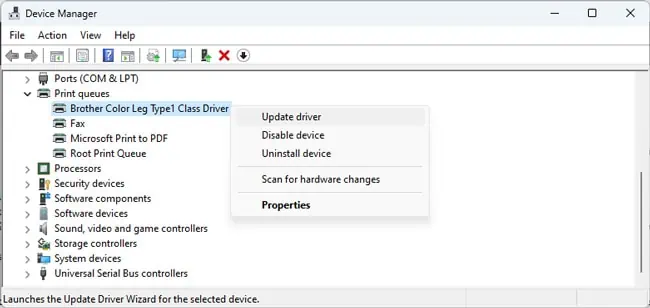
devmgmt.msc, and press Enter. - Expand the Print queues section. Right-click your printer and select Update driver.

- The Search automatically for drivers option installs a recent driver version from your system’s driver store or using Windows Update.
- If you’ve downloaded the latest printer driver from the manufacturer’s site, select Browse my computer for drivers instead to manually locate and install it.
- Or if the downloaded driver file is an executable, you can simply double-click and run the installer.
- Check if the error is resolved after updating the driver.
Use RPC over Named Pipes
After installing the updates discussed above, some users encountered the 0x00000709 error because incorrect protocol settings were used for outgoing RPC connections to a remote print spooler. In such cases, you can apply the following fix on your machines:
- Press Win + R, type
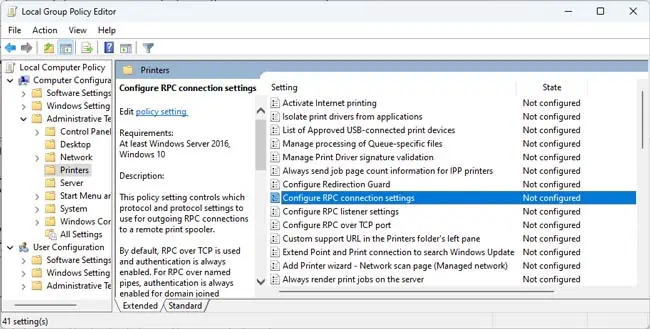
gpedit.msc, and press Enter. - Select Computer Configuration > Administrative Templates > Printers.

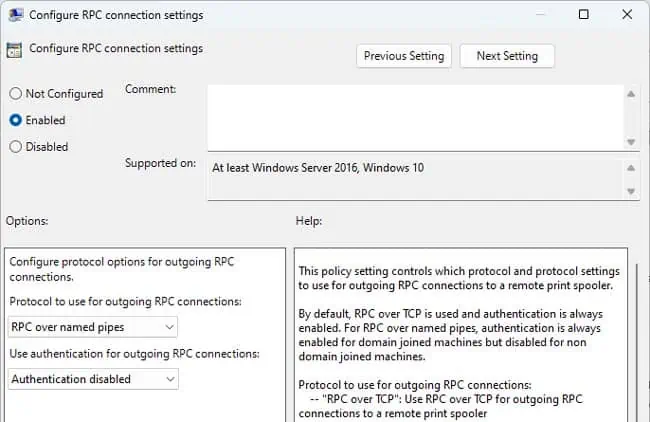
- Double-click the Configure RPC connection settings policy.
- Set it to Enabled. Then, select RPC over named pipes with Authentication disabled and press Ok to save the changes.

CNAME Patch
On the aforementioned systems, let’s say you’ve set an alternative UNC path for the print server using a CNAME (alias) resource record in DNS. If non-Microsoft DNS solutions are handling name resolution, the connection may fail with error 0x00000709. Here’s how you can fix the issue in such cases:
- On the server system, press Win + R, type
powershell, and press CTRL + Shift + Enter. - Run the following command:
reg add HKLM\SYSTEM\CurrentControlSet\Control\Print /v DnsOnWire /t REG_DWORD /d 1
- On the client system, press Win + R and enter:
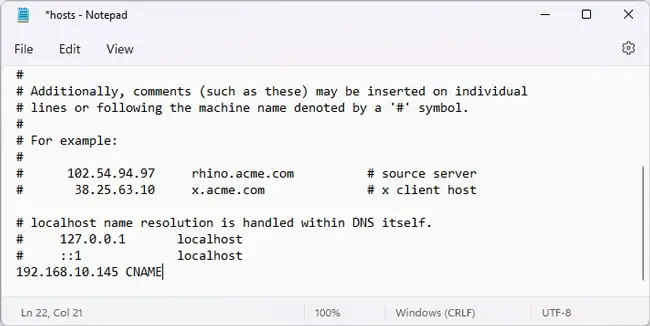
%windir%/system32/drivers/etc/ - Launch a text editor (e.g, Notepad) as an admin. Use it to open the hosts file in the current directory.
- Include the server’s CNAME record here and save the changes.

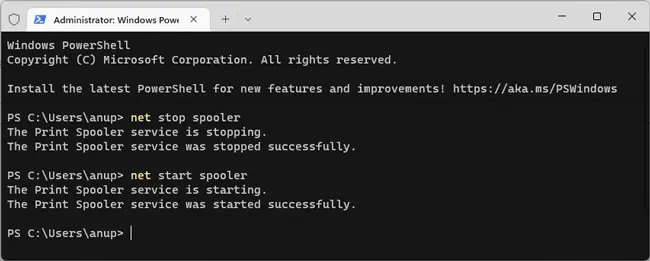
- Restart the print spooler service:
Net stop spoolerNet start spooler
- Now that the changes are applied, try reconnecting.
Check Server Name Length
NetBIOS computer and domain names have a 15-character length limit. If the print server you’re trying to connect to is named longer than this, you’ll encounter the error 0x00000709. You can easily resolve the error in such cases by renaming the server to 15 characters or lower.
If for whatever reason, you’re unable to rename the server, you can try a longer workaround. We’ll create a DNS entry in the client’s hosts file with a shortened name. Then, we’ll configure the systems to ensure file sharing and other services work with a DNS alias.
- First, refer to the previous section for steps to add the CNAME record to the hosts file. Make sure to enter the value as a NetBIOS name instead of an FQDN. For instance, we used
192.168.10.145 CNAMEin our example. Using the FQDN format(192.168.10.145 CNAME.TNT.COM)wouldn’t work. - Back up your registry before proceeding further.
- On your computer, press Win + X and select Terminal (Admin).
- Execute the following command:
reg add HKLM\CurrentControlSet\Services\lanmanserver\parameters /v DisableStrictNameChecking /t REG_DWORD /d 1
- On all client nodes, replace the value for the /d option at the end and run this command:
reg add HKLM\SYSTEM\CurrentControlSet\Control\Lsa\MSV1_0 /v BackConnectionHostNames /t REG_MULTI_SZ /d <CNAME or DNS alias> - Check if the error is resolved now.

