Setting up a Virtual Machine is not always a piece of cake. You have to configure a few important settings to make it work flawlessly.
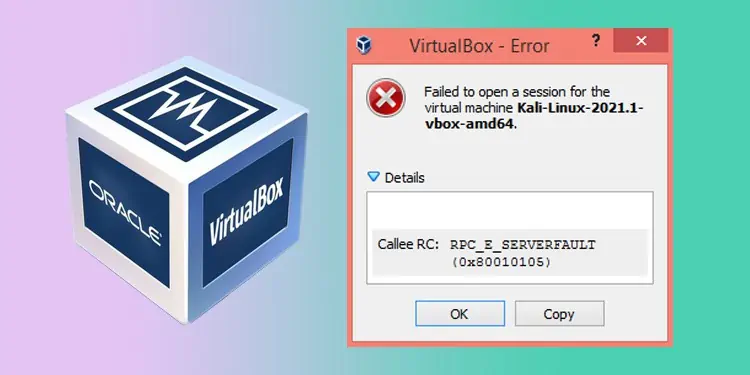
Failing to use proper settings can lead to several errors while running the VM. The Failed to Open a Session For the Virtual Machine error can usually occur if the system is unable to start the VM. This can be due to varying causes, ranging from virtualization not enabled at all to virtualization resources used by other programs.
This error can be accompanied by different Error codes, varying with the causes. If you find E_Fail in the error code, you can go through the specific fixes in our separate guide.
Apart from this, we have compiled the most probable cause for the error and the fixes to resolve them. Let’s go through it together.
What Causes Failed to Open a Session For the VM Error?
A number of malfunctions and faults in configurations can lead to the “Failed to Open a Session For the Virtual Machine” Error. Let’s see a few of them.
- Virtualization disabled
- Conflict due to enabled Hyper-V
- Interference by third-party Security programs, applications, and features
- Faulty Virtual Machine Manager software
- Inadequate memory allocation
Fixes: “Failed to Open a Session For The Virtual Machine”
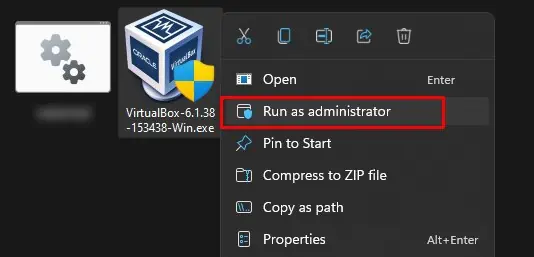
Before moving to the fixes, try opening the virtual machine manager with administrative privilege.
Search the name of the software in the Windows search bar and right-click on it. Choose Run as Administrator. See if the issue is solved.
If it still does, let’s try the fixes below.
Install Platform Package
The Virtual Machine platform provides special drivers as platform packages to support the devices and programs inside the VM for their proper functioning. If such drivers are missing, then the Virtual Machine will fail to load.
So, you will have to manually install the platform packages on your host computer.
- Search on the Internet for the platform package of the Hypervisor you are using. For example, you can download the platform package for Virtual Box from their respective site.
- After the download completes, run the setup as administrator to install the platform package.

Check whether the error is still there.
Enable VT-X or AMD-V
VT-X is the Virtualization technology by Intel that provides access to guest virtual machines to use the CPU’s resources while running multiple operating systems. AMD-V is a similar technology in AMD CPUs.
If VT-X or AMD-V is not enabled, then the Virtual Machine will fail to load and display the error. So, you should check the status of virtualization in your CPU and enable it, if available.
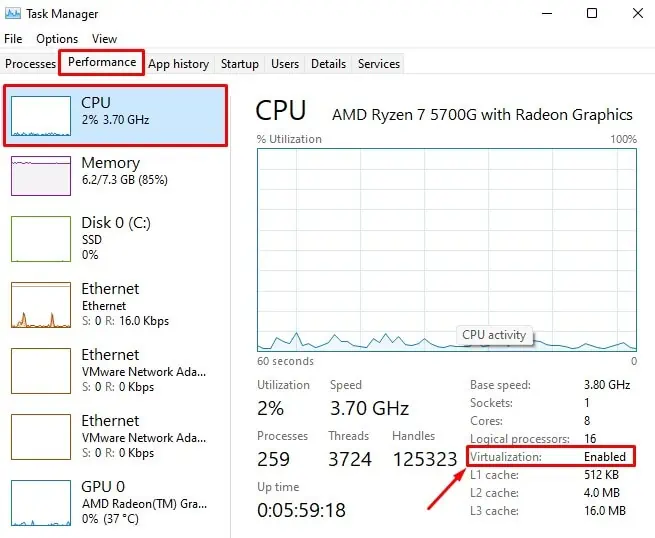
- Press Ctrl + Shift + Esc to open Task manager.
- Go to the Performance tab, and find the details of the CPU.
- See the status of Virtualization.

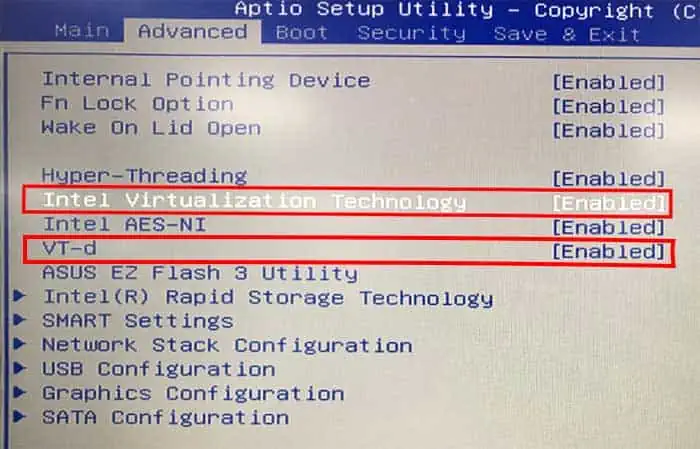
If it is in a Disabled state, you can enable it through BIOS. Since the BIOS settings may vary with the motherboard brands, we have provided general steps for the process below.
- Restart your PC and press F2, F12, or respective key repeatedly to get to the BIOS page.
- Go to Advanced or a similar tab and find CPU configuration.
- Find Intel Virtualization Technology, AMD-V, or SVM.
- Set it to Enabled.

- Press F10 or the associated key to save the settings and exit.
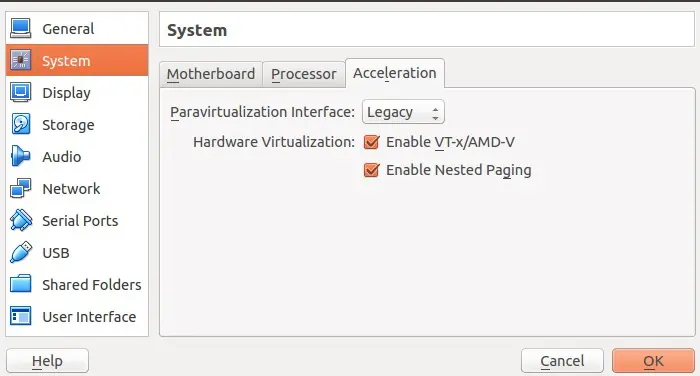
- After the system restarts, find the option to enable Hardware Virtualization inside the Hypervisor as well.

Try running the virtual machine again.
Discard the Saved Session
If you were running the Virtual machine and saved the earlier sessions to open easily afterward, it may cause the error to appear. The earlier state may use the resources preventing you from opening it again.
- Open the Hypervisor installed on your PC.
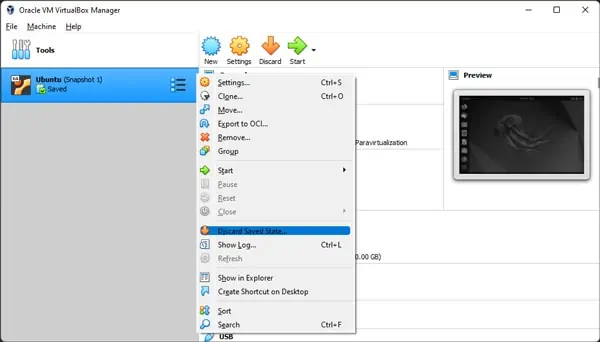
- In Virtual Box, right-click on the saved machine.
- Click Discard Saved State.

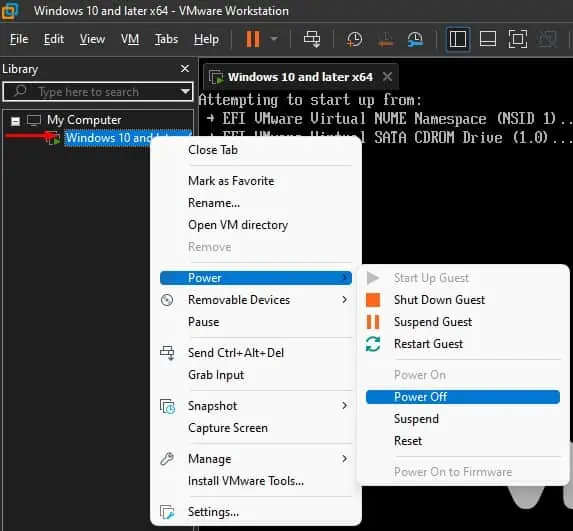
- In VMware, right-click on the saved machine, go to power and select Power off.

Start the machine now.
End the Virtual Machine Process
Sometimes, there may be multiple instances of Virtual Machine running from earlier sessions. This can prevent you from loading the new one, hence the error. You should end the VM process in Task manager and try again.
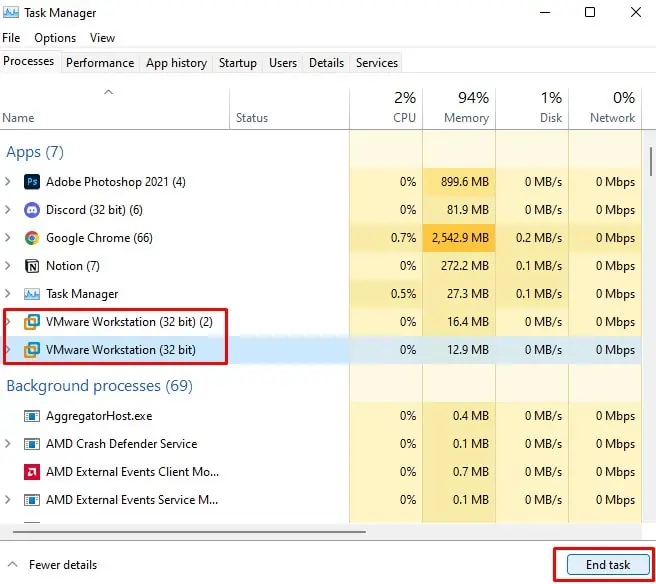
- Press Ctrl + Shift + Esc to open Task manager.
- In the Processes tab, find the name of the Hypervisor you are using and click on End task.

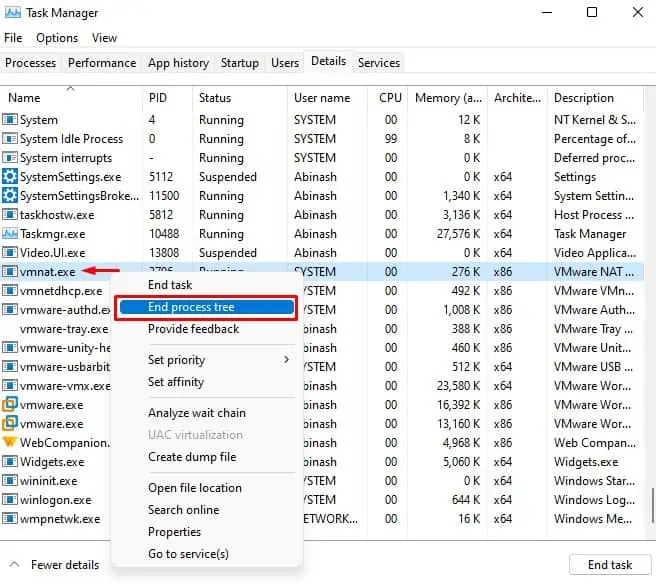
- Similarly, identify the process ID of the virtual machine, like
vmwp.exe, in the Details tab. - Right-click on it and select End Process tree. Sometimes, you may have to do it one or more times.

Run the virtual machine again and notice whether the error vanishes.
Disable or Restart Hyper-V And Other Features
Hyper-V is Windows’ own virtual machine-creating platform. It uses the system’s resources to create and run the virtual machine in the computer. However, if the Hyper-V is enabled in the system, then the virtual box or VMware can fail to work.
But Virtual Box v6 and higher now support Hyper-V as well. So, enabling it may not necessarily cause the problem. Nevertheless, in such a case, if Hyper-V is using the resources, then the Virtual machine in your hypervisor may still fail to load.
You should disable this feature in your system. Similarly, along with Hyper-V, you should disable other features that use virtualization.
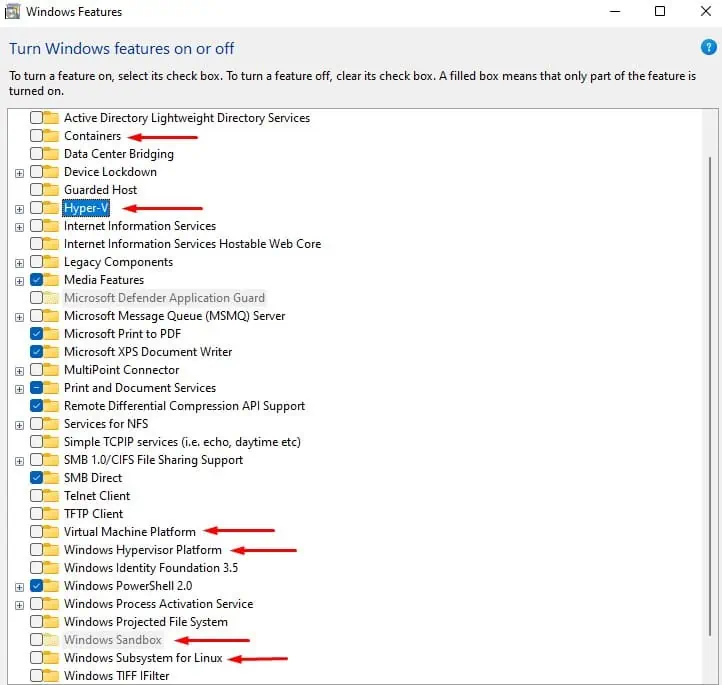
- Press Windows + ‘R’ and type
optionalfeaturesto open Windows Features. - Find the following features and uncheck them all.
- Hyper-V
- Windows Hypervisor Platform
- Virtual Machine Platform
- Windows Sandbox
- Windows Subsystem for Linux

- Click OK to save the settings.
- Press Windows + ‘R’ and type
cmd. - Press Ctrl + Shift + Enter to open the Command prompt in administrative privilege.
- Type
bcdedit /set hypervisorlaunchtype offand hit Enter.
In the Virtual box and VMware that supports Hyper-V, you can simply try restarting Hyper-V to fix the interference.
- Open Command prompt with administrative privilege.
- Type the following commands one by one.
Bcdedit /set hypervisorlaunchtype offBcdedit /set hypervisorlaunchtype on.
Run the created Virtual machine and see if the error still appears.
Disable Security Programs and Processes
Some security programs, such as antivirus, firewall, etc., try to block certain applications from functioning. If such applications are active, they may be interfering with the Hypervisor and preventing it from loading.
So, you can disable the third-party antivirus program and security software accordingly by going through their interface. For Windows Firewall, you can look at the following steps.
- Press Windows + ‘R’ to open the Run dialog box.
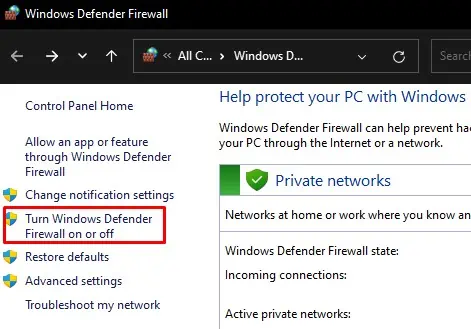
- Type
firewall.cplto open Windows Defender Firewall. - Click on Turn Windows Defender Firewall on or off.

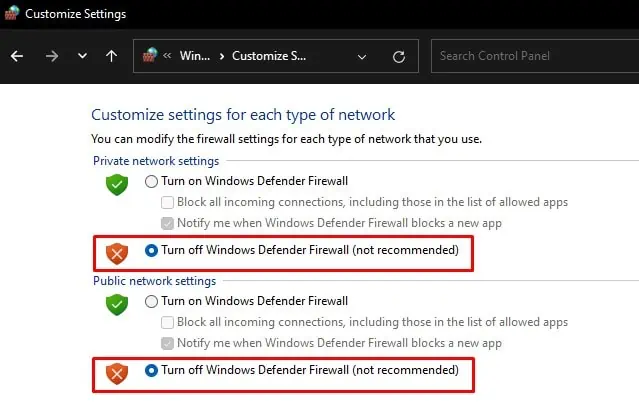
- Select Turn off Windows Defender Firewall (not recommended) for both Private and Public network settings.

Reboot your PC and see if it works. You can also clean boot your PC to identify the programs responsible for the error and remove them.
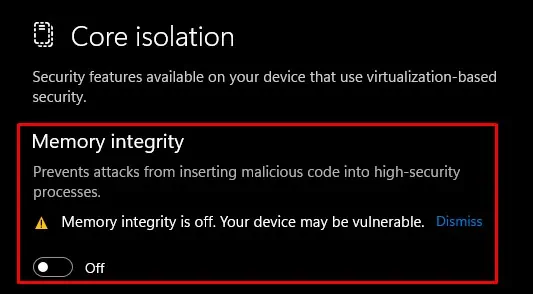
If the issue still persists, you will have to disable other security features on your PC as well that use the virtualization resources for protection. The Device Guard and Credential Guard features do the same to protect the credential from attack. Similarly, the Memory Integrity feature separates the CPU processes using virtualization to protect the core from threats.
So, you should disable all these features on your PC.
- Download the Device Guard and Credential Guard Hardware Readiness tool from Microsoft.
- Press Windows + ‘R’ to open the Run dialog box.
- Type powershell and press Ctrl + Shift + Enter to run Powershell in administrative privilege.
- Enter
DG_Readiness_Tool_v3.6.ps1 -Disable -AutoRebootcommand. You should replace v3.6 with the version of the tool you downloaded. - Press Windows + ‘R’ and type
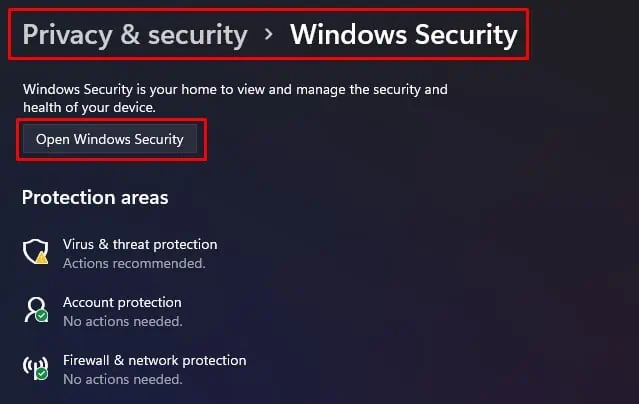
ms-settings:windowsdefenderto open Windows Security. - Click Open Windows Security.

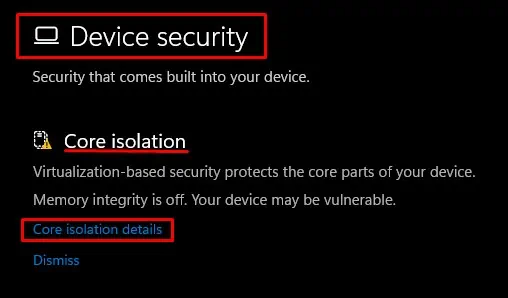
- Go to Device security and click on Core isolation details.

- Set Memory Integrity to Off.

Restart your system and run the Virtual Machine.
Allocate Enough RAM Size For Virtual Box
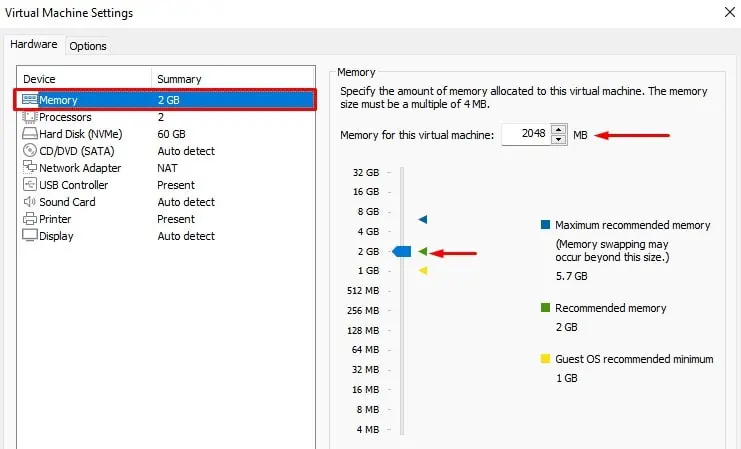
The error is also known to occur if enough RAM is not allotted to the Virtual Machine. You can manually allocate more memory to it and see if it solves the issue.
- Right-click on the created Virtual Machine and select Settings.
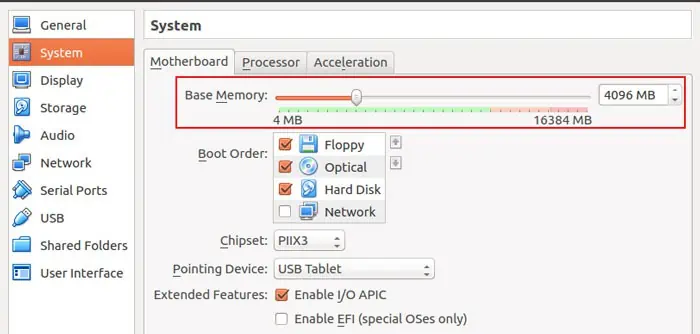
- On Virtual Box, click on System and select Motherboard.
- Now, drag the bar or enter the memory size as per your requirement.

- In the case of VMware, go to memory and set the memory size.

- Save the settings.
This should fix the issue in the case of 64-bit OS. However, if you are using a 32-bit OS, then the system cannot use more than 4 GB of memory. So, you will see the error if you try to allocate more RAM to the VM. However, you can always tweak a few settings, such as modifying PAE/NX to avail adequate memory to the VM.
Update or Re-install the Virtual Machine Platform
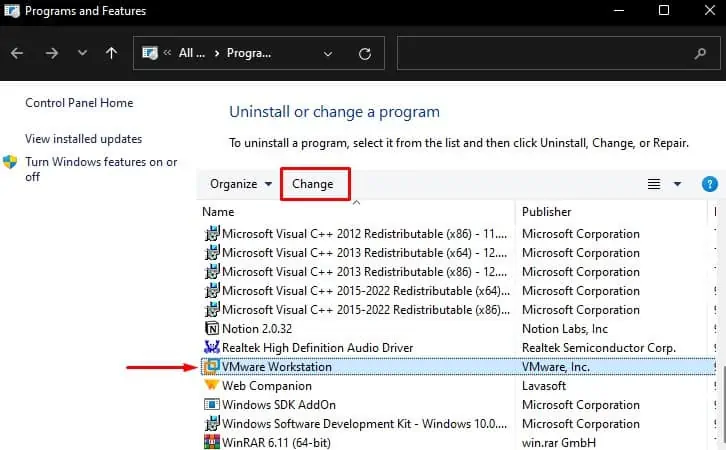
The Virtual Machine platform installed on your PC may have bugs in it, causing the issue. So, we recommend you uninstall it and install the latest one. The updated software usually provides fixes to solve the problems in earlier versions.
- Press Windows + ‘R’ and type
appwiz.cplto open Add or Remove Programs. - Find the Hypervisor program and click Uninstall or Change.

- Disable the antivirus or remove the third-party security tools from your PC.
- Now, download the Hypervisors from their respective websites.
- Run the installer file as administrator and follow the instructions.
See if the error vanishes in the new VM.
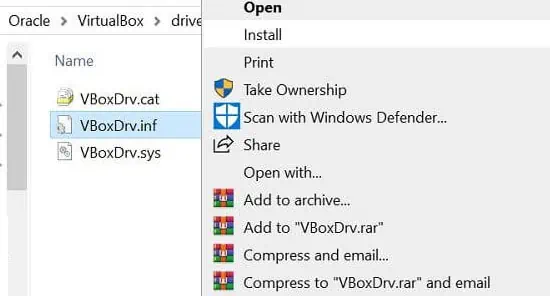
In the case of Virtual Box, you can manually install the driver VBoxDrv.inf as well.
- Navigate to the installation folder of Virtual Box. In Windows, it is in
C:\Program Files\Oracle\VirtualBox\drivers\vboxdrvby default. - Find
VBocDrv.infand right-click on it. - Click Install.

The problem should be solved now.

