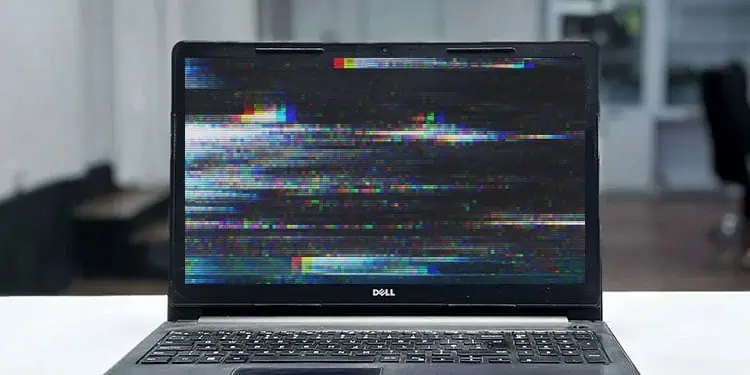
Screen flickering on the Dell laptop is a fairly common occurrence—you can start experiencing it after a system upgrade, installing some applications, or physical damage to the laptop. Sometimes it can even happen without you making any apparent changes to the laptop.
The flickers can range from occasional flickers that don’t hide any content inside the screen to full glitching of the display that renders the screen unreadable.
Such issues can happen due to software or hardware causes. So, the best way to deal with them is to get down to the probable causes and only then attempt to resolve them.
Determine the Nature of the Flicker
The first thing you need to do is to check in what situations the flickers occur to determine the nature of the issue and narrow down the potential causes.
- Restart your laptop and keep pressing the BIOS key (F2) repeatedly until you boot to BIOS. Then, see if the BIOS setup utility also shows the flickers.
- If you have an external monitor, connect the laptop to the monitor through HDMI or any other cable and check if the monitor flickers as well. You need to change the projection mode to Duplicate or Extend after pressing Windows key + P.
- After logging in to your account, press Ctrl + Shift + Esc to open the Task Manager and look out for flickers in this program as well.
If you don’t see the flickers on the Task Manager and the BIOS interface, a third-party program is causing some conflicts. You will need to troubleshoot in clean boot mode to figure out this program.
If you don’t see the flicker only on the external monitor and even your BIOS/UEFI screen keeps flickering, it indicates a hardware issue. Either you have a loose display connection between the screen and the motherboard, or the screen panel has some issues. In some cases, the GPU may not be working properly as well.
Other scenarios can occur due to corrupt display drivers, RAM issues and improper refresh rates on your display.
Troubleshoot in Clean Boot Mode
Some third-party processes like a few antivirus programs, iCloud, IDT Audio, LiveUpdate6, etc., have been known to cause flickering issues on a Dell laptop. You need to boot in clean mode and check each program one by one to determine which one is causing the conflict.
- Open Run by pressing Windows + R.
- Type
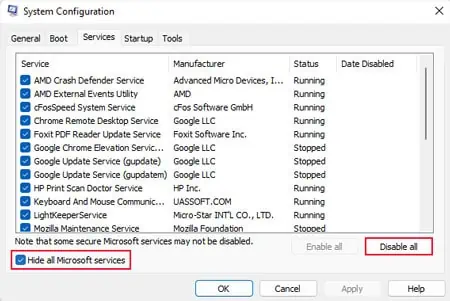
msconfigand press Enter to open System Configuration. - Go to the Services tab.
- Check Hide all Microsoft services and hit Disable all > Apply.

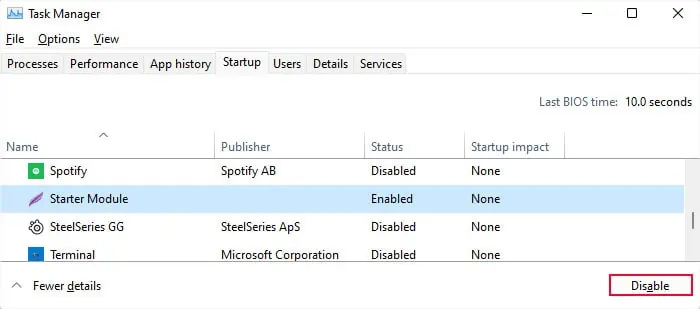
- Now, press Ctrl + Shift + Esc to open the Task Manager and go to the Startup tab.
- Here, select each app and click Disable if the option is there.

- Restart your laptop.
- After the reboot, the flickers should be gone. Get to the Services tab in System Configuration and check Hide all Microsoft services.
- Enable a bunch of the remaining services, click Apply and restart the laptop again.
- If you see the flickers, the conflicting process is among the services you enabled. Disable some of these conflicting services, restart again and keep reiterating this process to isolate the responsible service.
- If you don’t see the flickers, disable the services you enabled earlier and enable some other services. Then, perform the same process.
- Check all the services using this method. After you are done, check the startup apps (on the Task Manager) by enabling them in bunches in the same way.
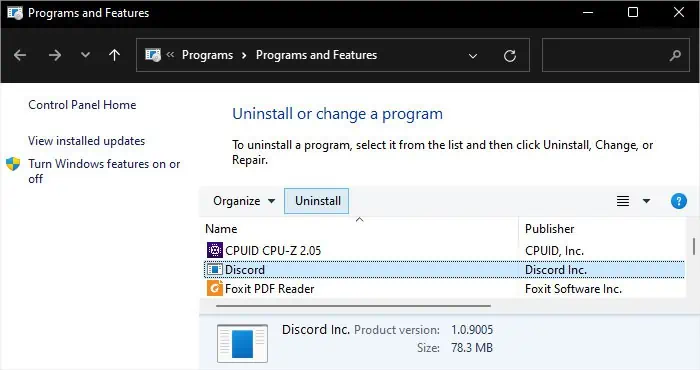
This way, you should be able to narrow down the problematic service or app. Then, you will need to keep these processes disabled or uninstall the root application to resolve the flickers. To uninstall the app,
- Open Run.
- Type
appwiz.cpland press Enter to open Programs and Features. - Select the app and click Uninstall or Uninstall/Change.

- Follow the on-screen instructions to remove the app.
Troubleshoot Driver Issues
Errors in the display driver can also cause various display issues, including flickers, glitches, artifacts, or even a black screen. Incompatibility between the system and the device driver is also quite common if you just upgraded your OS to a recent build.
You need to update the driver or reinstall it to resolve such errors. It’s best to install the latest version through the official website’s installer to perform both tasks at the same time.
- Open Run.
- Type
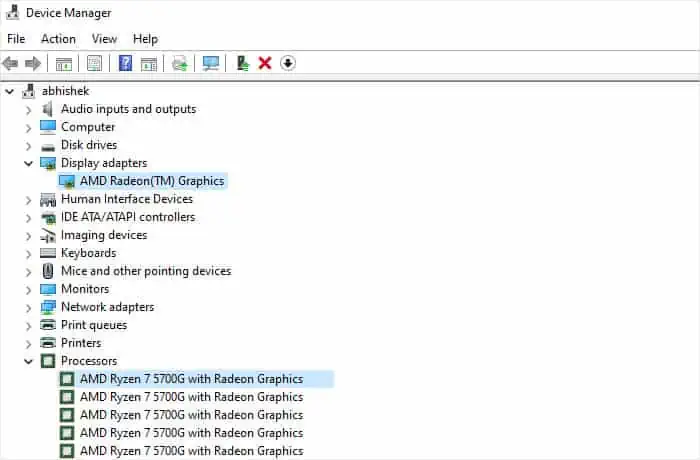
devmgmt.mscand click OK to open the Device Manager. - Expand Display adapters.
- Note down the name of your graphics adapter. To get the name of the integrated graphics card, expand Processors.

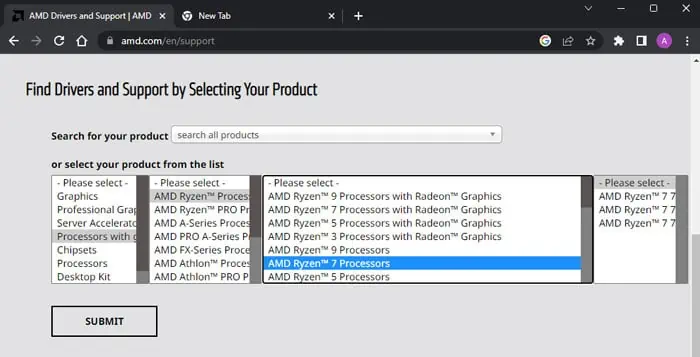
- Go to the official driver download platform of AMD, NVIDIA or Intel, depending on your graphics device.
- Select the GPU model and download the latest driver by following the instructions on the website.

- Run the installer and follow its instructions to update the driver to the latest version.
- Update or reinstall all your display drivers in the same way (both integrated and dedicated).
If the BIOS interface doesn’t show any flicker, you can also try uninstalling the driver before reinstalling it. However, make sure you don’t do the same if the flicker occurs in the BIOS. Otherwise, you may lose your display and even the external display may not work.
Right-click on the driver inside Device Manager and select Uninstall Device > Uninstall to uninstall it.
Check Refresh Rate
All screens have a maximum supporting refresh rate. If your current refresh rate is at max, it can cause some flickers, especially if you have enabled adaptive syncing technology in your graphics configuration. On the other hand, setting a much lower resolution can also cause similar problems.
These issues are very common while playing games, but they can also occur at other times. If it’s only in a game, try changing the graphics settings related to refresh rates, like Supersampling or Variable Refresh Rate.
For other cases, or if making these changes doesn’t help, try changing the refresh rate.
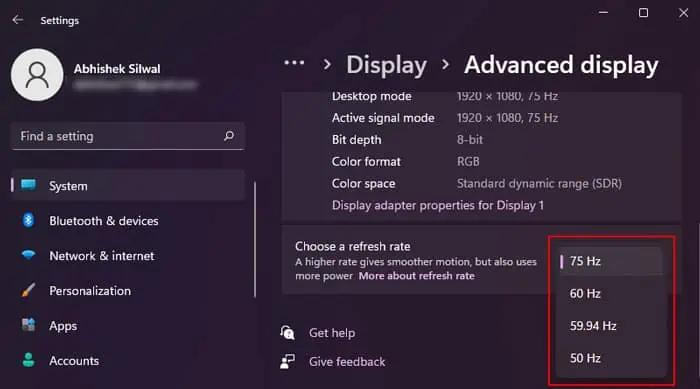
- Press Windows + I to open Settings.
- Go to System > Display and select Advanced display.
- Look for the refresh rate drop-down box.
- Click on it and select another value.

You can also disable Adaptive Sync or FreeSync or G-Sync altogether in such cases.
Run Windows Memory Diagnostic
The RAM temporarily stores a lot of graphics information before sending it to the GPU. This is especially true if you only have an integrated GPU, as these lack dedicated Video Memory (VRAM).
Also, since the integrated GPU is responsible for the normal display, it uses your RAM to store the graphics assets. As such, if your RAM is not working properly, you can experience various types of display issues.
It’s best to check the RAM whenever your screen starts flickering. You can use the Windows Memory Diagnostic app for this purpose.
- Open Run.
- Type
mdschedand press Enter to open Windows Memory Diagnostic. - Click on Restart Now and check for problems (recommended).

- Your laptop will restart and then run the diagnostic process. After it finishes, your laptop will restart again and show you the test result.
If you see any error, your RAM stick or slot might be damaged. First, open the laptop hardware and try reinserting the RAM into its slot in case the connection is loose. Then, if the laptop still shows flickers, switch the RAM to the other slot. If you have more than one RAM, try only using one stick at a time and run the test again.
After narrowing down which component is damaged, you need to replace or repair it. Try seeking help from a hardware specialist if you need to repair the slot.
Check Display Connections and Panel
Display issues in the BIOS but not in external monitors represent display hardware issues. You need to check the connections as well as the screen panel in such cases.
I recommend checking out my tutorial on fixing a broken Dell laptop screen to know how to open the display and access the internal components. Then, you can reconnect the connections on the screen or replace the panel using the instructions in that article.
If you still can’t resolve your issue, chances are that your GPU or display controller is not working properly. Since this hardware is integrated with the laptop, you need to take it to a hardware specialist or the Dell support centers and see if they can do anything about it.
