Are some or all of your emails lost in your inbox in Gmail? You are likely to encounter such issues when your email gets mislocated and ends up in a different tab. Gmail messages can also go missing if the message gets deleted unintentionally.
When this happens, turn off all the apps running in the background and restart your phone. Also, look through all the tabs and categories on your Gmail. If you are still unable to find the email messages, we have compiled a list of fixes to solve the missing Gmail messages issue.
Why Are Gmail Messages Missing?
- Slow internet
- Passed to spam
- Out of storage
- Located in a different tab/folder
- Server issues
- Mistakenly deleted
- A large amount of cache file
How to Fix Gmail Messages Missing Issue?
Before we get into the fixes, if you know who sent the email or what the subject is about, you can search for it on the Gmail search bar. All you have to do is type “in:anywhere info” on the bar, where info is the information relating to that email.
Make sure you have a stable internet connection and follow the methods mentioned below to locate and recover your missing Gmail messages.
Check Promotions And Socials Tabs
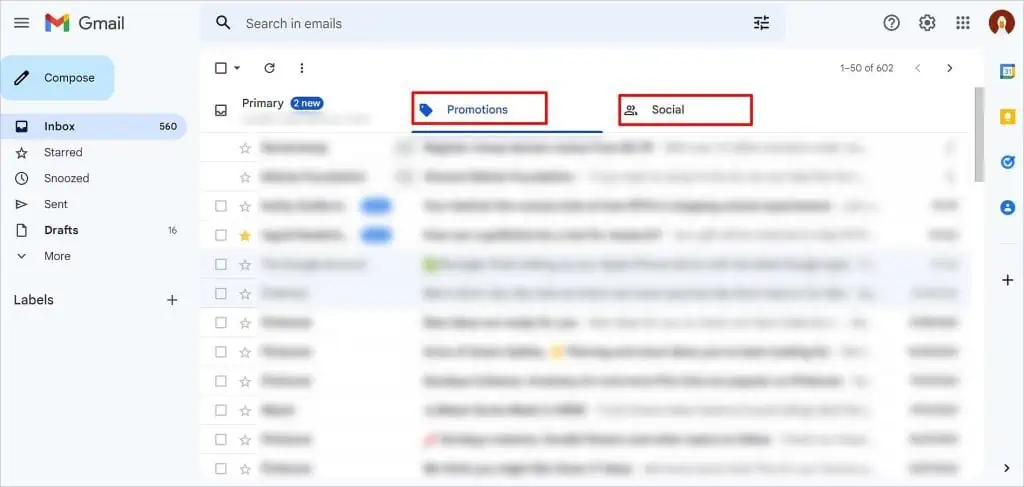
Gmail classifies emails into three categories. The user-to-user conversation is in the Primary tab, Promotional messages, deals, and marketing advertisements on Promotions, whereas statements from social networking sites on Social.
If you don’t find the missing email on the Primary tab, you can look for it on the social or promotions tabs. Sometimes they might get off track and land in a different category.
On PC
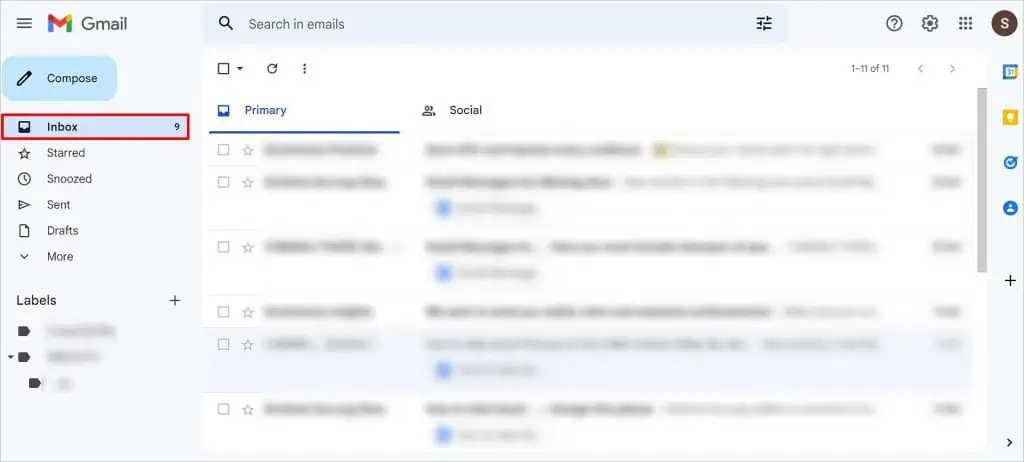
- Open Gmail on your web browser.
- Go to the Inbox tab.

- Click on the Promotions/Social tab.

- Scroll down and search for the missing email.
On Mobile
- Open Gmail.
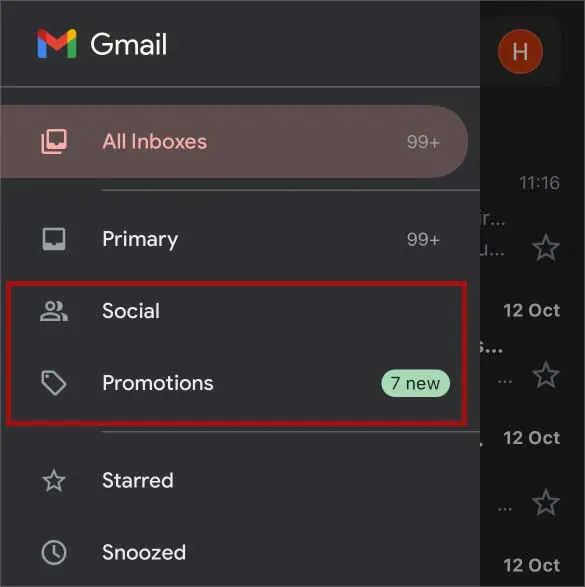
- Tap on the Three Horizontal Lines in the top left corner.
- Select the Social/Promotions tab.

- Search for the missing message.
Look Through Bin/Trash
Sometimes, an email can get deleted unintentionally. When this happens, you won’t see the message in your inbox. If the email has been missing for less than a month, you can quickly locate it in the Trash/Bin and recover it. A conversation tends to stay there for 30 days. Here’s how you can recover it.
On PC
- Open Gmail on your Web Browser.
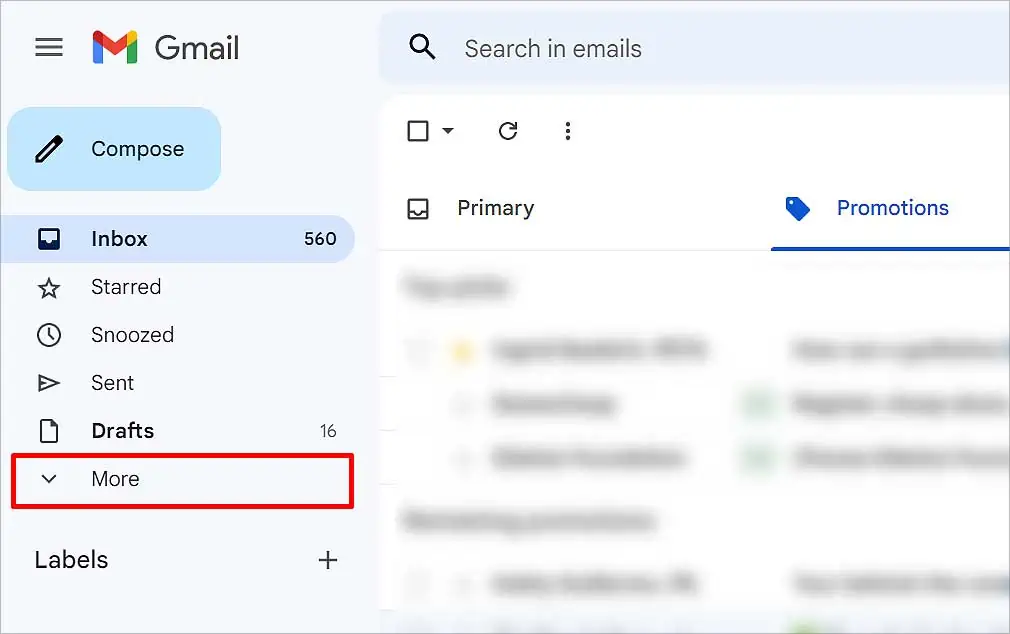
- Click on More on the menu on the left.

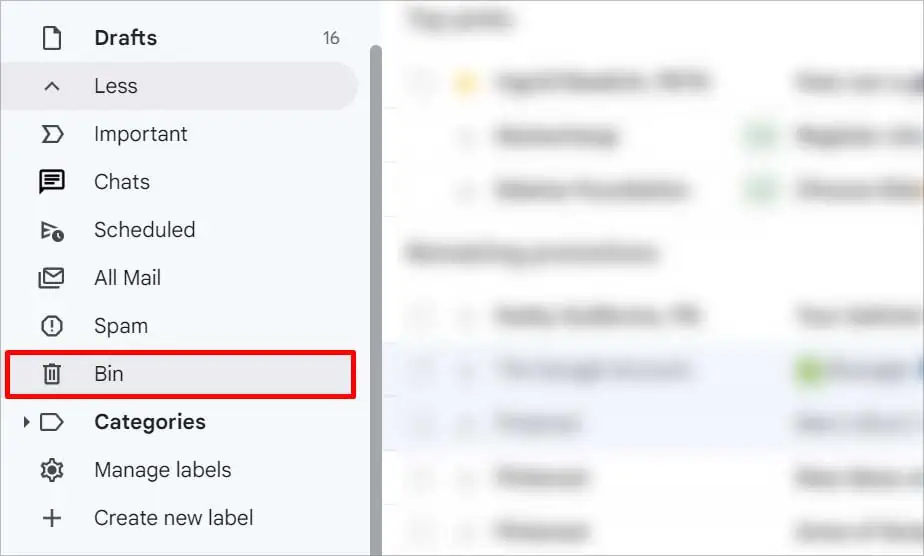
- Select the Bin/Trash option.

- Check for the missing email.
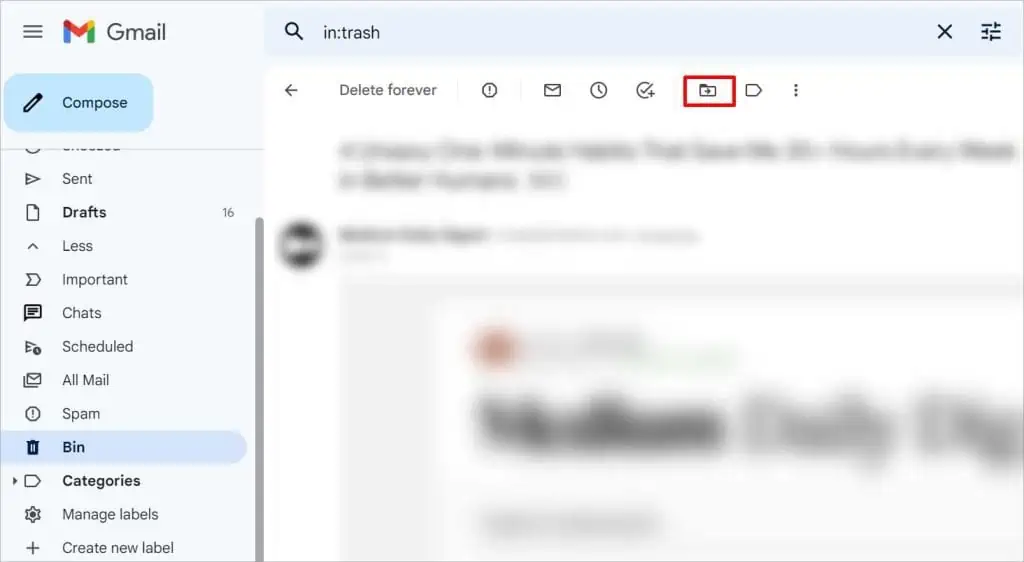
- If there, click on it and select the Move To icon at the top right.

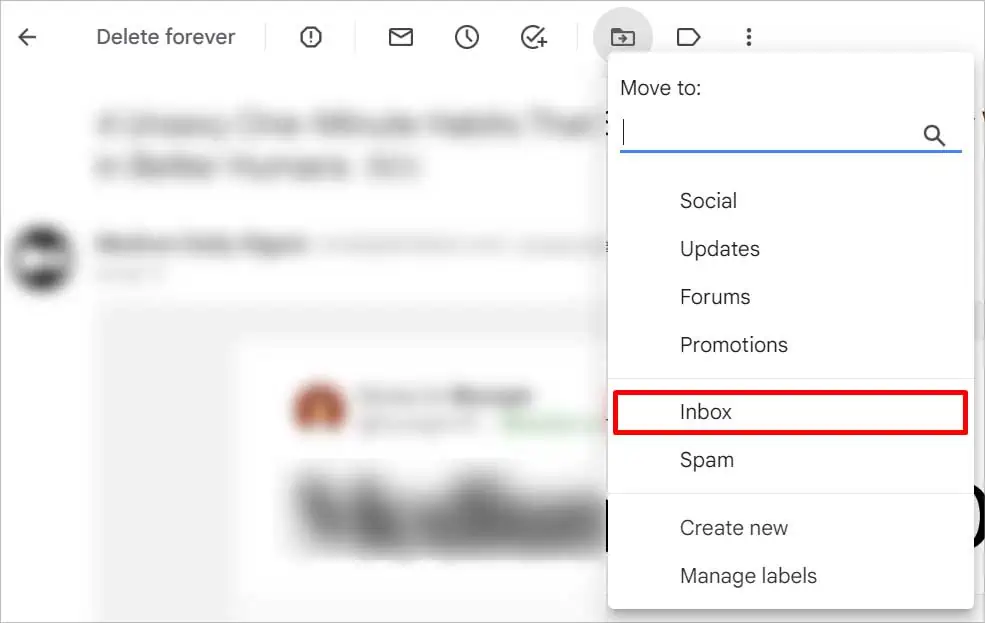
- Select the tab where you want it to appear.

On Mobile
- Open Gmail.
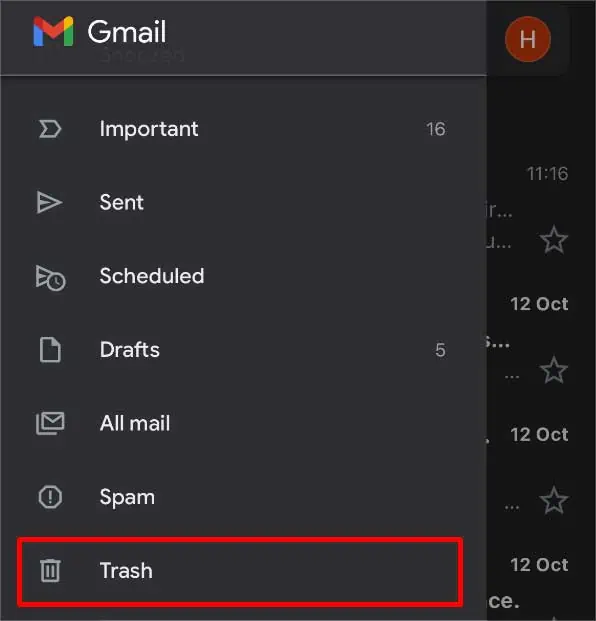
- Tap on the Three Horizontal Lines on the top left.
- Tap on Trash/Bin on the menu.

- Search for the missing email and open it.
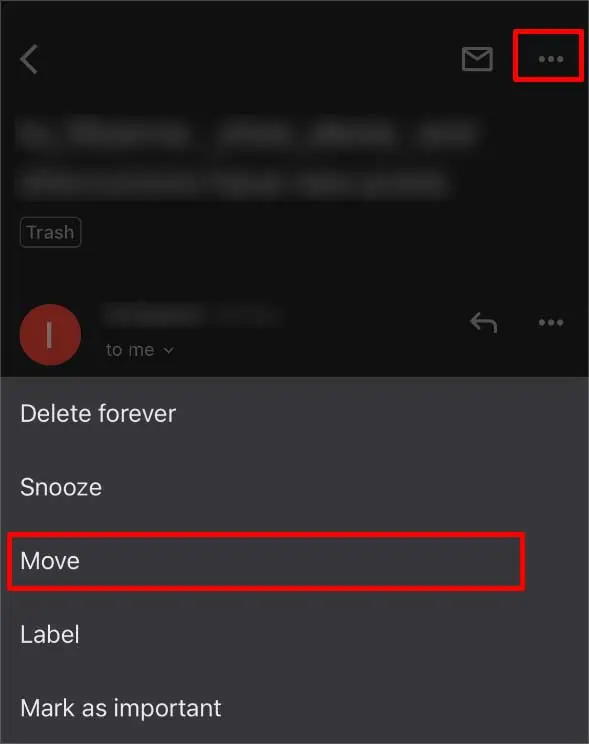
- Press the Three Horizontal Dots on the top right and select Move.

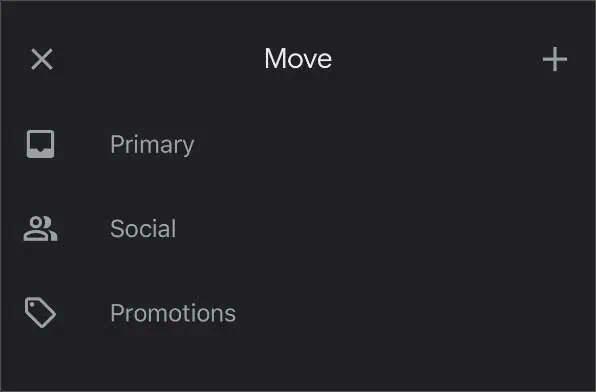
- Tap on the tab where you want to move it.

- Close the menu and go to that tab.
Doing this makes the conversation appear on the primary tab. It transfers the email from the bin to the inbox, where you can easily locate it.
Look through Spam
Gmail keeps track of what kind of messages you receive. When Gmail thinks you are getting unsolicited spam messages, it filters and sends the emails directly to the spam section. It is possible that Spam may locate the missing email. Emails tend to stay there for 30 days.
On PC
- Open Gmail on your Web Browser.
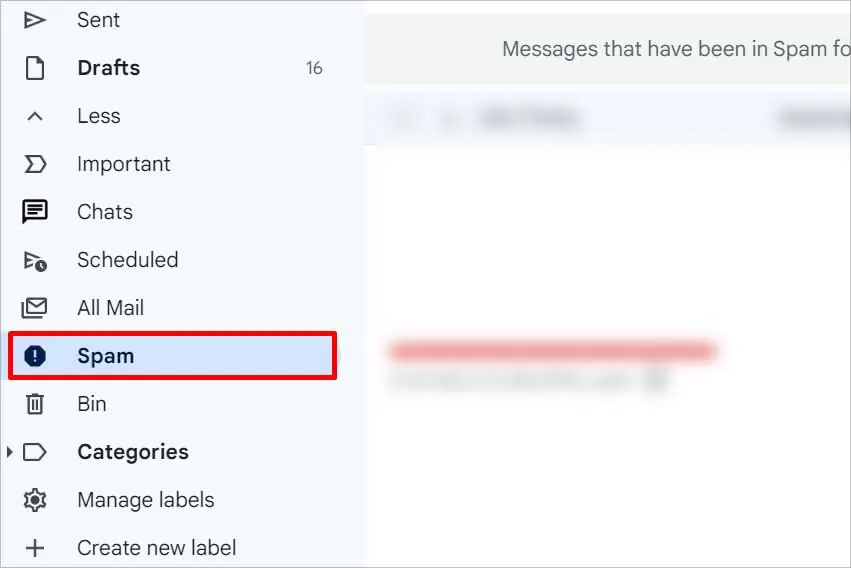
- Click on More on the menu on the left.

- Select the Spam option.

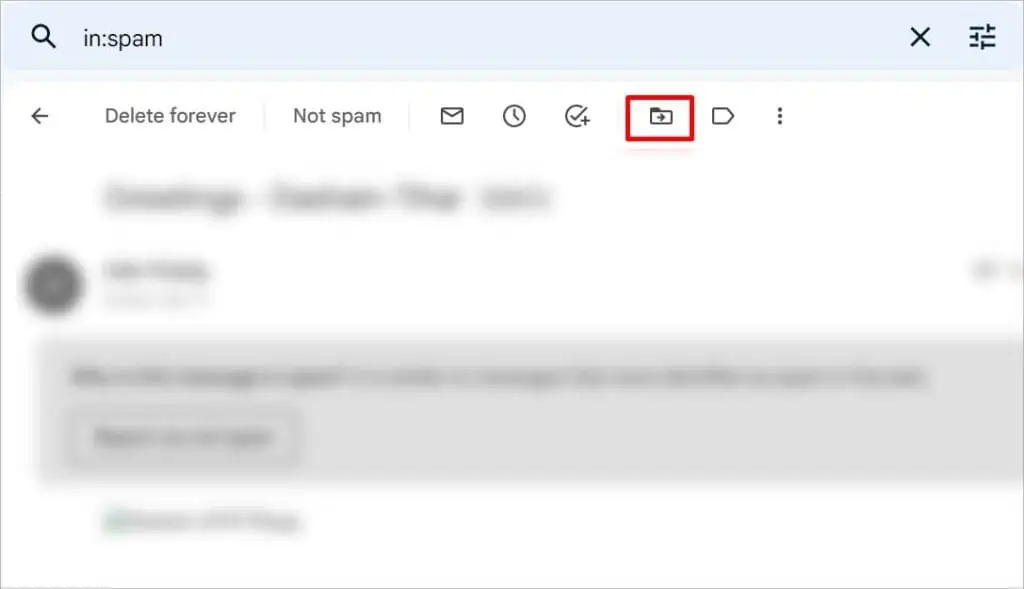
- Check for the missing email. If there, select it.
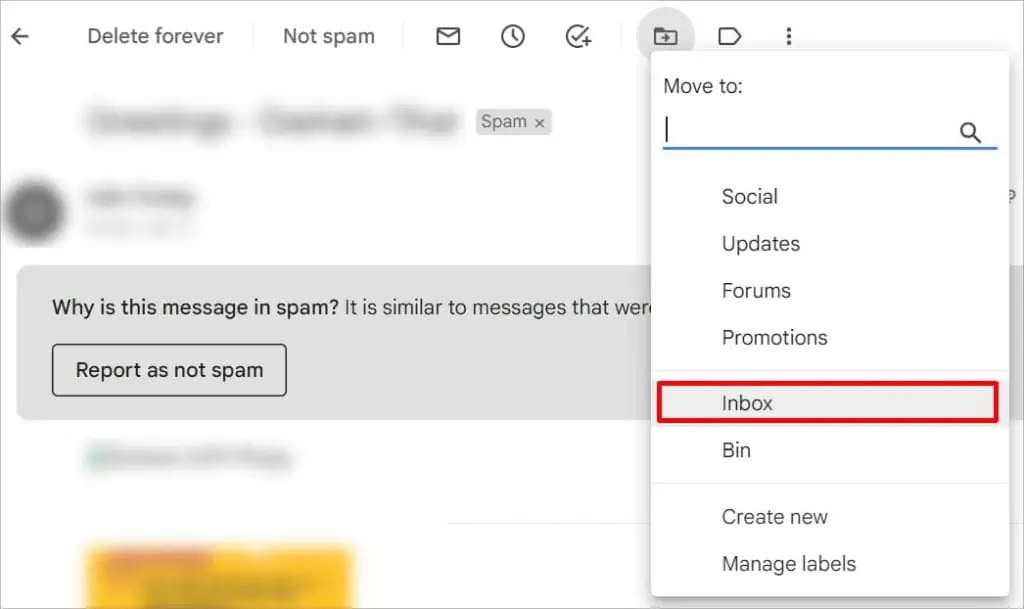
- Click on the Move To icon at the top right.

- Select the tab where you want the email to appear.

On Mobile
- Open Gmail.
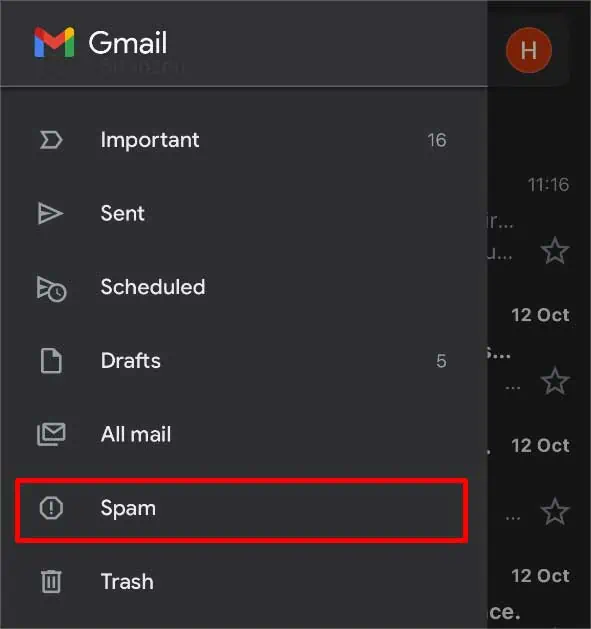
- Tap on the Three Horizontal Lines on the top left.
- Tap on Spam on the menu.

- Search for the missing email and open it.
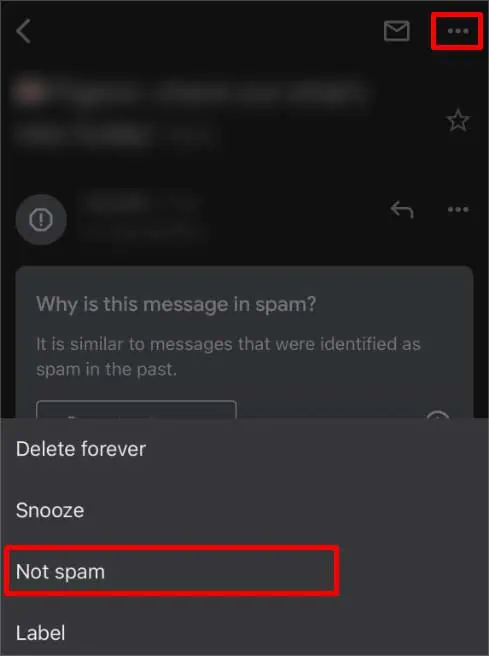
- Press the Three Horizontal Dots on the top right.
- Select the Not Spam option.

- Now, go to All Inboxes and search for the email.
Check All Mail/Inboxes
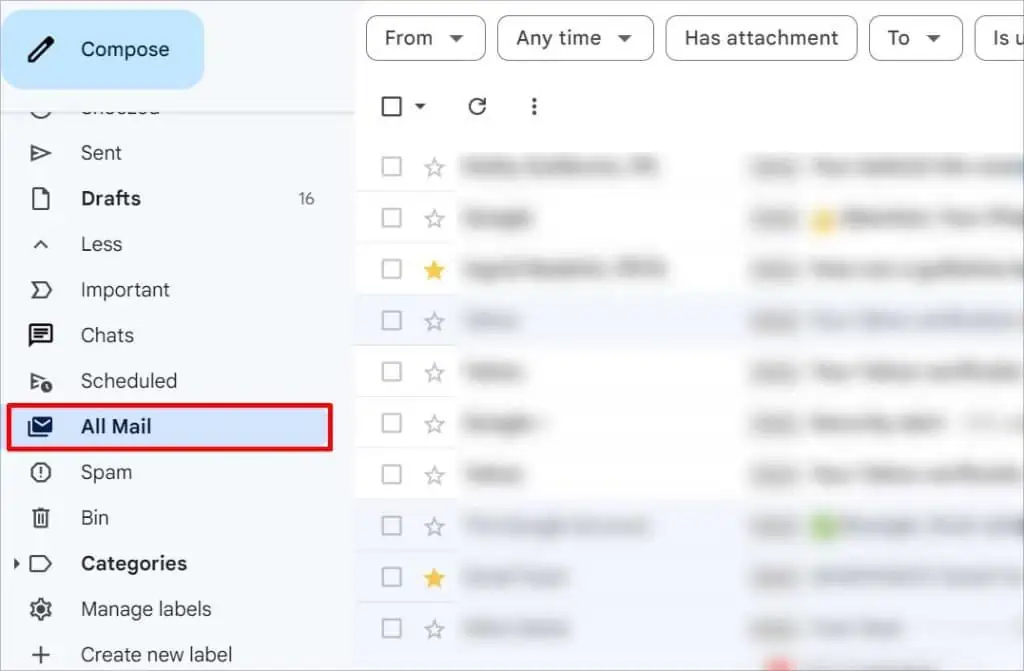
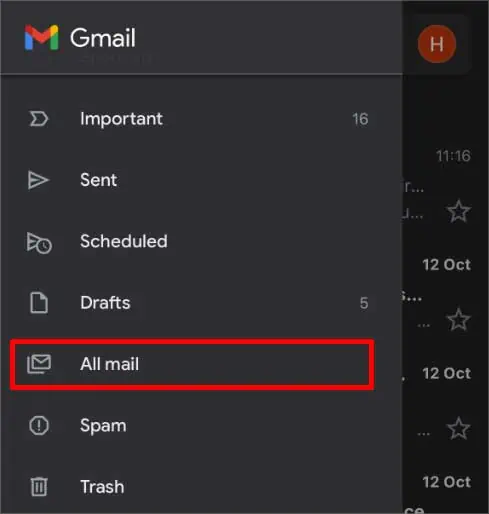
When a message gets archived, it gets removed from the general primary tab. If you use your phone to check emails, you might have mistakenly swiped right or left the email. You will have to go to the All Mail tab to be able to view it again.
On PC
- Open Gmail on your Web Browser.
- Click on the More option on the menu on the left.

- Click on All Mail.

- Search for the missing email.
On Mobile
- Open Gmail.
- Tap on Three Horizontal Lines on the top left.
- Press the All Mail option at the top.

- Search for the missing email.
Clear Cache
When your Gmail app cache or web browser cache is corrupt, it might not work correctly. You might often encounter glitches like finding emails in the wrong tabs and a few missing emails. When this happens, you can simply delete the cache file to prevent this error from occurring repeatedly.
On PC (Web Version)
- Open your web browser.
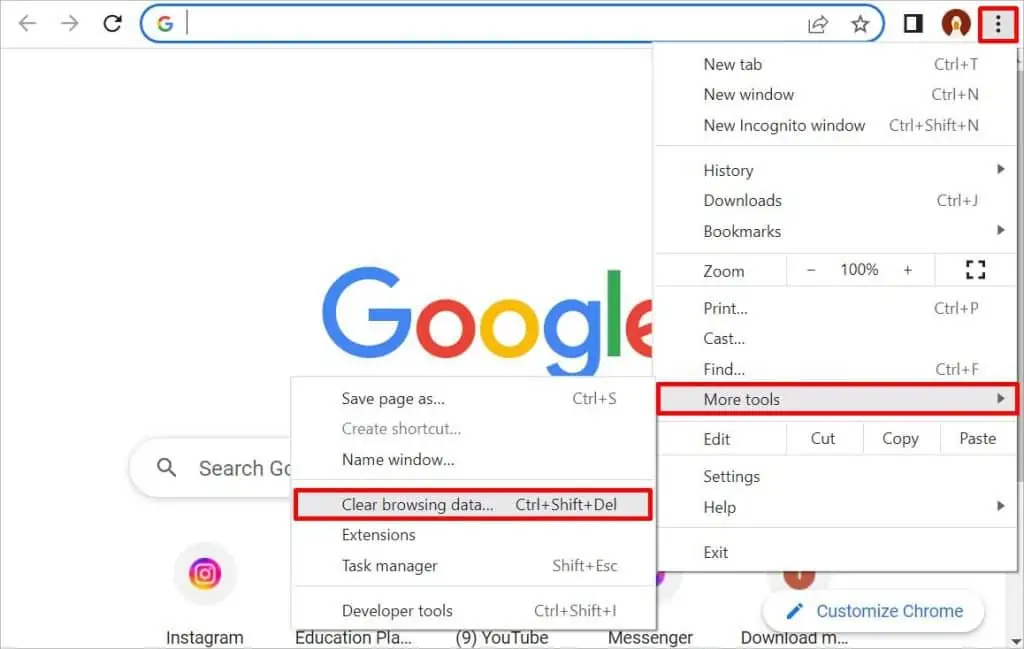
- Click on the Three Vertical Dots in the top right corner.
- Select the More Tools option.
- Click on Clear Browsing Data.

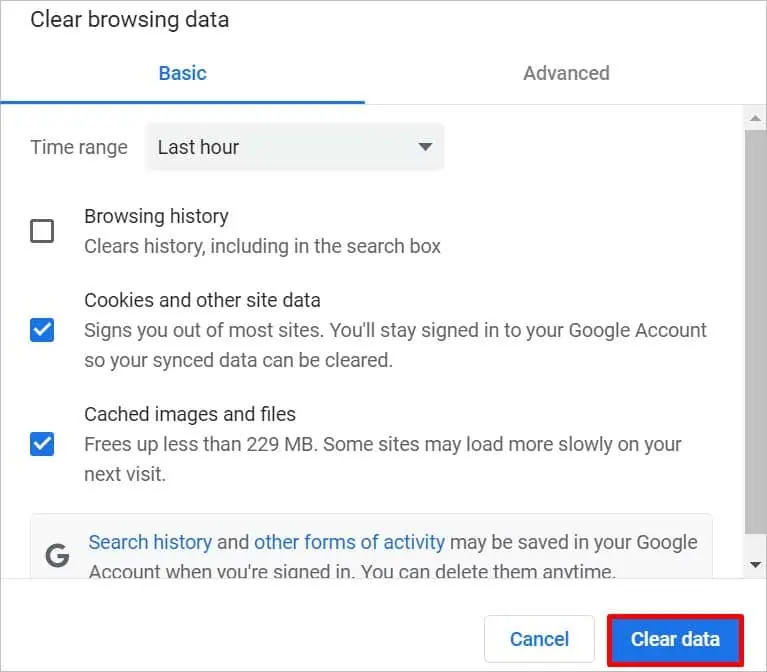
- Select Cookies and other site data and Cached images and files options.
- Click on the Clear data option.

On Mobile (Application Version)
This is only applicable to android phones.
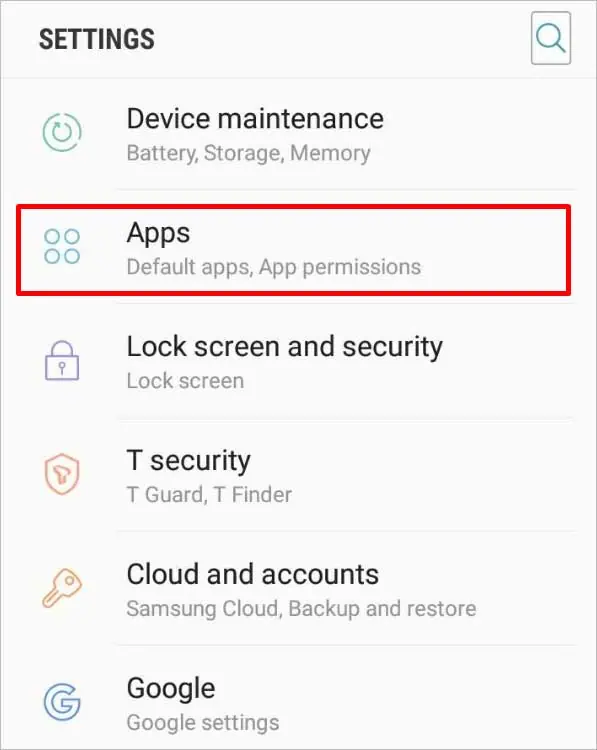
- Open Settings and go to Apps.

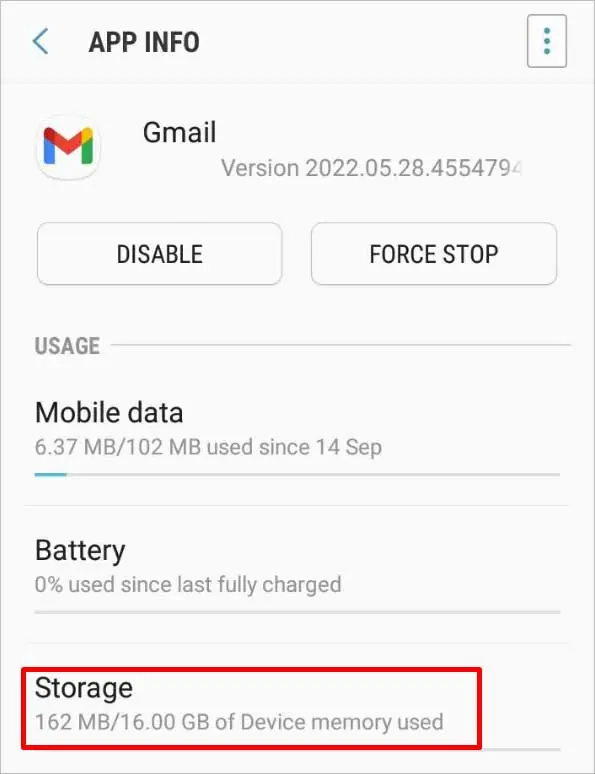
- Scroll down to Gmail and tap on it.
- Select the Storage option.

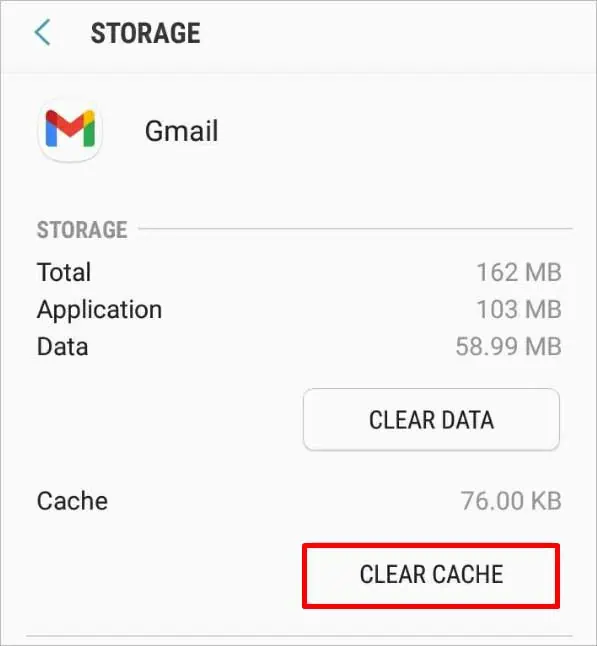
- Tap on Clear Cache.

Expand Storage
Google allows a regular user only 15 GB of storage on the Google Cloud Platform for free. When the storage gets full, you won’t be able to receive or send emails on Gmail, upload files on Google Drive, and back up to Google Photos.
You can either delete unnecessary things from the google cloud and create more space or upgrade your google storage space when such a problem arises. To get more google storage, go through Google One and choose the plan best for you.
Disable Gmail Filters
Gmail filter is a feature that helps you arrange emails based on the criteria you set. Due to syncing issues, Gmail might delete or locate them in a different place. In such cases, you can disable the Filter feature to avoid such a problem in the coming days.
On PC
- Open Gmail on your web browser.
- Click on More on the left menu.

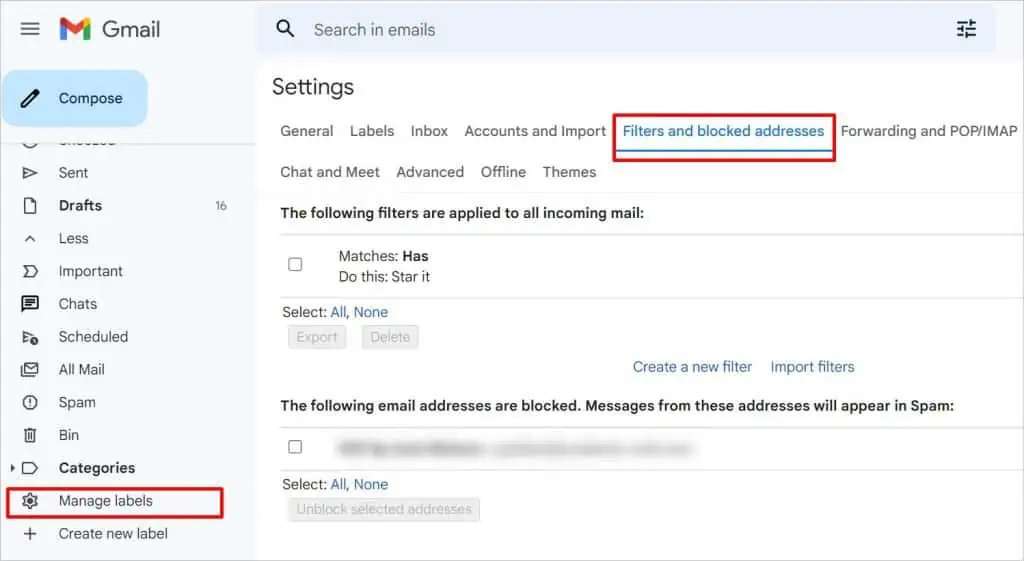
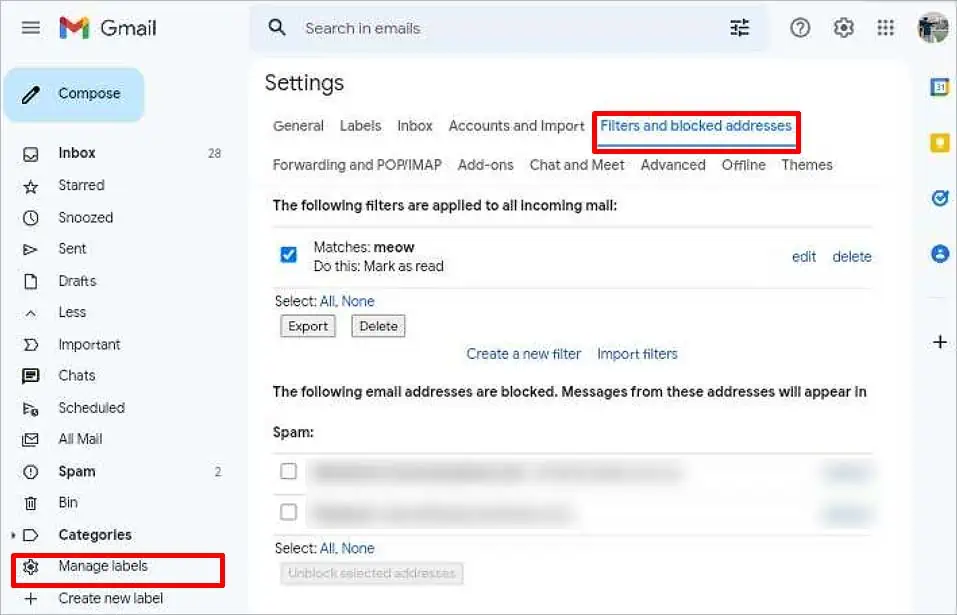
- Click on Manage Labels.
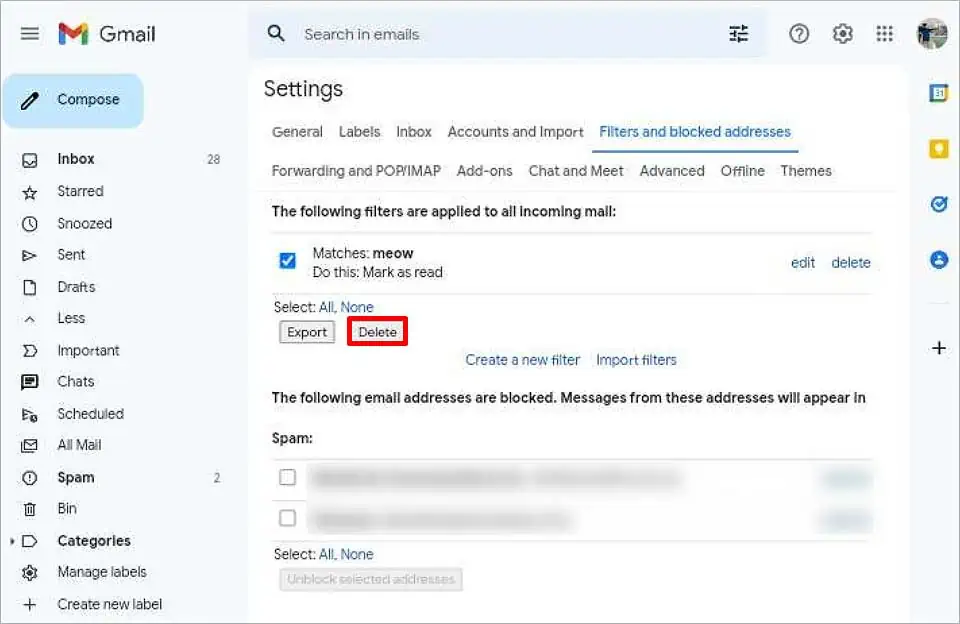
- Click on the Filters and blocked addresses option at the top.

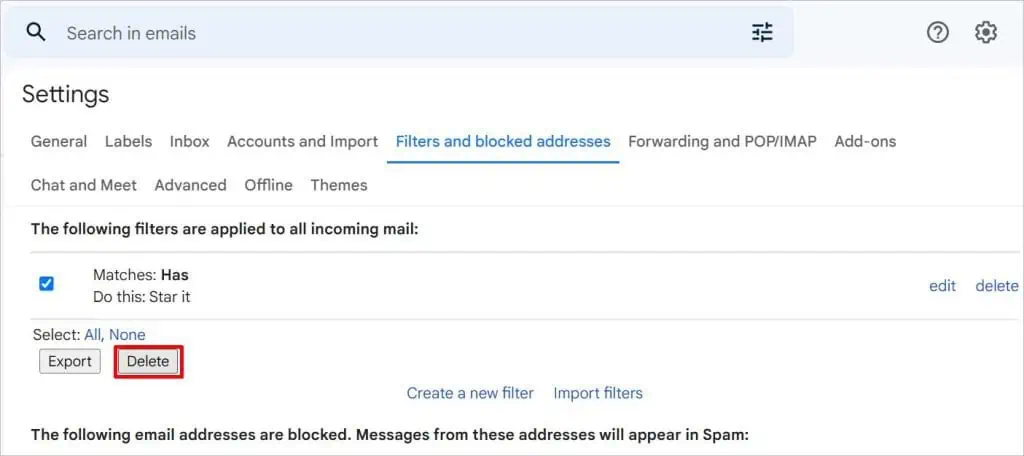
- Select all the Filters by clicking on the checkboxes beside them.
- Click on the Delete option.

- Select OK on the confirmation box.
On Android
- Open the Web Browser and go to a new tab.
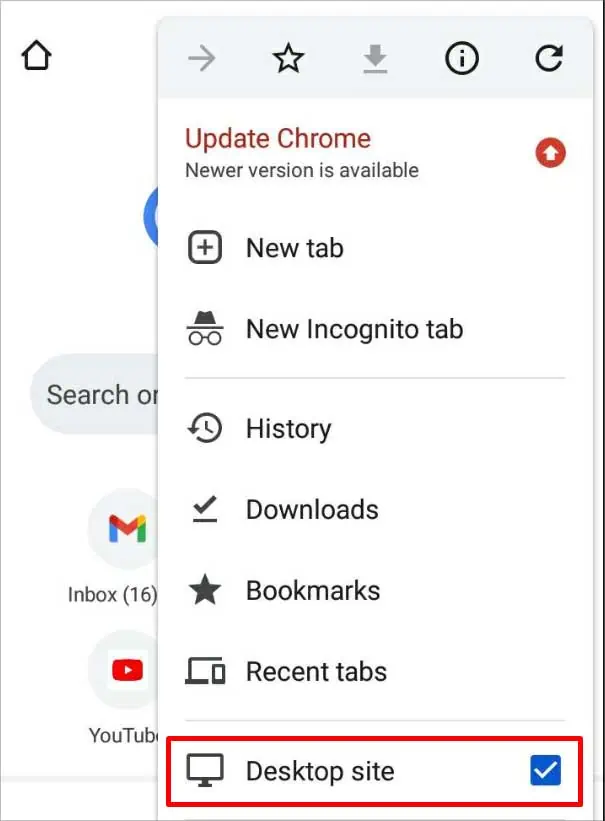
- Press the Three Vertical Dots in the top right corner.
- Enable the Desktop Site option.

- Open Gmail and log into your account.
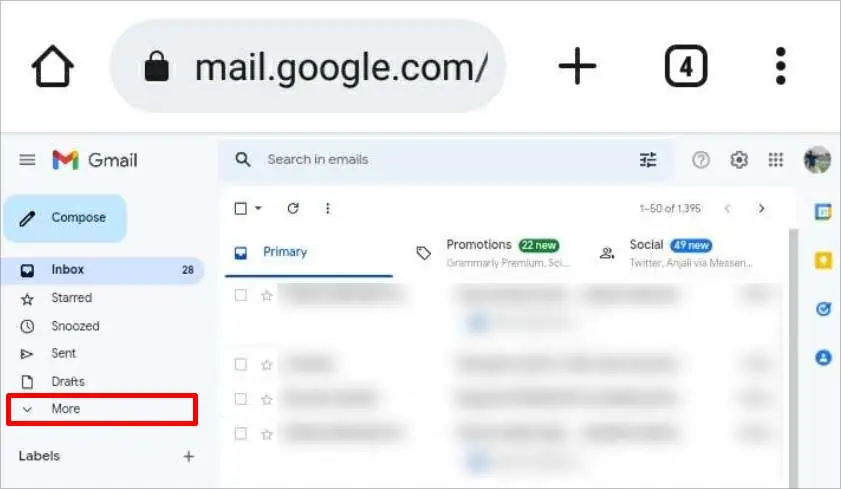
- Tap on the More option on the left menu.

- Select the Manage Labels option.
- Tap on Filters and blocked addresses at the top.

- Select all the Filters by clicking on the checkboxes beside them.
- Tap on the Delete option.

- Select OK on the confirmation box.
On iPhone
- Open Gmail on your Web Browser.
- Tap on the Three Horizontal Lines on the top left.
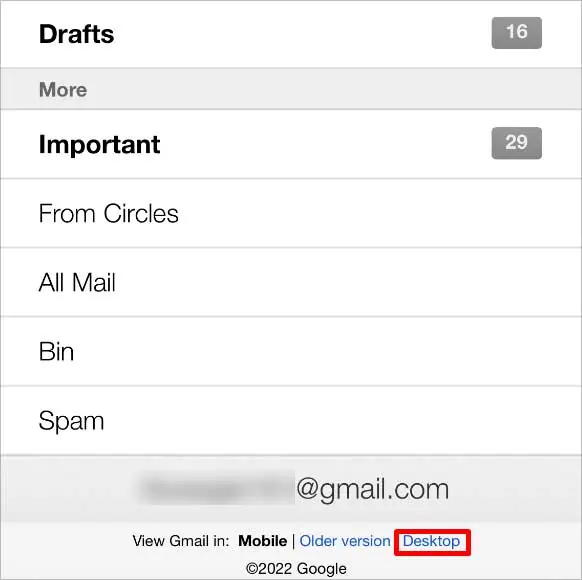
- Scroll down and Select Desktop for “View Gmail In.”

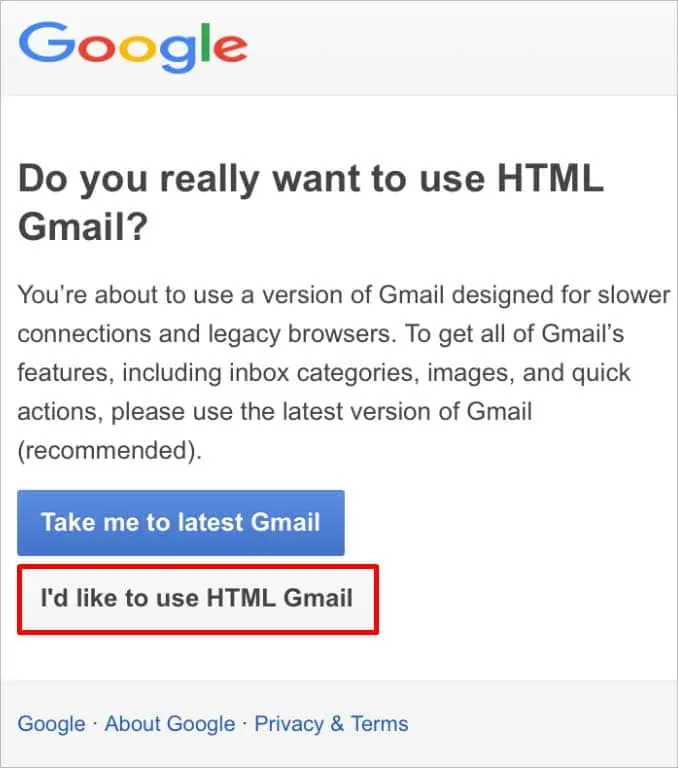
- Select I’d like to use HTML Gmail on the confirmation box.

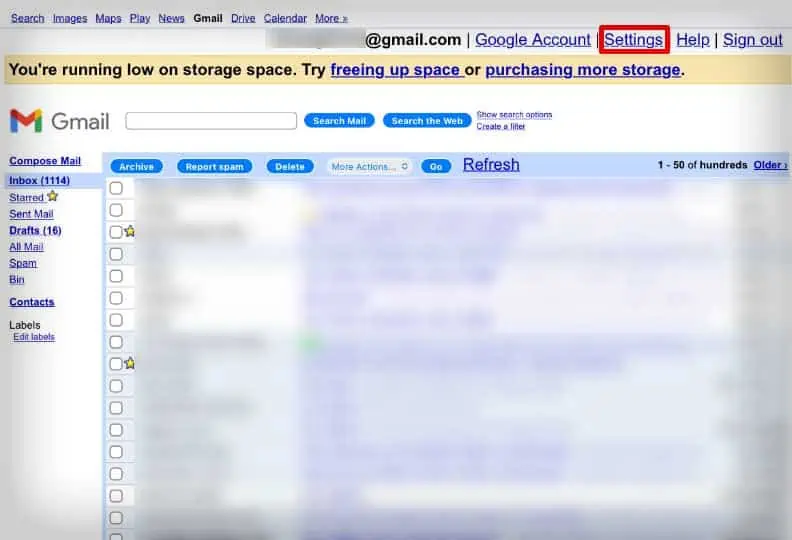
- Tap on Settings on the top right.

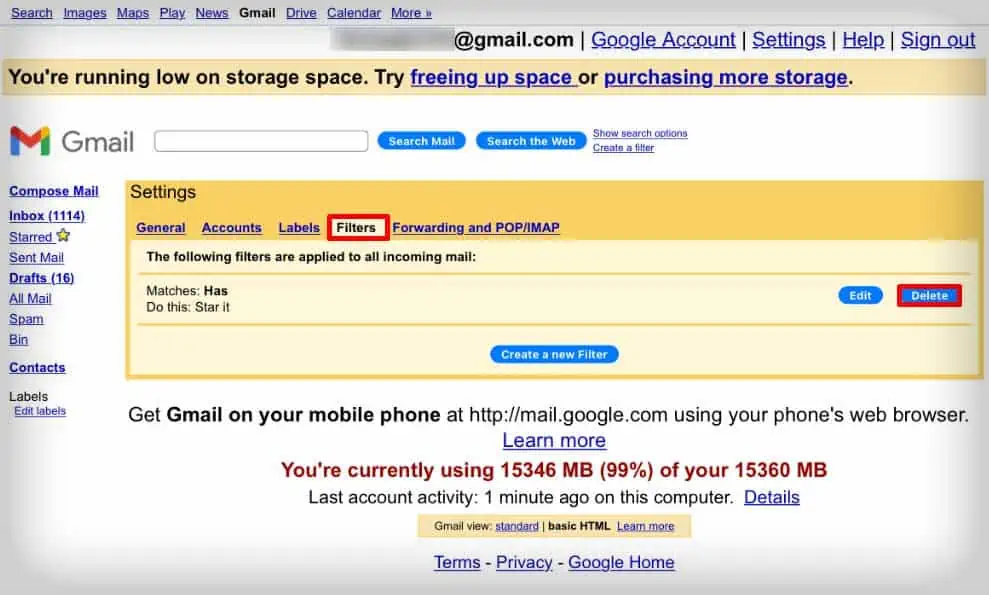
- Go to the Filters tab.
- Tap on Delete for all filters to remove it.

Disable Email Forwarding
When the automatic forwarding feature is in use, sometimes, the email might end directly at the forwarded address. While creating a filter, if you had selected the options to send the email elsewhere, i.e., Archive, Spam, or Trash/Bin, you won’t see it on your general tab.
When this happens, you can go through the filters under Forwarding and POP/IMAP and select where you want them to appear. If not, you can disable the Forwarding feature and manually forward it to the address after you read the email.
On PC
- Open Gmail on your web browser.
- Click on More on the left menu.
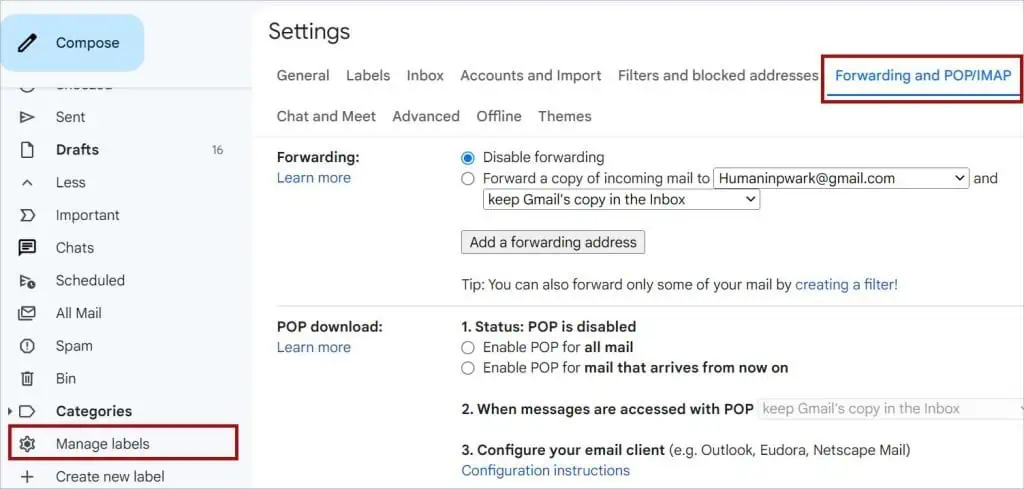
- Click on Manage Labels.

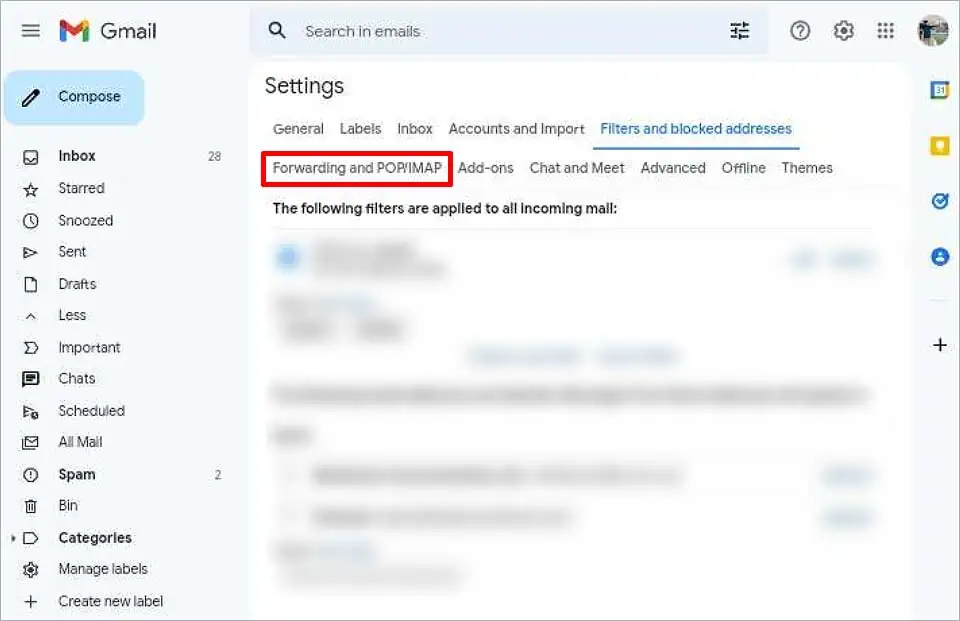
- Go to Forwarding and POP/IMAP tab.
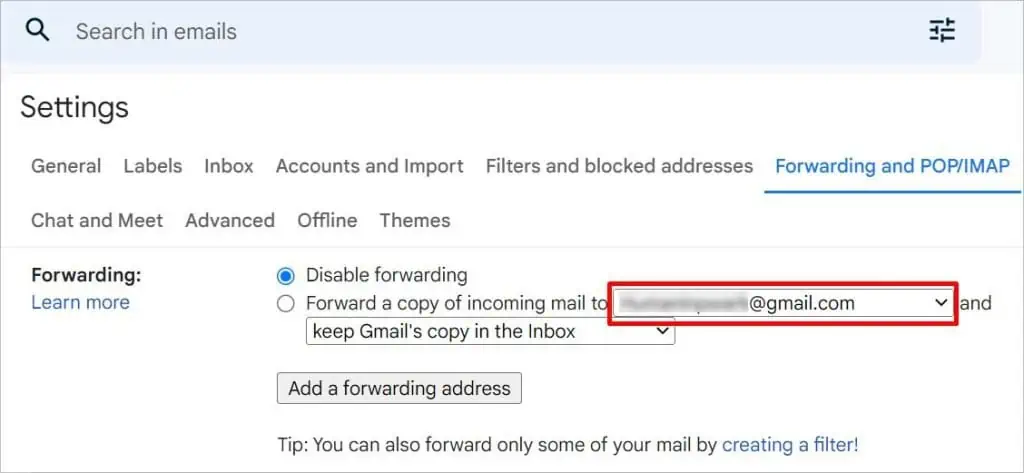
- On the Forwarding tab, click on the email in use.

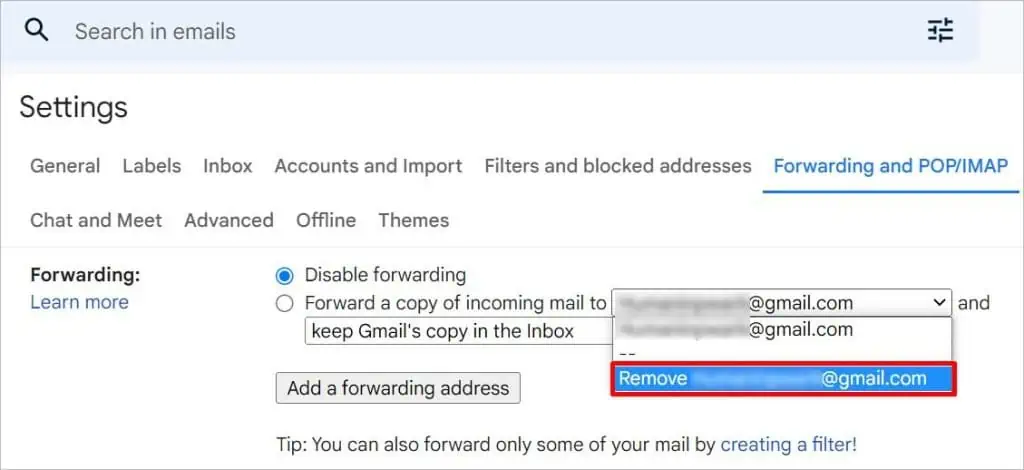
- Select the Remove usersmail@gmail.com (in use) option.

- Click on the OK button on the “Confirm active forward address removal” box.
On iPhone
- Open Gmail on your Web Browser.
- Tap on the Three Horizontal Lines on the top left.
- Scroll down and Select Desktop for “View Gmail In.”

- Select I’d like to use HTML Gmail on the confirmation box.

- Tap on Settings on the top right.

- Click on the Forwarding and POP/IMAP tab.
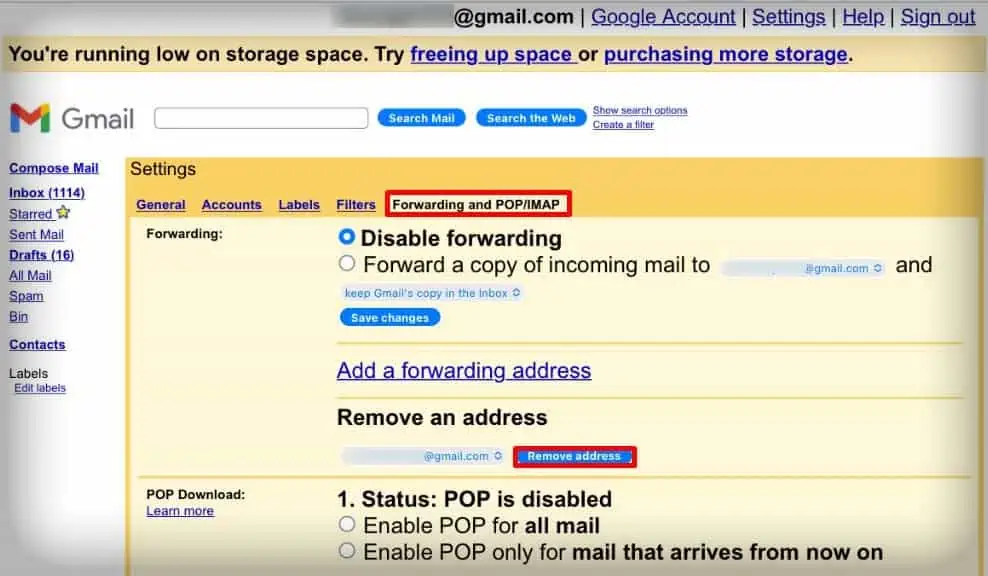
- On the Forwarding tab, navigate to Remove an address.
- Tap on Remove address beside the emails.

- Click on the OK button on the “Confirm active forward address removal” box.
On Android
- Open the Web Browser and go to a new tab.
- Press the Three Vertical Dots in the top right corner.
- Enable the Desktop Site option.

- Open Gmail.
- Tap on the More option on the left menu.
- Select the Manage Labels option.
- Go to Forwarding and POP/IMAP tab.

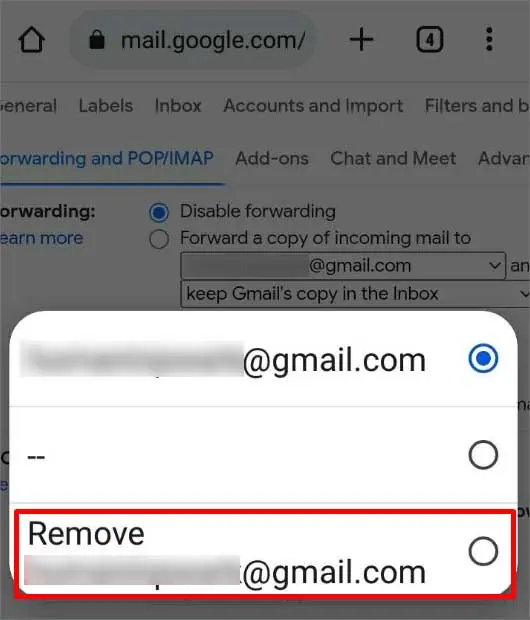
- On the Forwarding tab, click on the email in use.
- Select the Remove usersmail@gmail.com (in use) option.

- Click on the OK button on the “Confirm active forward address removal” box.
Use Gmail Message Recovery Tool
The Gmail Recovery Tool helps you find lost emails in your Gmail. If your Gmail is infected with malware and viruses, your emails can get deleted permanently without your access. This tool mostly comes in handy if the emails were permanently deleted from Gmail within the last 30 days. If this doesn’t work, you can contact Google Support and mention your queries.

