If your HP printer is not printing in black color, there may be some issues with the black cartridge. However, HP printers have a special ink-backup mode that allows printing using only tricolor cartridges (C, M, Y) when the black cartridge encounters a problem.
In such cases, the black color can either disappear on the printout or appear as a grayish color instead of true black. Mostly, a low level of black ink is responsible for the issue. Sometimes, a mispositioned or clogged printhead can also prevent the printer from printing in black color.
Check the Level of Black Ink
If your HP printer is refusing to print in black color, you should first check the level of black ink on the cartridges. There are multiple ways you can check the ink levels on your HP printer.
If you have an HP Ink Tank series printer, you can inspect the ink levels from outside the printer only. Otherwise, you can use the HP assistant tool to check it.
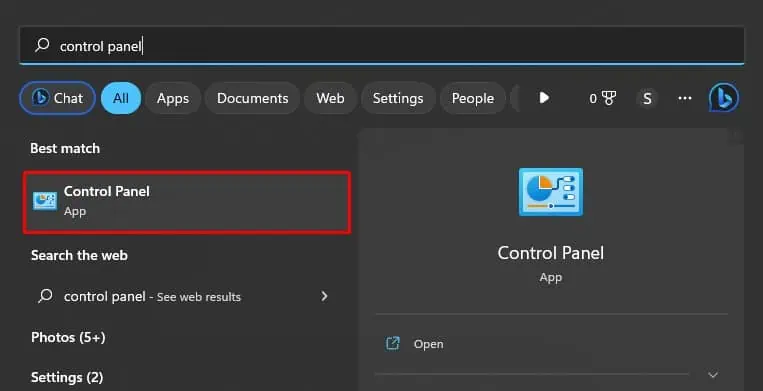
- Open Control Panel.

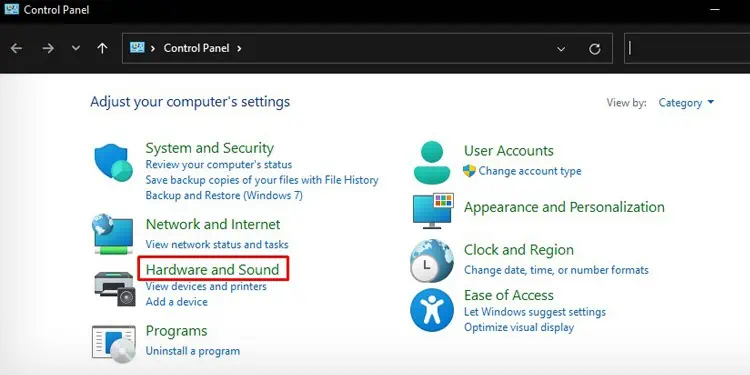
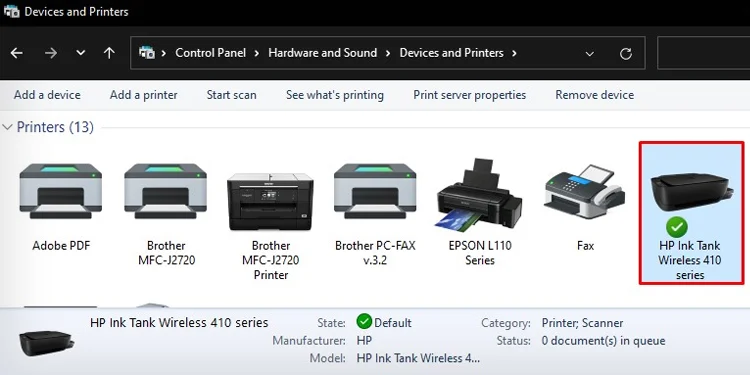
- Click Hardware and Sound.

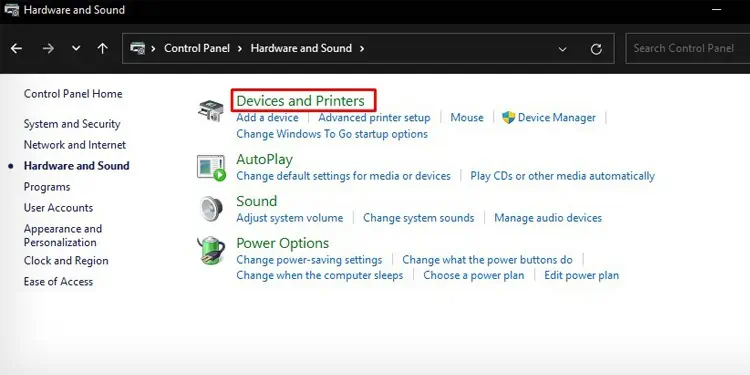
- Click Devices and Printers on the next window.

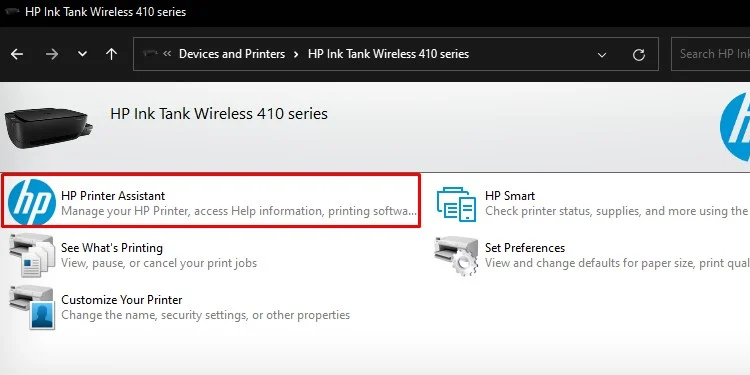
- Double-click the HP printer profile.

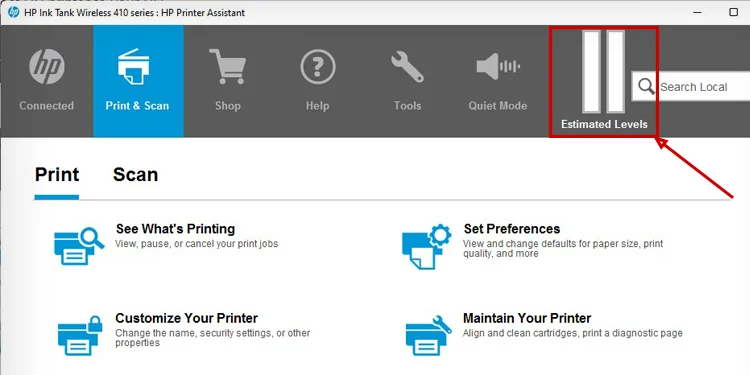
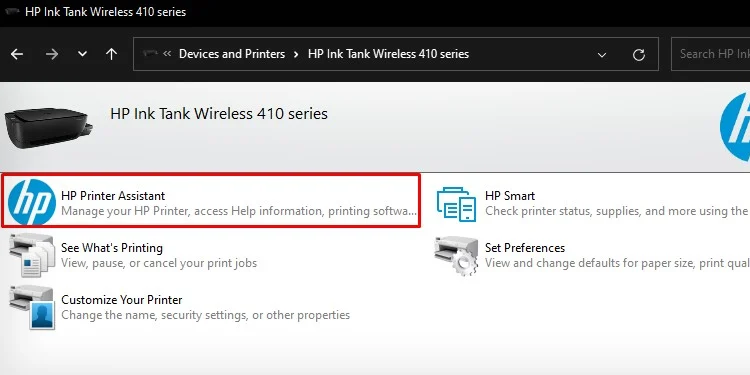
- Again double-click HP Printer Assistant.

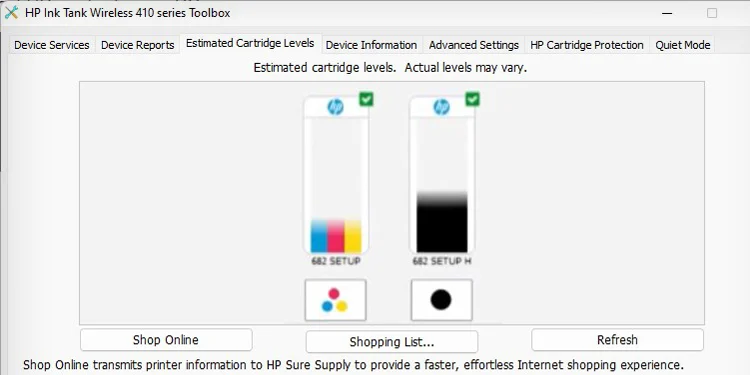
- Go to Estimated Levels.

- Now click Estimated Cartridge Levels to see the level of black ink on your printer. Consider refilling the ink tank or changing the ink cartridges if the ink levels have gone too low.

You can also refer to this guide to learn about multiple ways to check ink levels in HP printers
Change Paper Settings
An incorrectly configured paper setting is another reason the printer refuses to print in black color. Not only black, but it can also sometimes cause problems printing in color. It is because the ink spraying mechanism of the printer varies depending on the paper type.
So, you should always set the paper size and paper type that exactly matches the papers in the input tray of the printer. Also, make sure you are using papers compatible with your printer.
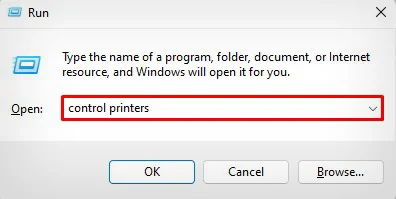
- Hit Windows and R keys simultaneously on your keyboard.
- Type
control printersin the text area.
- Click the OK button.
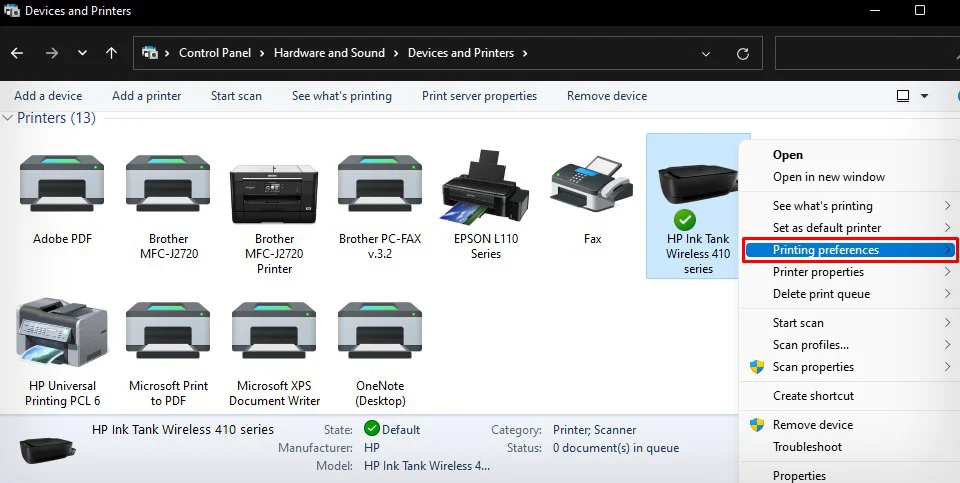
- On the new Control Panel window, look after the HP printer name and right-click it.
- Select Printing preferences.

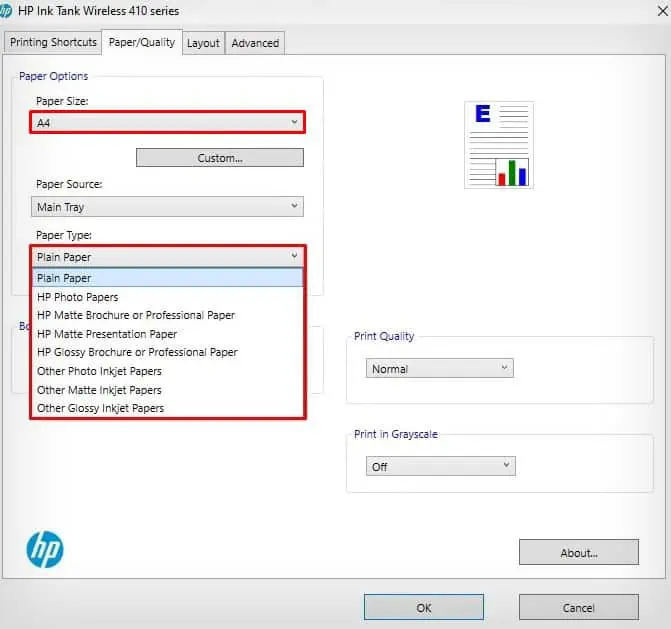
- Click the Paper/Quality tab.
- Choose the correct Paper Size and Paper Type from the respective drop-downs.

- Click OK.
Align the Printheads
The printheads of your printer should be correctly aligned so that it can properly spray the ink onto the paper and generate quality printouts. Even a slight change in the position of the printhead can prevent the colors from getting to the paper. Aligning the printheads also helps if you have started facing issues after installing the cartridge.
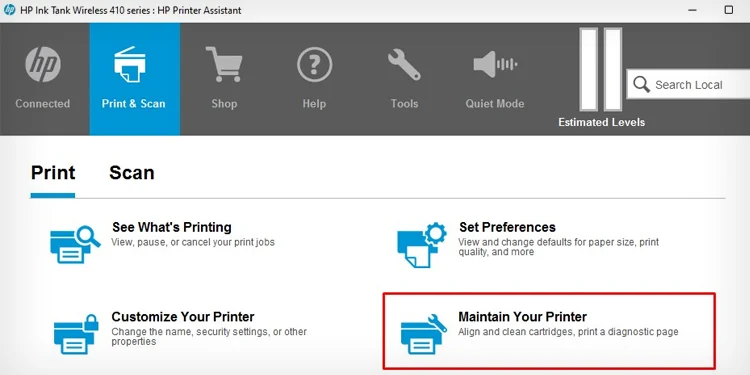
- Open HP Printer Assistant from Control Panel.

- Go to the Maintain Your Printer menu.

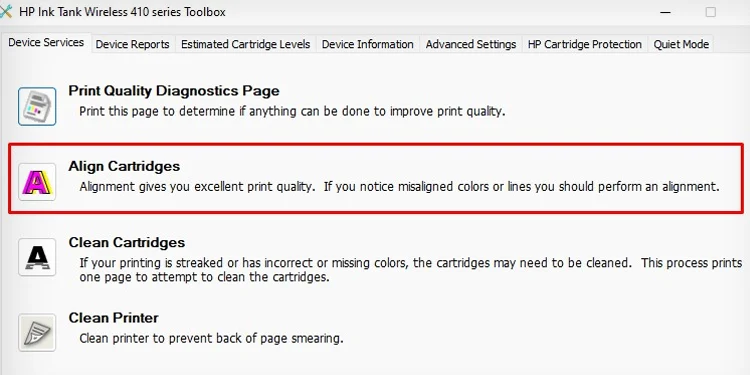
- Now click the Device Services tab and select Align Cartridges.

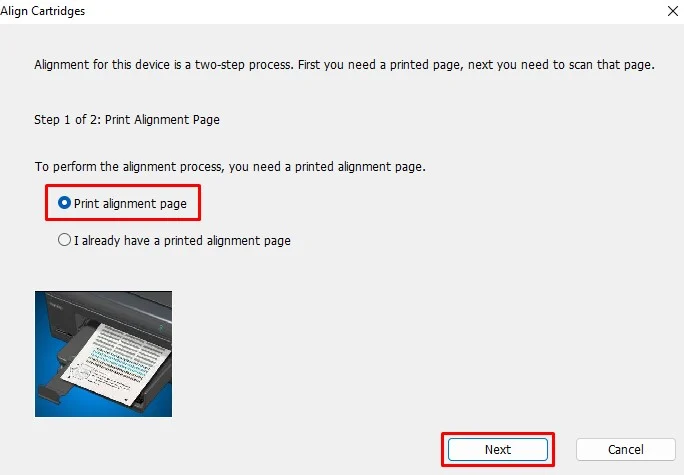
- Click Print alignment page > Next.

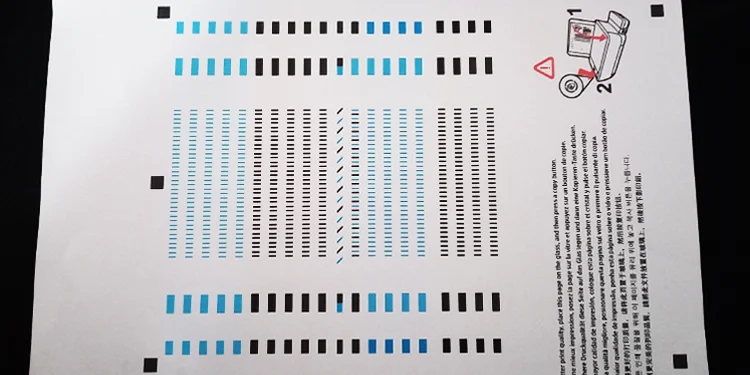
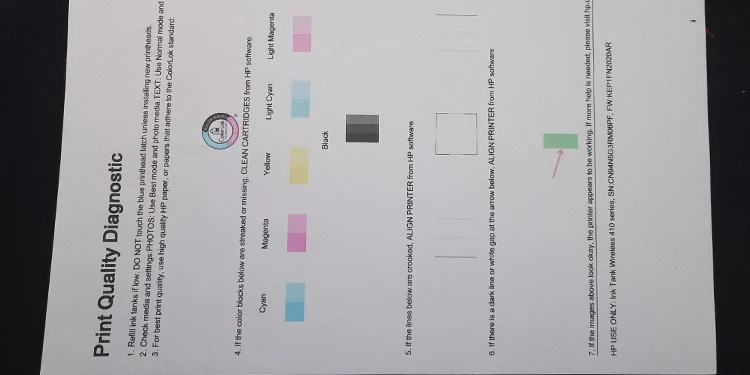
- You will get a printout of an alignment page like this.

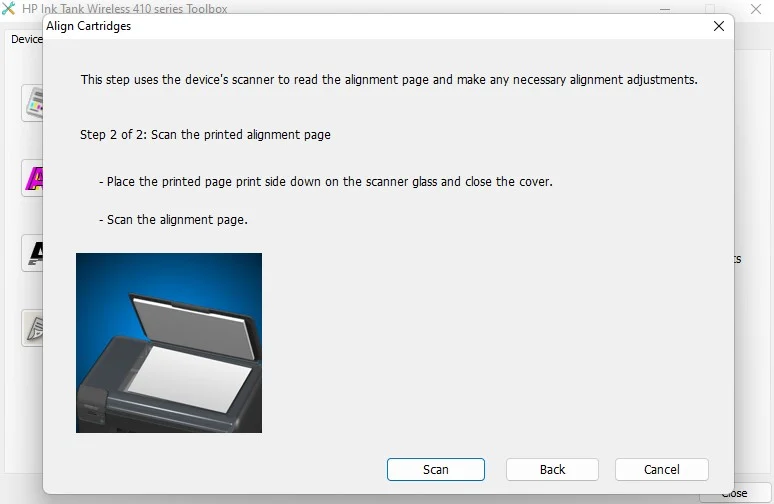
- Insert the printout over the scanner assembly.
- Now click the Scan button.

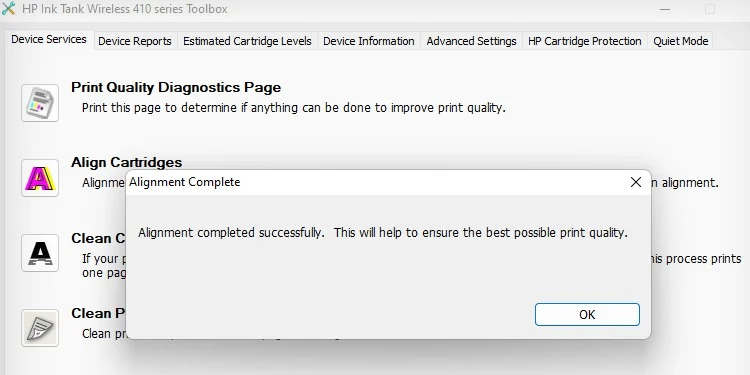
- You will get an alignment successful popup after the printer completes the alignment process.

You can consult this comprehensive guide to learn more about aligning the printheads of HP printers.
Run the Printhead Cleaning Cycle
Running a printhead cleaning cycle will be helpful if the printhead of the black cartridge is blocked due to ink residues or any foreign bodies. We recommend you run about three cycles of printhead cleaning for better results.
- Open the Run application on your PC.
- Type
control printersand click OK.
- Double-click HP printer > HP Printer Assistant.

- Select Maintain Your Printer.

- Click the Device Services tab.
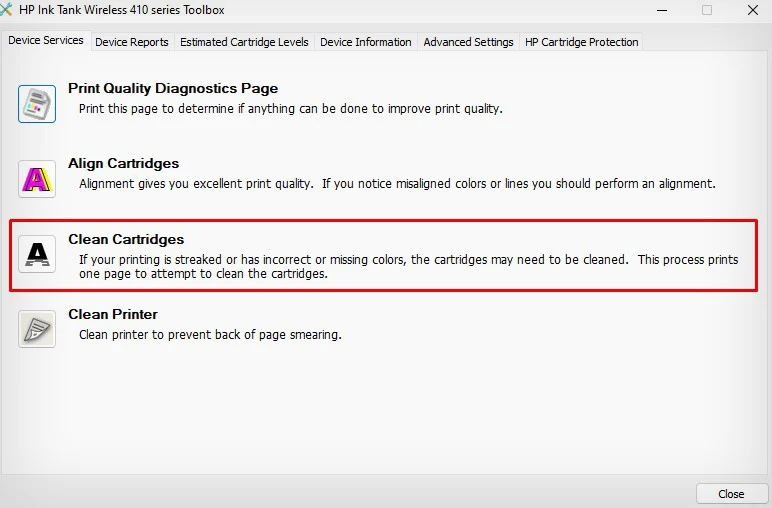
- Click Clean Cartridges.

- Your printer will eject a diagnostic report after completing the cleaning process.

You may also read our other article on how to clean the HP printheads and learn more about the manual process of cleaning them.
Running a manual clean cycle will help if you cannot sort out the issue after performing the automatic cleaning cycle.

