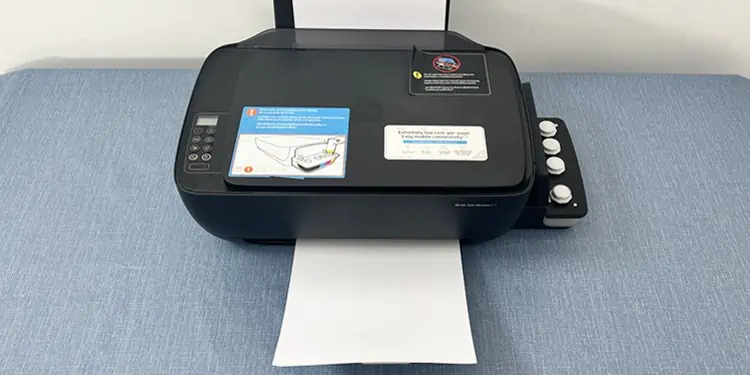
Whether you try to print a grayscale or colored document, your HP printer can sometimes run into problems and eject blank pages. Such issues often arise when your printer is running low on ink or the printhead is clogged that requires cleaning.
Since printhead cleaning consumes a significant amount of ink, you can first try printing from another device. If the issue persists, you can adjust a few printing preferences to get the normal printouts again.
Try Printing a Test Page
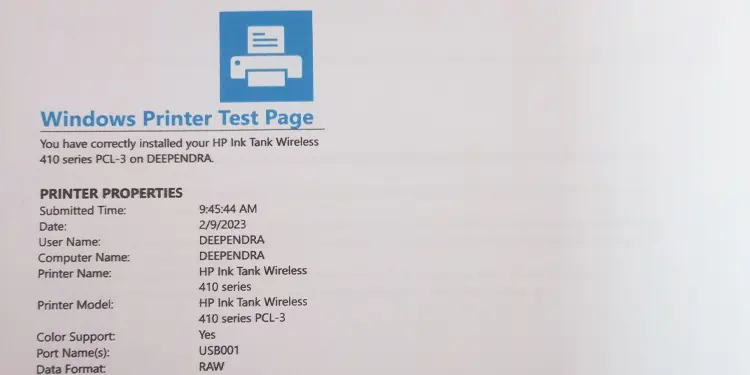
You should initially check if you are facing a similar issue while printing other documents as well. You may be trying to print a document in an incompatible file format or a document containing unsupported fonts. You can print a test page to verify if the issue is with the document or the printer itself.
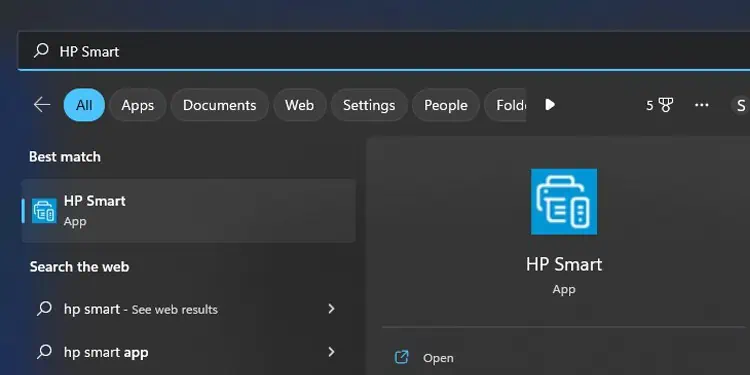
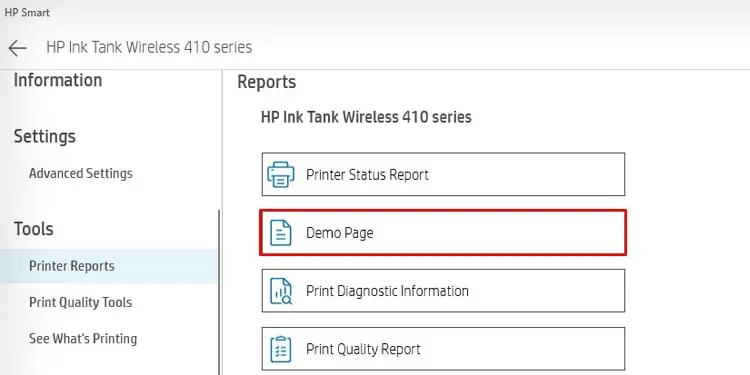
- Launch HP Smart app on your PC.

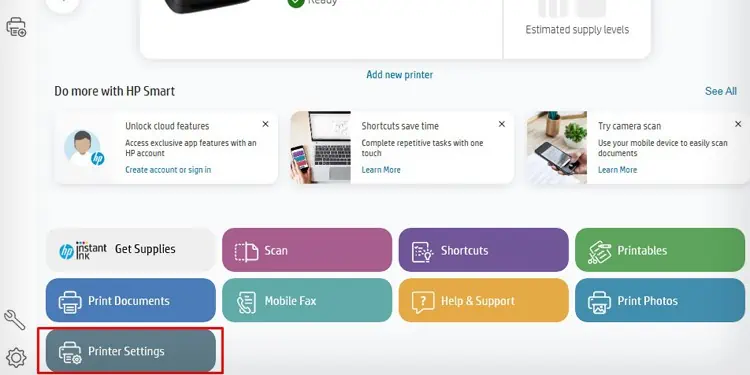
- Click the Printer Settings tab on the homepage.

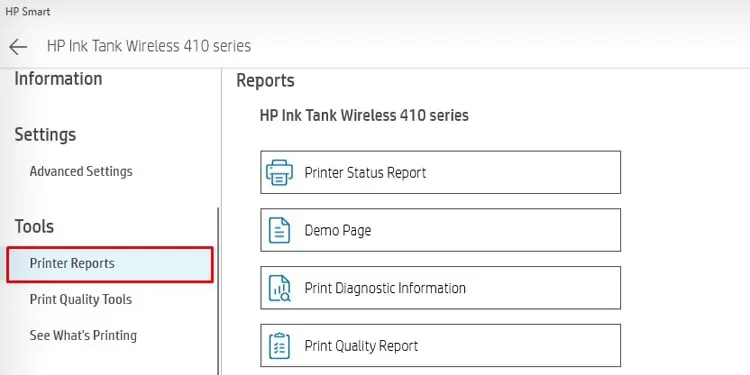
- Choose the Printer Reports option under Tools section.

- Choose Demo Page.

- Your printer will print a demo page. Check if it is blank too.

Alternatively, you can do it through the control panel as well.
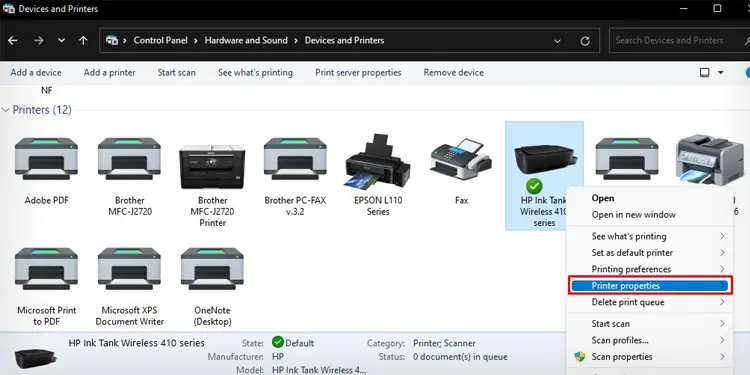
- Open Control Panel.
- Go to Hardware and Sound > Devices and Printers.
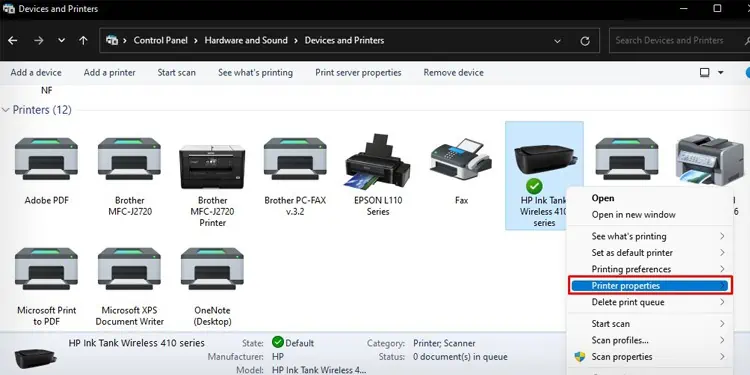
- Right-click over your HP printer name.
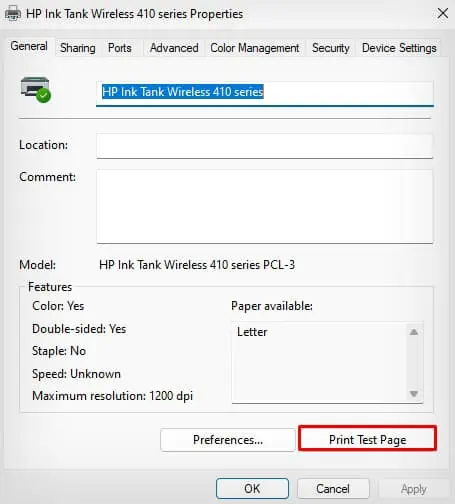
- Choose Printer properties option.

- Click the Print Test Page tab.

Check Ink Levels
If the test page is also printed blank, your printer is probably running low on ink. If you own an HP Smart Tank series printer, you can check the ink levels on the ink tank from outside only. However, if you are using a printer with ink cartridges, you can check the ink levels using several other ways. You can consult this detailed guide on how to check ink levels on your HP printer.
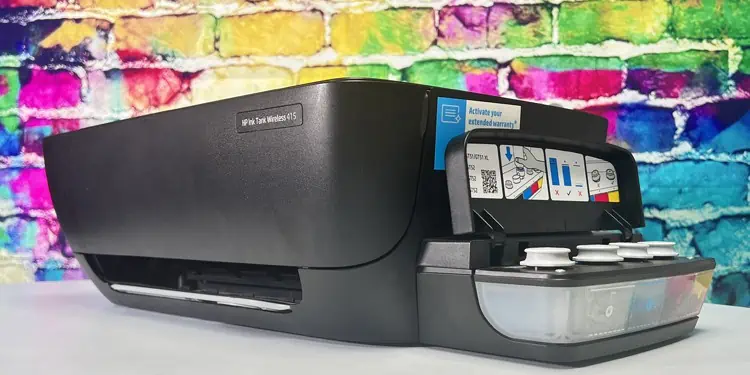
Further, you should always use genuine HP ink with your HP printer. If the issue just arose after changing the cartridges, are you sure you used a genuine HP cartridge and installed it correctly? You may try removing and reseating the cartridge. It would help if you have placed the cartridge incorrectly.
Change the Printing Preferences
If you are currently printing from your PC, we recommend you install the HP Smart app on your mobile phone and try printing from there. If you do not face an issue while printing from a mobile phone, you should make a few changes in the printing preference of your PC.
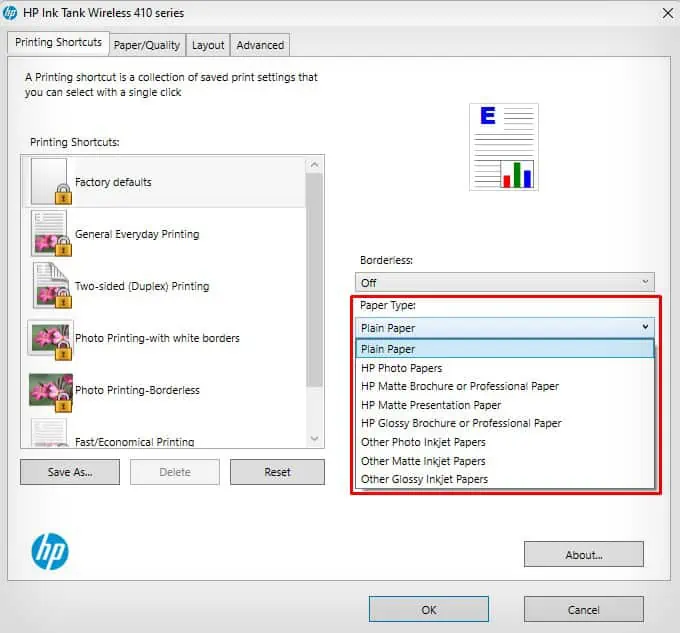
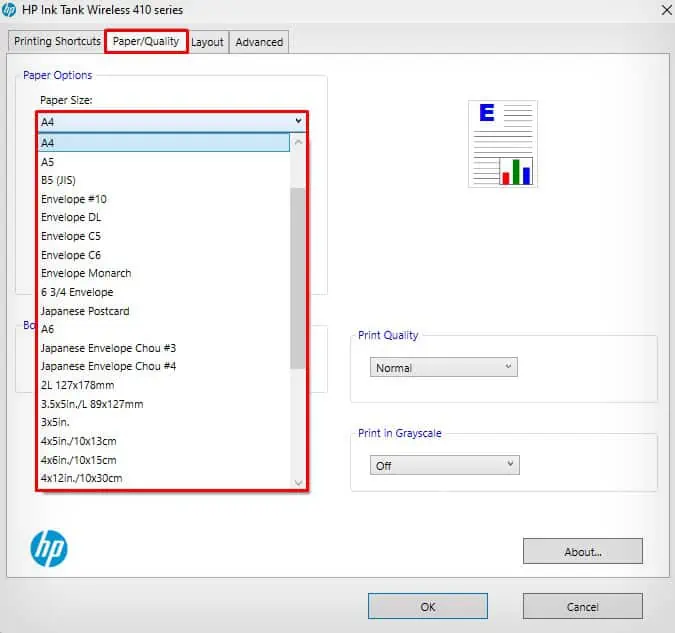
At first, you should correctly set the paper settings such that the paper size and paper type match the specifications of the paper inserted in the paper tray. When these settings are misconfigured, the HP printer rather prints blank pages instead of printing misaligned texts and images.
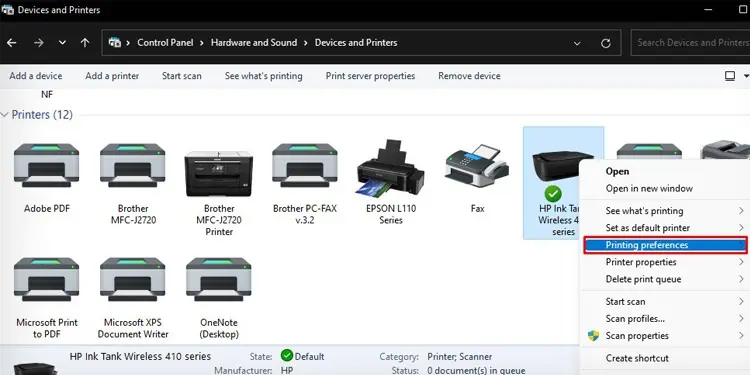
- Open Control Panel.
- Navigate to Hardware and Sound > Devices and Printers.
- Right-click your HP printer profile and choose Printing preferences from the context menu.

- Under the Printing Shortcuts tab, choose the correct Paper Type.

- Then jump to the Paper/Quality tab and select appropriate Paper Size.

Similarly, you should only use HP-compatible printing papers. Using glossy, coated, or incompatible papers can cause the printer to refuse the print or eject a blank page.
Print Without Print Spooler Service
Windows computer utilizes a dedicated print spooler service to handle all the print jobs. Sometimes, when this print service crashes, it can prevent the printer from printing correctly. You can try bypassing the print spooler and print directly from your printer without its intervention.
- Launch Control Panel and go to Hardware and Sound > Devices and Printers.
- Under the Printers section, right-click your printer and choose Printer properties.

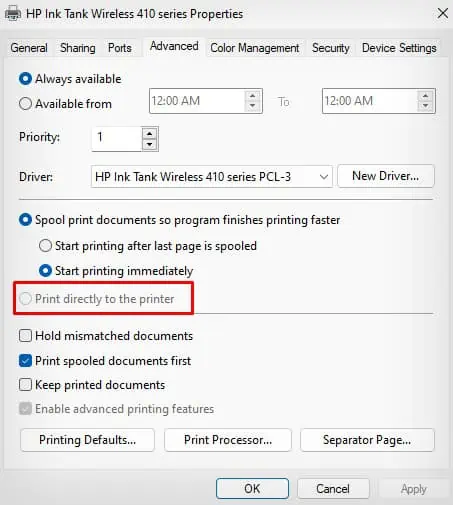
- On the new window, jump to the Advanced tab.
- Check the box next to Print directly to the printer. If the option is grayed out, your HP printer may not support the feature. You can skip this step.

Run Maintenance Tools
The print heads can get clogged due to dust, debris, and ink residues over time. It can interrupt the ink flow to the paper and the printer ends up printing blank documents only. There are several maintenance tools available to sort out the issue. You can easily run the print head cleaning and head alignment tools and see if it fixes the problem.
- Open HP Smart App.

- Click Printer Settings.

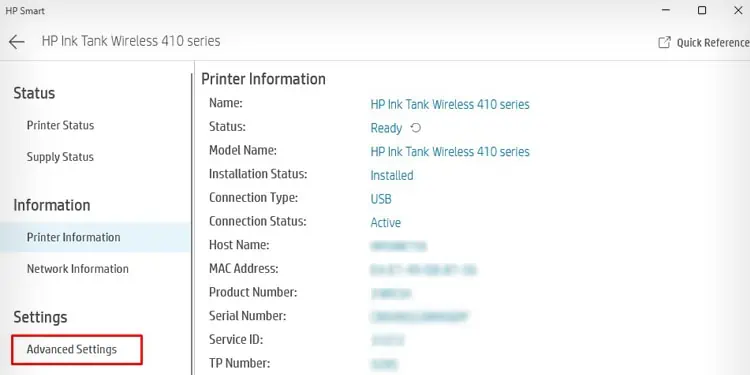
- Go to Advanced Settings.

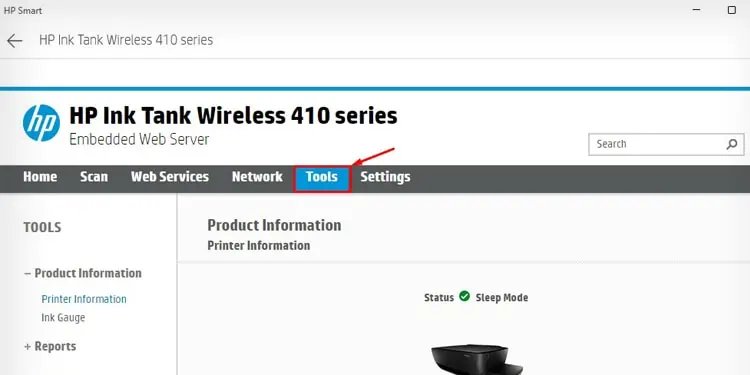
- Click Tools on the next window.

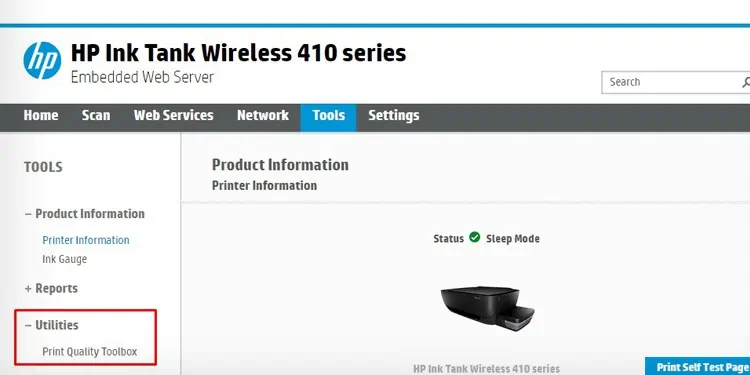
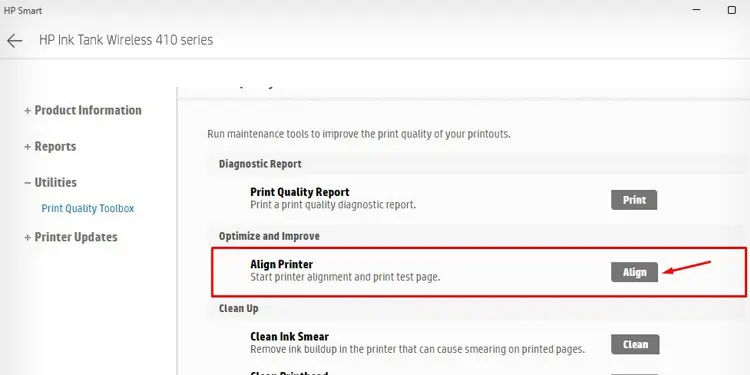
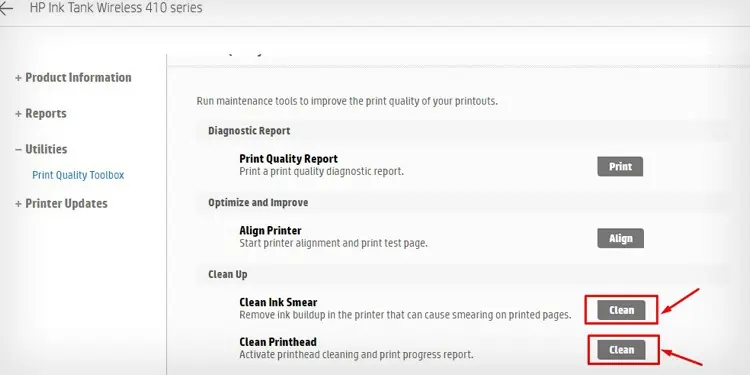
- Click Utilities > Print Quality Toolbox from the left-hand side.

- First, run the Align Printer tool.

- Then consecutively run the Clean Ink Smear and Clean Printhead tools.

- Try printing your document now.
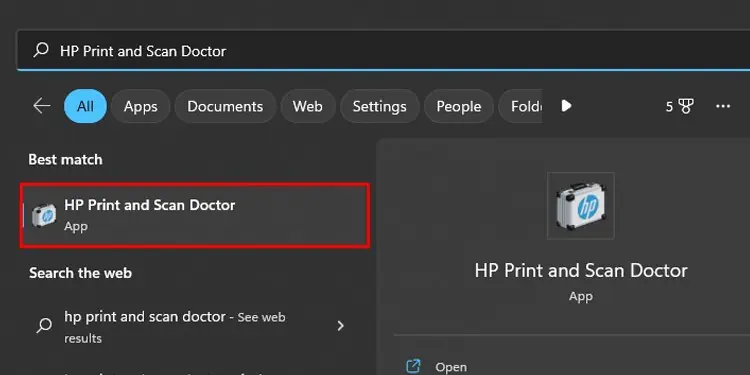
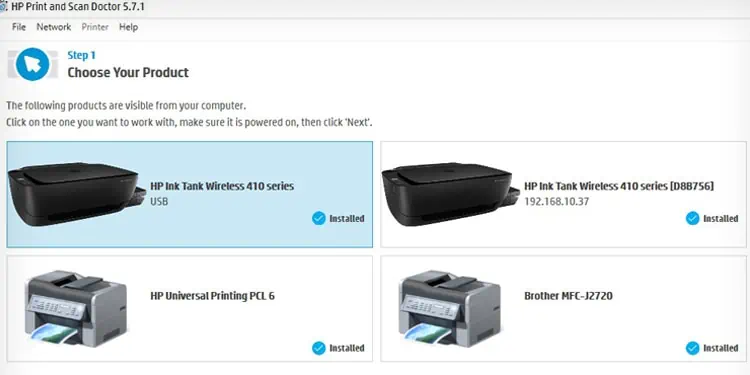
Similarly, you can also run the “HP Print and Scan Doctor,” a diagnostic tool from HP to troubleshoot the issue.
- Launch HP Print and Scan Doctor.

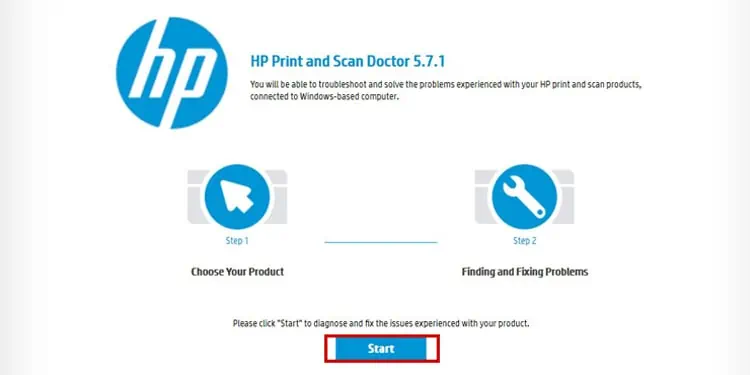
- Click Start on the welcome screen.

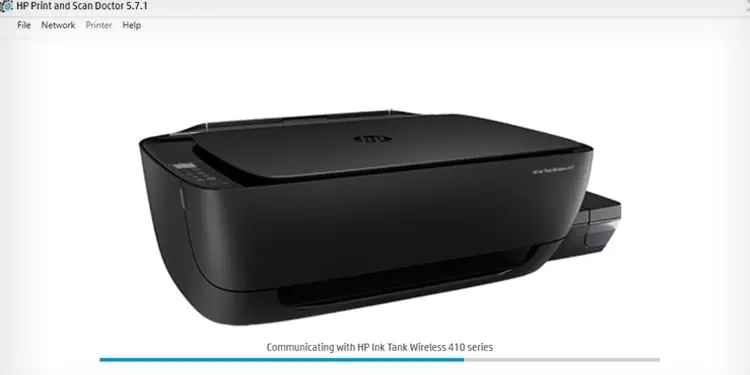
- Choose your printer and click Next.

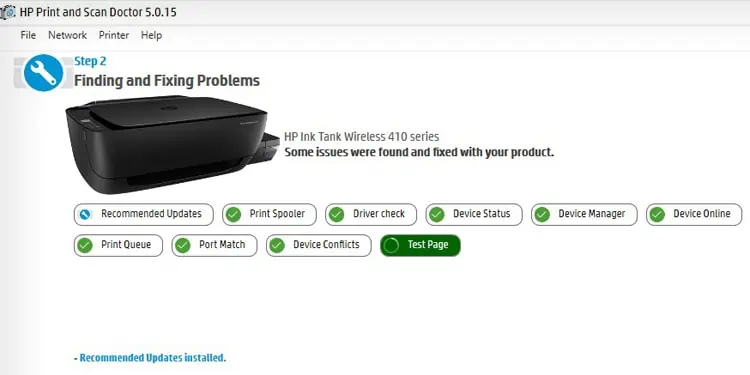
- It will start diagnosing the problems and show the possible solutions to you.

- Follow the on-screen instructions to complete the diagnosis.


