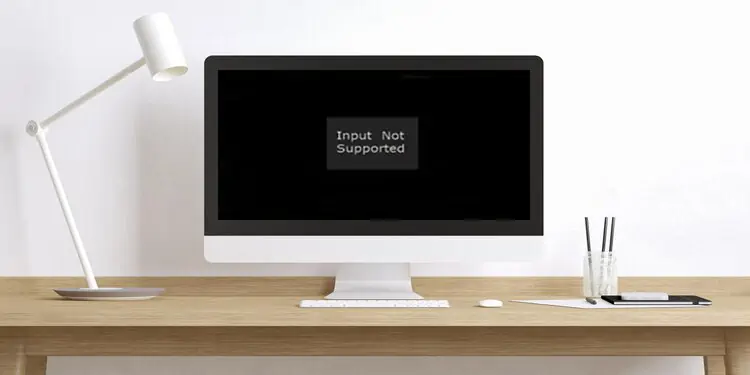
Input not Supported is a common issue seen when the resolution and refresh rate are not adjusted correctly. This problem is mostly the result of the incompatibility of the monitor to handle the display resolution set by the user. It is reported that this problem frequently affects Acer monitors.
The fixes for this can be configuring the display settings and managing the display and graphic drivers. These workarounds will be addressed in detail in today’s article.
Why is Input not Supported on Monitor
- Screen resolution not adjusted correctly
- Graphic card and Display Driver Issues
- Damaged Display Cable
- Incorrect display source
- Hardware issues with the monitor
How to Fix Input not Supported on Monitor Error
Start the troubleshooting by inspecting the display cables. Check the connections at both the device and monitor ends. Make sure they are connected to the correct display source. If everything seems fine with the cables, power cycle (turn off and on) your monitor and the system.
Boot Into Safe Mode
Input not Supported on Monitor error is mostly generated if the resolution settings are not adjusted correctly. Sometimes users cannot start their devices normally because of this error. If this happens, you can enable the safe mode and access your device properly.
This mode lowers the resolution and refresh rate, making it easier for the monitor to cope with. It also loads up the system with default system configurations and minimal drivers that helps the display run more stability.
- Go to the power options from the start menu.
- Click on the Restart button while pressing the shift key at the same time.
- The system will now restart and boot into the recovery environment.
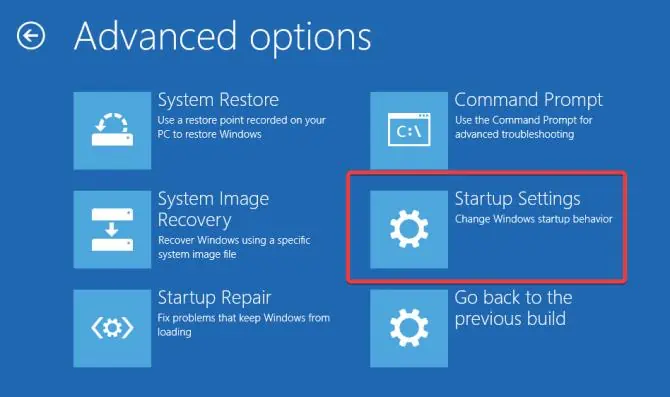
- Go to Troubleshoot > Advanced Options > Startup Settings.

- Click on the Restart button.
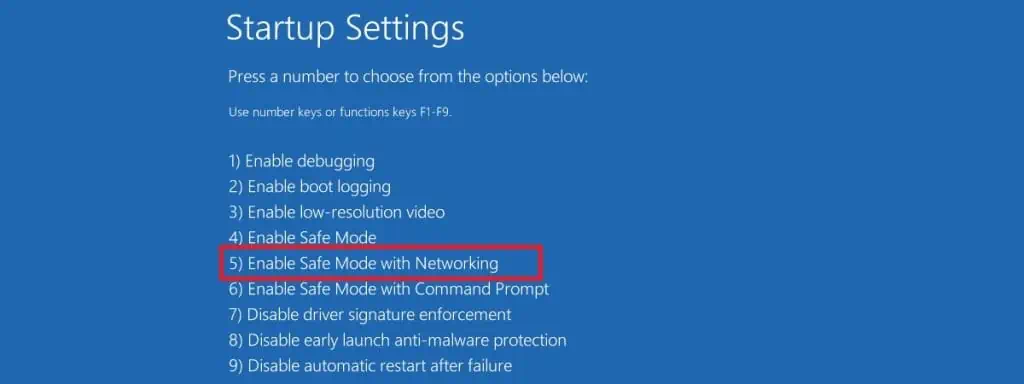
- When the system boots up, press 5 or F5 to Enable Safe mode with Networking.

Note: If the monitor is connected to any other console, boot from its respective safe mode and see if it resolves the issue.
Adjust Screen Resolution
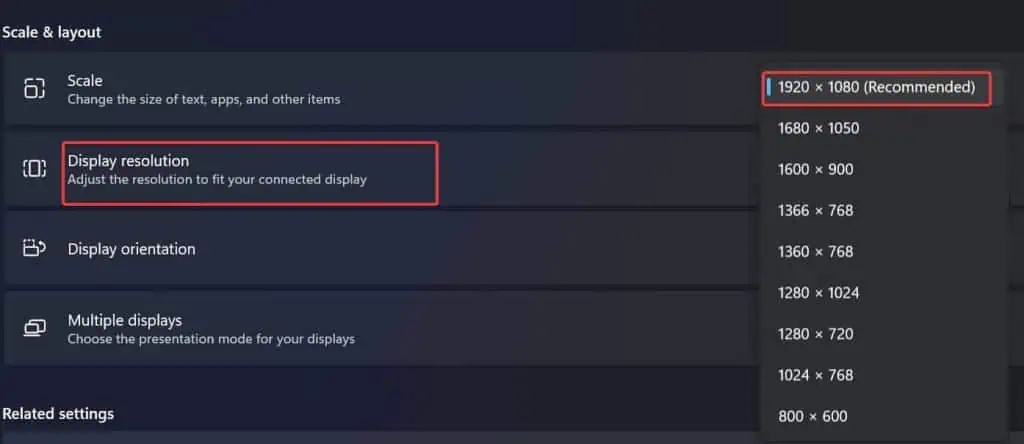
If you have set a resolution to the point that is not handled efficiently by the monitor, then you get to see such error messages. Try lowering the resolution or configure it to recommended settings in order to get rid of this error.
- Press Windows + I to open the Settings.
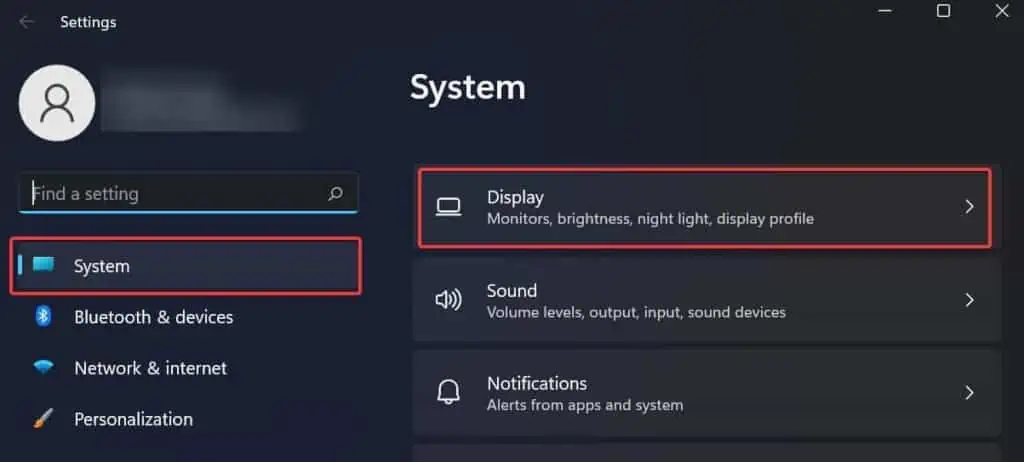
- Go to System > Display.

- In the Scale & Layout Section, adjust the Display Resolution to the recommended settings or lower than it.

- You will get a confirmation pop-up. Click on Keep changes to save the configuration.

Configure Refresh Rate
Higher refresh rates mean the screen updates new images per second with higher frequency.
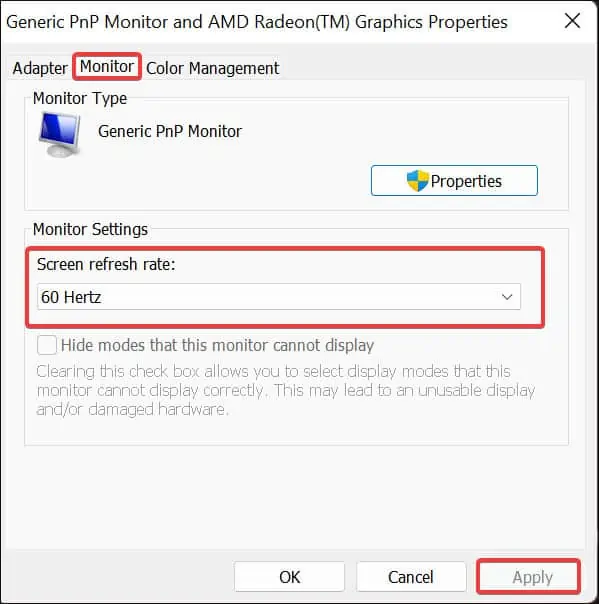
If you have set a higher refresh rate than your monitor can handle, you can get the Input not supported error. As reported by some users, lowering the refresh rates solved the issue with their monitor. To do so,
- Right-click on the desktop and click on Display.
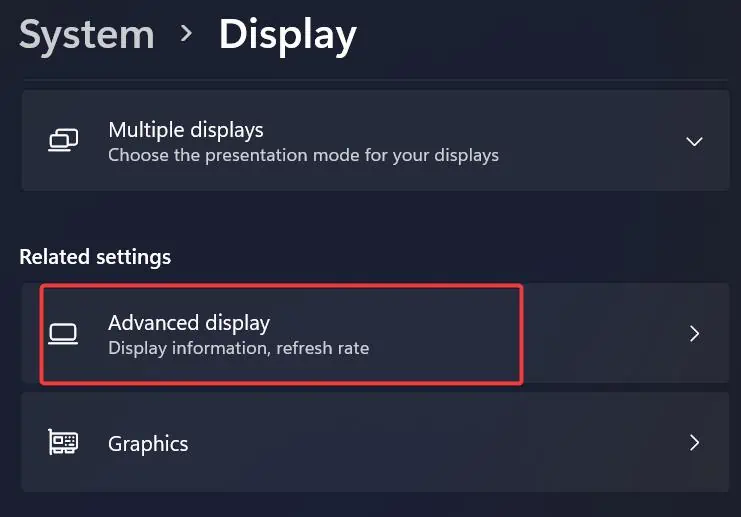
- Go to Advanced display.

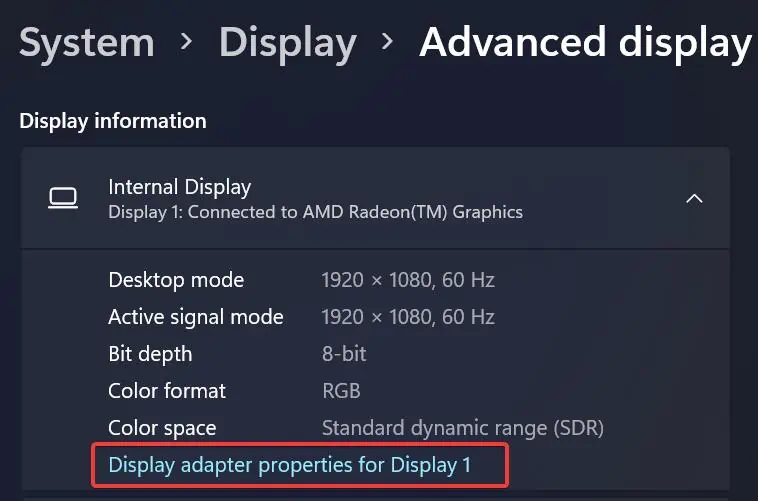
- Click on Display adapter Properties.

- Go to the Monitor tab.
- Lower the Screen Refresh Rate.

- Click on Apply to save Changes.
Update Display and Graphic Driver
A small yellow exclamation mark on the side of the display or graphic drivers on the Device manager indicates some issues with it. This can generate such issues that get fixed with driver updates. In such cases, it is a must for you to fix this in order to solve the issue.
- Press Windows Key + X and Click on Device Manager.
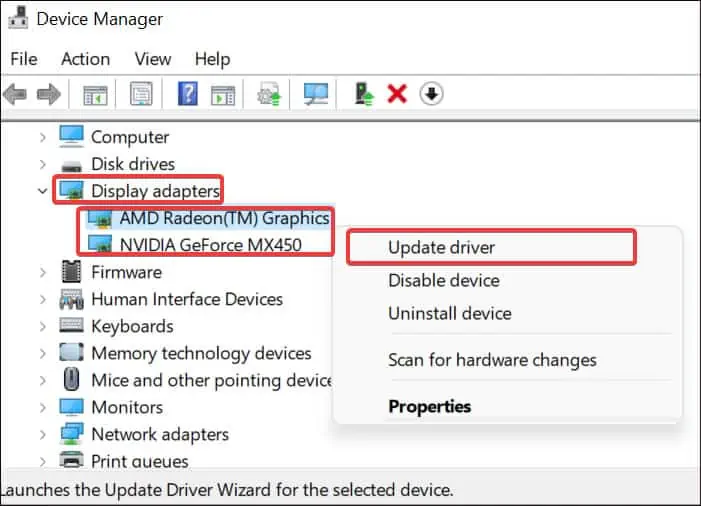
- Click on Display adapters to expand the driver list.

- Right-click on the Graphic driver.
- Select Update Driver.
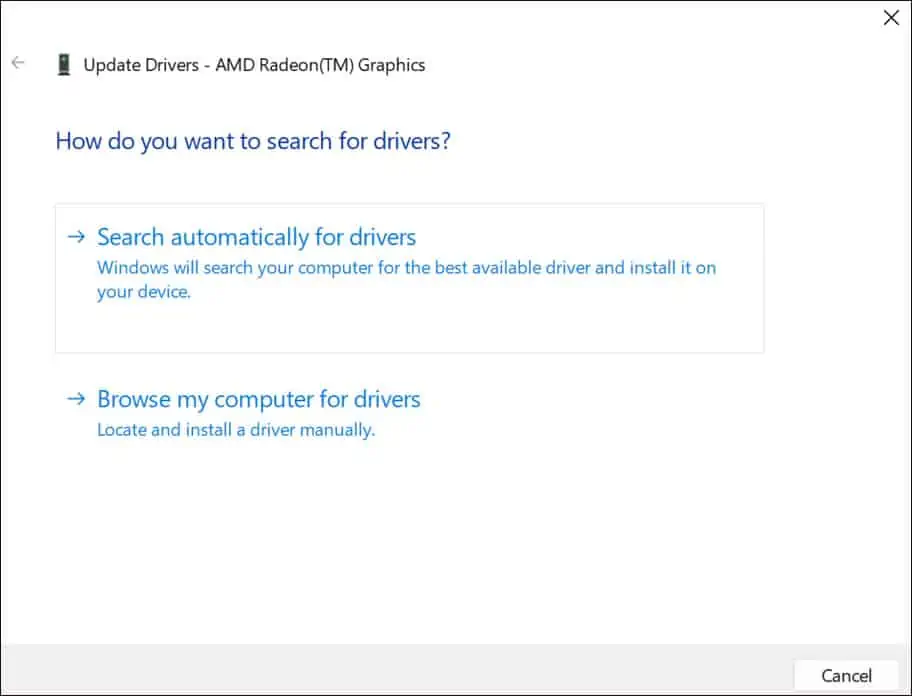
- Choose Search automatically for drivers to make the Windows search for the driver and install it.
- If you choose Browse my computer for driver, click on Let me pick from a list of available drivers on my computer.

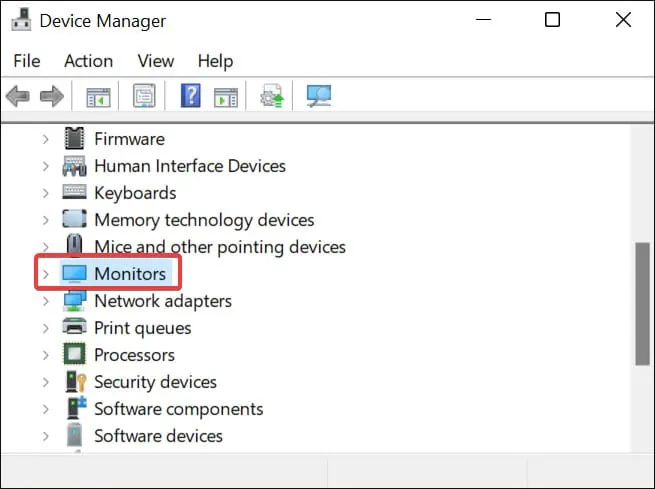
- Follow the same steps to update the Monitor driver.

Enable Windowed Mode
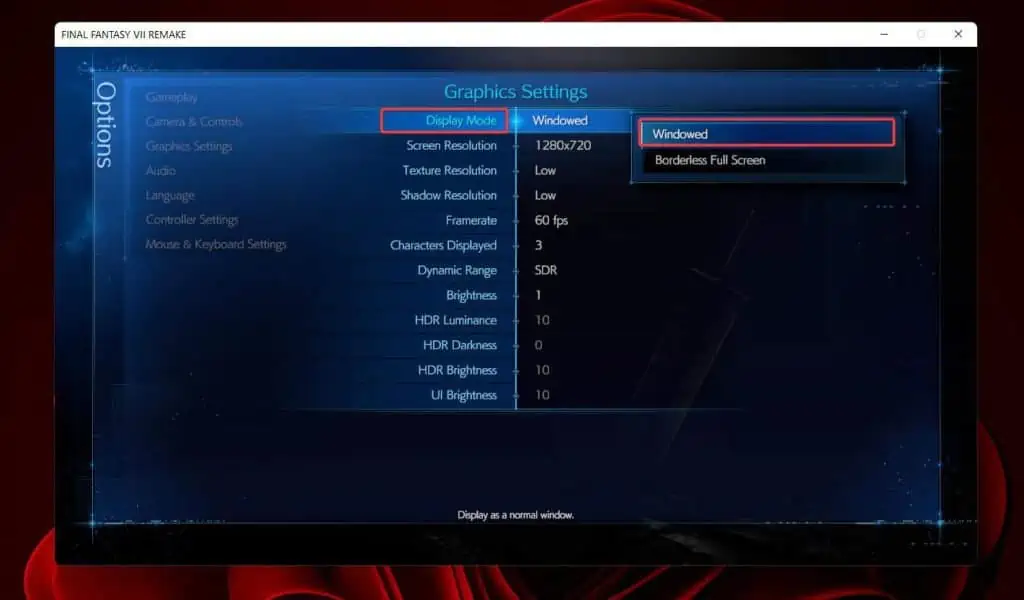
Sometimes the Input Not Supported error might pop up while playing games. This can occur if the monitor cannot handle the resolution set in the game. You can change the game screen to Windowed mode in such a situation. You can get into the windowed mode by pressing Alt + Enter.
This mode must sometimes be first configured by going to the game’s display setting. Once set, using the windowed mode will let users adjust the resolution by dragging the sides of the game window. 