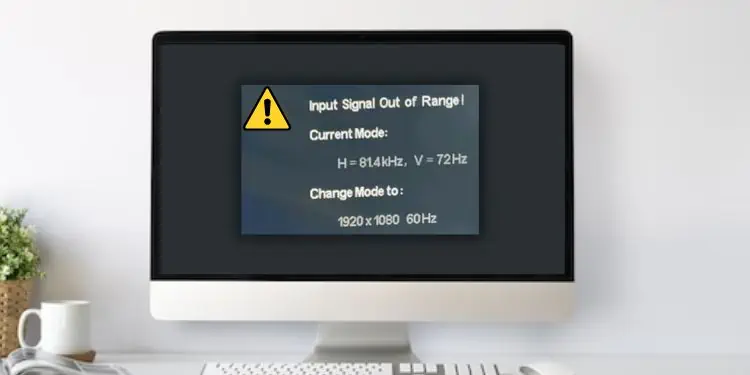
You’ll likely get the “Input Signal Out of Range” message on your monitor when using it as an external display for your laptop or console. Also, some Intel users have encountered this error when reinstalling their graphics drivers.
Primarily, this is caused when the monitor doesn’t support the signals sent by the video adapters. Moreover, it can also be due to corrupted device drivers or hardware malfunctions.
Generally, you get an additional message after encountering this message, like asking you to change the refresh rate or resolution. Thus, fixing this problem shouldn’t be burdensome.
Causes: “Input Signal Out of Range” on Monitor
In the past, monitors were only compatible with fixed resolutions. And when the input signal was out of range, it still attempted to display it, often producing scrambled images.
However, modern monitors are now capable of supporting a plethora of screen resolutions and refresh rates. Nonetheless, this is also limited, and when the device you’re connected to sends signals of higher resolution or refresh rate, the message “Input Signal Out of Range” pops up.
Basically, this is an indication that your monitor cannot handle these signals. Thus, you need to set your display settings to the display device’s highest supported resolution and refresh rate.
Before moving on with the fixes, find out why you could be seeing this error message:- Unsupported screen resolution and refresh rate
- Corrupted display or graphics drivers
- Problems with your video or graphics card
- Damaged monitor components
How to Fix “Input Signal Out of Range” Monitor Error?
If you didn’t tweak any settings or overclocked the refresh rate but still see the “Input Signal Out of Range,” we recommend restarting your PC or console to see if this fixes the problem.
Likewise, you can also try power cycling your monitor. Basically, this will reload the firmware and fix any bugs that might have been tinkering with the input signals.
If the aforementioned general fixes didn’t solve your problem, you can now move ahead with the solutions below.
Boot PC in Safe Mode
If your monitor is not waking up from sleep after getting the error, we recommend first force restarting your PC. But if it’s still not turning or you’re encountering the message repeatedly, you can boot the computer in safe mode to start Windows in a basic state.
Hence, this mode allows you to check whether the “Input Signal Out of Range” error is due to problems with the basic display settings or drivers. Please follow the below instructions on how to enable safe mode on Windows 11:
- Firstly, force restart your PC and immediately use the power button to shut down your PC.
- Repeat the step three to four times, which should start the automatic repair.
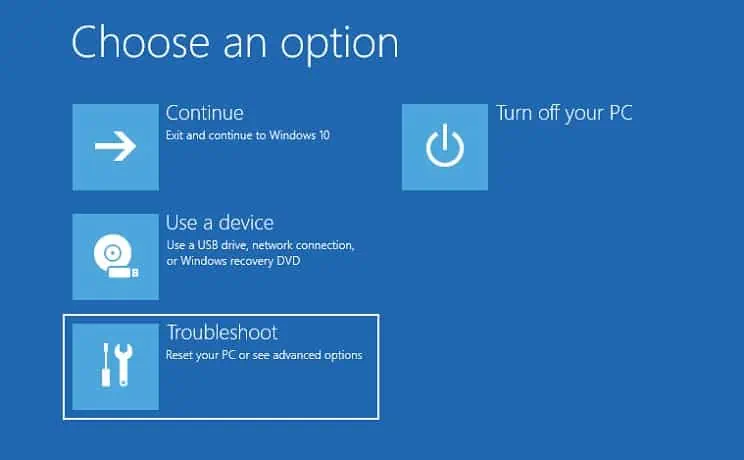
- In the Advanced Repair window, press the Advanced option to enter the Windows Recovery Environment.

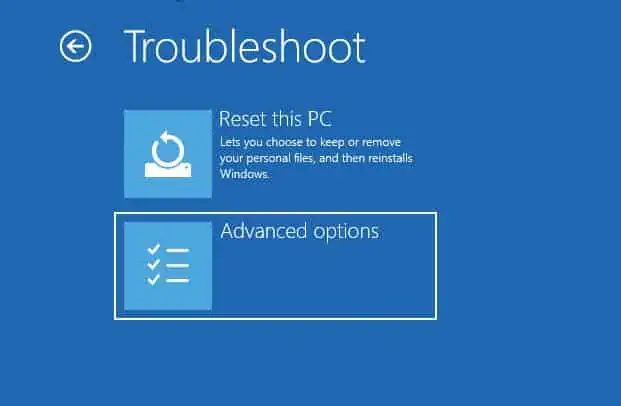
- Now, select Troubleshoot.

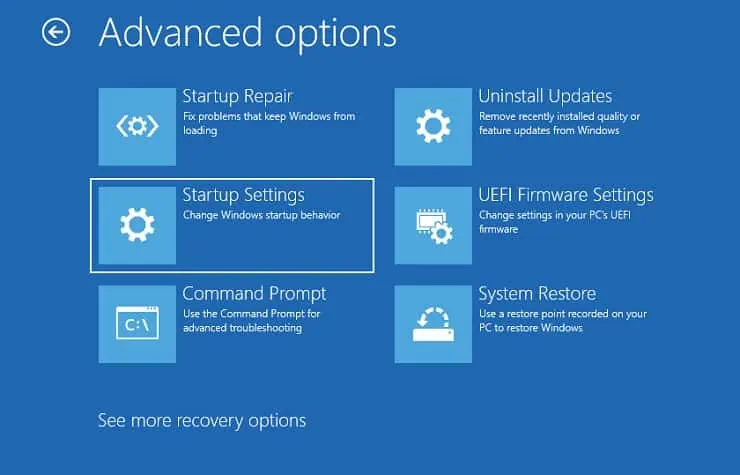
- In the next window, choose Advanced options.

- Then, press the Startup settings option.

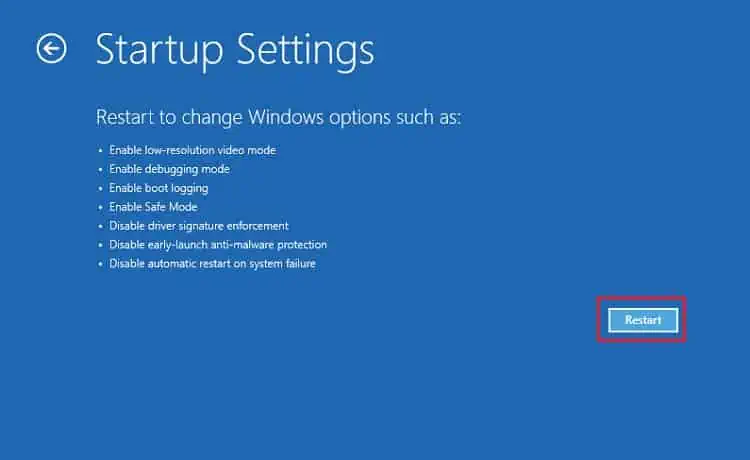
- Next, click the Restart button to launch the Startup settings window.

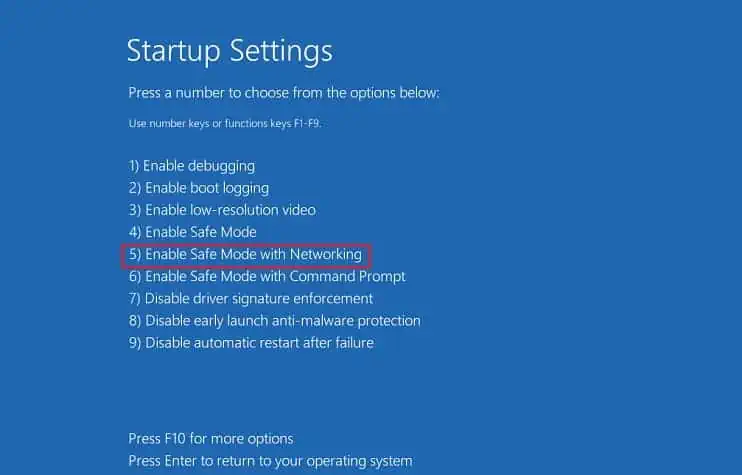
- Now, hit the F5 key on your keyboard to enable the safe mode with networking.

- Once your PC boots into safe mode, try changing the screen resolution and refresh rate. Also, we suggest updating your drivers. Well, we have explained each of these procedures below.
Change Resolution and Refresh Rate
As mentioned earlier, you also get another message alongside the “Input Signal Out of Range” error. For example, you may encounter “Change Mode to 1920×1080 60 Hz”, which means that you’re required to tweak the screen resolution and refresh rate as stated.
Generally, the monitor will go to sleep, and you can simply wake it up to reset these display settings. However, some users have complained that their screen didn’t turn on after receiving the message.
Well, if you’re using the monitor as a secondary display, you can directly change the resolution and refresh rate using the laptop. Else, you can boot into safe mode and proceed with the below guide:
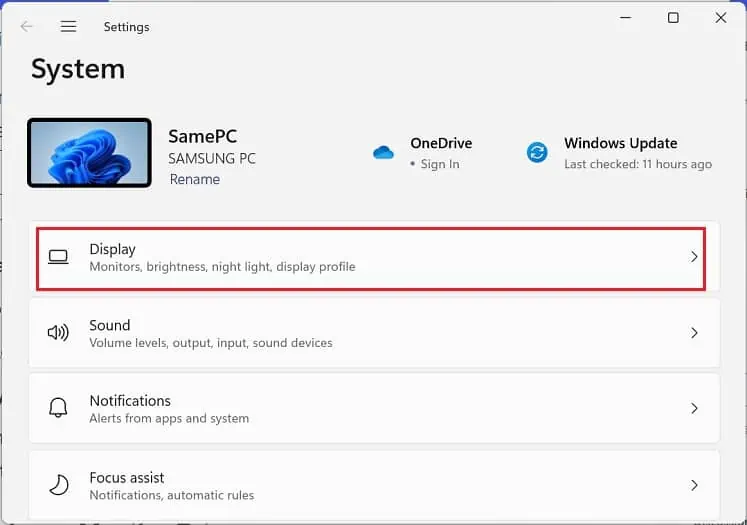
- Use Windows + I hotkey to launch Settings and navigate to Display.

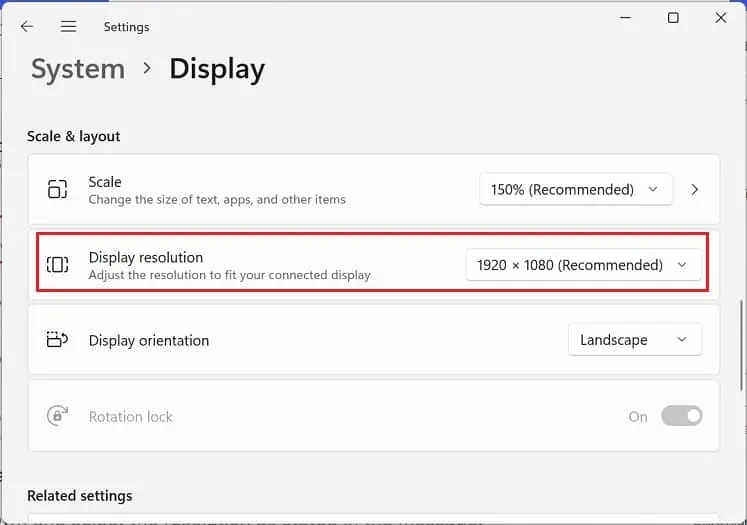
- Under the Scale & layout section, find the Display Resolution settings.

- Expand the drop-down and select the resolution as stated in the message.
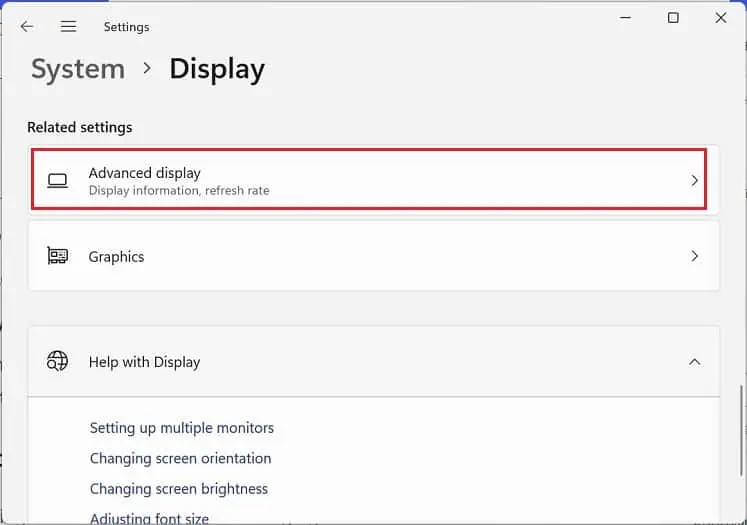
- Next, move to the Advanced display option in the Related Settings section.

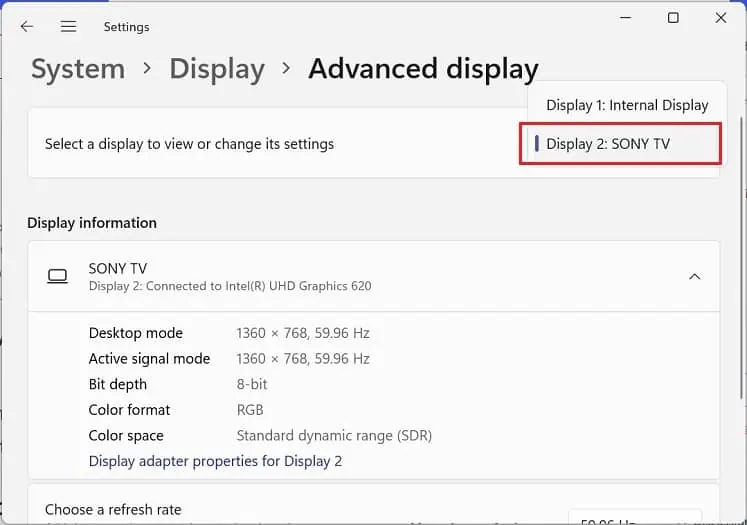
- Then, select Display 2 (your monitor).

- Under Display Information, expand the Choose a refresh rate drop-down and select the Hz as stated in the message.
Fix Corrupted Display or Monitor Drivers
If you’re repeatedly getting an error message after changing the screen resolution and refresh rate, there are probably issues with the display or monitor driver.
If there are bugs or other errors, they might interfere with the input signals. Thus, it’s necessary to check and update the device drivers regularly. If that didn’t help, you could try reinstalling them:
- Open the Run utility using Windows + R keys and paste the below command to launch Device Manager:
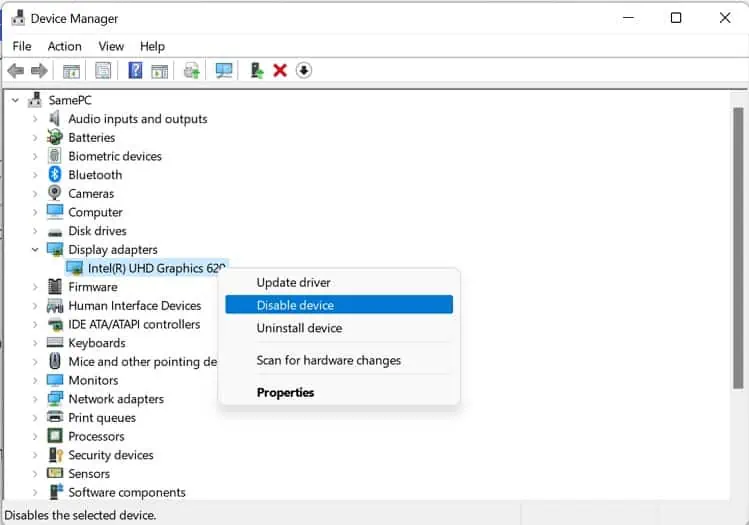
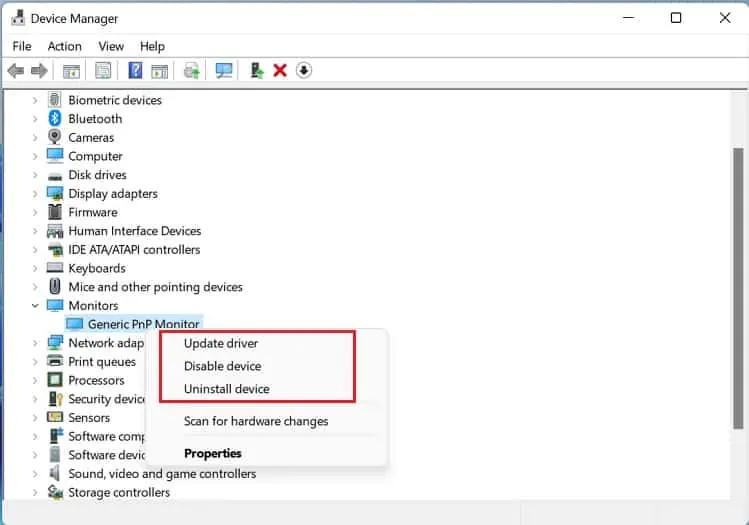
devmgmt.msc - Then, expand the Display adapters drop-down and right-click your driver. Here, choose Disable device and check if the problems lie with the display drivers.

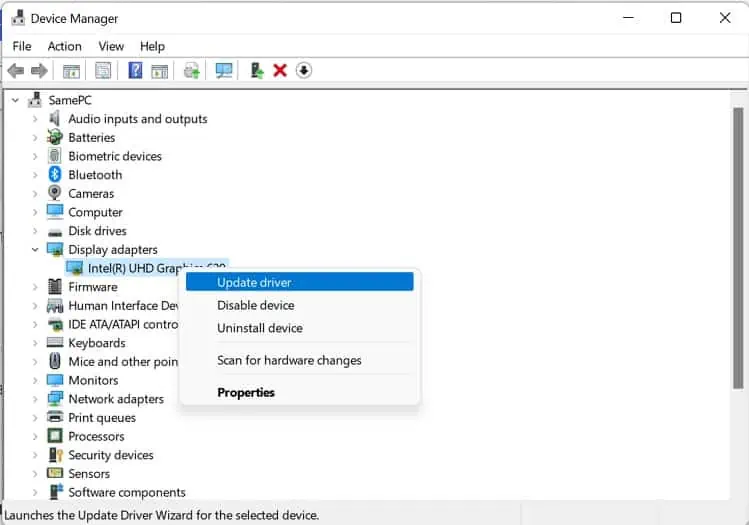
- If you’re not getting the error message anymore, right-click the adapter again and select Update driver.

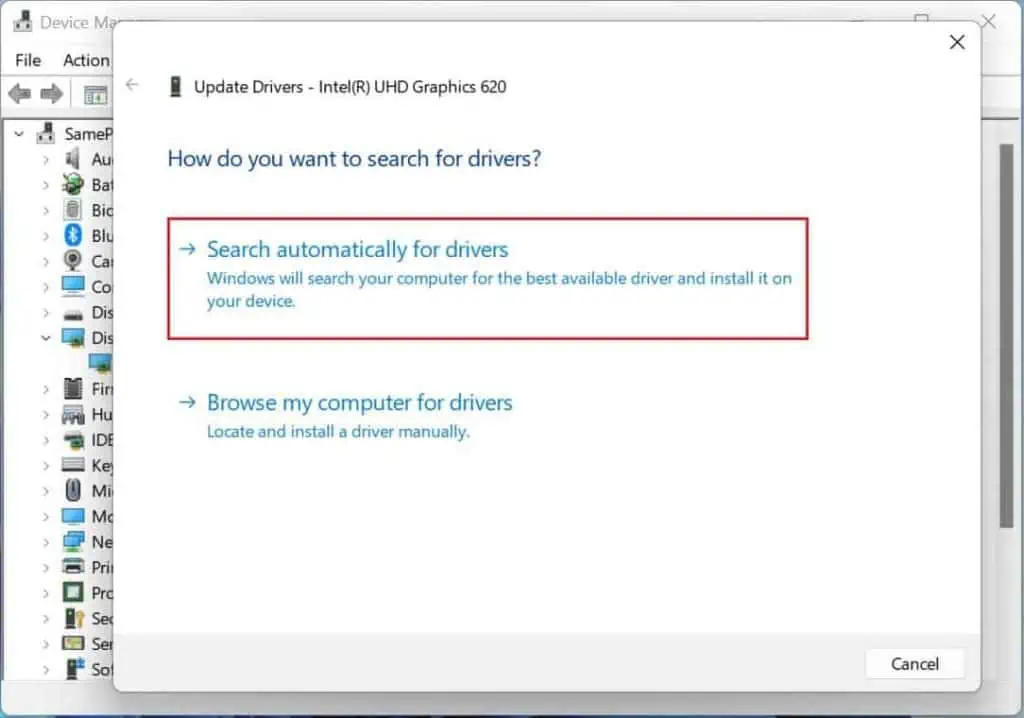
- Once a new window pops up, tap the Search automatically for drivers option.

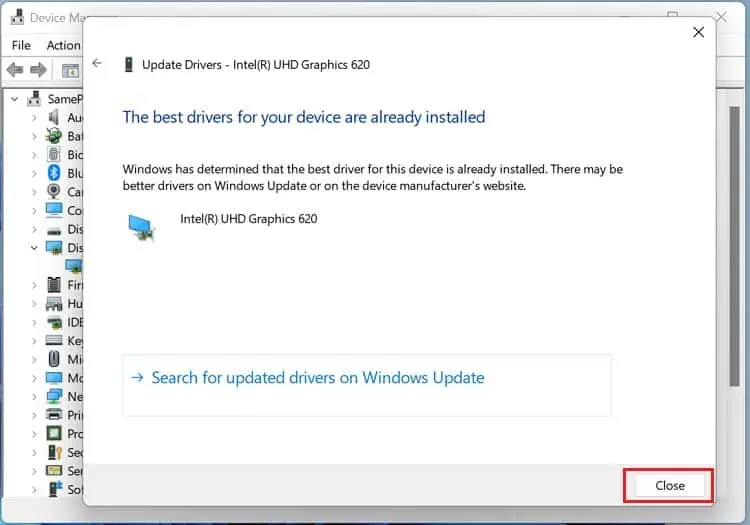
- Wait until the latest display adapters are installed on your PC.
- Close the dialogue box and wait to see if the error still occurs.

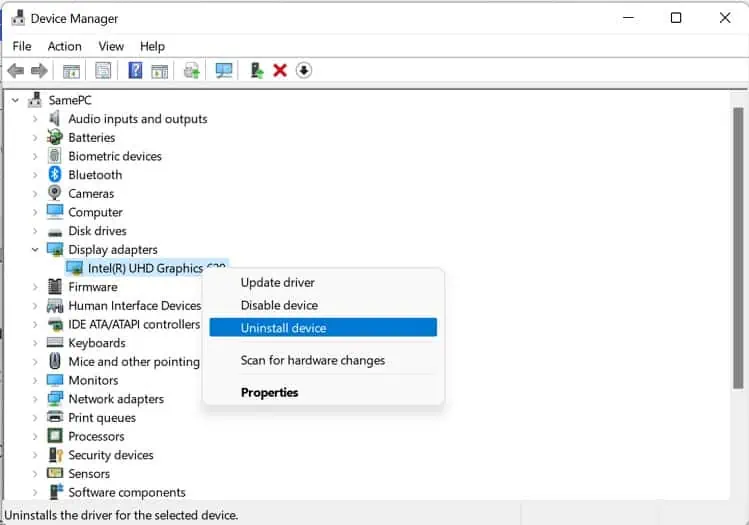
- If you still get the “Input Signal Out of Range” message, right-click the display driver and, this time, choose Uninstall device.

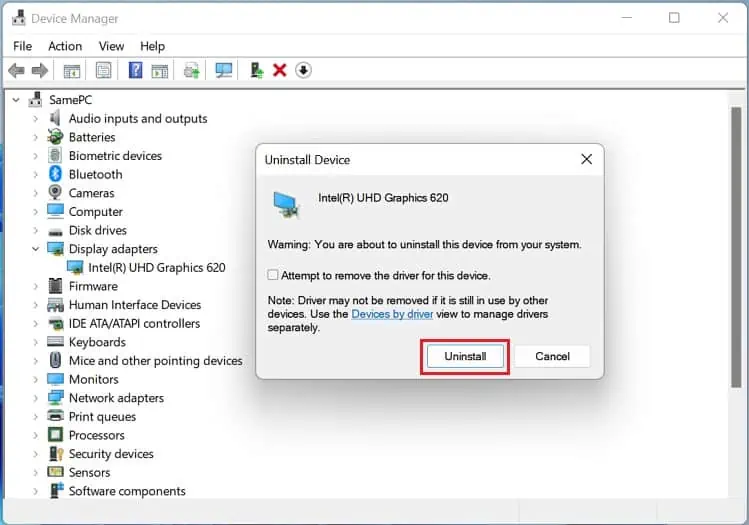
- Then, click on the Uninstall button and restart your PC. Once the computer boots, the required drivers will be reinstalled.

- If the error persists, open the Device Manager application again. This time, expand the Monitor adapters and right-click the correct driver.

- Then, try disabling the device first to see if that’s causing the issue. Next, use the same method as earlier to update and reinstall your monitor driver.
If updating or reinstalling the corrupted adapters doesn’t solve your problem, we recommend installing the latest ones from the manufacturer’s website. Here’s a complete guide on how to install the monitor drivers manually.
Boot PC in Low-Resolution Video Mode
If your PC didn’t start in safe mode, you could try booting it in low-resolution video mode, also referred to as the VGA mode. Basically, this will start Windows in low resolution (typically 640×480), whose signal is supported by most monitors.
Moreover, this mode only uses the current video driver, which lets you know whether additional display drivers on your PC are causing the problem. Kindly go through the steps below on how to boot a computer in low-resolution video mode:
- First, get into the Windows Recovery Environment, as discussed earlier.
- Then, switch to Troubleshoot > Advanced options > Startup settings.
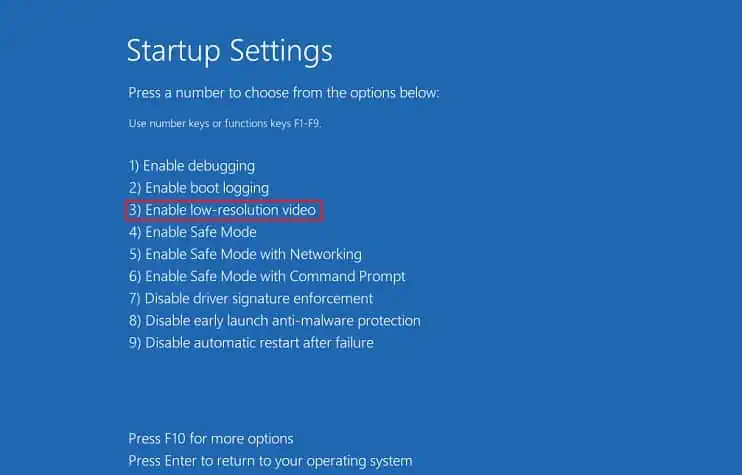
- Hit the Restart button, and once the Startup Settings window launches, use the F4 key to enable low-resolution video.

- After the PC restarts at 640×480, you can open Settings and configure the recommended screen resolution. While you’re at it, we also recommend changing the refresh rate and updating the corrupted drivers.
Reseat or Upgrade Graphics Card
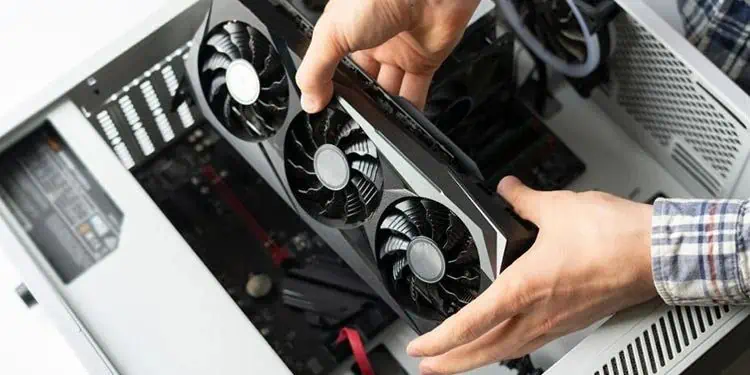
In a desktop setup, the graphics card sends the input signal to the monitor, deciding how to use the pixels on the screen. Hence, if you get errors like Input Signal Out of Range, Input Signal Not Found, etc., reseating the graphics card might help:
- Firstly, turn off your computer and unplug the power cord. We recommend removing the external battery for laptop users using the monitor as an external display.
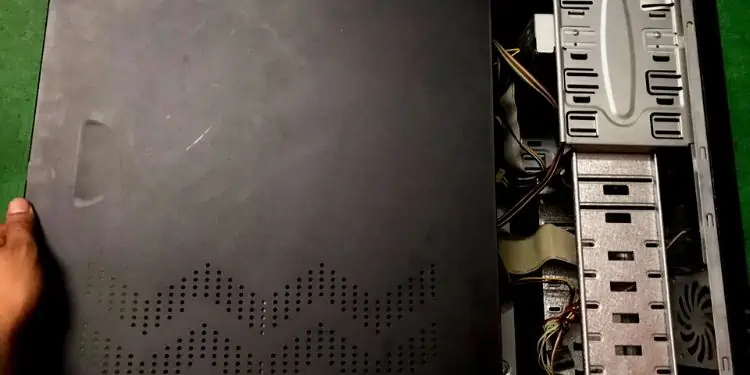
- Next, remove the PC cover or laptop’s bottom case.

- Now, navigate to the graphics card and carefully unplug the power cable.
- Then, find the screws that are holding the graphics card in place. Use a screwdriver to unscrew them. In some PC cases, there are dedicated clips that hold it. Once this is done, the attachment becomes a bit lose.
- Now, move to the motherboard and unlock the PCIe clip, where the video card seats.
- Then, carefully pull off the card from the slot.
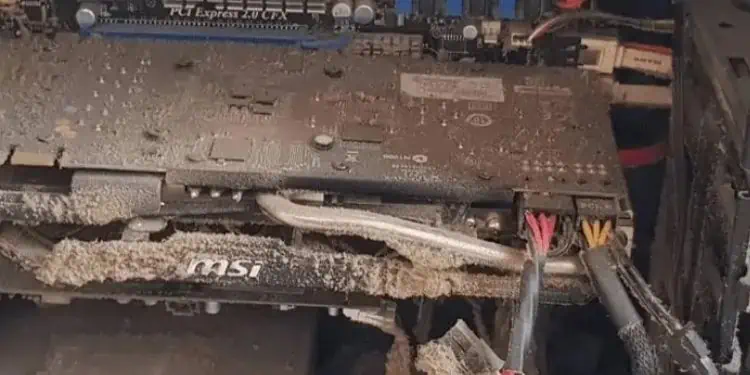
- Once removed, we recommend using a small brush to clean the slot to eradicate any dust particles stuck inside. While you’re at it, you can also use a microfiber cloth or a can of compressed air to clean the graphics card.

- Next, align the card with the PCIe slot and carefully seat it. Ensure that you do not damage the port or break the card while doing so.

- Then, lock the video card with the PCIe clip, screw them to the PC case, and rejoin the PCIe cable.
- Finally, cover the PC or laptop cover and turn on your computer. Now, you should no longer get the signal error.
- Upgrade PC graphics card the right way
- Upgrade your laptop’s graphics card
If you still encounter the message, we recommend upgrading the graphics card. Well, you can check out the following two guides on how to do this the right way:
Try Connecting to a Different Monitor
If none of the above methods worked for you, there’s a chance that your internal monitor components have been damaged. To confirm this, you can connect your PC or laptop to a different monitor.
Well, if everything runs smoothly and you do not get the “Input Signal Out of Range” message, try changing the display resolution and updating the graphics driver. Now, connect the PC to your primary monitor and see if this fixes your problem. If this doesn’t help, you may need to repair your monitor or replace it with a new one.

