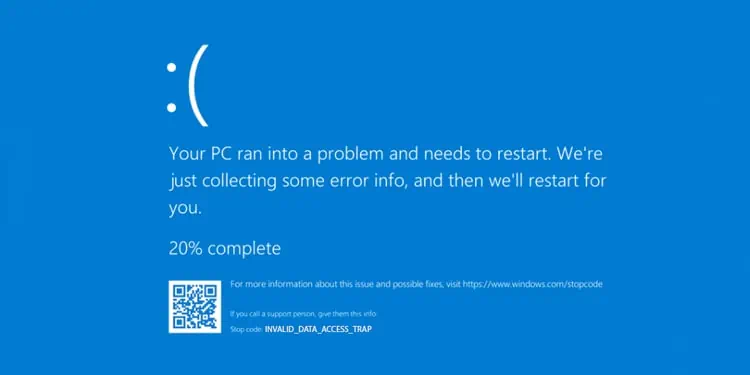
The INVALID DATA ACCESS TRAP bugcheck, which has a value of 0x4, occurs when a Windows upgrade fails due to an incompatible driver.
In most cases, this BSOD results from problematic third-party media drivers. As such, uninstalling the faulty software will resolve this error in most cases.
If you can’t upgrade despite that, we’ve also detailed other ways to resolve BSOD error in this article.
How to Fix INVALID DATA ACCESS TRAP
We recommend trying the first two methods, as they will most likely resolve the issue. In case they don’t, you can analyze the dump file to get further information.
Remove Media Software
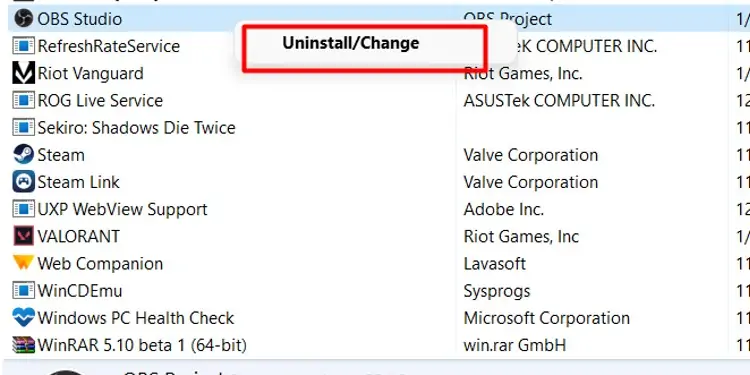
Most users have reported third-party capture software like AVerMedia Capture, PowerDVD, OBS Studio, etc., as the cause of this BSOD. Uninstalling such software allowed them to proceed with the upgrade without any issues, so we recommend that you do the same with the following steps:
- Press Win + R, type
appwiz.cpl, and press Enter. - Select the media software, press Uninstall, and follow the on-screen instructions.

- Restart your PC afterward and try upgrading now.
Uninstalling the software will remove the corresponding driver, which resolves the issue. But do note that if a separate driver update is available from the manufacturer, installing said update could be another way to fix the problem. Additionally, using an older stable software/driver version could also do the same.
Clean Boot and Upgrade
Certain third-party services could also be the reason for this BSOD. We recommend clean booting and trying to update, and if it does work, you can always re-enable the services afterward. Here’s how you can do so:
- Press Win + R, type
msconfig, and press Enter. - In the Services tab, enable the Hide all Microsoft services option.

- Click on Disable all and press OK.
- Restart your PC and check if you can upgrade.
Install Pending Updates
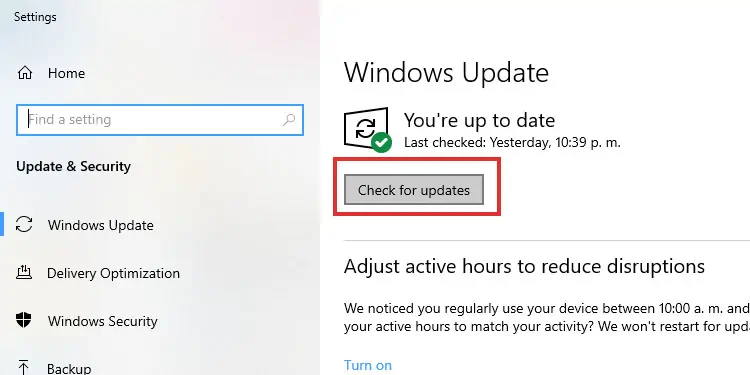
Some users were also able to resolve this BSOD by installing all pending updates before upgrading. Here’s how you can do the same:
- Press Win + R, type
control update, and press Enter. - Check for updates, then download and install any pending updates.

- Restart your PC afterward and test if you can upgrade.
Analyze Upgrade Logs
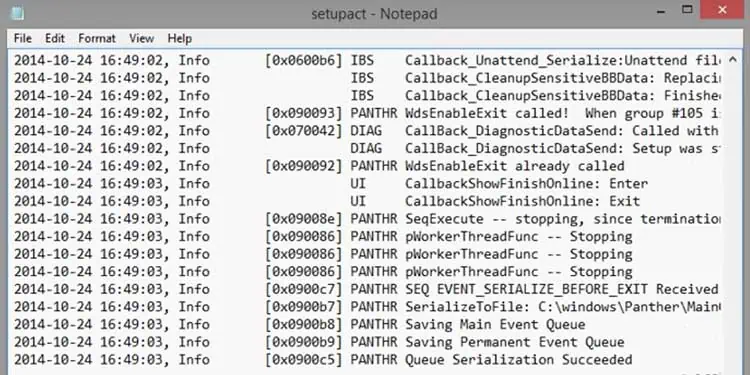
Numerous log files are created during the Windows Upgrade process. These are very helpful for diagnosing upgrade issues.
The setupact.log file from the $Windows.~BT\Sources\Panther directory will be most helpful. The log file from $Windows.~BT\Sources\Rollback is more generic, but it may still be worth analyzing as a second resort.
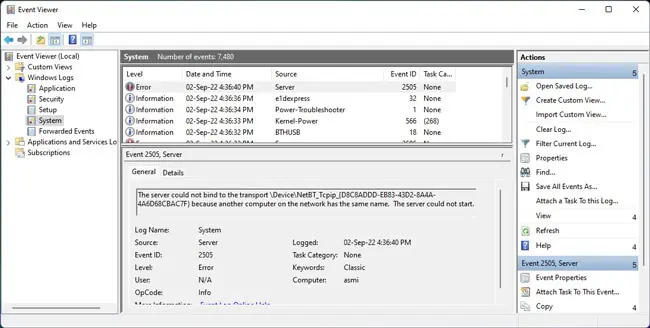
Although this won’t be as helpful, you could also check the Event Viewer logs for further information. Here’s how you can do this:
- Press Win + R, type
eventvwr, and press Enter. - Expand the Windows Logs tab and click on System.

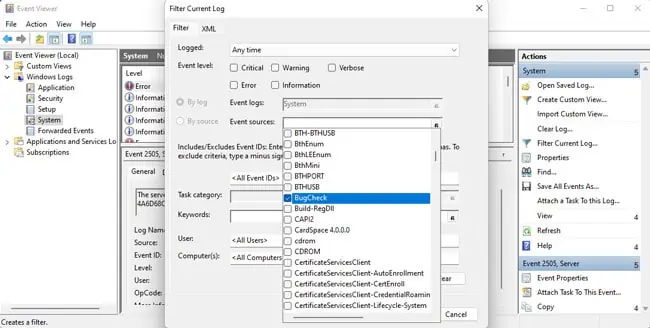
- Click on Filter Current Log from the right pane.
- In the Event Sources section, select Bug Check and press OK.

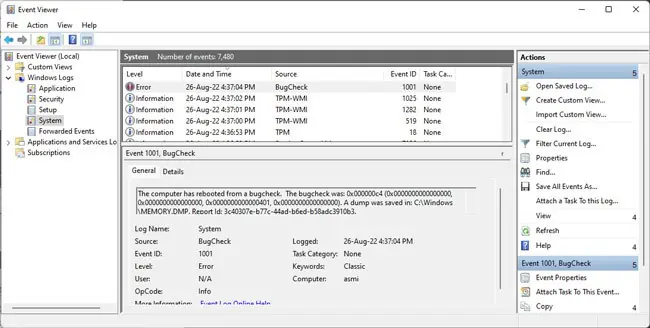
- Note the bugcheck event’s Date and Time and click on Clear Filter.
- After clearing, sort by Date and Time and locate the events from Step 5.
- First, select the Event and check if the General and Details tabs provide any useful information, such as Driver Names.

- If not, check the events before and after the bugcheck to get hints on what could’ve been the issue.
Analyze Dump File
A failed upgrade will lead to a rollback, which creates a dump file named setupmem.dmp in the C:\$WINDOWS.~BT\Sources\Rollback directory. Analyzing this dump should give you further hints as to what’s causing the BSOD. Here are the steps for this:
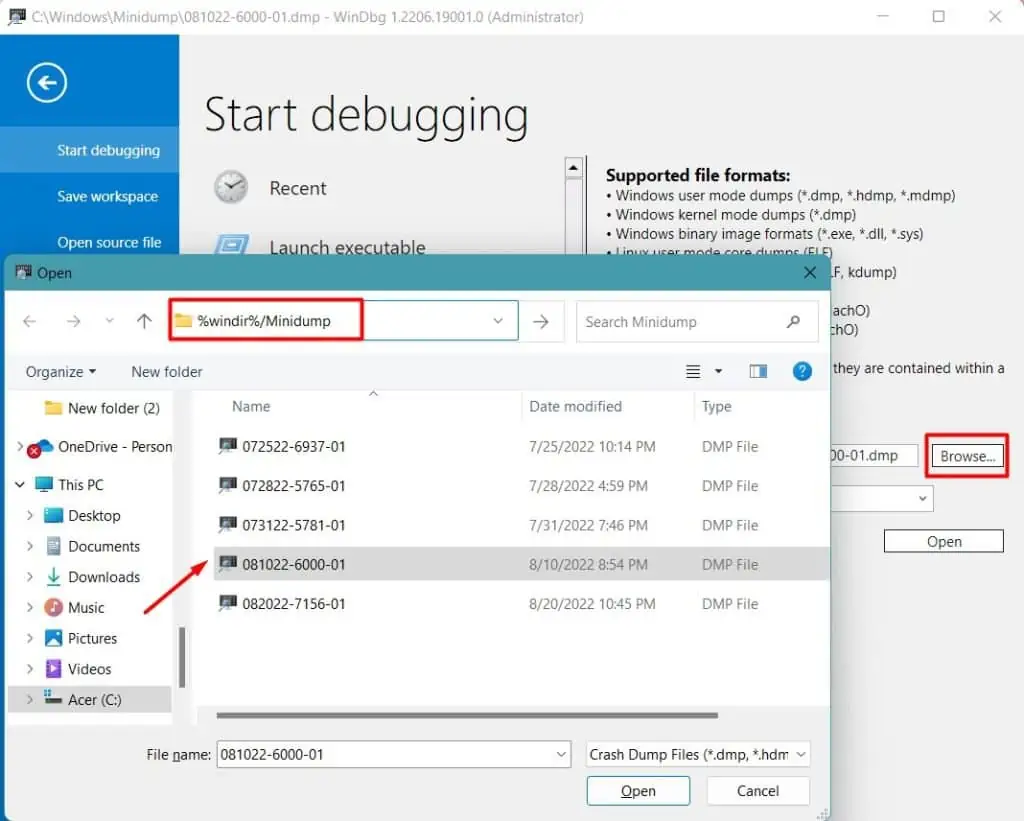
- Download the WinDbg Preview App from the Microsoft Store.
- Launch the WinDbg Preview App and press CTRL + D.
- Navigate to the aforementioned directory and open the
setupmem.dmpfile.
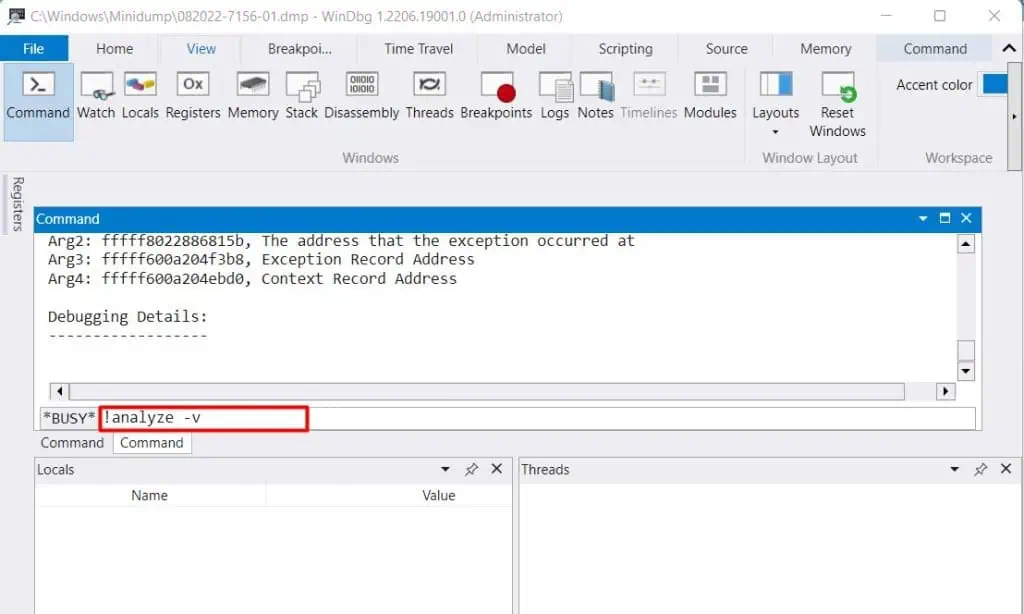
- Select View > Command and enter
!analyze -v.
- Check the MODULE_NAME and Probably caused by sections.
- If you have additional dump files, analyze the rest similarly to get more information.
Manually Install Windows
If the BSOD is still not resolved, your only may be to manually install Windows with an installation media instead of trying to upgrade. You can use the media creation tool for this, or you can download the ISO from Microsoft’s site and create a bootable USB using something like Rufus. We also have an article with full steps on installing Windows from a USB for your further reading.

