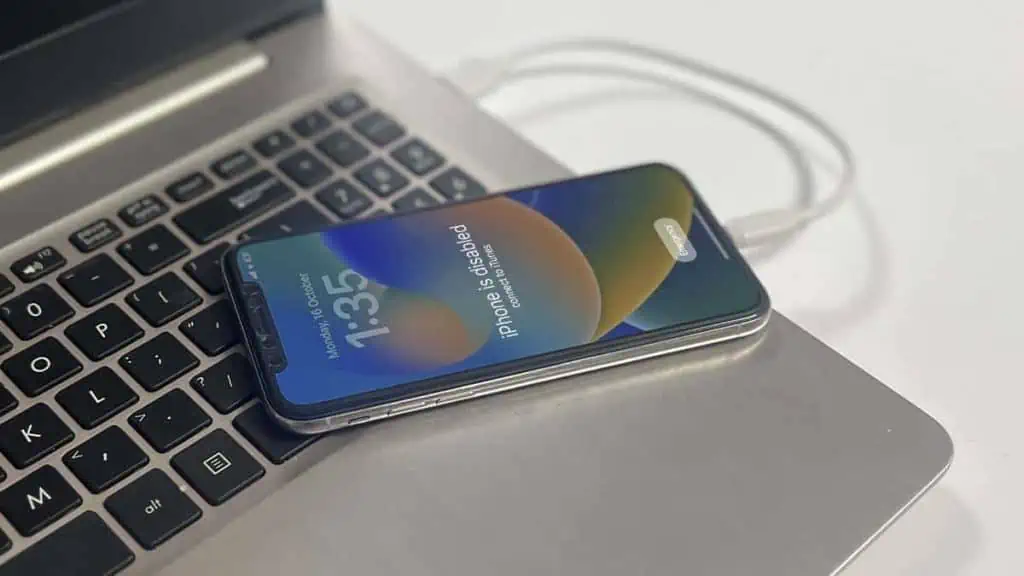
The “iPhone is disabled connect to iTunes” error message appears after 10 consecutively failed password attempts.
This security feature is meant to protect your data and prevent unauthorized access to your device.
The only way you can remove this error and get your iPhone back is by resetting it. To do so, you can either use iTunes/Finder or the Find My application.
However, resetting your iPhone will require you to lose all of your data. If you want to recover your data as well, you will need to have a backup of your iPhone beforehand.
Reset Using iTunes/Finder
Following the error message, you can connect your iPhone to iTunes or Finder to reset it. All you need is a computer and a lightning cable that goes into your computer.
Now, you will first need to put your iPhone on recovery mode and then reset it using iTunes or Finder.
Step 1: Enter Recovery Mode
As you are locked out of your iPhone, you won’t be able to use conventional methods to reset your device. You will need to put your iPhone on recovery mode to be able to reset it.
For iPhone 8 and newer
- Connect your iPhone to your computer using a lightning cable.
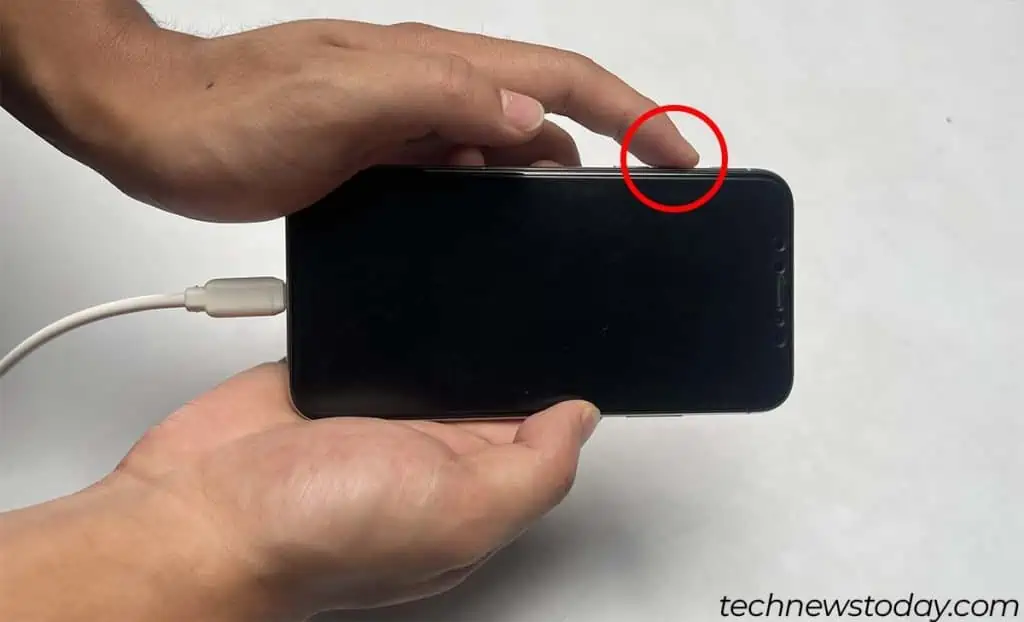
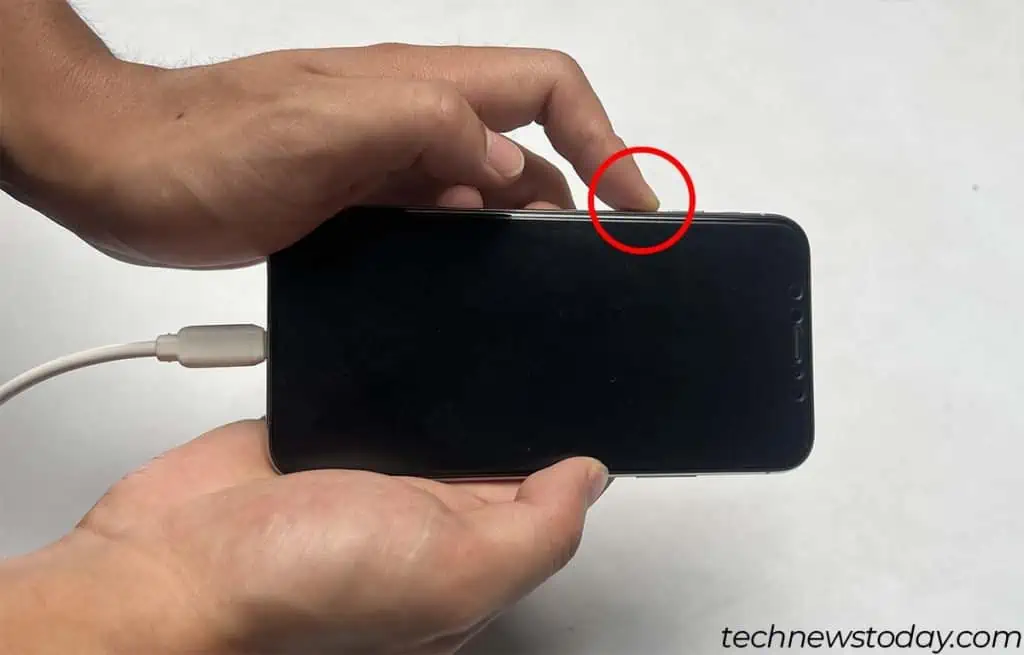
- Press and quickly release the volume up button.

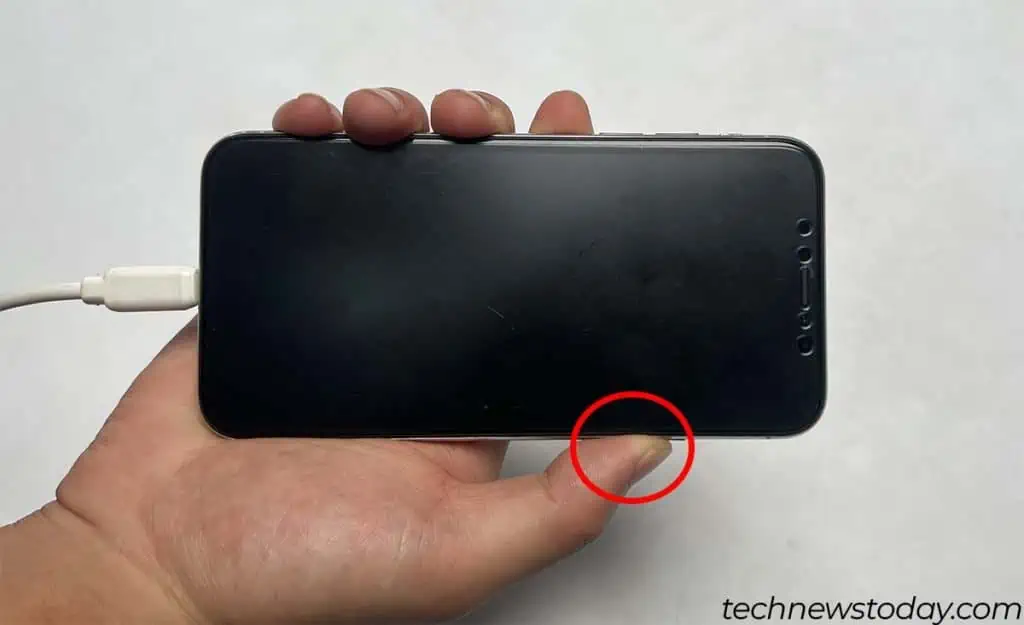
- Do the same for the volume down button down as well.

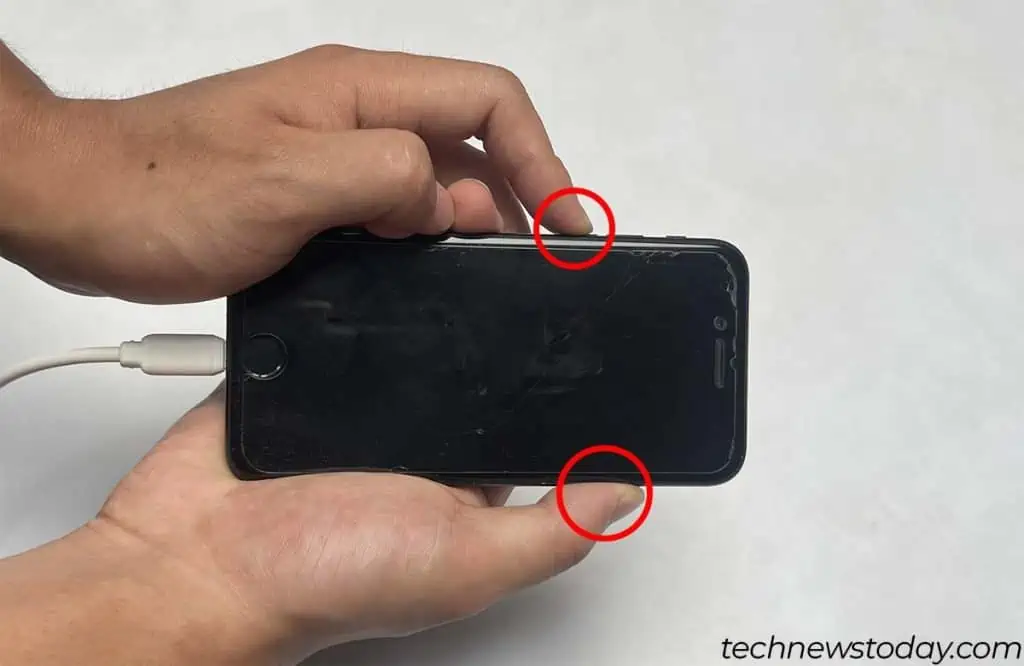
- Press and hold the power button until you enter recovery mode.

For iPhone 7 and older
- Connect your iPhone to your computer.
- Press and hold the power and home button simultaneously. (If you have the iPhone 7 series, press and hold the power and volume down button instead.)

- Keep holding the two buttons until you enter recovery mode.
Step 2: Reset iPhone
Now, you can reset your iPhone using either iTunes or Finder. The application you will need to use will depend on your operating system software.
- If you have a Mac computer running Mojave or older, you will need to use iTunes.
- For Mac Catalina and newer, you will need to use Finder.
- For Windows, you will also need to use iTunes.
In newer versions of Mac, the iTunes functionality was moved over to Finder. Both of these applications share a similar user interface, so the steps are pretty similar as well.
- Open iTunes or Finder. (For Windows users, download the iTunes app from the Microsoft store.)
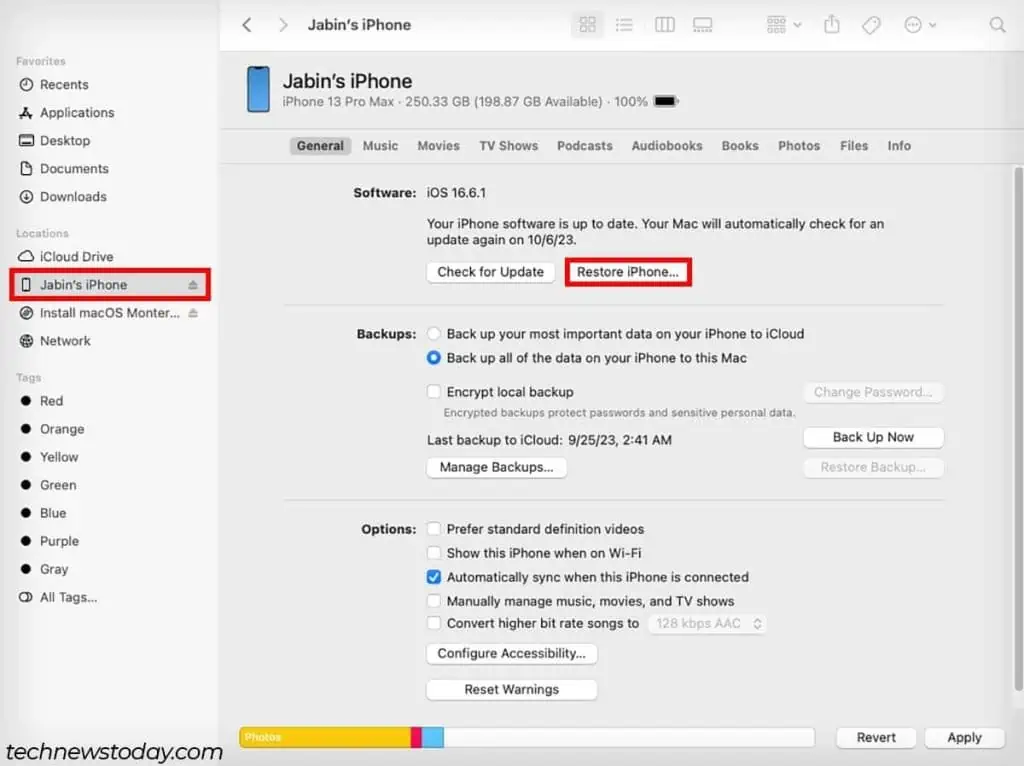
- Click on the device name at the left sidebar. (For iTunes, click on the device icon at the top.)
- Select Restore iPhone and click on Restore to start the process.

Reset Using Find My
Another way you can reset your iPhone is by using the Find My application. It allows you to remotely reset your device and also have it locked with your Apple ID.
However, for this to be possible, you will need to have Find My already enabled on your disabled iPhone.
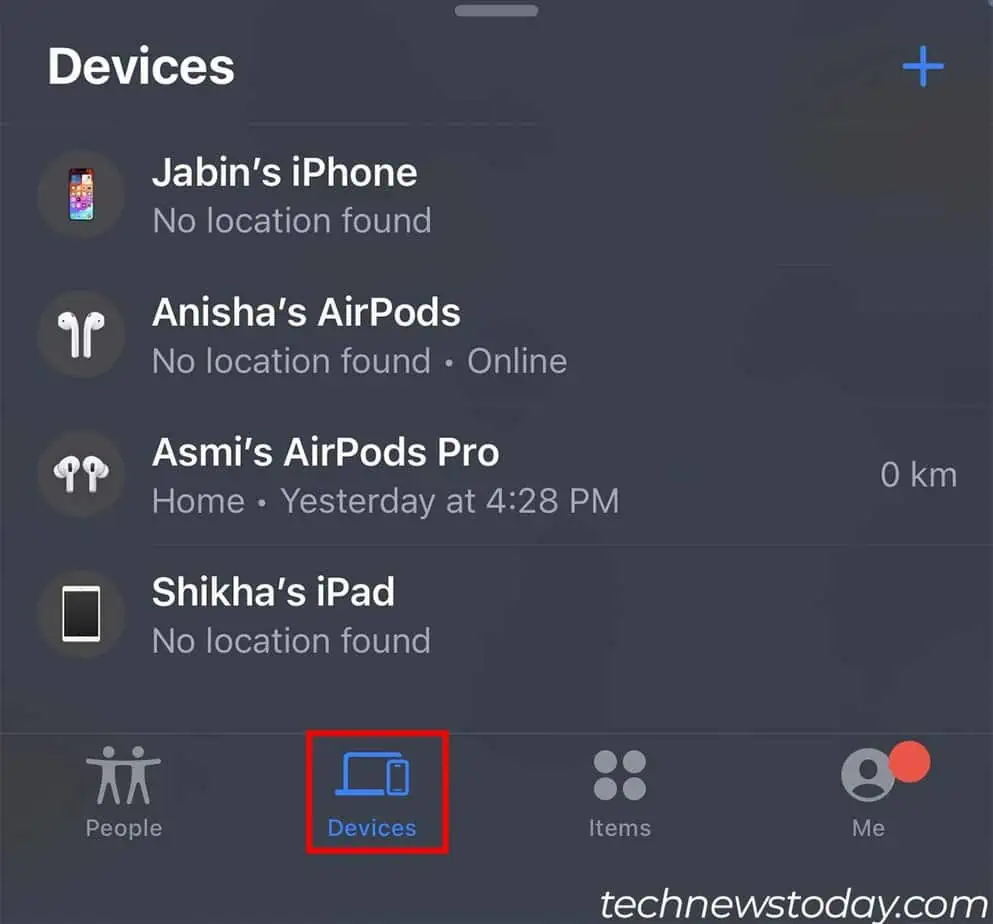
- Open the Find My application on another iOS device. (Make sure you are logged in with the same Apple ID.)
- Tap on Devices and select your disabled iPhone.

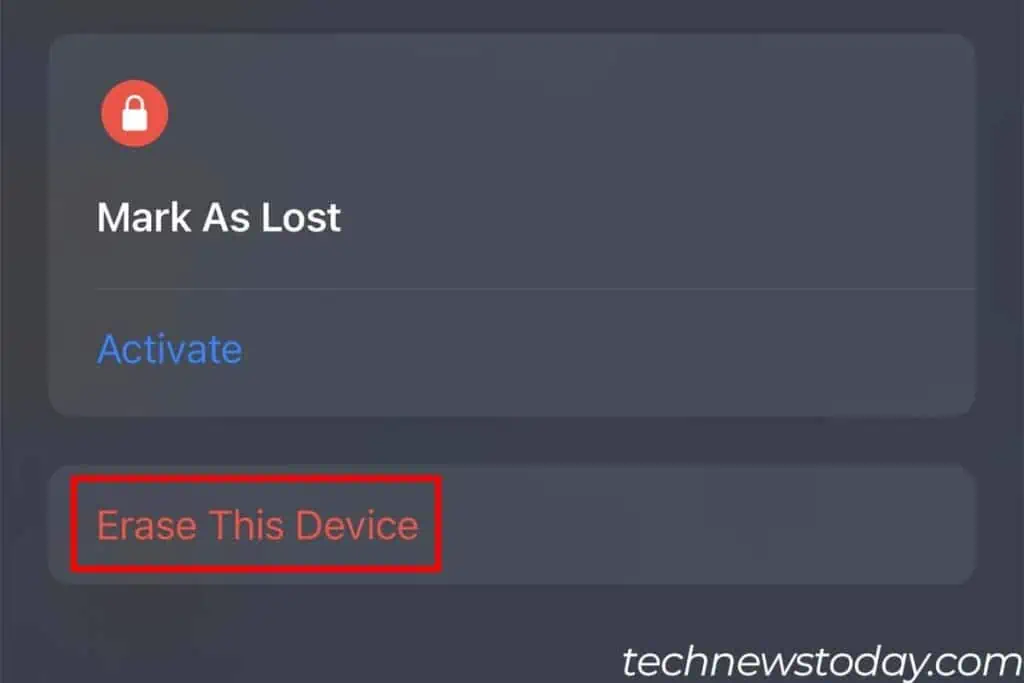
- Swipe up and tap on Erase This Device.

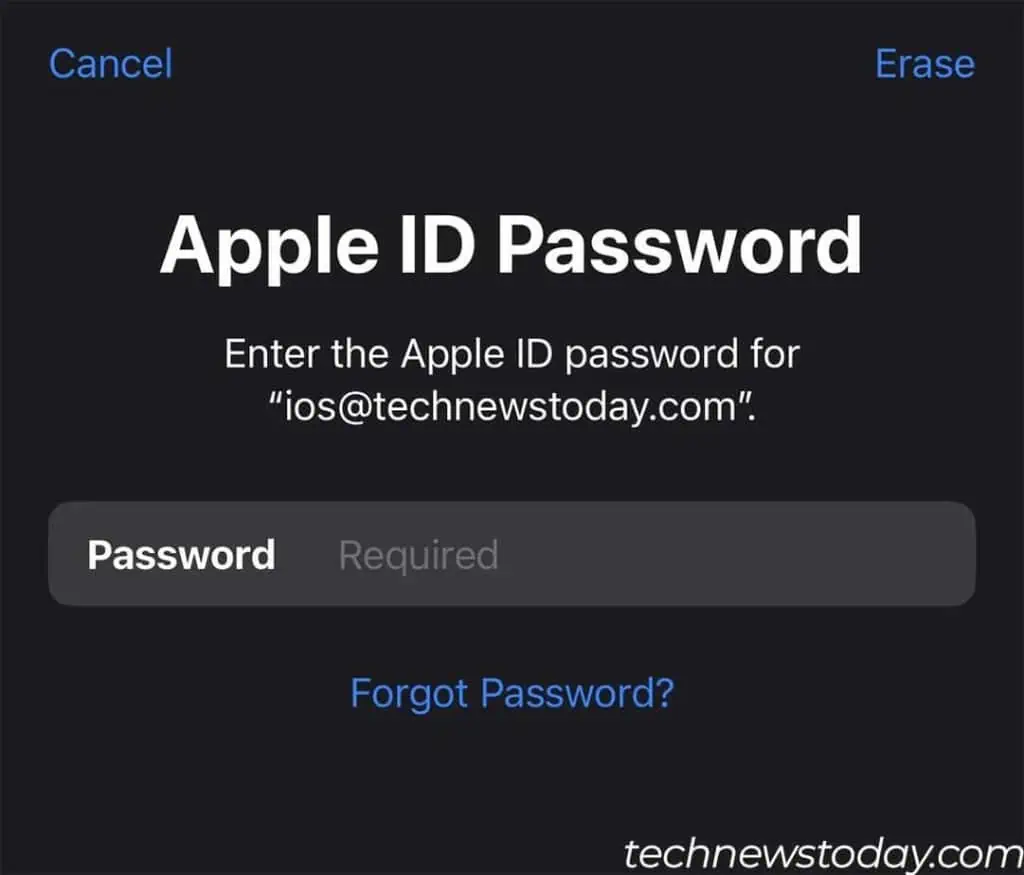
- Follow the on-screen instructions and enter your Apple ID passcode to start the process.

If you don’t have another iOS device, try using the web version of Find My to erase your disabled iPhone.
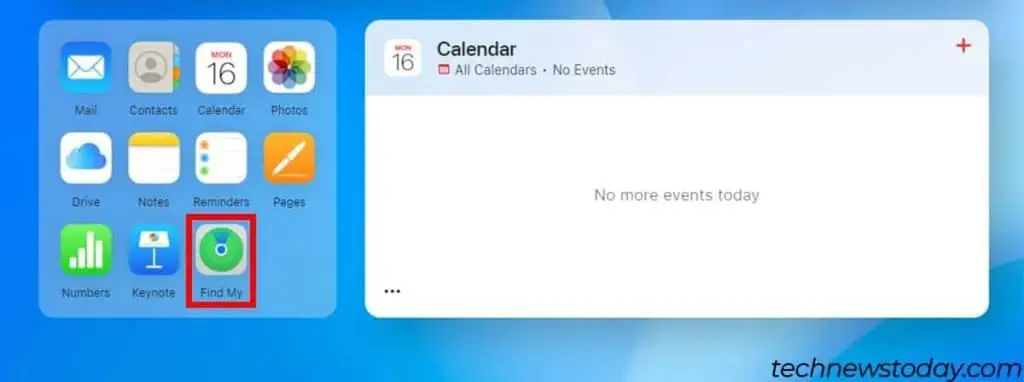
- Go to the iCloud website.
- Scroll down and click on Find My.

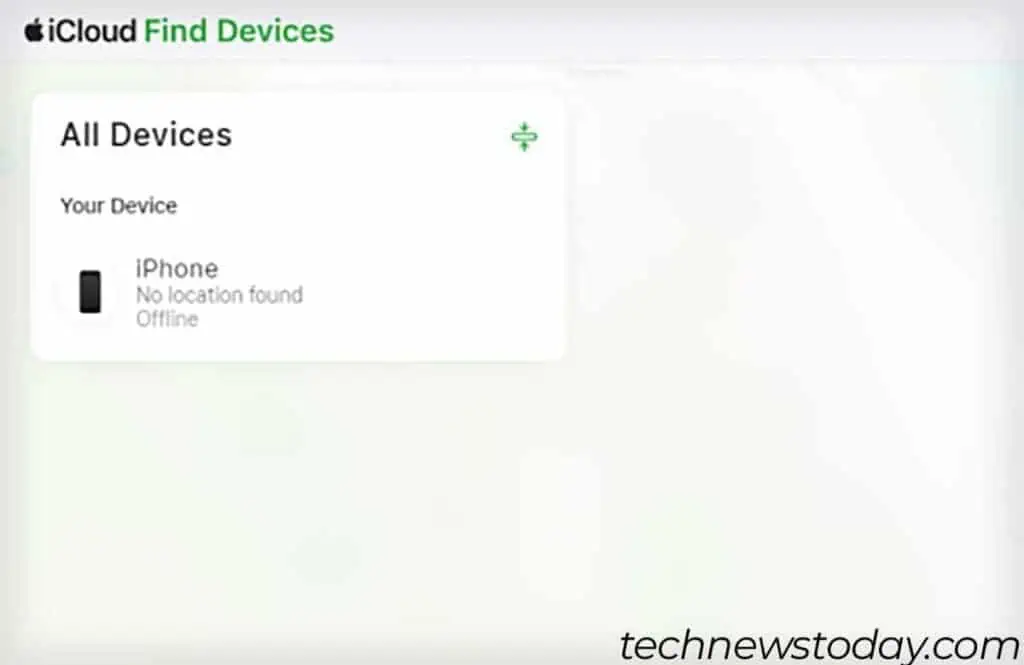
- Click on All Devices and select your disabled iPhone.

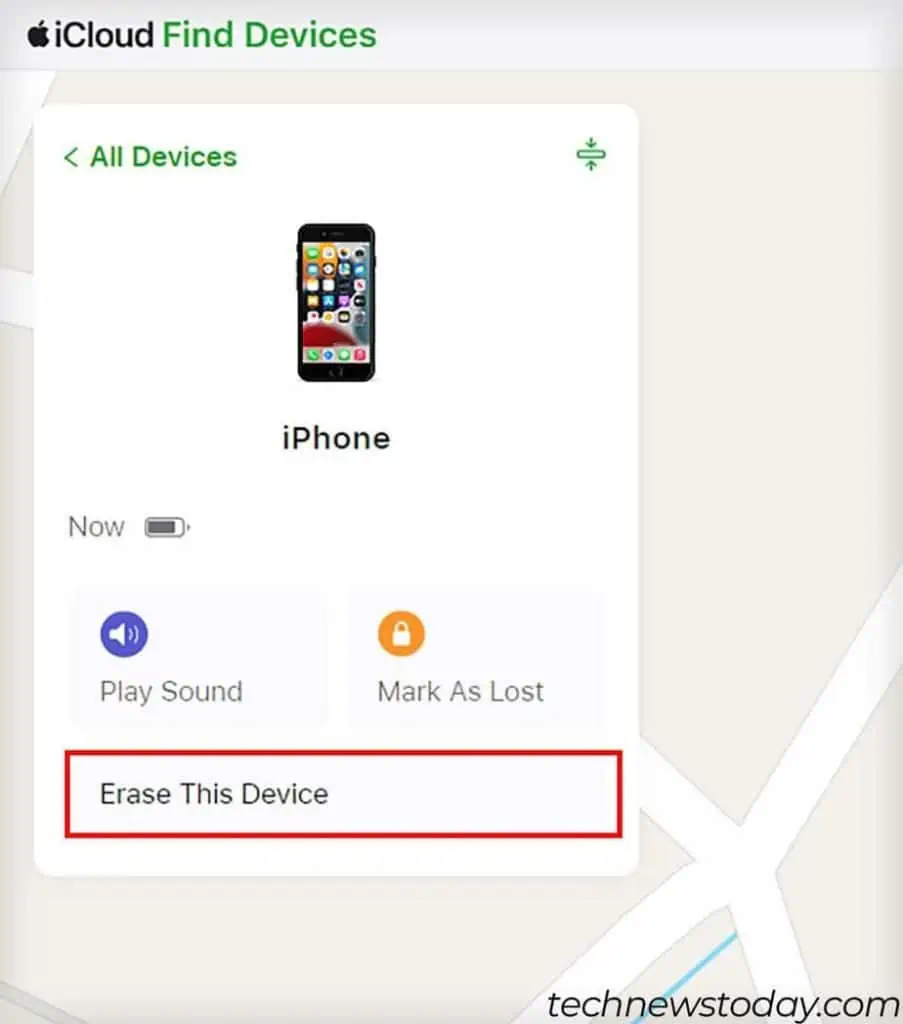
- Select Erase iPhone and click on Erase again.

- Follow the on-screen instructions and enter your Apple ID passcode to start the process.
How to Recover Data From Backup?
After the reset completes, you can recover your data if you have a backup of your iPhone. The steps to recover your iPhone from a backup differ depending on where you backed up your iPhone.
Anyway, I’ll show you how to recover data from the two most common methods of iPhone backup
Using iCloud
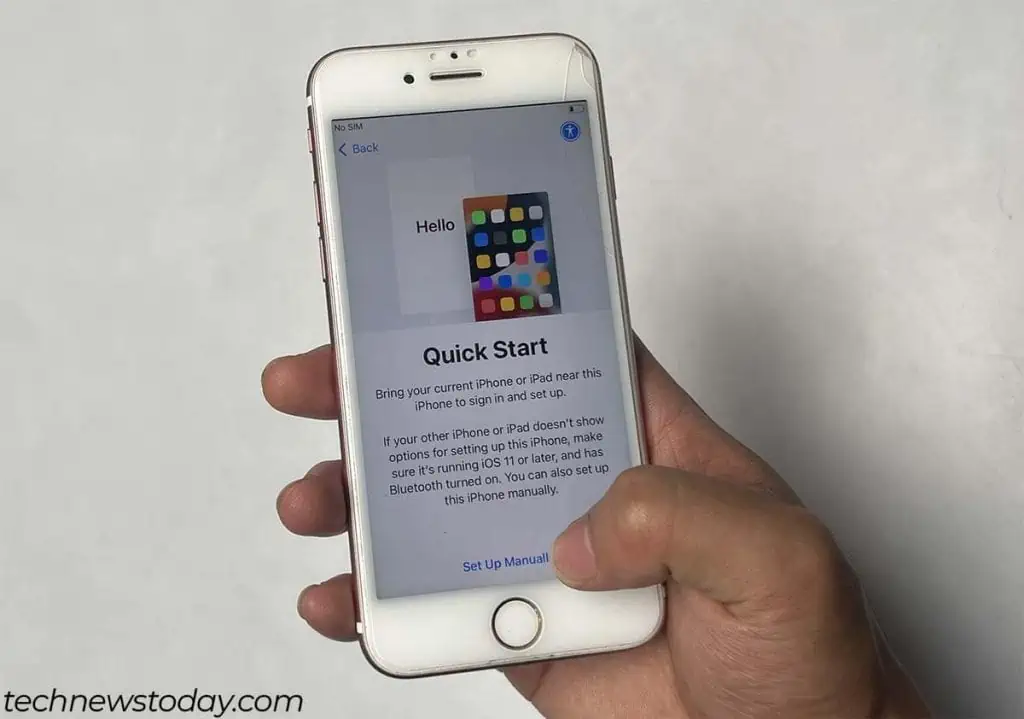
- After the reset completes, start setting up your iPhone.
- On the Quick Start screen, tap on Set Up Manually.

- Follow the on-screen instructions to continue setting up your device.
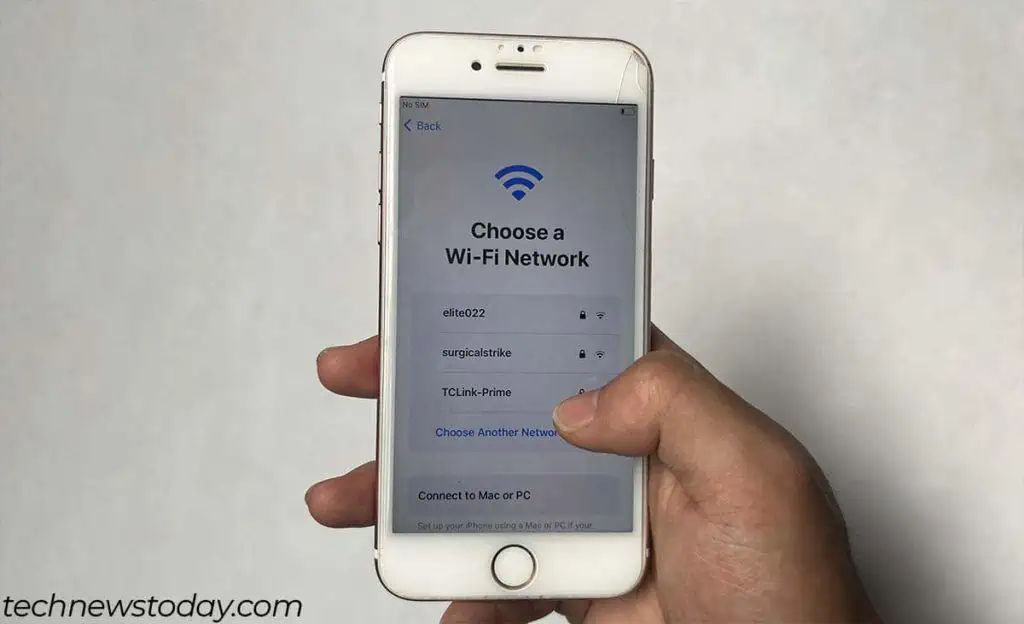
- In the Choose a Wi-Fi Network screen, make sure to connect to a wireless network.

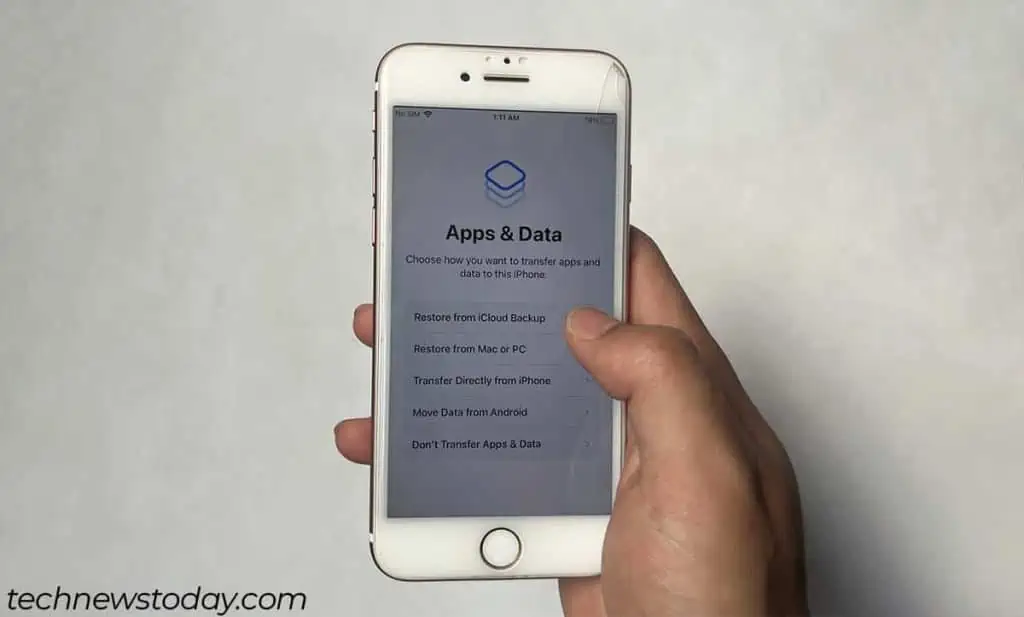
- Continue setting up your device, and on the Apps & Data screen, select Restore from iCloud Backup.

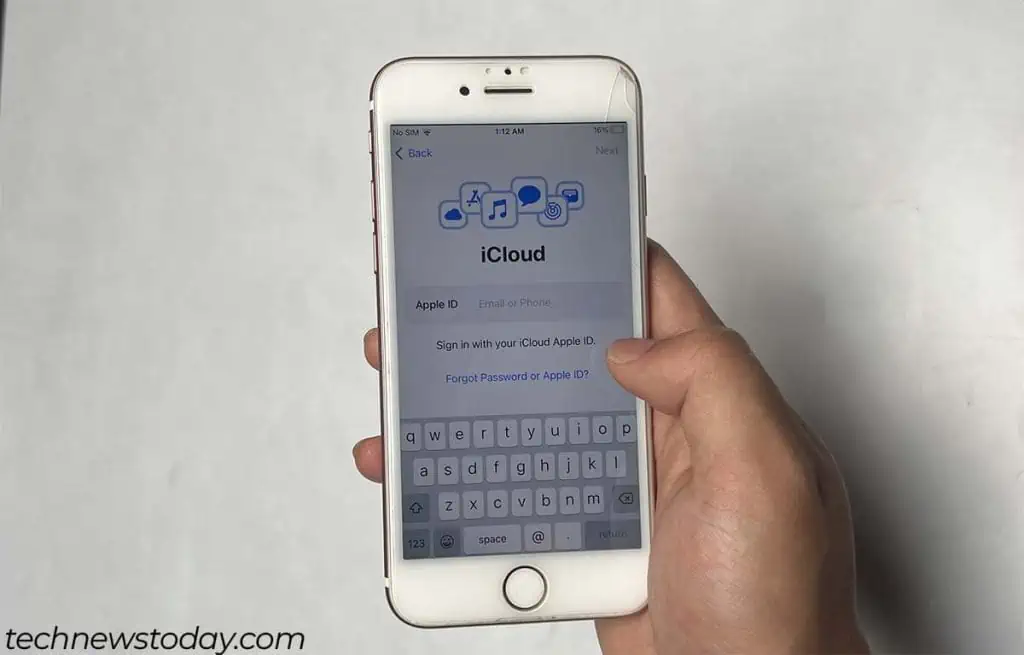
- Enter your Apple ID and password.

- Complete the verification process by entering the code you received on another device.
- Now, select your most recent backup and tap on Continue.
- Follow the on-screen instructions to complete the restore process.
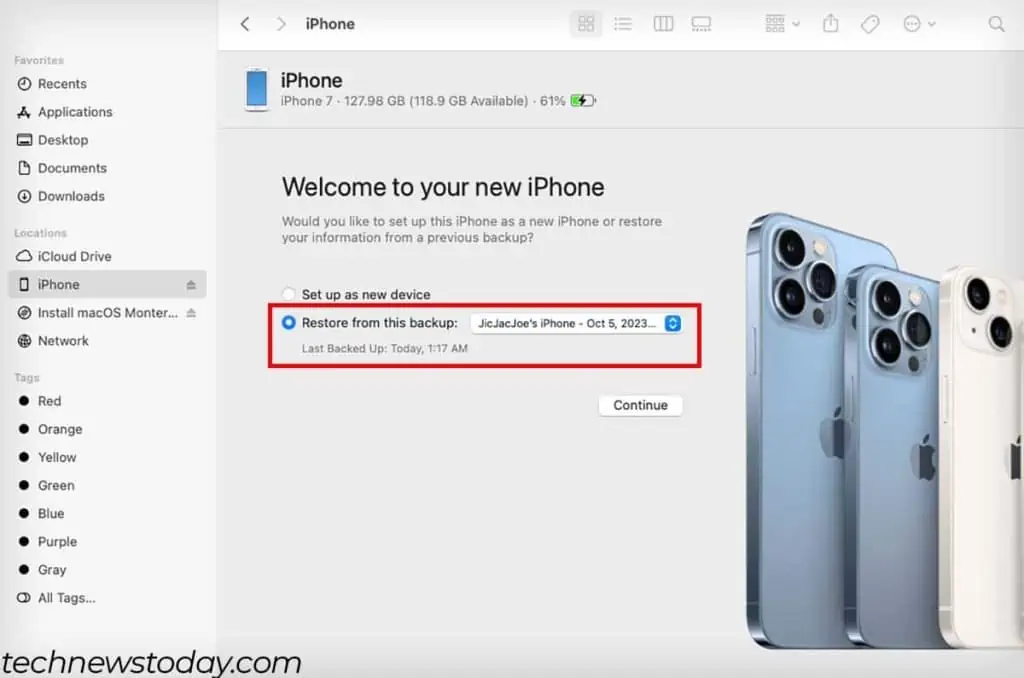
Using Finder/iTunes
- Connect your iPhone to your Computer.
- Open Finder or iTunes.
- In the Welcome to your new iPhone screen, select Restore from this backup. (If this screen does not automatically appear, click on the device icon or name.)

- Choose your most recent backup from the drop-down menu.
- Click on Continue.

