When you’re typing on your keyboard, there’s nothing more frustrating than finding the same keypresses appear twice or even more times on your screen. This phenomenon of keyboard chattering or double typing can occur for a variety of reasons—misconfigurations of the keyboard settings being the common one.
Sometimes the problem with the key switches or the membranes can bring up double typing, while at other times, it also has to do with the keyboard drivers. Fortunately, there are some simple solutions that can assist you in fixing this problem and getting back to normal keypresses with ease.
Before You Begin
Here are some preliminary troubleshooting measures worth trying before we move on to the major fixes.
- Sometimes minor glitches in Windows can trigger issues with the keyboard. Restarting the computer can fix them.
- If you use a wired keyboard, disconnect it from the USB port and reconnect it to another USB port. For wireless keyboards, disconnect or unpair the keyboard and pair it back with the computer.
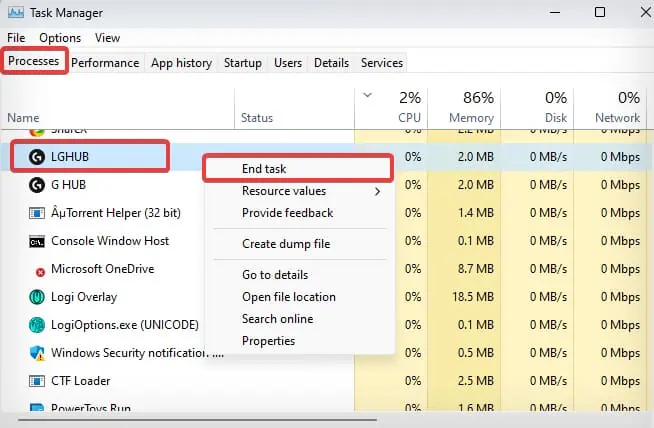
- If there are some applications that you think might interfere with the keyboard driver, try stopping processes for such programs or uninstall them completely.
- Press Ctrl + Shift + Esc keys to open the Task Manager.
- Go to the Processes section and search for any of the applications that might interfere with your keyboard’s functionality.
- Right-click on it and select End task.

Run Keyboard Troubleshooter
Whenever you go through any keyboard-related issues, the first thing you need to do is run the Keyboard troubleshooter. This built-in troubleshooting utility of windows detects the possible hardware and software problems that could trigger double typing and fix them accordingly.
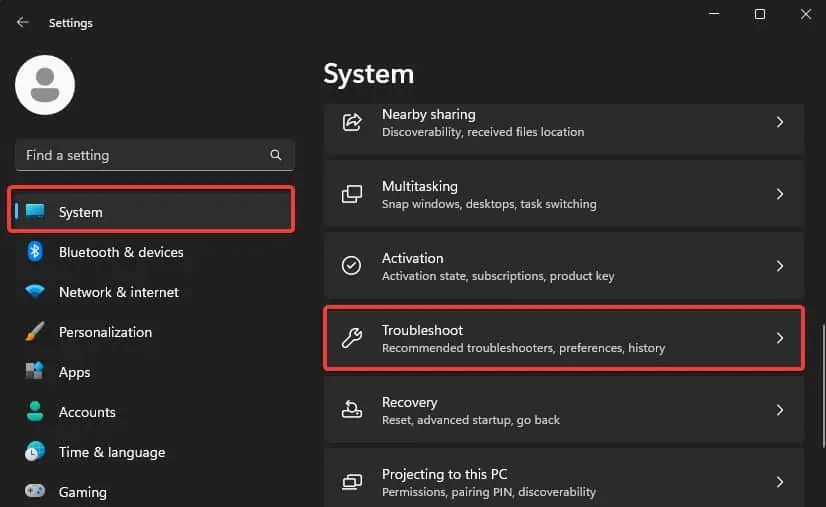
- Press the Windows key + I to open Settings.

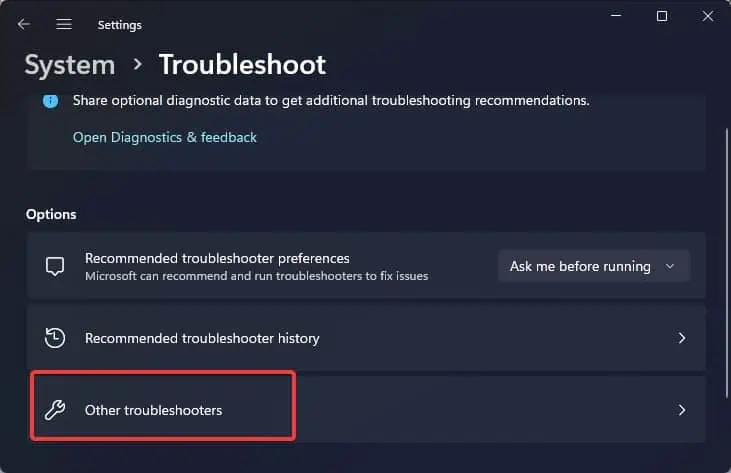
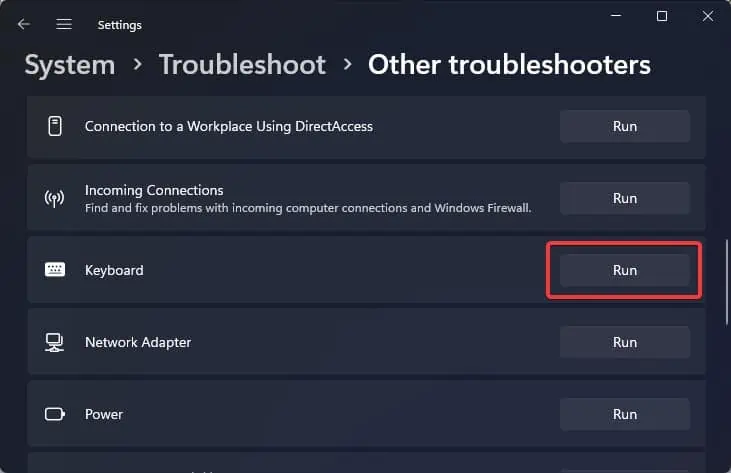
- Go to System > Troubleshoot > Other Troubleshooters.

- Find the keyboard from the list and click on the Run button on its side.

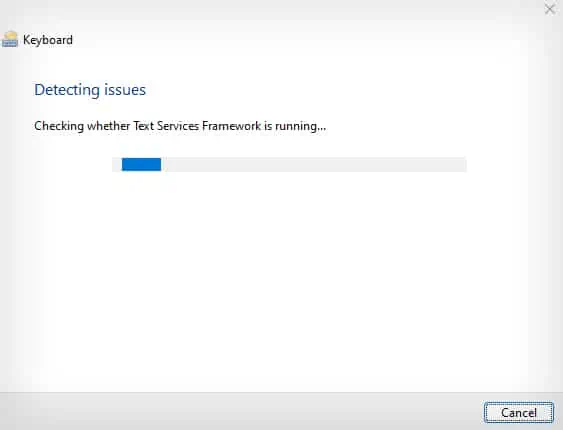
- Troubleshooter will then start the diagnostics and apply the relevant fixes accordingly.

Turn on Filter Keys
If the troubleshooter did not work, you should turn on the filter keys option from the Windows settings. When the filter key feature is enabled, Windows does not register the repeated keystrokes and avoids double typing.
- Open the Settings.
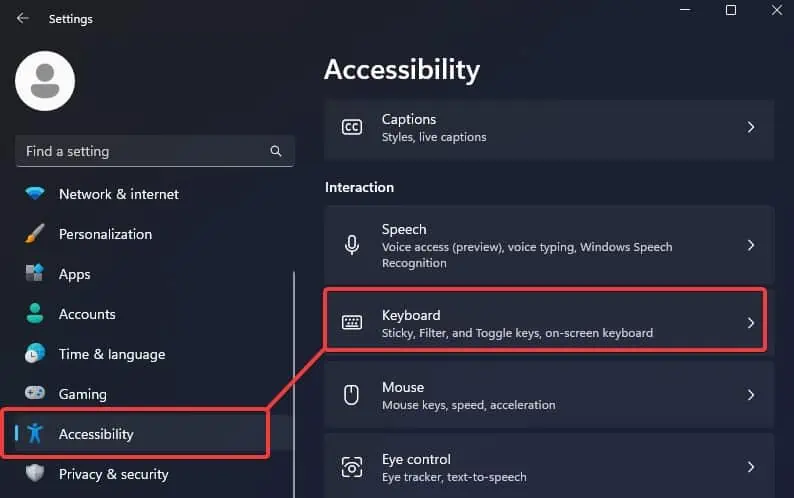
- Go to Accessibility > Keyboard.

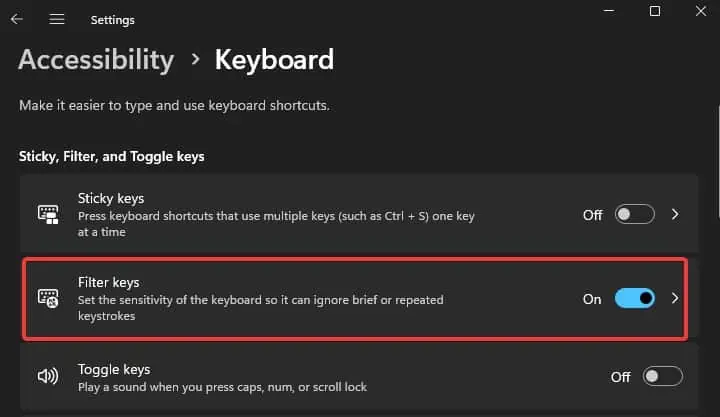
- Click on the Filter Keys slider to turn the feature on.

- No click on the Filter keys to access the other related settings.
- Enable the Ignore unintended keystrokes (bounce keys) option.
Reconfigure the Repeat Rates
If the repeat rates for the keyboard inputs are misconfigured, you may experience a similar problem with the keystrokes. Repeat rate simply is the rate at which the system registers the repeated keystrokes. If the rate is set too high, you may find that even with a single keystroke, multiple inputs may be registered by your computer.
Note: It is recommended to back up the registry before you make any changes to the registry values.
- Press Windows key + R, type
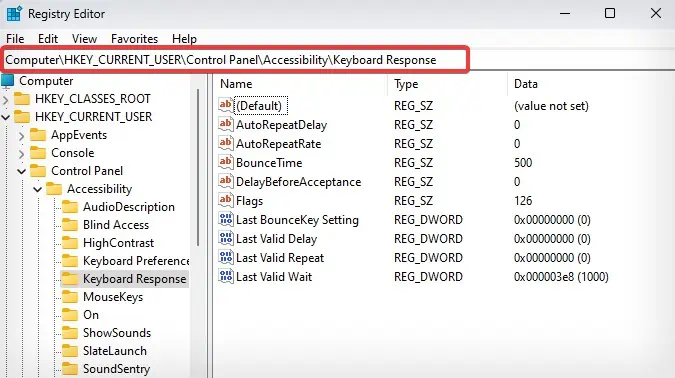
regedit, and hit Enter. - Now, navigate to this registry location.
Computer\HKEY_CURRENT_USER\Control Panel\Accessibility\Keyboard Response
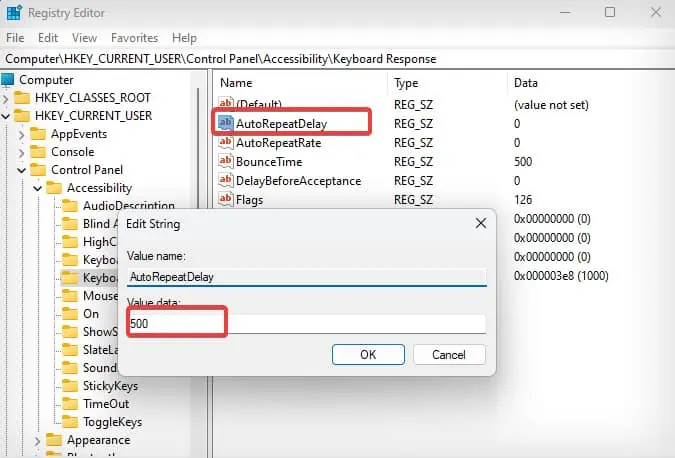
- Double-click on the key named as AutoRepeatDelay and set its value to 500. Click on OK.

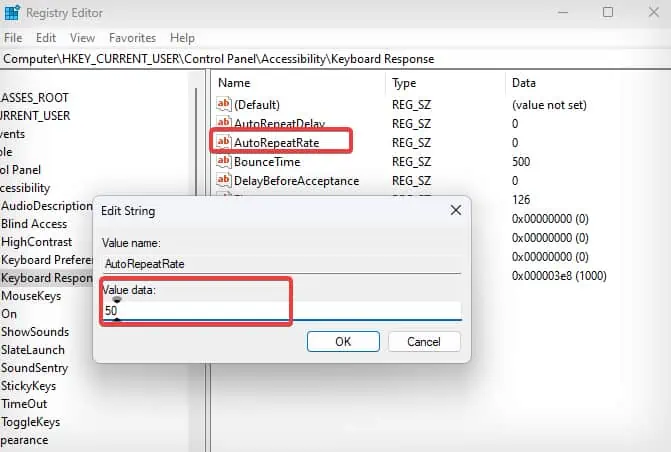
- Then, open another key named AutoRepeatRate and set its value to 50.

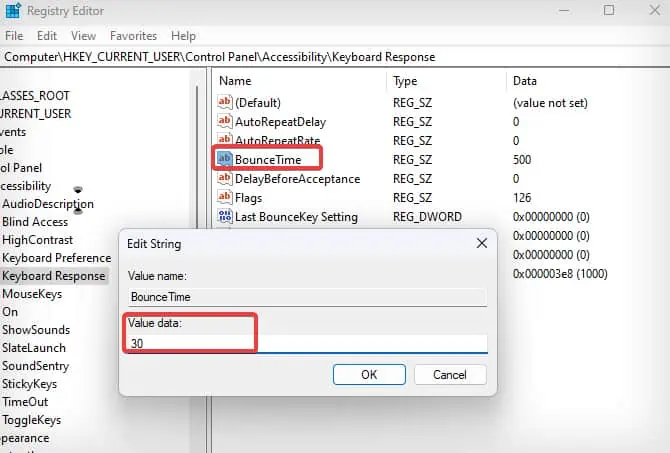
- Lastly, open the Key labeled as BounceTime and enter 30 in the value data field.

- When you have made these registry changes, restart the computer for these changes to work.
Clean the Keys
If dirt and crumbs are settled well underneath the keys, you might see such issues with the keystrokes. Users with mechanical keyboards tend to see such issues once in a while. You will also see similar key repetition problems if the keys get stuck while pressing.
Cleaning the switches or the rubber membranes of the keys is found to resolve the double typing problem to some extent. Here’s how you can clean the keys of your mechanical and laptop keyboards.
Cleaning Mechanical Keys
- Disconnect the keyboard from the computer.
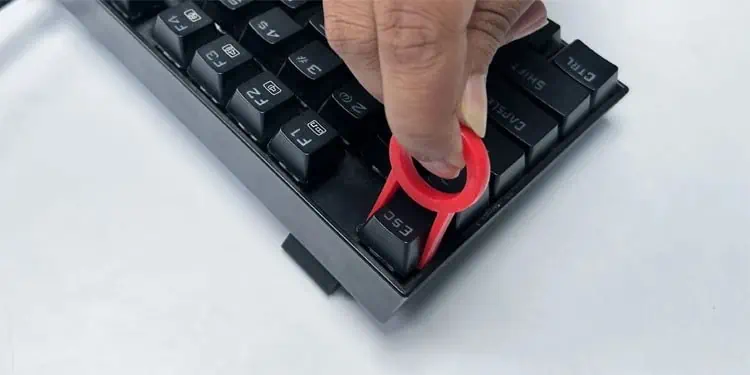
- Use a keycap puller that comes packaged with the keyboard and place it into the key until it gets below it. Now, pull it upwards to remove the keycap.

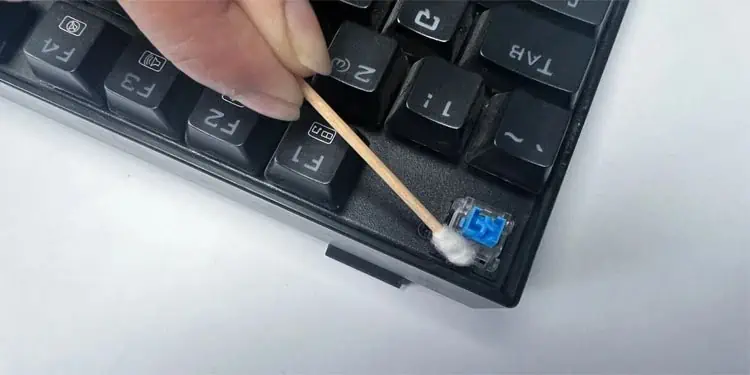
- Using a brush, clean the keycap and the switches thoroughly.
- Use a Q-tip dipped in an Isopropyl alcohol solution to get any external particles out of there.

- After the cleaning is done, insert the key back into its original place.
Cleaning Laptop Keys
- Turn off the laptop and disconnect the charger. If your laptop has a detachable battery, remove it as well.
- Now, take a flathead screwdriver and insert it into the key from its side.

- Insert the screwdriver horizontally inward, keeping the retainer clip underneath the screwdriver. This will make the key pop out of its place. Perform this process gently in order to avoid any physical damage.
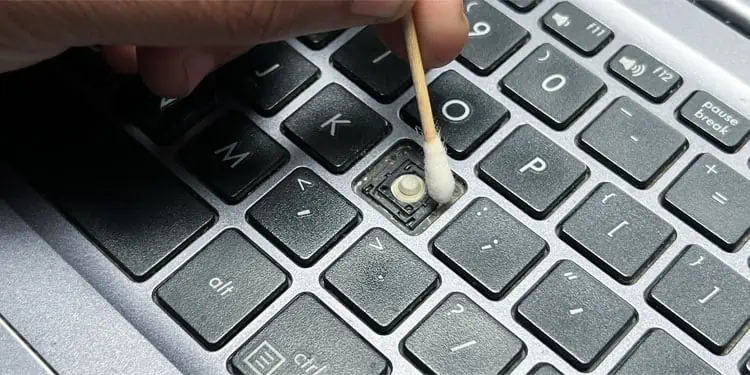
- Use a microfiber cloth or a Q-tip to clean the keycap as well as the underneath the keys. You might also use the alcohol solution to clean the internals.

- Once done, let the keys and the internals dry off. Finally, place the keycap back in its original spot.
Reinstall Keyboard Drivers
You can never write off the issues with the drivers whenever you encounter a problem with the keyboard. Keyboard drivers establish communication between the keyboard unit and the operating system. If this driver gets corrupted, the best solution is to reinstall it again.
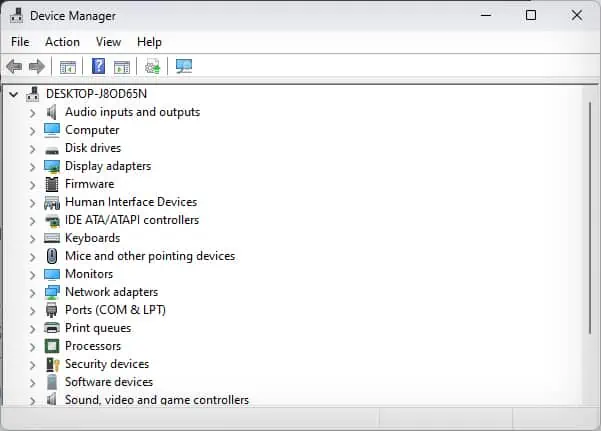
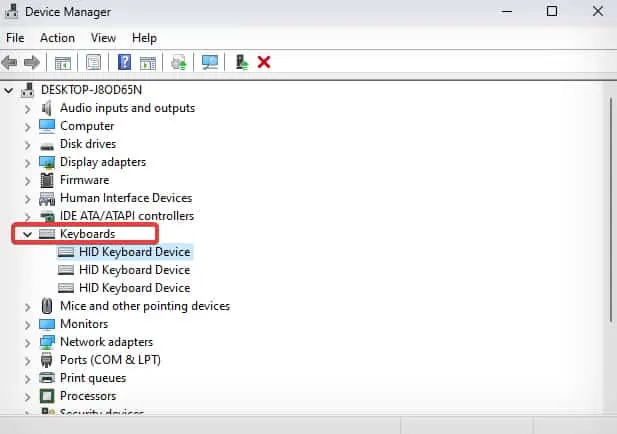
- Press the Windows key + X and open Device Manager.

- Click on the Keyboard to find the devices under it.

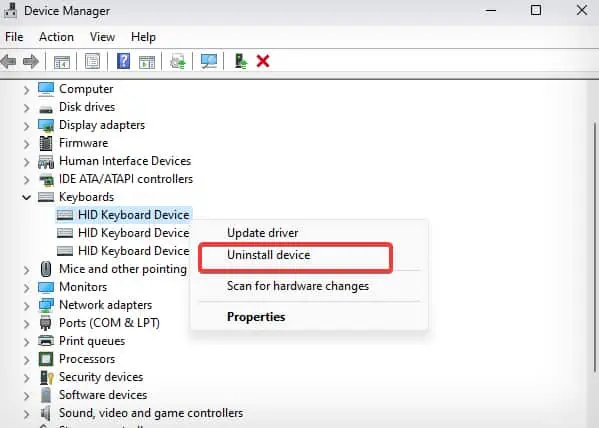
- Right-click on the keyboard drivers.
- Select Uninstall device.

- Give the final confirmation by again clicking on the restart button and restarting the computer.
- After the computer boots up, Windows will install the generic drivers for the keyboard which might fix the problem for you.
Some keyboard manufacturers such as Logitech also have their own firmware for the Keyboards. You might try updating that firmware too to find any sort of resolution to the issue.

