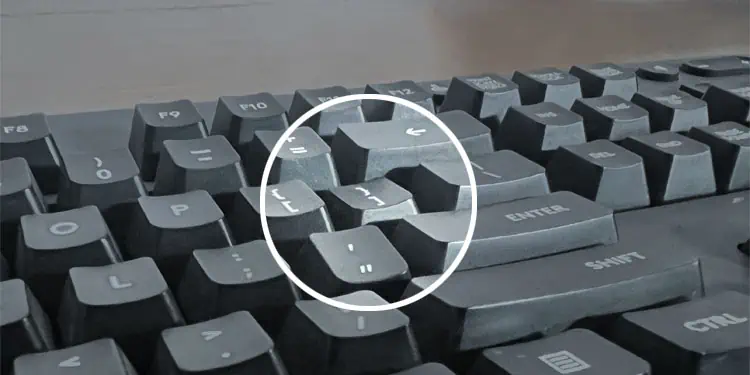
A keyboard uses a combination of multiple components on the key for each keystroke. So if any parts don’t work properly due to damage or get blocked due to dust or gunk, the keys can get stuck while pressing.
Usually, you need to access the internal components and check or clean them. Different types of keyboards comprise different components. So, the method to check which part is causing the issue as well as fix it is different for each type of keyboard.
On Mechanical Keyboard
A mechanical keyboard usually contains removable keycaps, mechanical switches, top and bottom cases, a plate under the top case for stability, and a PCB circuit below the plate.
If a key is getting stuck, it indicates that the keycap or the switch of the key is damaged and has some issues. So, you need to remove the keycap and check these components.
- Disconnect the keyboard from your computer. If it’s a wireless keyboard, turn it off and take out the batteries just to be safe.
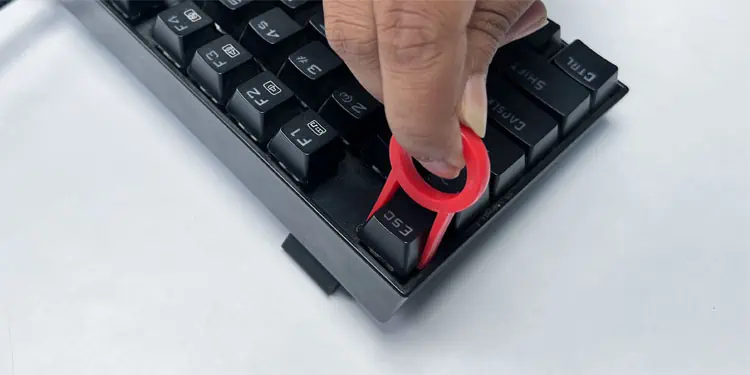
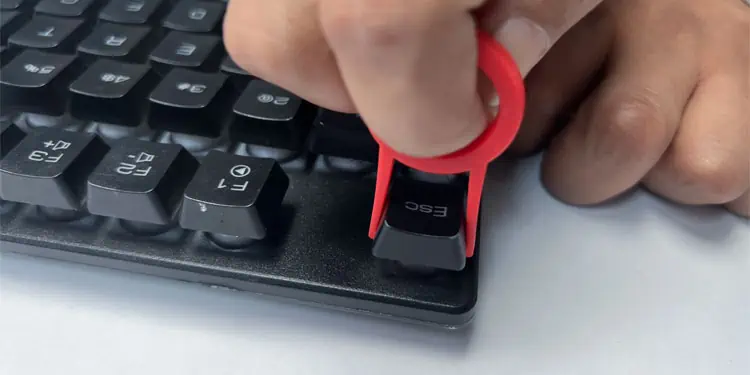
- Place a keycap puller into the stuck key until the curved edge gets below the key (you should be able to feel it).

- Then pull it directly upwards to remove the keycap.
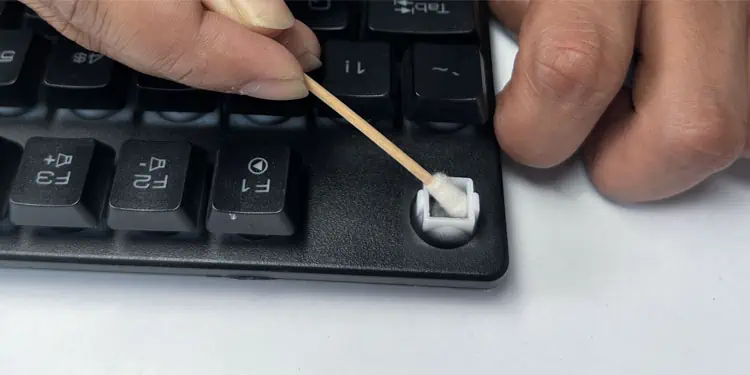
- Clean the keycap, the exposed parts of the case, and the key switch using a soft-bristle brush.
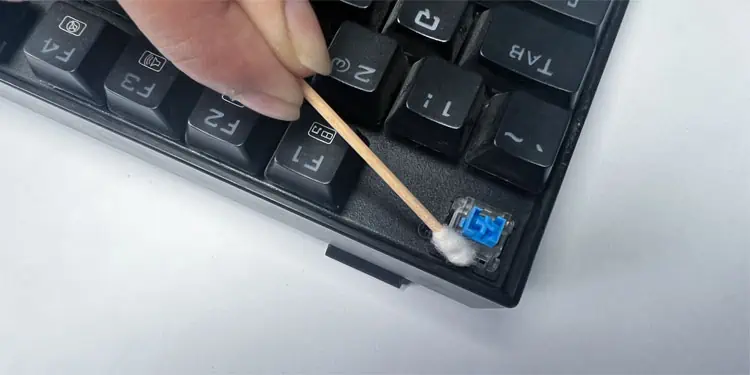
- You can use a Q-tip or microfiber swab dipped in rubbing alcohol to remove any stuck gunk. But, make sure the swab is not too damp, as excess alcohol can seep into the keyboard circuit and corrode the components. Also, make sure the parts are dry before reinserting the keycap.

- Check the keycap and the switch for any damage. If the parts are damaged, you need to replace them. You also need to replace the switch if you can’t press it easily even after removing the keycap.
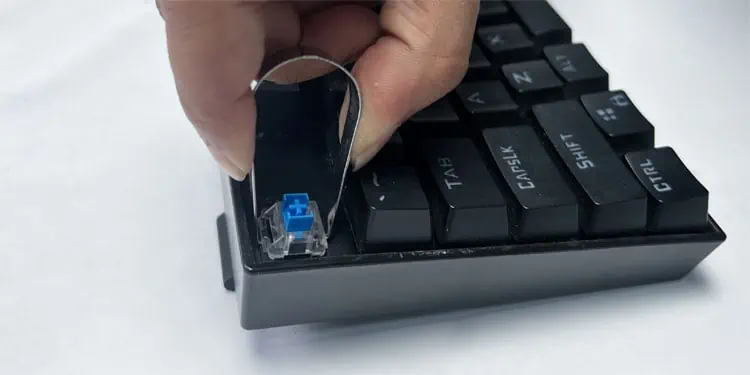
- If you have to replace the switch, you can use a keyboard switch puller to remove it if it is hot-swappable. Some keyboards have soldered switches, and you need to open the keyboard to access the circuit and then desolder the switch. So, we recommend seeking help from professionals for this process.

- You should also clean the switch housing/holder using a soft-bristle brush or a Q-tip after removing the switch.
- Then, buy the replacement for the broken parts (keycap or switch) and insert them properly. Make sure to buy the same type of switch as the original ones, as many types are available on the market.
- You can also lubricate the switch, if you wish to keep experiencing the proper keystroke feedback from the key.
- Insert the keycap if you haven’t done so already.
On Membrane Keyboard
A membrane keyboard uses rubber membrane domes to press the capacitive switches in the keyboard circuit for its operation. A key in this keyboard may get stuck if either the keycap or the membrane dome gets damaged so, you need to check both these parts.
Unlike a mechanical keyboard, you may not be able to remove individual keycaps on some membrane keyboards. But you can easily do so for other membrane keyboards. So, here we have listed the steps you can use for both types of keyboards.
- Disconnect or power off the membrane keyboard.
- If the keyboard contains removable keycaps (check official sources or gently try removing them)
- Use a keycap puller to remove the stuck keycap. Be careful as individual keys may have separate membrane domes that can easily get lost.

- Check the keycap and the upper keyboard case for any damage. If so, you need to replace the damaged part. If the locks on the case are damaged, you need to replace the whole case by opening the keyboard (go to step 3).
- Use compressed air, a Q-tip, or a soft-bristle brush to clean the keyboard (keycap and the upper case) at the same time. If the key has a separate membrane dome, take it out and keep it somewhere clean while you clean the keyboard.

- Check the membrane dome for any damage. If you see any tears, you need to replace the dome. If the keyboard contains a whole membrane layer with linked domes, you need to open the keyboard and then replace the membrane layer altogether.
- After replacing the damaged component, reinsert the keycap into its place.
- Use a keycap puller to remove the stuck keycap. Be careful as individual keys may have separate membrane domes that can easily get lost.
- If you need to open the keyboard,
- Use a screwdriver to remove all the screws on the keyboard.
- Carefully remove the upper part of the keyboard. Look for the screws under the stickers, if the part doesn’t come off easily. Then, try again.
- Check the dome below the stuck key for any damage. If so, buy another membrane dome or layer and then replace your original one.
- You should also check the top panel with the keycaps key for damage and similarly replace the panel if necessary.
- Also, make sure to wipe the circuit layer with a dry microfiber cloth beforehand if it is dirty. Don’t use any cleaning agent.
- Clean the inside of the top case or the membrane layer as well if you didn’t replace them.
- Reassemble the keyboard by reversing the disassembly process.
On Laptop Keyboard
A laptop key contains a different internal structure compared to external keys. It contains a keycap attached to one or more retainer clips through locks. The retainer clip in turn is locked to the keyboard panel through four pins.
Most laptop keyboards contain membrane dome keys, and you will see the membrane popping out from below the retainer clip. This dome is glued in on most keyboards but may be removable on some. A few modern gaming keyboards also have mechanical switches instead of the rubber dome but the rest of the parts are the same.
Similar to the other scenarios, you need to remove the keycap and then check what is responsible for the key getting stuck.
- Shut down the laptop and disconnect the charger. If it has a removable battery, take it out as well.
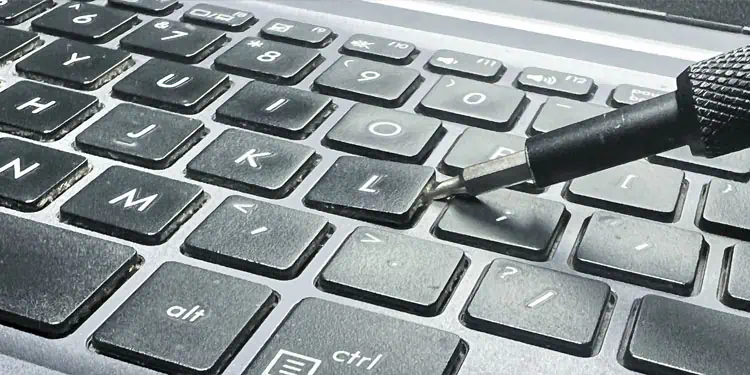
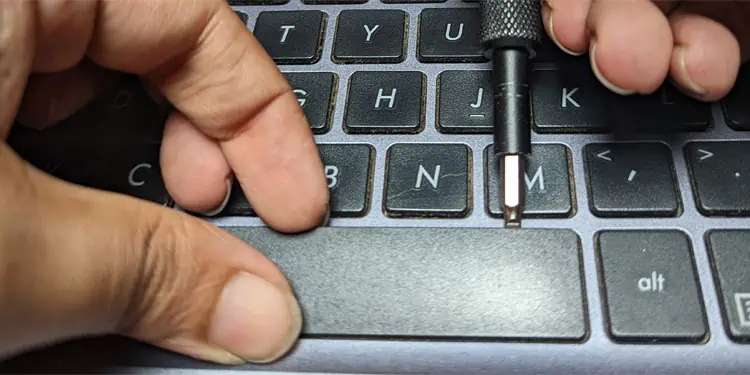
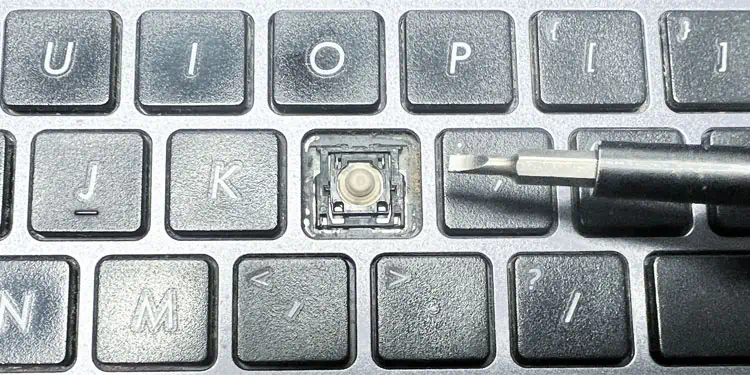
- Insert a flathead screwdriver into the key from the seam at the side as horizontally as you can. Make sure it stays on the top of the retainer clip.

- Hold the key with another hand so that you are gently pulling up the key from the side where you enter the screwdriver.
- Push the screwdriver horizontally inward so that the key pops out. Make sure not to pull the screwdriver upwards so as not to break any locks on the key.
- The space bar and other long keys have more than one retainer clip on the bottom. So, you will need to unlock the key from two sides by inserting the screwdriver from the top or bottom. They also usually contain two stability metal bars attached to the keys or on the keyboard case.

- Check the key cap, the retainer clip, and the key cap holder for any damage. You can look where the symmetry breaks or compare the key with another one that is not stuck. If the keycap or the retainer clips are damaged, you need to replace them.

- If the retainer clip is not locked properly, push it in on all corners to pop it back into its place.
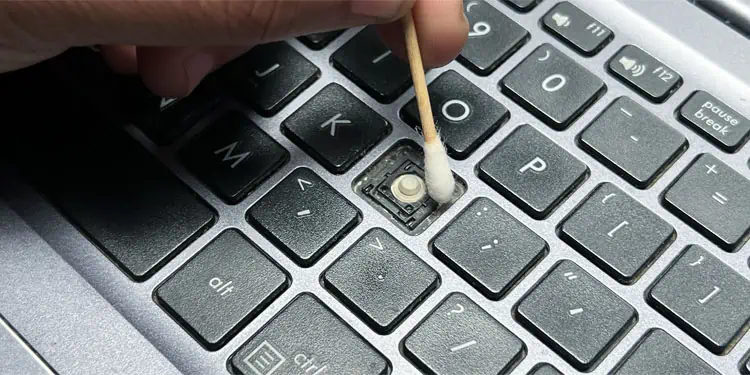
- You should also clean the keycap as well as the holder as the built-up dust can also cause the key to get stuck. Use a Q-tip or microfiber swab to clean the edges of the key holder and the keycap.
- If there are stuck gunks, you can dip the swab in rubbing alcohol and wipe the parts but make sure it has a higher alcohol concentration (less water). And don’t use too much so that you won’t damage the plastic parts on the device.

- Let the key dry off and then insert the keycap. Just align it in the proper direction and then press the key. If the symmetrical keys like ‘o’ don’t go in easily, you might not have aligned it in the proper orientation.
- If the key still gets stuck, there might be more dust below the retainer clip. Removing the retainer clip is very risky without the use of proper equipment and you might damage it. So, we recommend taking it to a hardware repair center instead.
If you think your keyboard key is damaged, you can refer to this article for a more detailed guide.
