The battery on your Lenovo laptop will stop charging if there are some issues with the AC adapter, the battery, or the battery controller. Other than that software components, like battery controller driver and battery firmware may also be responsible.
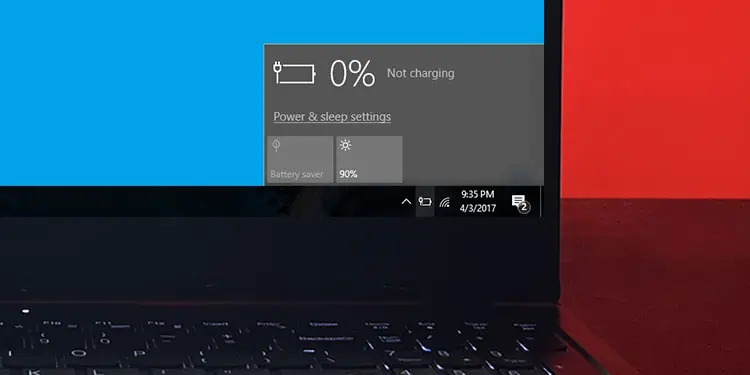
In such cases, if you hover over the battery icon on the Taskbar, you’ll see messages like “plugged in”, “plugged in, not charging” and so on. The icon will also look different depending on whether the system doesn’t detect the charger, the battery, or if there’s some other issue.
- By default, your system won’t start charging the laptop battery unless it is 94% or lower (i.e., at 95-99%) to protect the battery.
- If you want to use USB-C to charge your a laptop, you need to use the USB-C PD (Power Delivery) port as well as a PD charger.
Check for Battery Conservation or Optimization
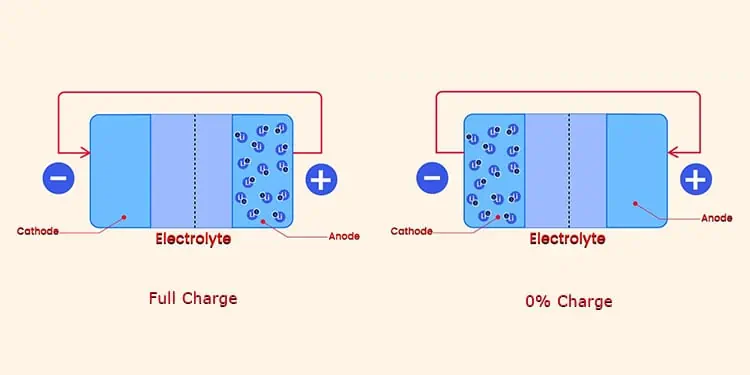
Every time you charge your battery, its maximum capacity decreases ever so slightly. This process further accelerates if you charge to 100%. It is because batteries work due to the movement of electrons and ions inside the individual battery cells. And at 100% or 0% the ions pool to one side and stress the battery, resulting in a faster reduction of its lifespan.

This is why Lenovo laptops come with a battery conservation feature that limits the charge to 60%. When this feature is enabled, your laptop won’t charge if you try connecting the AC adapter if your current battery is at 55-60%.
So if your current battery charge is in this range, disconnect the AC plug and try lowering it to 50-54. Then, connect the power cable again. If the battery starts charging, then battery conservation is enabled on your system. You can keep it as is without stressing over it as this is a natural behavior. Or you can disable this configuration if you want 100% maximum battery backup.
- Open Lenovo Vantage. If you don’t have this application, download it from Lenovo’s official website and open it.
- Click on Power under System Tools.
- Toggle Off Conservation Mode.

Check AC Adapter Connection
If you haven’t enabled battery conservation, you need to narrow down whether the AC adapter is causing the issue or your battery.
- Check if the Charging indicator glows when you connect the power supply. If not, it indicates a loose charger connection. You need to check the connections at three places: the power socket, the power brick, and the laptop. Check for damage at any parts or ports as well.

- Make sure that the power rating of your charger matches the input requirements of your battery. You can find these details on the stickers in the adapter’s power brick and the battery or the back of the laptop respectively.

- If available, use the charger with another laptop with similar power requirements. You can similarly use another charger with your laptop to check if the issue is with the charger.
- If you have a detachable battery, remove and then reinsert the battery, then connect the AC supply, Doing so will re-establish the connection between the battery controller module and the battery.
If your charger doesn’t work anywhere, you need to replace it. And if the power port on the laptop is damaged, take the laptop to a hardware specialist for repair. Alternatively, if your warranty is still valid, you can take it to a service center instead.
If everything is all right with the charger or ports, the issue is likely with your software components.
Check Battery Report
The Power Configuration tool on Windows allows you to create a battery report to check all the details on the battery including its health and life estimates. You can check it to see if your battery is nearing its end.
- Open Run.
- Type
cmdand press Enter to open the Command Prompt. - Type
powercfg /batteryreportand press Enter.
- It will say “Battery life report saved to file path
C:\Users\...\battery-report.html.” - Select the path and press Ctrl + C to copy it. Then, paste it on your web browser to open the .html file.
- Scroll down and check the Battery capacity history and Battery life estimates.

If your full charge capacity is very low compared to the design capacity, your battery is failing. Your only solution in this scenario is to replace the battery.
Power Cycle Laptop
Your hardware components, including the battery controller module, may not work properly after a power failure or some abrupt changes in your system. In such cases, you need to close and reopen them properly to refresh the components.
Even if you shut down your laptop, the capacitors in the components may still be holding some charge and preventing the devices from turning off. In such cases, you need to power cycle your laptop and drain all excess charge.
- Shut down the laptop.
- Remove any removable batteries and the AC power cable. Detach all peripherals as well.
- Press and hold the power button for a minute.

- Reconnect the battery and the AC adapter. Then, power up the laptop and see if it starts charging.
If your laptop has an internal battery, you can’t take it out. The laptop may have an emergency reset pin hole on the bottom, which you can press using a pin or straightened paper clip for 10-20 seconds to drain the capacitors. If you can’t find the pinhole, check the user manual or official sources for the exact location.
Reinstall Battery Driver
The battery controller module won’t work properly if there are some issues with its driver. You can reinstall the driver to take care of any possible bugs.
- Make sure that the AC power supply is connected.
- Press Win + R to open Run.
- Type
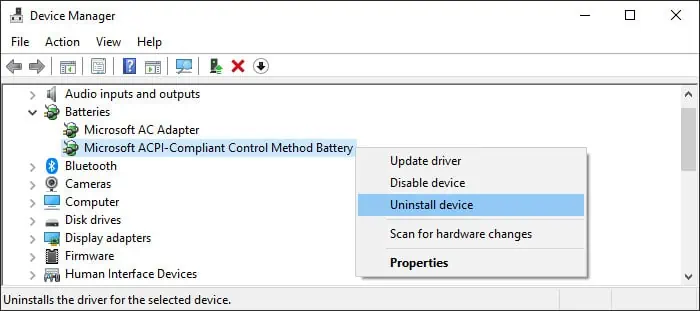
devmgmt.mscand press Enter to open the Device Manager. - Expand Batteries and right-click on Microsoft ACPI-Compliant Control Method Battery.
- Select Uninstall device and then Uninstall.

- Click on Action and select Scan for hardware changes.
If the battery is still not charging, you need to update the driver or reinstall it from Lenovo’s Support webpage.
Update Battery Firmware
Some prior battery firmware versions included bugs that prevented the battery from charging on Lenovo Thinkpads. Lenovo has long since resolved the issue in later firmware versions, so make sure to update to the latest version as soon as possible. You can use Lenovo Vantage for this purpose.
- Open Lenovo Vantage.
- Click on System Update under System Tools.
- Select Check for updates.

- If it shows a battery firmware update, check the option and select Install Now. In fact, it’s best to install all other available updates as well.


