Lenovo laptops primarily beep in three situations,
- When typing too fast or pressing many keys at the same time
- When plugging in or unplugging the AC power cable
- During startup.
The first type of beep indicates an invalid key combination warning as the laptop tries to interpret the simultaneous keystrokes as a key combination. The second situation is also a simple alarm denoting the respective action and does not affect your system in any way.
You can disable both of these beeping features by changing your BIOS settings. You need to access the BIOS (F1 or F2 key) and go to the Configuration or Config tab to find such options.
Startup beeps, however, indicate POST errors and are more serious. The laptop runs a Power-On Self-Test (POST) sequence from its BIOS to check all hardware components before handling the control to the kernel of the Operating System. If it finds any issues during this diagnosis, your computer starts beeping in particular sequences depending on the exact issue.
Resolving POST Beeps
If the screen also displays some error message along with the beeps, you can try searching those on the internet to obtain relevant causes. If not, try listening to the beeps carefully and note down the sequence. Then, you can search for the exact cause corresponding to that sequence on the official sources.
For instance, on Lenovo ThinkCentre,
- 3 short – 1 long: Memory issue
- 2 long – 3 short: Graphics card issue
- 4 long: Lack of PCIe/PCI MMIO or Shadow RAM
You can also use the Lenovo PC Diagnostics app on your mobile phone to determine the reason automatically. After that, go to the relevant solution to resolve your issue.
Use Lenovo PC Diagnostics App
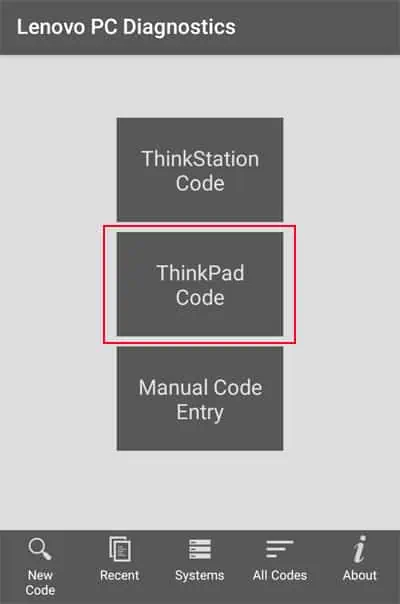
Lenovo provides a PC diagnostic app, which you can install on your android or iPhone devices to diagnose the startup beeps on Lenovo ThinkPads.
- Download the app through the PlayStore and open it.
- Tap on ThinkPad Code.

- Give permissions to the app if necessary.
- Power up your laptop and place the mobile near it so that it can hear the beeps.
- It will show a description of the error along with the solutions you can take to resolve the issue.
You can also tap on AQUIRE, and then press and hold the Volume up or Fn button on your Lenovo keyboard to get a different beeping sound. The app will use it to get the serial number of the device and determine if the warranty is still valid.
Power Cycle Laptop While Resetting CMOS
You can resolve many issues with your devices and system voltage by power cycling the laptop. Doing so drains any excess charge on the components and properly refreshes them. So, it’s better to do so anyway whenever you encounter POST errors.
In addition to it, it’s also better to clear the CMOS memory to reset your BIOS at the same time. If you made some undesirable changes to your BIOS settings, your hardware devices may not work properly.
- Take out any external battery, power cords, and peripheral devices.
- Remove all the screws on the back of the laptop using a screwdriver.

- Take off the case using a prying tool and look for internal batteries.
- If they are attached using cables, remove them. You may need to unscrew some batteries. Also, make sure not to touch any circuit unless you are wearing antistatic equipment.
- Detach the cable of the coin-cell battery as well which resets your BIOS. If the device has a CMOS battery without any cables, you need to gently push aside its lock or pop it up from an open side using a screwdriver.
- Press and hold the power button on the laptop for 30 seconds to a minute to drain all charge.

- If you can’t remove some batteries, you need to push a thin pin into the emergency reset hole and press the button there.
- Now, reassemble the laptop by reversing the steps above.
- Reconnect the external battery and the power cable (do not connect any peripherals).
- Power up the PC.
Reseat RAM
Your system loads all active processes to your RAM. So, the POST operation does not allow booting if there are some issues with the RAM. First, you need to reseat the RAM to make sure it is working properly.
- Open Remove the AC power cord and external battery.
- Remove the back panel of the laptop with the help of a prying tool after unscrewing it. Some devices have multiple panels on the back where you can simply remove the one just above the RAM (the panels should have some indications of the components below them).
- Disconnect any internal battery.
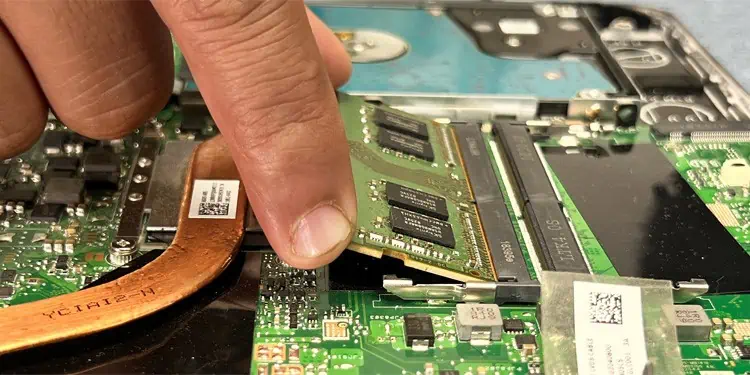
- Push the locks holding your RAM to the sides to pop the RAM up. Then, pull it out.

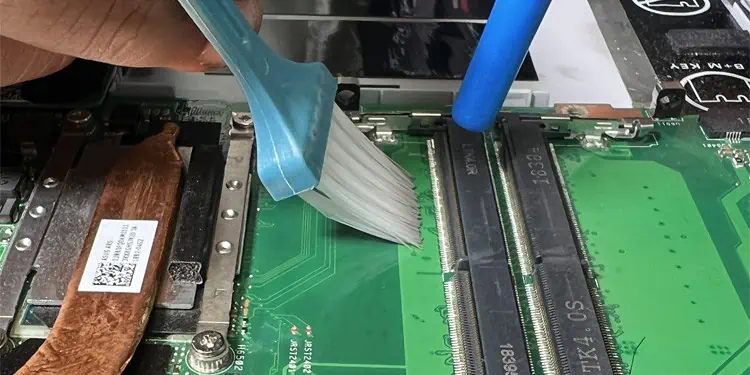
- Clean the slots and the RAM using compressed air or an ESD brush.

- Put the RAM back into the slot in the proper orientation and push it down to lock it back in place.
- Reattach the internal battery and reassemble your laptop.
- Then, connect the power resources and turn on the device.
If the error persists, try connecting the RAM to another DIMM slot. If it still doesn’t work, you need to replace the device with a new one.
Reconnect Display Cable
If you were able to narrow down the beeps to display issues using the app or by searching on the internet, you need to first check the cable connection.
- If the screen part of your laptop contains some small stickers or rubber circles/squares, they have hidden screws. So, you need to take them out and unscrew the screen.
- Then, use a prying tool on the seams to gently pop out the screen bezel.

- On some laptops, the bezel is fused with the hinge covering. In this case, you need to close the lid and pry out the case from the seams on the hinge.
- Take out the bezel and unscrew the LCD panel on all sides.
- Pull out the LCD panel and place it carefully on the keyboard to prevent damaging the display cable.
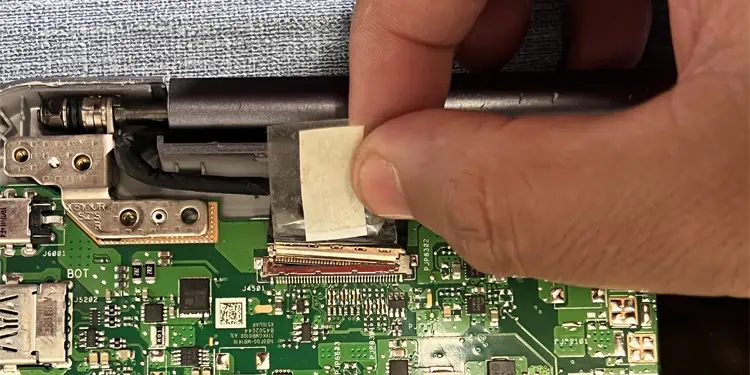
- Now, push the metal part on the connector from the port on the panel using a screwdriver to detach the cable. Don’t try to pull the cable as it may break.
- Clean the port by using an ESD brush. Then, plug back the cable while making sure all the pins are in properly.
Then, power up the laptop and see if you encounter POST beeps. If you do, you need to reattach the display cable on the system board as well.
- Screw back the LCD panel but don’t cover it with the bezel yet.
- Remove any external battery if present.
- Pry out the back case on the laptop after removing all the screws.
- Disconnect the internal battery and look for the display cable.
- Remove it in the same way you did before, clean the port and then reattach the cable.

- Reconnect the batteries and reassemble the laptop.
- Power up your PC.
If you still encounter the beeping error, try connecting your PC to an external monitor and see if it displays properly. If so, you need to replace the LCD panel. After replacing it, reassemble everything together by reversing the above steps.
Sometimes, the cable itself may be damaged. Replacing this component is more difficult as you need to take apart the entire hinge to remove it. So, we recommend seeking help from hardware experts.
Check Fan
Your laptop will also not boot if your CPU fans are not running to protect the processor from overheating. If the beep sequence indicates that your fans are responsible, open your laptop’s case using any of the above methods and clean the fans. We recommend using a toothpick to hold the fans and then spraying canned air with different angles for thorough cleaning.
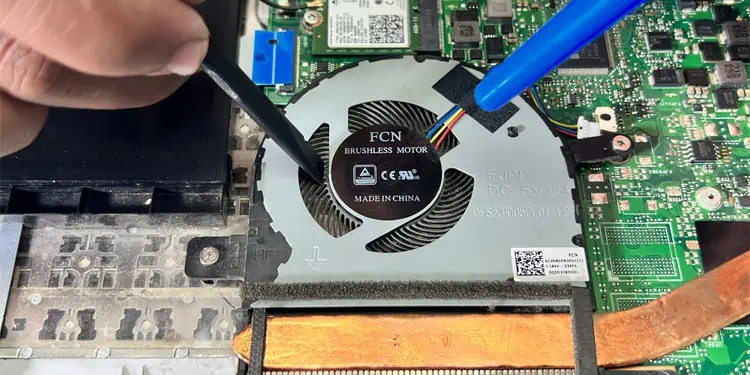
After that, put everything back together and check if the POST error persists. If so, your fan may be damaged and you need to have it replaced.
Replace Hardware Components
If the diagnostic app shows that your external devices are drawing off too much voltage, you can simply remove them to resolve the issue. Then, you can easily replace them with other devices which don’t have such problems.
However, for internal devices, replacing them is not so easy. It’s best to take your laptop to a hardware specialist or a Lenovo service center to replace components such as the system board, PCIe or DIMM slots, fans, graphics cards, and so on.
