Your Lenovo laptop may not turn on for many reasons. For some it could be as simple as a drained battery or loose cables, while for others it could be more complex, like a damaged PCB or corrupt software.
The following errors are more probable to cause your device to not boot.
- Damaged power cables and peripherals
- Damaged/malfunctioning internal components
- Display related issues
- Corrupt system files
- Physical damage/Ingress of foreign material
- Damaged battery
To diagnose and fix these problems, you must test and evaluate using multiple methods. For fixing faulty components, visually inspecting and then repairing/replacing them is typically the most effective approach.
How to Fix Lenovo Laptop Not Turning On
Power Component Issues
Warning: Before attempting this fix, we suggest you to remove all cables and peripherals from the wall outlet or the power socket to not risk getting electrocuted.
Components such as the A/C adapter, power cables and power strips are responsible for regulating and delivering safe amounts of electricity to your laptop. To diagnose if the problem is due to power components, perform a visual inspection on them first.
If any one of these components have been damaged, or is malfunctioning, then this may be causing your laptop to not power on.
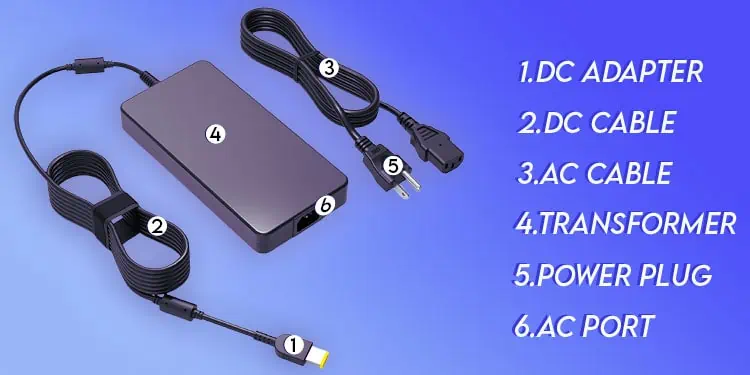
- Power cables: Damaged power cables can potentially cause a short circuit, which can further damage your laptop due to faulty power supply. If there are any bends, twists or breakages, this may be causing the device to not receive enough current to power on or charge your laptop.
Replacing the power cable would be the most safe and effective solution. A new power cable is relatively cheap and you can easily buy and replace it. While buying, make sure that the cable is rated to provide enough power for your laptop.
- A/C Adapter: Another issue can be due to a faulty A/C adapter. These components convert high-voltage mains electricity to a laptop safe D/C current. When connecting the adapter to a power strip, if there is any crackling sound or a burnt smell, then the A/C adapter may be at fault.
To fix this, replace with a genuine, Lenovo authorized A/C adapter that is compatible with the model of your Lenovo laptop.
- Power Strips: Power strips, multiplugs or outlet extenders are peripherals that can safely extend mains power to your device. They are responsible for increasing the amount of devices that can be connected to a single wall outlet.
For power strips, depending on the model, replacing the damaged fuses can suffice. Otherwise, the whole unit needs to be replaced.
Power Button Issues
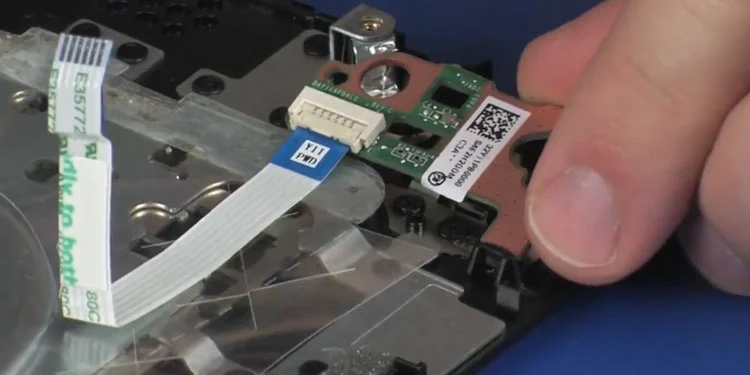
If the power components are running smoothly, check if the problem lies on a faulty power button. Your power button might not work if there is a damaged circuitry, broken components or dirt and dust ingress.
To check if the problem is due to the power button, connect your laptop to a charger and see if the charge indicator is on. If the light turns on, you can perform the following steps to check if the problem is due to a faulty power button.
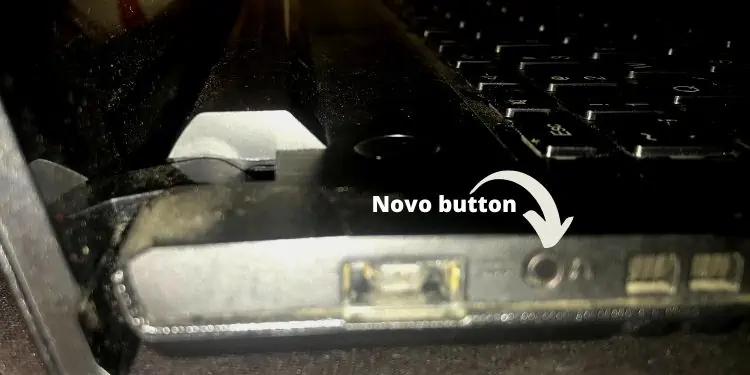
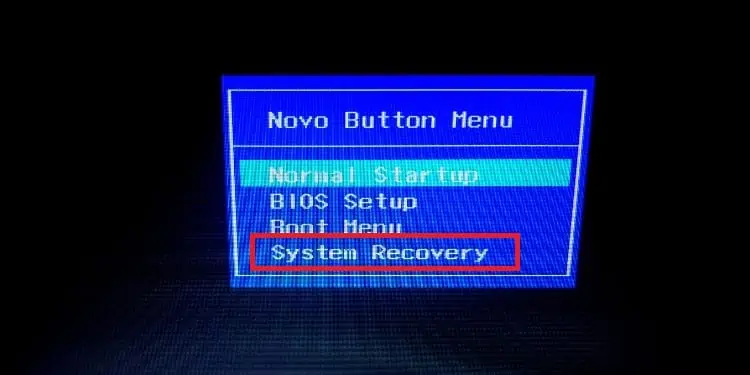
- Before disassembling, press the ‘Novo’ button available on some models of Lenovo laptops to see if the device boots into recovery mode.

- If the device turns on, remove the access panel/cover of your laptop and then extract the power button.

- Clean any dirt, grime and dust from it by using a lint free cloth or compressed air.
- If the power button has any loose or improperly connected wires, reseat or reattach them.

- For components that are damaged or broken, if possible repair, otherwise replace them entirely.
Battery Related Issues
Batteries are consumable components. Your laptop not turn on if the battery has no power, has loose or damaged connections/cables or there is a malfunction like short circuit or damaged battery chip.
- Connect your laptop to a charger and see if the charge indicator lights on

- Let the battery charge for sometime and then, try booting it.
- If the issue persists, detach the back cover and then remove the battery if the laptop has a non-removable battery.

- Press the power button for at least 8-10 seconds and again, insert the battery and check if the laptop boots.
- If the device fails to boot, reset the battery connection by inserting a pin into the emergency reset pinhole.
- If there is no reset pinhole, press the power button for 8-10 seconds to see if the device turns on.
- If the issue is because of a dead CMOS battery, replace it with a working one. If the battery is soldered, you may need to take it to a professional to replace it.

If your laptop has a user removable battery,
- Power cycle the laptop and then check if the device turns on normally.
- If the laptop does not boot, remove the battery and connect the charger to see if it boots.

- If the device turns on by establishing a direct connection, you may need to replace the battery.
Internal Component Issues
Laptops have hundreds of parts that work in tandem to function. If one component goes off, the system might fail to boot.
Damage to internal components such as the RAM, motherboard, storage or the CPU can cause the laptop to fail to boot. If any of them have corroded traces, shorts or burn marks, they could cause your laptop to not power on.
To troubleshoot these components,
- Disconnect the charger and make sure your device is turned off
- Remove the back panel and disconnect the battery from your device
- Now carefully remove the below mentioned components and inspect them to see if there are any problems mentioned above.
- Motherboard: After disconnecting the battery from the motherboard, inspect for any water damage, corrosion, disconnected wires and physical damage. In-case of damage, repair the affected component or replace them. If that is not possible, apply for an exchange or send it to an authorized repairman for fixes.

- Storage: To check for storage issues, remove them and check for any visible damage. Any kinks, cracks or damaged/ missing connectors should be repaired or replaced. If the storage (hard disk/ optical disk) has moving components, servicing or replacing them can usually fix the issue.

- RAM: Sometimes the issue can also be caused by faulty RAM. While inspecting, check and see if it is seated properly on the SODIMM slot. If all appears ok, remove the RAM and check for any damaged connectors, leads or modules. Clean the RAM or replace the component if there is visible corrosion/damage.

- Motherboard: After disconnecting the battery from the motherboard, inspect for any water damage, corrosion, disconnected wires and physical damage. In-case of damage, repair the affected component or replace them. If that is not possible, apply for an exchange or send it to an authorized repairman for fixes.
Display Related Issues
If the keyboard lights and internal components such as fans are working when turning on your laptop, then the issue is probably related to the display. The problem could be due to issue with display components.
Likely cause for this to happen is because of broken connectors, damaged panel or related components such as the power controller malfunctioning.
To test if the display is damaged,
- Connect your laptop to a charger.
- If the charging indicator glows, connect a HDMI cable from your laptop to an external display and press the power button.

- If the laptop is being projected, and all other functions are working normally, then the display component is likely the issue.
Replacing the damaged display component, or sending it for repairs to an authorized technician can help solve the issue. Additionally, issuing an RMA and exchanging the laptop if it still has a valid warranty can also be done.
Software Related Issue
Lastly, your Lenovo laptop may fail to boot if it has performed an unsuccessful OS (operating system) or (Basic Input Output System) BIOS update. An unsuccessful update may corrupt the system files causing it to not boot when pressed the power button.
To attempt this fix,
- Press the Novo key (valid laptop models) and try accessing the BIOS or the recovery mode.

- If successful, try restoring the OS of the device by inserting a recovery media or in the case of BIOS, re-flashing the device and reinstalling the BIOS.
If unsuccessful, send the device to a qualified repairman and see if either repairing or exchanging the device for a new one can help resolve the issue for you.

