No matter how sturdy and well-built the Lenovo Laptops are, they are not immune to the common problems that plague other manufacturers’ devices. Issues with Wi-fi connectivity is one such problem frequently experienced by Lenovo Users.
The majority of Lenovo products come with Broadcomm chips, which have been known to have serious bugs that cause Wi-Fi connectivity issues. The main contributors to this problem appear to be bugs in WLAN adapter drivers and misconfigured Power management settings on Windows.
Other factors are also contributing to this issue, which we will discuss in detail and offer solutions to help you connect to Wi-Fi.
Reasons for Lenovo Laptops Not Connecting to WiFi
- Wi-fi Switch on the Laptop is turned off
- Issues with the Router
- WLAN is disabled in BIOS
- Wireless adapter driver is disabled
- Incorrect password used for connecting to the Wi-fi
Fixes for Lenovo Laptops that won’t connect to WiFi
To begin, check to see if you have enabled Wi-Fi from the system tray. If you can’t turn on Wi-Fi or connect to a Wi-Fi network, restart your computer and see if it works now. Sometimes some minor glitches in Windows can also cause such connectivity issues that get fixed by the system restart.
Another possible cause of this Wi-Fi connectivity problem is not properly configuring the Wi-Fi Network’s authentication process. Check that you are attempting to connect to the right network and that you have entered the correct password.
Turn on the Wi-fi Switch
Lenovo laptops include a dedicated Physical switch that can be used to turn the device’s Wi-Fi on/off.
On most Lenovo Laptops, pressing Fn + F5 gives you access to the Wi-fi controls. For the Idea Models, pressing this key combination will open the Lenovo Wireless Device Settings window. Ensure that the Wireless Network card is On in this setting.
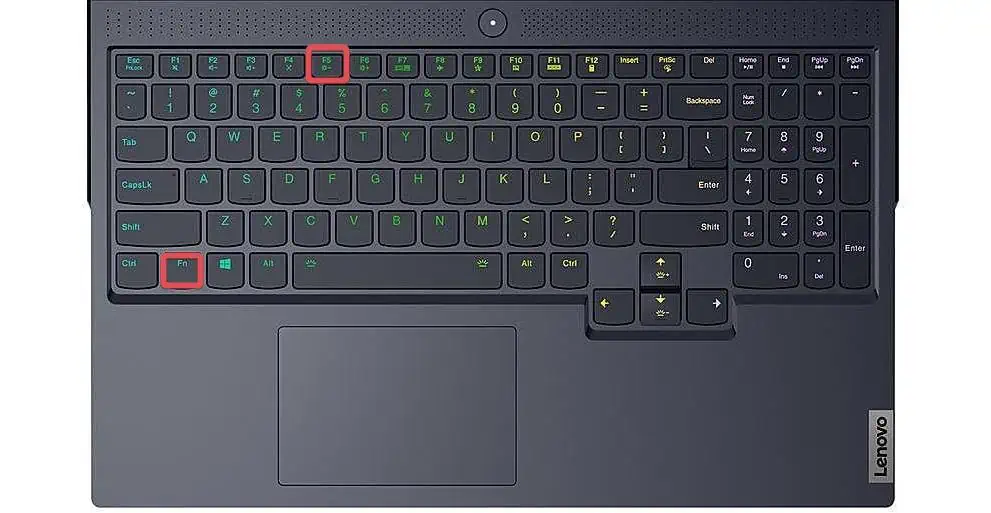
For the latest Thinkpad models, pressing the F8 gives you the option to enable or disable the Wireless Radio. Make sure to change its Status to On if you find it disabled.
Rebooting the Wi-Fi Router
The issue could very well be related to your Wireless Router. Therefore restarting the router is always the first thing to do for most connectivity issues.
For this, disconnect the Wireless Router from the power source. Wait for about 30 seconds and plug it back. Finally, check if the Lenovo Laptop can get connected to the Wi-fi network.
If you’re still having connection problems, try connecting to the Wi-Fi with another device (Mobile phone, tablet etc.). If the connection does not get established on the other device, the problem is most likely with the router or the ISP. Contacting the ISP would be a good option in this case.
If the connection issue is limited to your Lenovo laptop, try the fixes suggested below.
Disable Airplane Mode
Most of the time, users unknowingly leave their devices in Airplane mode. This will disable all connection mediums on your device, including cellular and Wi-Fi networks.
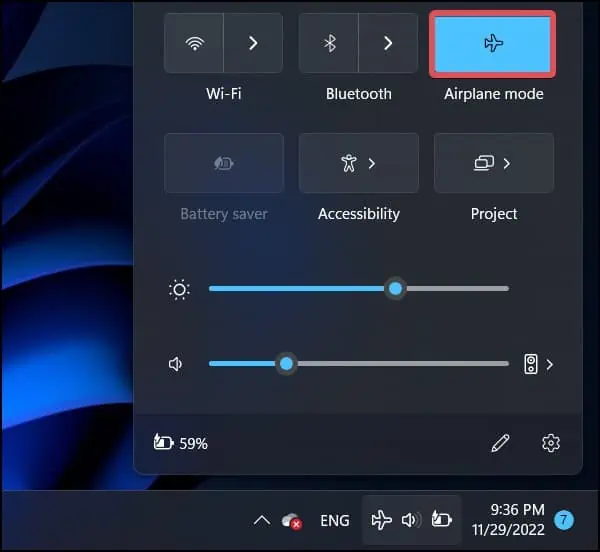
- Click on the Wi-fi icon from the System Tray.
- Ensure that the Airplane mode is turned off. If you see it enabled, click on it to turn it off.

- Now, see if you can connect to the Wi-fi.
Enable Wireless LAN in BIOS
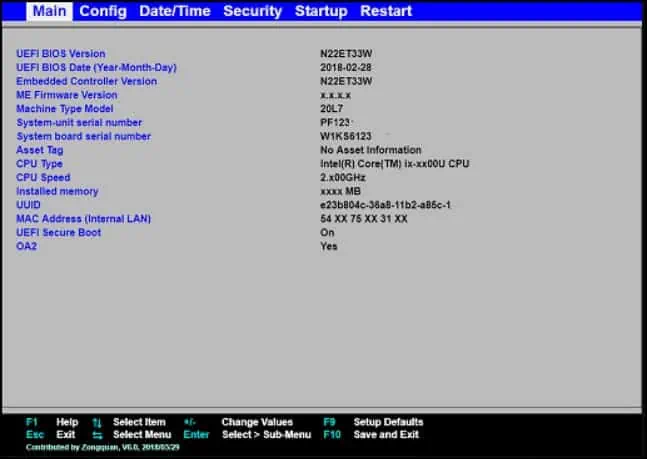
Users can configure their wireless connections (WLAN and Bluetooth) from the BIOS. Connecting to the WiFi would be impossible if the WLAN was disabled in the BIOS of your Lenovo device.
- Restart the computer and enter the BIOS.
- Go to the Config or Advanced Section.

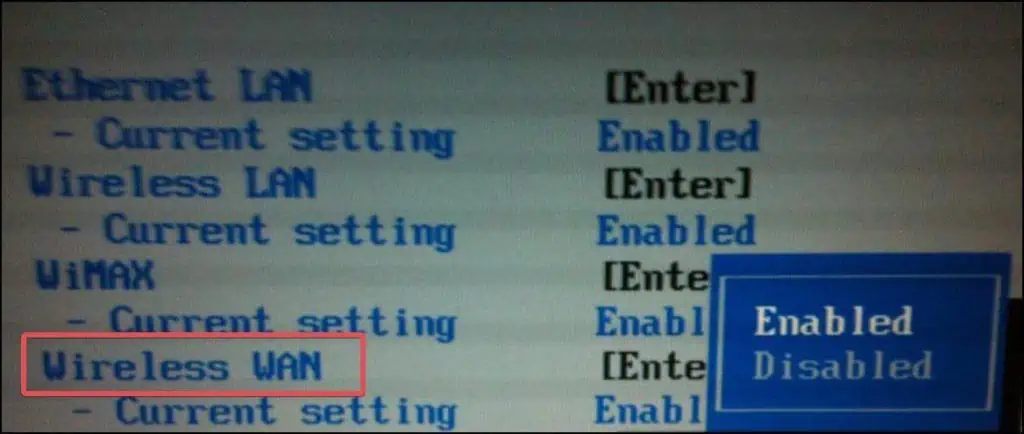
- Navigate to the WLAN device option. This option also can be named as a Wireless device on some models of Lenovo Devices.
- Set the option to Enabled.

- Save the changes and Exit from the BIOS.
- When Windows Boots up, turn on the Wi-fi and check if it can connect to the network.
Enable the Wireless Adapter Driver
WLAN adapters driver plays a crucial role in the operation of Wi-fi on your Lenovo device. If these drivers are disabled, you wouldn’t be able to get connected to the Wi-fi. Follow these steps to enable it from the device manager.
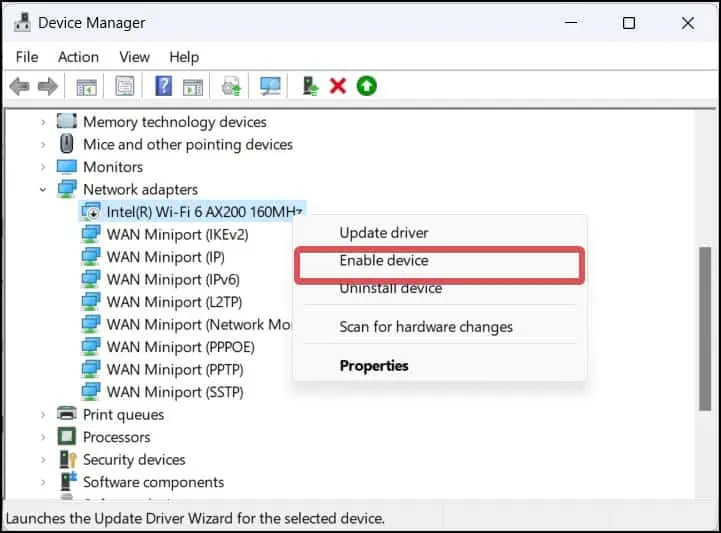
- Press Windows Key + X and open the Device manager.
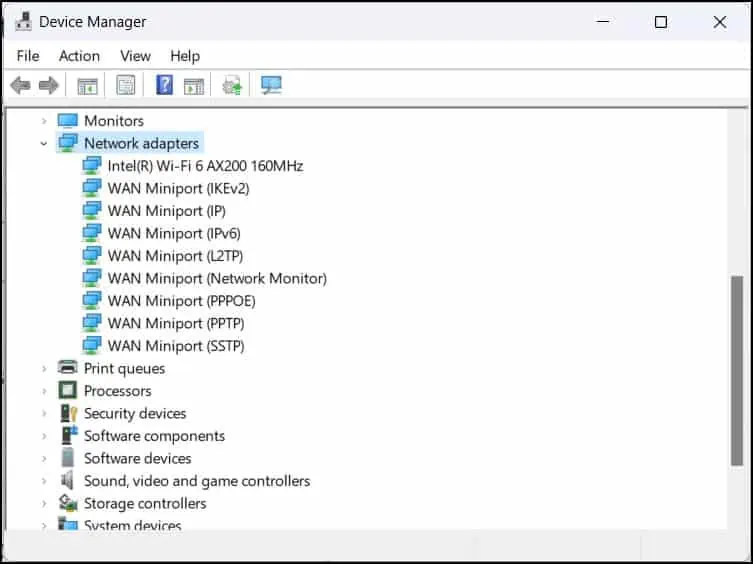
- Go to the Network Adapter section and right-click on the Wi-fi Adapter.

- Click on Enable device option and close the device manager.
Update / Install the Wifi Drivers
Wi-fi Drivers are important for establishing communication between the network adapters and your Lenovo Laptop. If these drivers suffer any corruption or get outdated, it can trigger connectivity issues as such. Updating the Wi-Fi driver can resolve most of the issues with it.
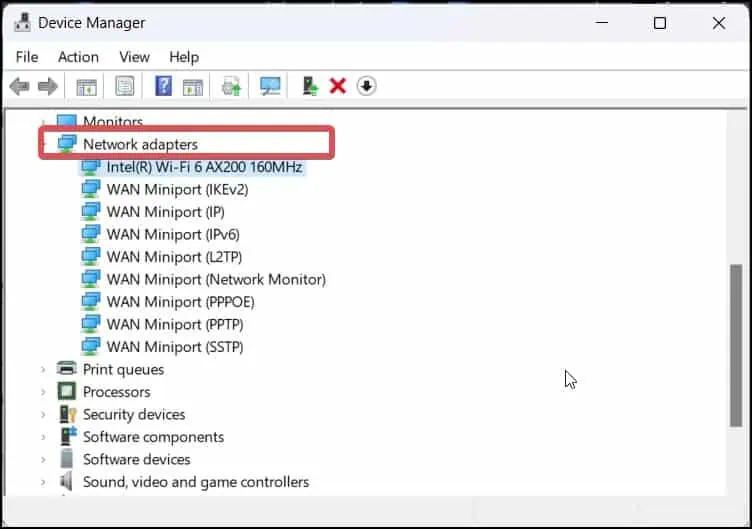
- Press Windows Key + X and open the Device Manager.
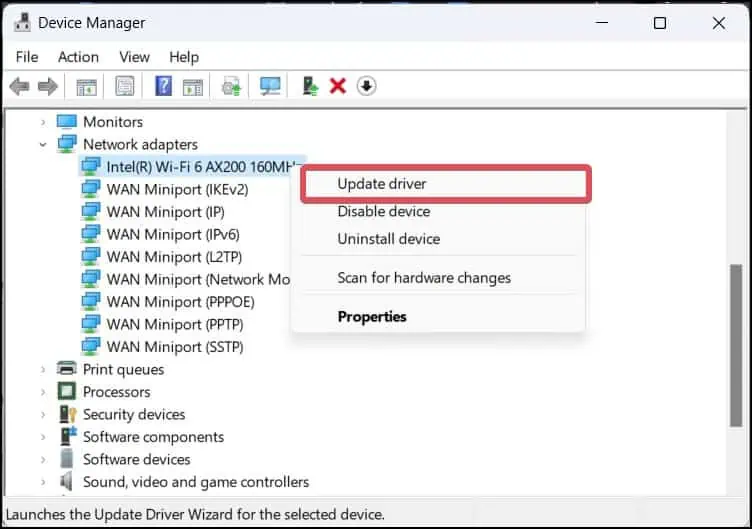
- Under the Network adapters, select the Wi-fi Driver and Right-click on it.

- Select Update Drivers.

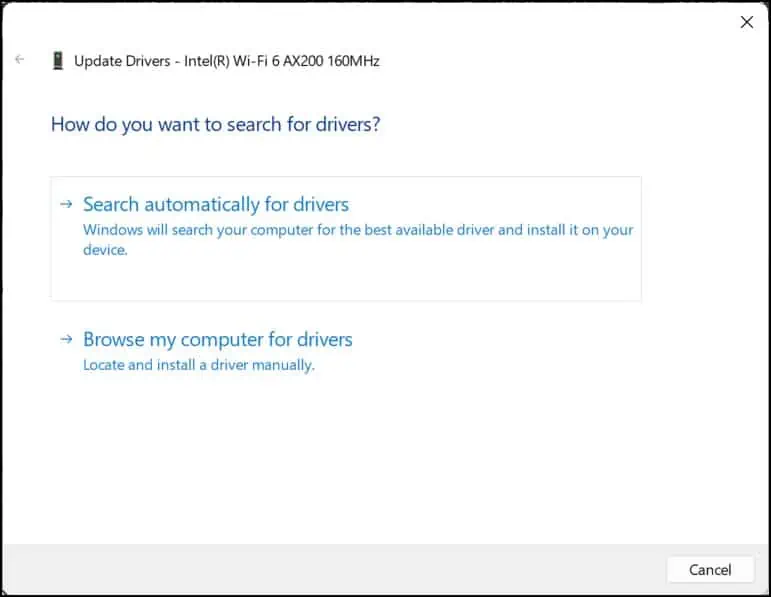
- Choose the option Search automatically for drivers.

- Follow the prompts and install the latest available drivers.
If there is no Wi-Fi icon in the system tray and Wi-Fi drivers in the device manager are missing, this indicates that the drivers have not been installed on your Lenovo device. You can install the Wi-Fi drivers manually on Windows. The same process can be followed to update the drivers manually.
- Go to the Lenovo Support Website.
- Select the Lenovo Device you own from the list. It also has the option to detect your device model automatically.
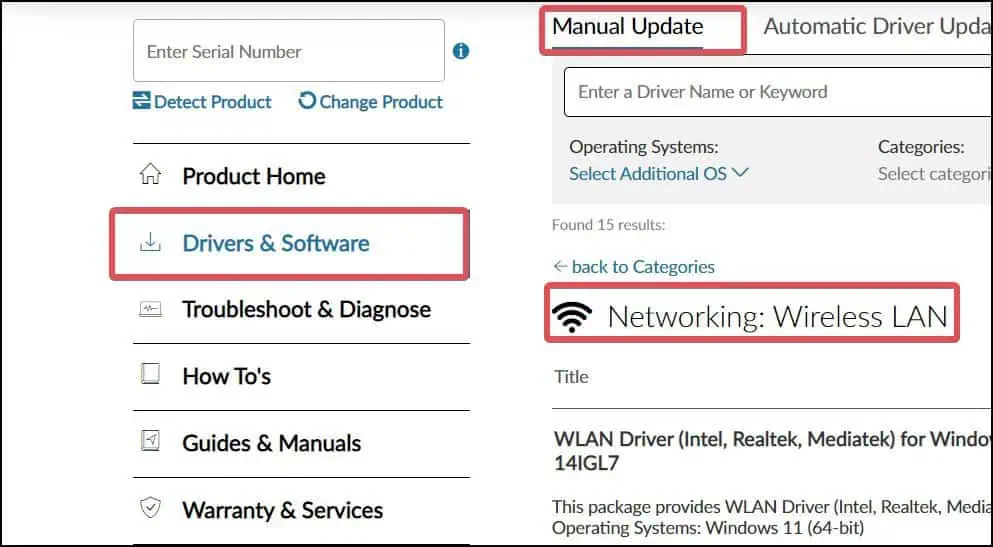
- Once you reach the dedicated page for your device, go to the Drivers & Software section.

- Click on the Manual Update tab.
- Find the Networking: Wireless WAN driver and download it.
- Run the executable file and install the Wi-fi Drivers.
Restart WLAN Auto Config Service
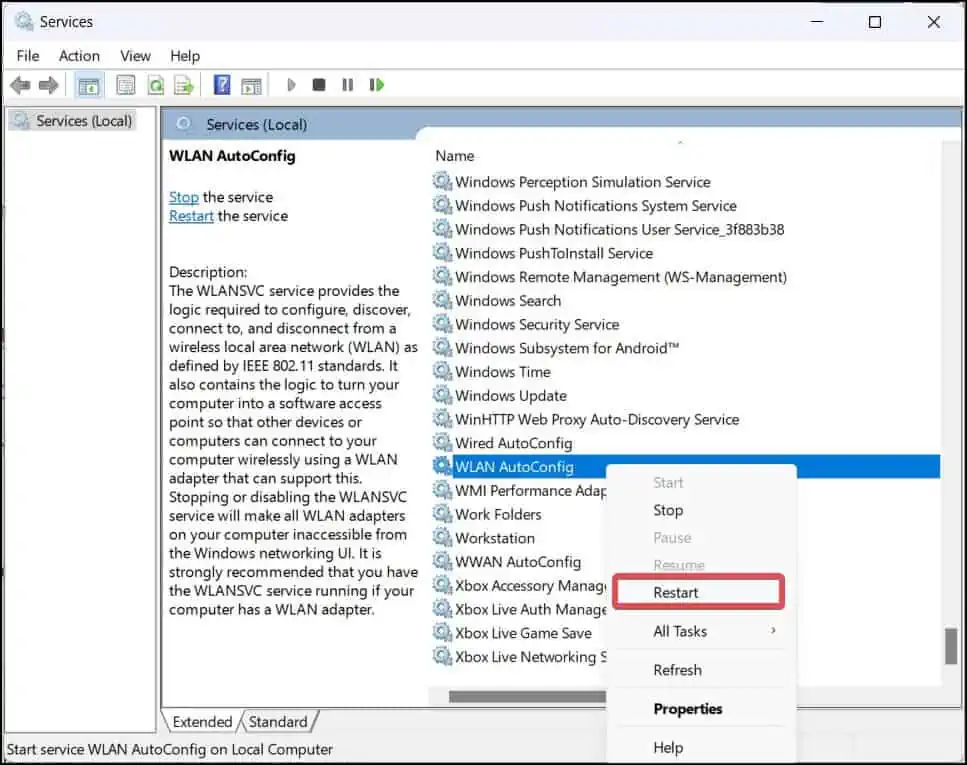
The WLAN AutoConfig service chooses the wireless network with best signal and connects the computer to it automatically. If this service does not start, it may cause problems with Wi-Fi connectivity. You can manually restart this service to resolve the issue.
- Press Windows Key + R, type
servies.mscand hit enter. - In the Services, locate a windows service named WLAN AutoConfig.

- Right-click on it and select Restart. If the Restart option is not available, select the Start option.
You can perform this from the Command prompt as well.
- Type
netshand hit enter. - Now, type
WLANand hit enter. - Finally, start the WLAN Autoconfig service by using this command line.
set autoconfig enabled=yes interface="<Name_of_Wireless_Network_Connection>"
For instance, for a Network connection named “Sigma“, use this command as set autoconfig enabled=yes interface="Sigma"
Disable the Power Management Feature for Wi-fi Adapters
When the wireless network is idle or inactive, the power management configurations on Windows disable the WiFi adapters for power efficiency. You can turn off this power management configuration to solve the issue if this is the case.
- Open the Device Manager.
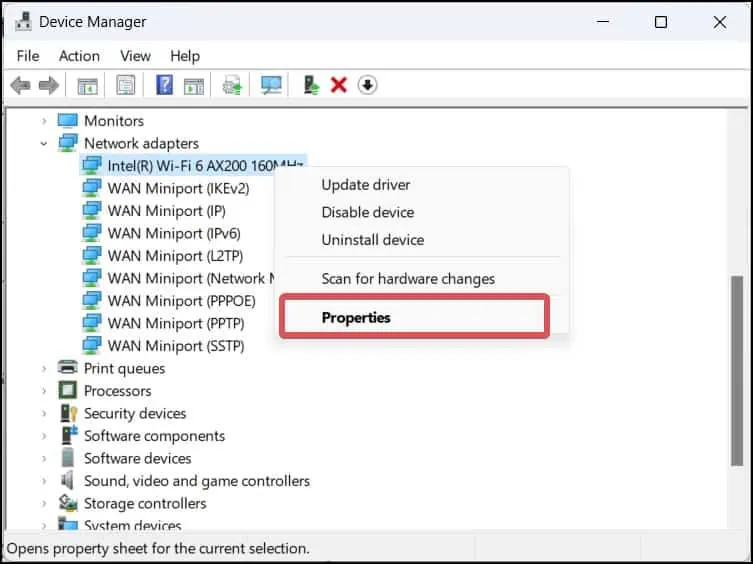
- Go to the Network Adapters section and Right-click on the WLAN device.

- Click on Properties.

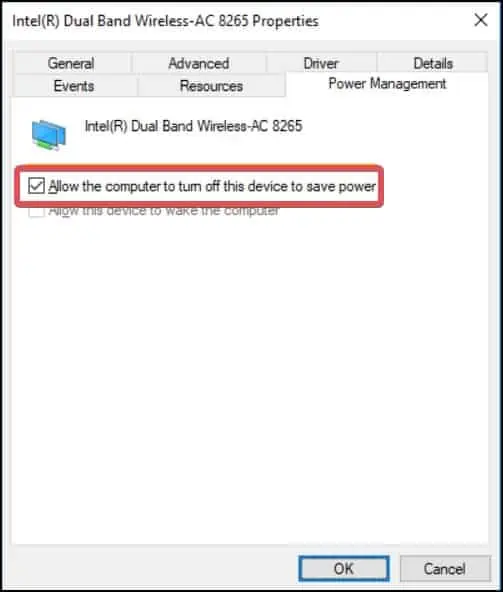
- Go to the Power Management tab.

- Uncheck the Allow the computer to turn off this device to save power.
- Click on Apply to save changes
Resetting Windows is your last resort if your Lenovo device still won’t connect to the Wi-Fi despite using all of these recommended fixes. For this purpose, we have a detailed guide for you on how to reset the Windows.

