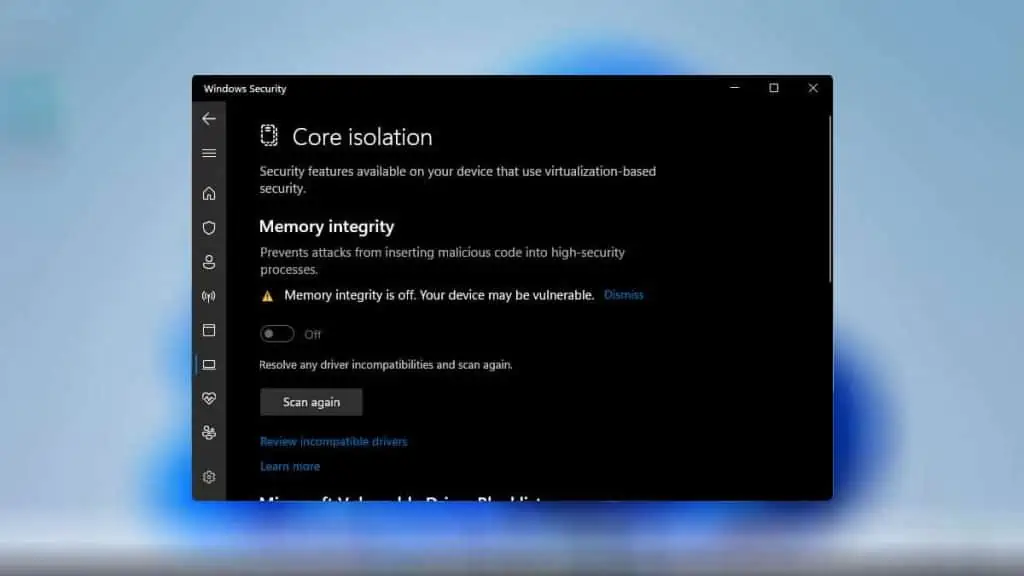
Memory Integrity is one of the components of Core Isolation. It uses virtualization-based security to prevent applications/third-party software from injecting malicious code into core system processes.
Windows enables Memory integrity by default. However, Windows turns off this feature if it detects any issues with the device drivers. It could be a corrupted, incompatible, or outdated driver. So, the best way to resolve the issue with memory integrity is to review these incompatible drivers and update or remove them.
Review Incompatible Drivers
One particular reason you cannot enable memory integrity is due to driver complications. It could be an outdated or corrupt driver that is restricting you from enabling memory integrity.
To enable Memory Integrity, you first need to review incompatible drivers.
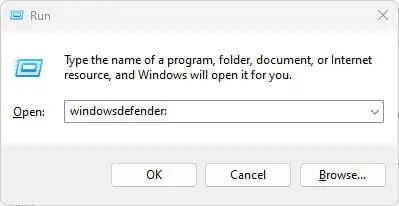
- Press the Windows + R key to open Run.
- Type
windowsdefender:and press Enter. This will open Windows Defender.
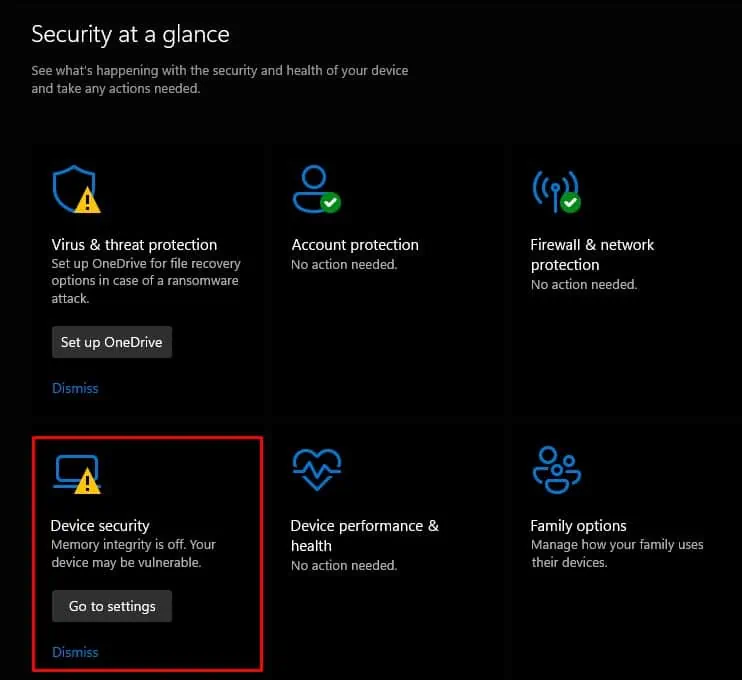
- Click on Device Security.

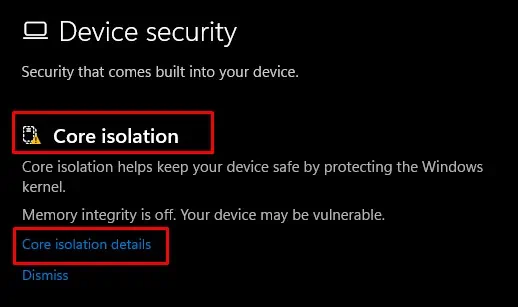
- Under Core isolation, click on Core isolation details.

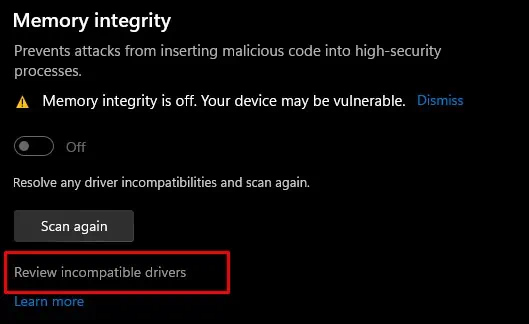
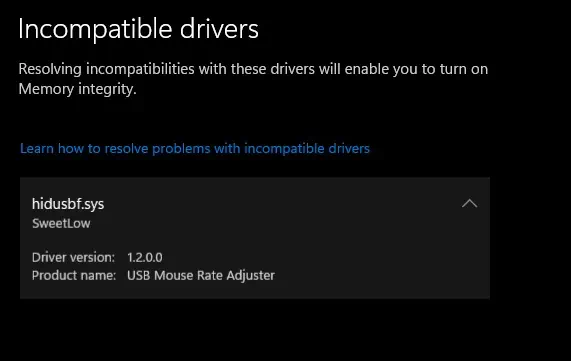
- Under Memory integrity, click on Review incompatible drivers. Here, you will see a list of incompatible third-party drivers.

- Click on it and note the Published Name. The Published name will have a
.infextension. If you do not see a Published name, simply note the Product name or the incompatible driver name.
Once you have the Published/Product name, you need to either update the driver or remove them.
Windows does not recommend removing the driver, so we will first try to update the driver and see if it fixes the issue.
Update Incompatible Drivers
To enable memory integrity, we will try updating the outdated drivers mentioned above.
- Press the Windows + X key and select Device Manager.
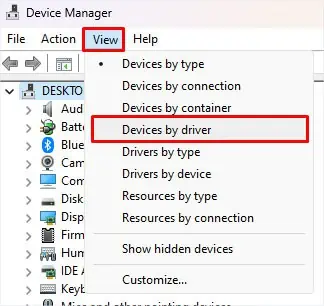
- Click on View and select Devices by driver.

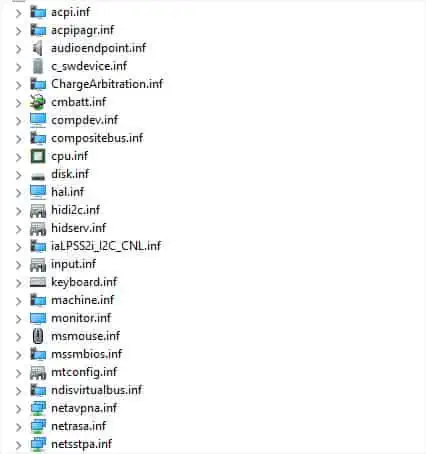
- Here, search for the driver that matches the Published name or the incompatible driver name.

- If you are unable to figure out the Published name,
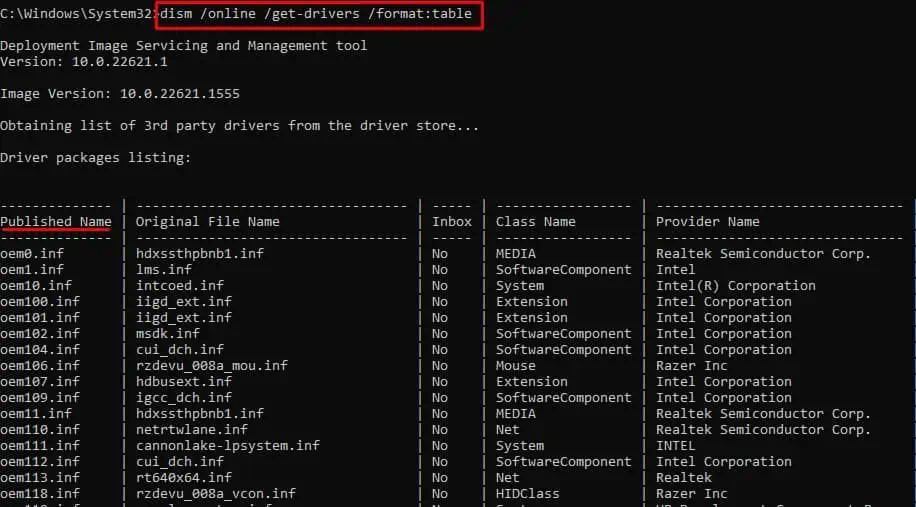
- Open Command Prompt with elevated permissions.
- Type this command and press Enter:
dism /online /get-drivers /format:table
- Check the Published name column for the incompatible driver and check its corresponding Provider Name.
- Once you know the manufacturer’s name, search for the drivers and install it using device manager.
If the driver is not available, try updating the application. It should automatically install the latest driver as well.
Delete Incompatible Drivers
If updating the incompatible driver does not work, you can remove the entire driver. Here’re the ways you can do it.
Using Command Prompt
This step is only applicable if the incompatible driver list has a driver with a Published name. If you do not have a Published name value on the incompatible driver, you can try the next method.
- Press the Windows + R key to open Run.
- Type
cmdand press Ctrl + Shift + Enter to open Command Prompt as Admin. - Type
pnputil /delete-driver <Published Name> /uninstall /force. Replace<Published Name>with the incompatible driver’s Published name.
Using Autoruns
To determine the faulty driver in Autoruns, you need to find the application that is using the driver with said Published name. You can do this using the DISM command.
- Open Command Prompt as Administrator.
- Type
dism /online /get-drivers /format:tableand press Enter.
- Note the Provider Name corresponding to the driver’s Published name.
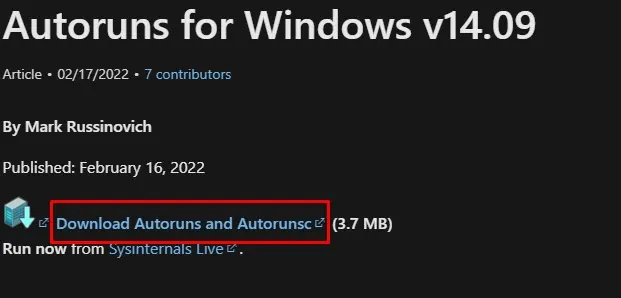
- Now, download Autoruns and extract the downloaded folder.

- Open
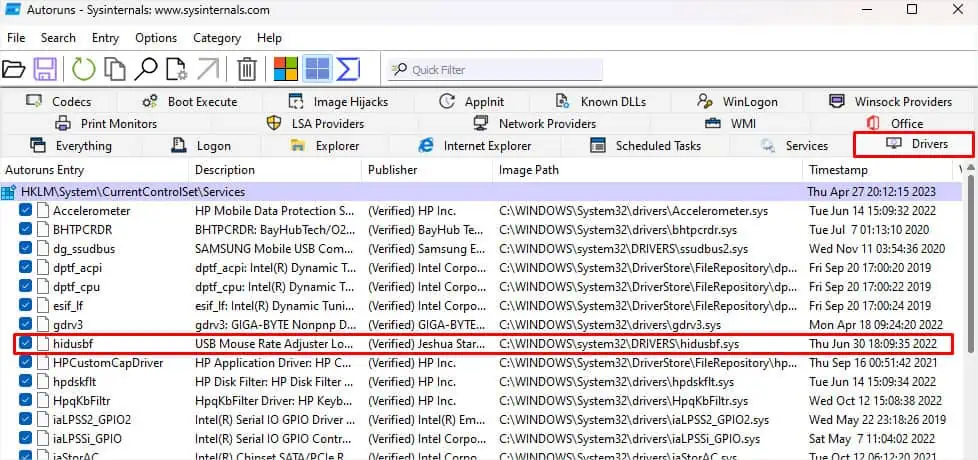
Autoruns.exeas an Administrator. - Go to the Driver tab.
- Search the incompatible driver using the Provider Name or the Product name that you noted in Step 3.

- Uncheck drivers from said Publisher. You can also note the Image Path and Description if you want to uninstall the application that’s using the incompatible driver.
- Now try enabling Memory Integrity.
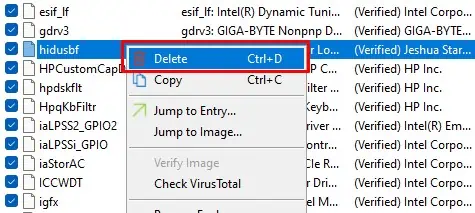
- If that does not work, right-click and delete the driver entry.

Uninstall Application with Incompatible Driver
If the application with the incompatible driver is the one you don’t use too often, you can go on and uninstall the application as well. This will automatically remove the problematic driver from the system.
To determine the application that uses the incompatible driver, you can use Autoruns.
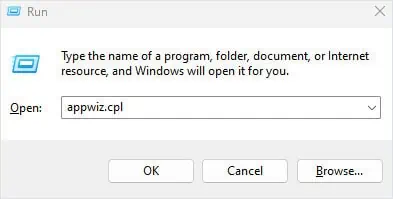
- Press the Windows + R key.
- Here, type
appwiz.cpland press Enter.
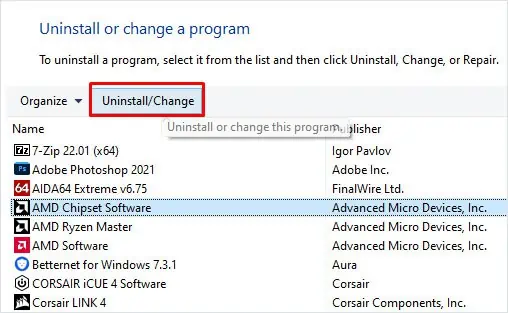
- Select the application that is using the incompatible driver and click on Uninstall.

- Follow the removal process.
- Restart the PC to completely remove any cache files from the application.
- Check if you can enable Memory Integrity.
Change Registry Keys
If updating/removing incompatible drivers does not work, you can try changing the registry keys to enable Memory Integrity.
- Open Run.
- Type
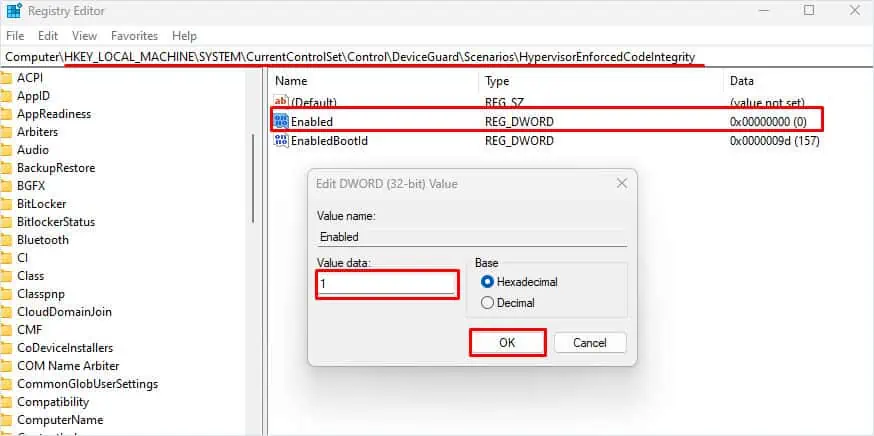
regeditand then press Enter to open the Registry Editor. - Navigate to
HKEY_LOCAL_MACHINE\SYSTEM\CurrentControlSet\Control\DeviceGuard\Scenarios\HypervisorEnforcedCodeIntegrityfor Windows 10 Version 1607 or higher and Windows 11 21H2 or higher.
- Double-click on Enabled, set Value data to 1, and click on OK.
- Navigate to
HKEY_LOCAL_MACHINE\SYSTEM\CurrentControlSet\Control\DeviceGuard\HypervisorEnforcedCodeIntegrityfor Windows 10 Version 1511 or earlier. - Double-click on Unlocked, set Value data to 1, and click on OK.
- Restart your PC and check if the error message is fixed.
Update Windows
Sometimes, bugs and errors in Windows could also cause complications with drivers that might trigger the error message. If you have not updated your version of Windows, try updating it to see if it fixes the issue.
- Press the Windows + I key to open Settings.
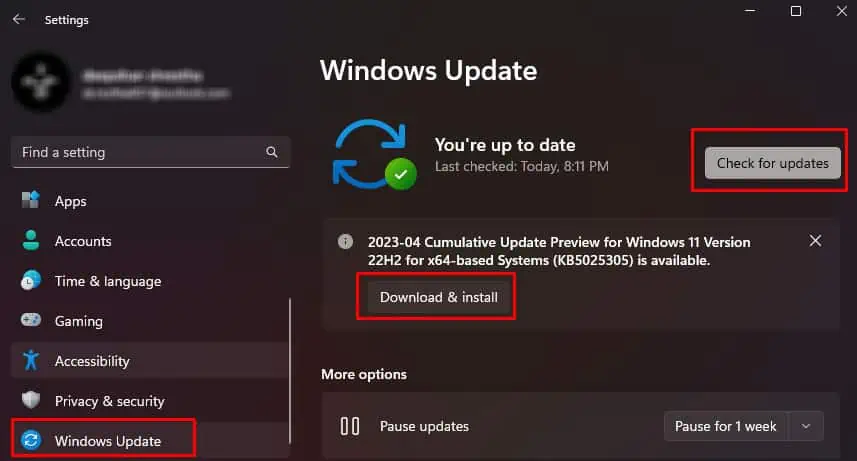
- Go to Windows Update.
- Click on Check for updates to see if there is any pending Windows update.
- If there is pending Windows update, click on Download and install.

- Restart the PC once the process completes.

