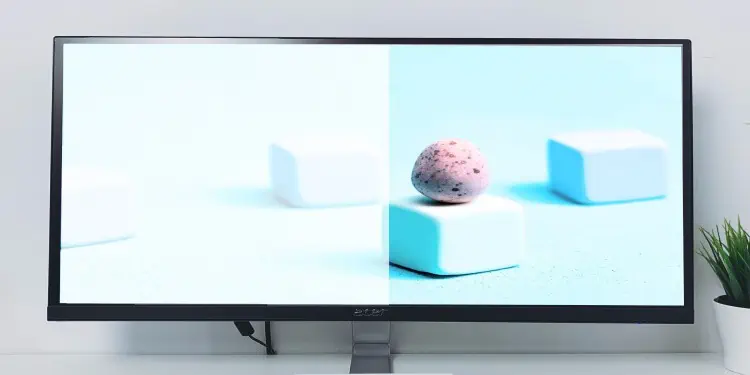
If the colors on your monitor are too bright, or the contrast seems out of place, your monitor is probably washed out or fading.
This can make black-on-white texts barely readable, and grey texts on a white background will be almost invisible. Pictures are affected too, meaning tiny icons on your desktop or toolbar might be difficult to identify.
It isn’t usual for monitors to behave this way. However, if you have a washed-out-looking monitor, it does not necessarily mean that your monitor is going bad. We have a few different simple tricks that will make your monitor looking sharp as ever in no time. Just give it a read and a try.
Why Your Monitor Looks Faded?
- Outdated drivers
- Updated driver is buggy
- Color adjustment is wrong
- Wrong GPU outputting display
- Incorrect brightness and gamma settings
- HDR settingsr
- Incorrect color filters applied
How to Fix a Faded or Washed-out Monitor?
Fading of monitor due to driver issues can be resolved by reinstalling or updating graphics and monitor drivers. Any color/gamma adjustments that were incorrect can be recalibrated. We can also look into HDR and color filter settings. Anyway, the fixes are discussed in depth below.
Tweak Monitor Settings
The first thing you should check for is the settings built into the monitor itself. Somebody might have accidentally changed color, contrast, and gamma settings, causing the monitor to display inaccurate colors.
Open the monitor’s settings menu using the buttons built into the monitor and try to adjust settings such as Contrast and Brightness. If there are settings for Color, Gamma, Sharpness, Backlight, etc., try changing them as well.
Mode or Profiles are other settings that you need to look into.
Use Full RGB Color Format
Your graphics card might have been configured to use Limited RGB settings instead of Full.
A monitor uses RGB values ranging from 0-255, where 0 is black, and 255 is white. This is RGB full. Television sets, however, use RGB values ranging from 16-235. This is RGB Limited.
Usually, Windows automatically takes into account the display device that is connected to, and thus having your RGB set to Limited should not be a problem. However, this is not always the case.
For Nvidia users:
- Right-click on an empty area on the desktop and select NVIDIA Control Panel.
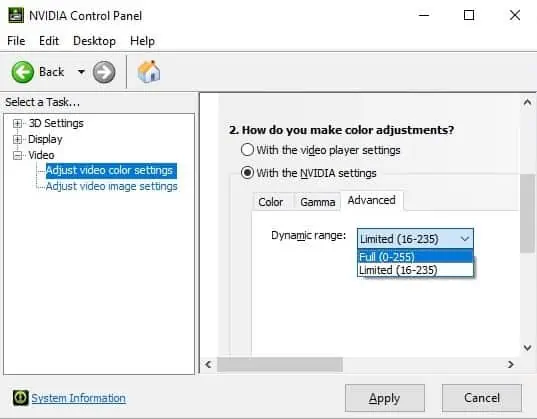
- Expand Video and click on Adjust video color settings.
- Under How do you make color adjustments?, click on the radio button next to With the NVIDIA settings.
- Switch to Advanced tab and set Dynamic range to Full (0-255). Click Apply.

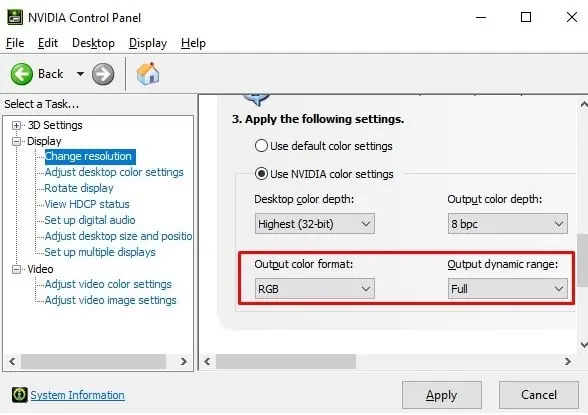
- Next, expand Display on the left, and select Change resolution.
- Scroll down to Apply the following settings.
- Set Output color format to RGB and Output dynamic range to Full.

For AMD users:
- Right-click on the empty area of the desktop and select AMD Software: Adrenalin Edition (Windows 11 users will find this option behind Show more options).
- Switch to Display tab and scroll to Pixel Format.
- If it’s set to RGB 4:4:4 Pixel Format Studio (Limited RGB), change it to RGB 4:4:4 Pixel Format PC Standard (Full RGB).

Remove Color Profile
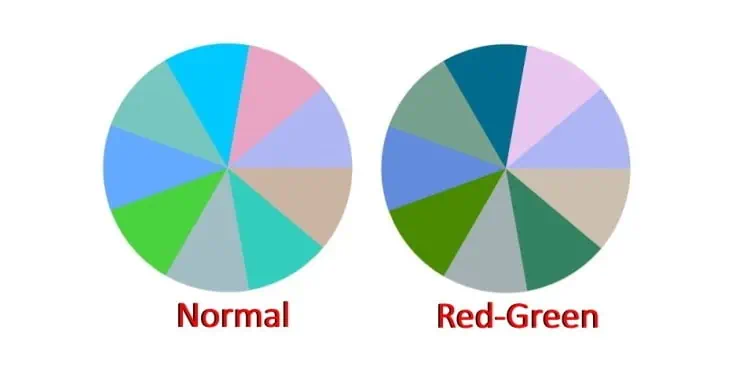
A color profile you set up for your display could be causing the problem. You can check if this is the case by removing it using the control panel.
- Press Win + R and type control to launch the Control Panel.
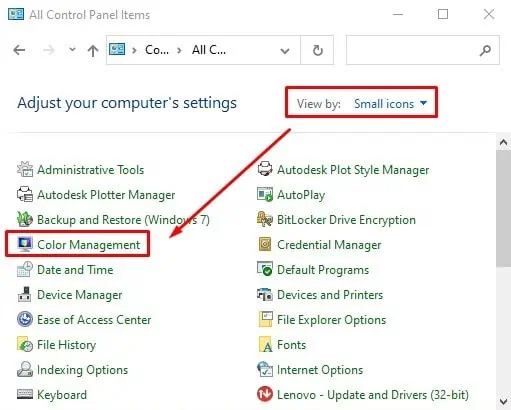
- Switch the View by option in Control Panel to Small icons.
- Click on Color Management.

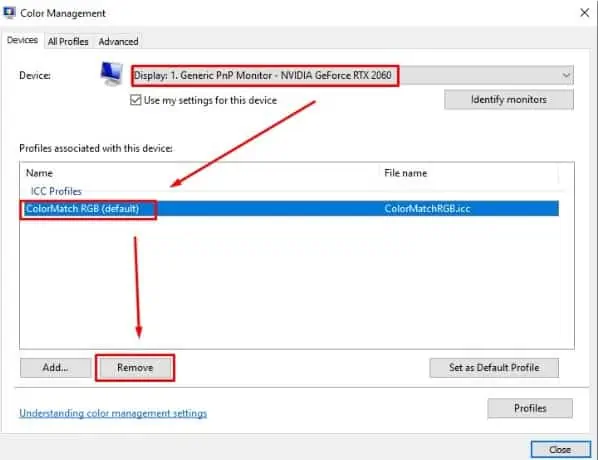
- Select your display under the Devices tab, and click on a color profile from the list below, then click Remove.

- Repeat the above step for all color profiles available.
- Restart the computer.
Turn Off Color Filters
The color filter is an accessibility feature designed to help people with visual disabilities. However, if it’s turned on, a normal person will find the colors on the screen abnormal.
Windows 11
- Launch Settings (Win + I) and navigate to Accessibility.
- Go to Color filters.
- Toggle the switch under Use color filter to Off.

Windows 10
- Press Win + I to launch Settings and navigate to Ease of Access.
- Click on Ease of Access Center, then Color filters.
- Toggle the switch under Use color filter to Off.
Calibrate the Monitor
Incorrect color calibration can also cause your monitor to look faded and washed out. Professional-grade kits are available to calibrate your monitor, which could be expensive. Thankfully, Windows has a built-in calibration tool that you can use to adjust the monitor’s color calibration.
- Press Win + R and type
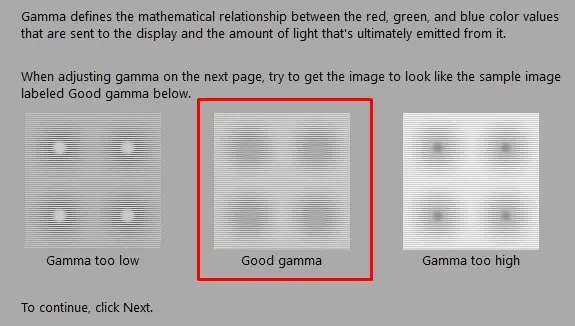
dccwto launch the Display Color Calibration tool. - Click Next until you reach the How to adjust gamma screen. Take note of Good gamma.

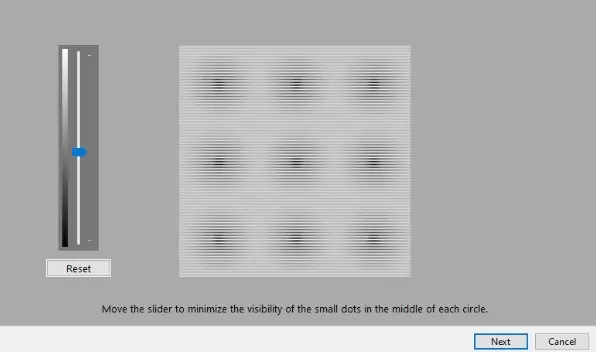
- The next screen will let you adjust gamma. Move the sliders until you feel good gamma has been replicated. (For a good gamma, the central dot will not be visible. Slide it too much towards the top, and you will see a black central dot, slide it too much towards bottom and you will see a white central dot.)

- Similarly, in the next few screens, adjust the brightness, contrast, and color balance of your display. Use the on-screen cues to help you find the best settings.
- Click Finish when you reach the end of calibration screen.
Disable HDR
If an application you are running does not support HDR profile, but you’ve set up Windows to display HDR content, there could be an encoding-decoding error in the video stream at the application layer that can cause your screen to look washed out.
You can fix this issue by turning off HDR in settings.
Windows 11
- Press Win + I to launch Settings.
- Navigate to System > Display > HDR.
- Select the display from drop-down menu, then toggle the button next to Use HDR to Off.
Windows 10
- Press Win + I to launch Settings.
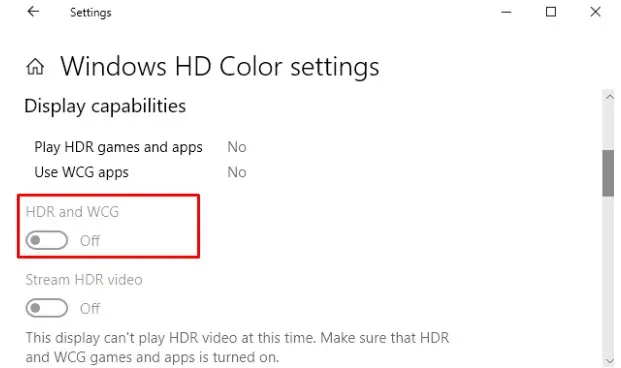
- Navigate to System > Display and click on Windows HD Color settings.
- Select the display from the drop-down menu, then toggle the button next to HDR and WCG to Off.

Reinstall/Update Drivers
Since you’ve tried various color/brightness/contrast/HDR related settings and they’ve not fixed your problem, it’s time to consider that maybe the display or monitor drivers are corrupted or outdated.
Drivers sit between your OS and the hardware layer, communicating to your device instructions from the OS. Corrupted or outdated device drivers could be sending wrong signals to the device, making your display output incorrect.
You should try reinstalling or updating drivers, or if your problems suddenly start once you’ve made an update, you should roll back the driver.
To update drivers,
- Launch the Device Manager (Press Win + R then type in
devmgmt.msc). - Expand Display Adapters, select your display adapter, then right-click on it.
- Select Uninstall device.
- Expand Monitors, select your monitor, and uninstall it as well.
- Click on Scan for hardware changes button at the top.
- Again, select your display adapter, right-click on it, then select Update driver.
- Either let Windows Automatically search for drivers, or if you have downloaded updated drivers, select Browse my computer for drivers and navigate to driver location.
- Repeat the procedure with your monitor as well.
- Restart the computer.
Rollback Drivers
- Launch the Device Manager (Press Win + R then type in
devmgmt.msc). - Expand Display Adapters, select your display adapter, then right-click on it.
- Select Properties, and switch to Drivers tab.
- Click on Roll Back driver, select one of the options from the feedback form, then click Yes.

Perform Windows Restore
Again, this fix is useful if your monitor suddenly started to look washed out and you’ve already tried the fixes above without success. To perform this fix, a restore point when the monitor worked normally is required.
This fix will not remove or replace your files and documents.
- Press Win + R and type
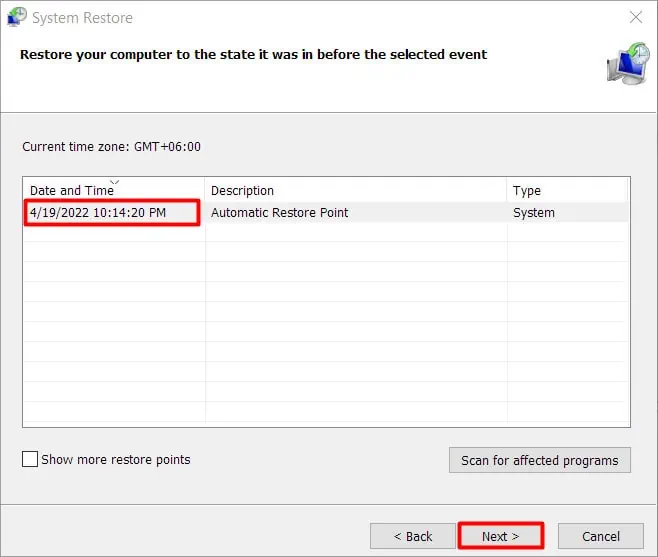
rsrtuito launch System Restore. - Click Next, then select a restore point to use. Click Next again.

- Click Next on the warning screen regarding Windows, then click Finish.
- Click Yes on the warning screen regarding interruption, then wait for the process to complete.
Get a Professional to Look at Your Monitor
When you’ve exhausted all above fixes without success, it is time to consider that the monitor hardware might be faulty.
Please take your monitor to the nearest authorized repair shop. If your monitor is still under warranty, it might be a good idea to contact the manufacturer or the vendor you purchased the monitor from, as well.

