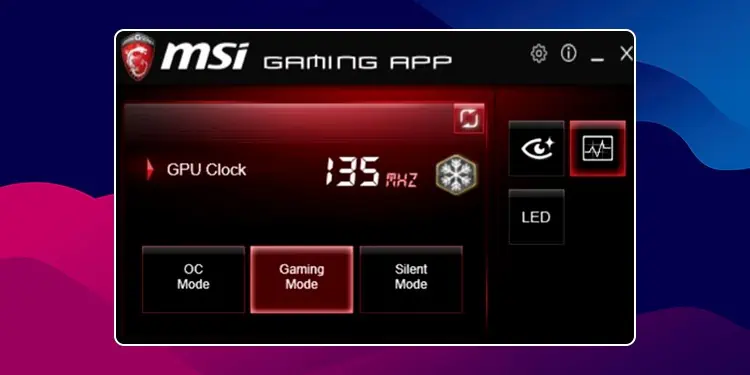
The configurations saved on MSI Gaming Application only apply to your hardware once you open the application. So when your MSI Gaming App fails to open, you cannot customize or overclock your MSI hardware connected to the system.
Users across multiple forums reported that the error started with the release of Windows 10 Fall Creators Update—Windows 10 version 1709. Besides this, a few other reasons like compatibility problems, or corrupted redistributable files also stop the app from opening.
Change Compatibility Settings
If you are using an older version of MSI Gaming Application, it may not open on a newer version of Windows. In such cases, you can change the compatibility mode to run the application.
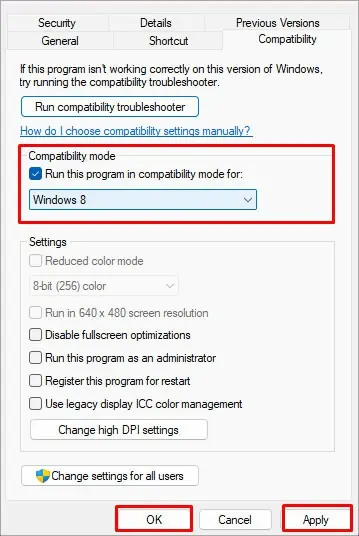
Compatibility mode allows the latest OS to run an older application. To run an application in compatibility mode,
- Right-click on the MSI Gaming App executable (
.exe) file and select Properties. - Navigate to the Compatibility tab.
- Under Compatibility mode, check Run this program in compatibility mode for: and set it to a lower version of Windows.

- Click on Apply and then OK.
- Now, try running the application.
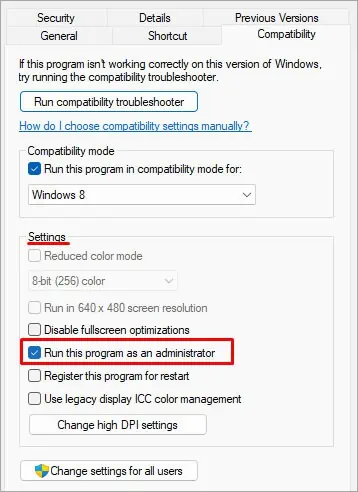
If changing the compatibility mode does not work, you can try running the application as an administrator. Running a program as administrator gives users administrative privileges and gives the application special permissions to access computer resources.
- Open MSI Gaming Application Properties.
- Go to the Compatibility Tab.
- Under Settings, check Run this program as an administrator.

- Click on Apply and then OK.
- Now run MSI Gaming Application.
Perform Clean Boot
If any third-party service or startup app is interfering with the working of the MSI Gaming Application, the application may not start at all. To fix this, you can try performing a clean boot and disable the actual service or app that is causing the issue.
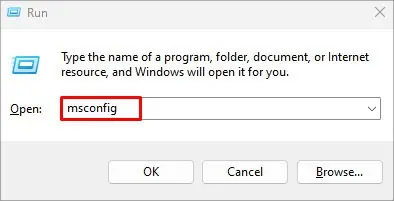
- Press the Windows and R key to open the Run Window.
- Type
msconfigand then press Enter.
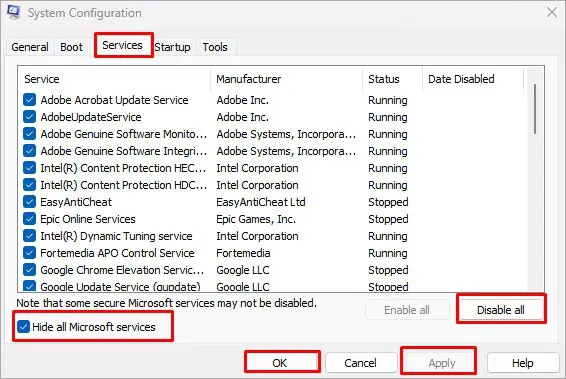
- Go to the Services tab.
- Uncheck Hide all Microsoft services and click on Disable all.

- Again, click on Apply and then OK.
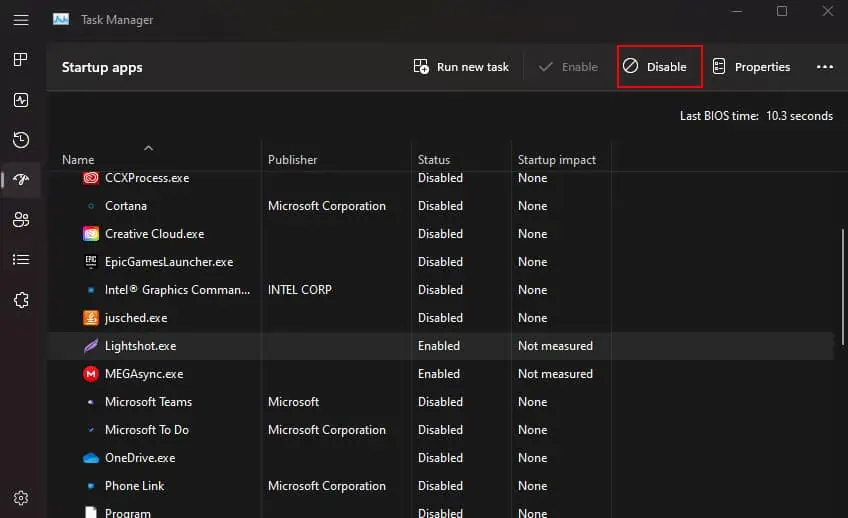
- Click on the Startup tab and open Task Manager.
- Right-click and disable all applications.

- Now, restart your PC and check if the MSI Gaming app starts.
- If it fixes the Gaming app, you need to find out the particular service that is causing resource conflict with the Gaming app. To do this, enable the first service in System Configuration.
- Restart your PC and launch the application.
- Keep repeating the process until you find the service that is causing the conflict and disable that particular service.
- Follow similar steps for startup apps.
Reinstall Microsoft Visual C++ Redistributable
Microsoft Visual Redistributable contains libraries of functions in C++ that can be used by applications written in Microsoft Visual C++. If the redistributable library is corrupted or outdated, an application that uses said library may run into issues, or in some cases the application does not open.
Reinstalling Microsoft Visual C++ Redistributable should fix the issue with the MSI Gaming Application.
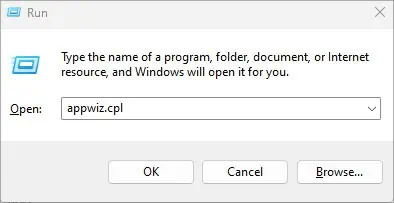
- Open Run by pressing the Windows and the R key simultaneously.
- Type
appwiz.cpland press Enter.
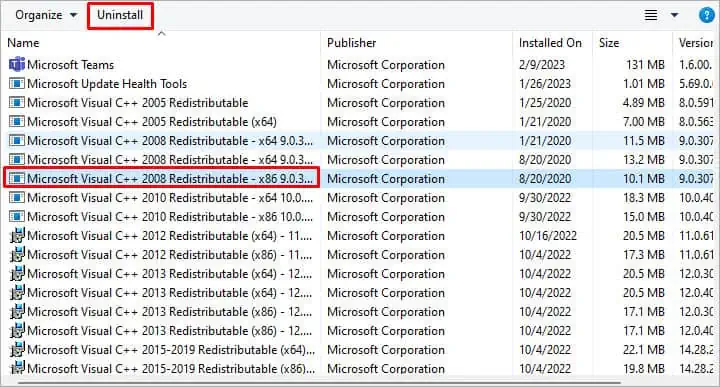
- Scroll down and look for Microsoft Visual C++. There should be several of these installed on your PC.
- Click on any one of these redistributable applications and select Uninstall.

- Uninstall all Microsoft Visual C++ Redistributable from your PC.
Once you uninstall all the redistributable, you need to install a new redistributable library.
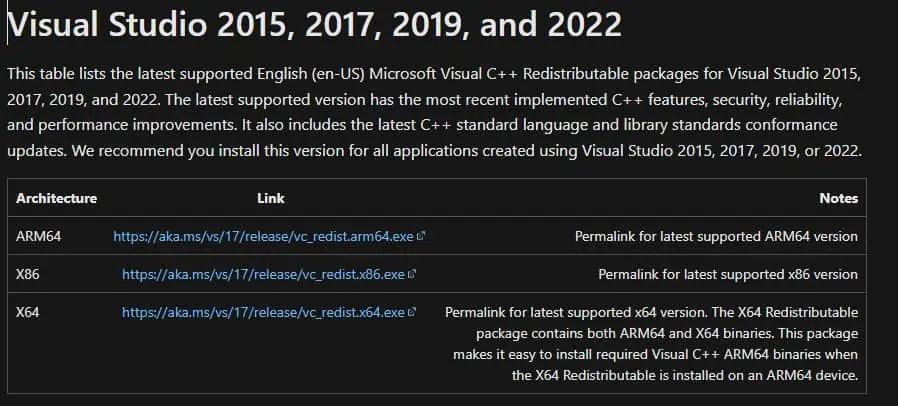
- Go to the official Microsoft documentation website to download the latest C++ Redistributable.

- Here, you need to select the link that matches your system type.
- Once the download is complete, run the executable (
.exe) file to start the installation process. - Now, try running MSI Gaming Application.
If reinstalling Microsoft Visual C++ Redistributable does not work, you might need to reinstall the application.
Update Windows
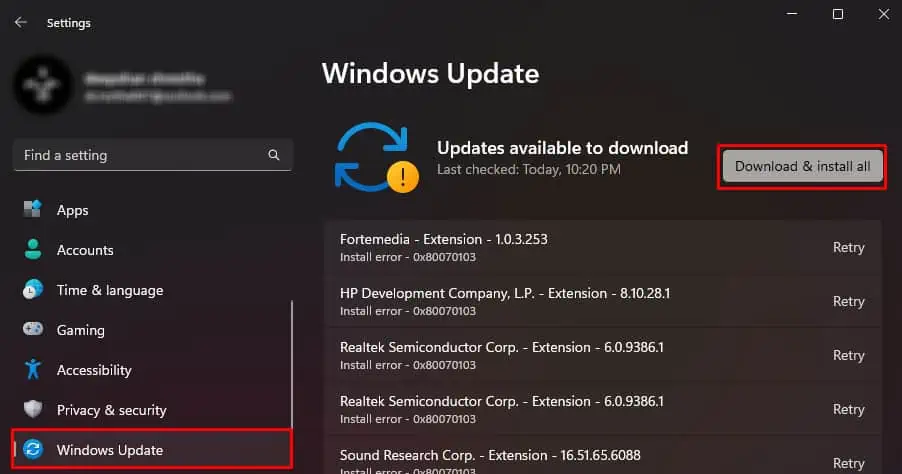
Users across multiple forums have also reported that Windows 10 Fall Creator Update (version 1709) started the issue with MSI Gaming Application. If you are facing similar issues after a Windows Update, we recommend that you update Windows to the latest version.
- Press the Windows and I key simultaneously to open Settings.
- Go to Windows Update (Update & Security > Windows Update for Windows 10).
- Click on Check for updates or Install Updates.

- Once the installation is complete, restart your system.
Reinstall the MSI Gaming Application
If none of the solutions explained above works, you can try reinstalling the entire gaming application. Uninstalling and reinstalling an application completely removes all the application files and replaces them with a new one. So if any corrupted application files are causing the issue, reinstalling should fix it.
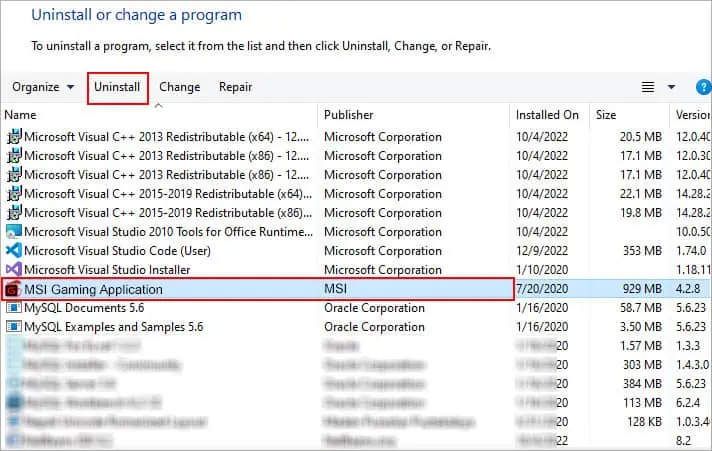
- Open Programs and Features from the Control Panel.
- Search and click on MSI Gaming Application.
- Select Uninstall and follow the removal process.

- Once you remove MSI Gaming Application, go to MSI Gaming Application’s official website.
- Here, click on Download Now on the version that you want.

- Once the download is complete, open the downloaded file to start the installation process.
- Now, follow the installation process and run the application once the installation is complete.
MSI Gaming Application Alternatives
MSI Gaming Application is older and rarely features new upgrades to the application. Therefore, it is best that you know about some alternative applications for MSI Gaming App.
If you want to overclock your GPU, you can try using MSI Afterburner. MSI Afterburner works with any graphics card regardless of the manufacturer. However, it does not have a feature to change RGB on your graphics card. If you want to change the RGB, we recommend you use MSI Mystic Lights.

