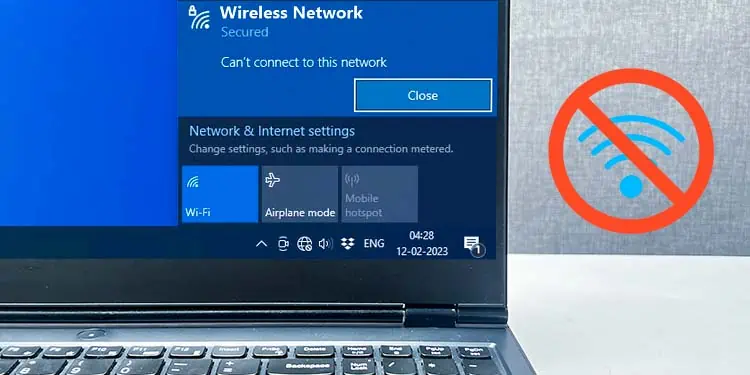
Sometimes the Wi-Fi icon in the system tray can disappear or all the Wi-Fi SSID may be missing. Other times, the SSIDs are available and when you try to connect to the network, you get the error message “Can’t connect to this network.”
In the latter case, your Wi-Fi network may be working fine, but there is something wrong with your computer that is preventing it from connecting to a wireless network.
Whatever the case may be, these issues usually happen due to reasons like problematic network adapters, misconfigured internet settings, disabled network services, and corrupted network drivers. However, most of the time the problems are software related, so you can pretty easily fix this issue by yourself.
Before You Begin
There are a few things you should keep in mind before jumping into the fixes listed below.
- When Airplane mode is enabled, your Wi-Fi will stop working, and it won’t show any networks you can connect to. So, make sure to disable Airplane mode on your computer.
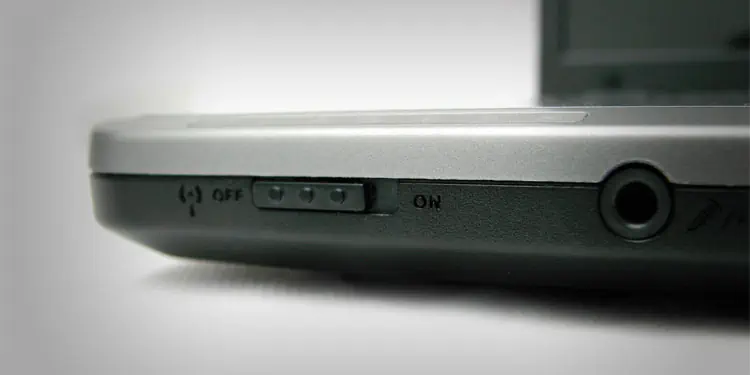
- If your laptop has a physical Wi-Fi key, make sure that the key’s indicator light is on, signifying it’s enabled. If it isn’t, you can click on the Wi-Fi key once to enable it.

- If you’re not able to connect to only a singular Wi-Fi network, you can also try forgetting the wireless network and reconnecting to it by entering the Wi-Fi password again.
- If you have a dual-band router, you can try alternating between the 2.4 GHz or 5 GHz band to see if you can connect to one.
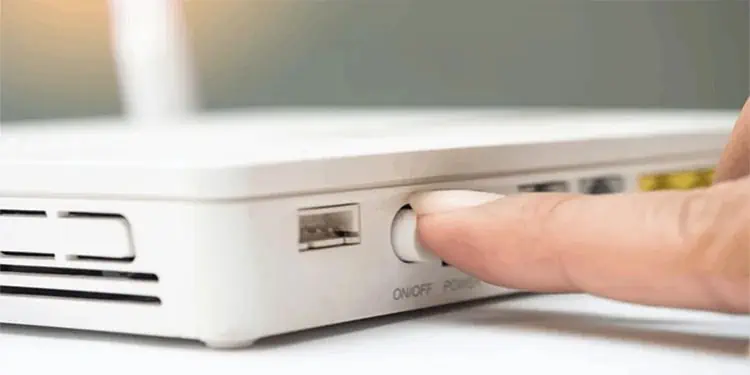
- You can also check if any other device can connect to the network. If no device can connect to that network, it is likely a problem with your router or ISP. You can try restarting your router to make sure your router isn’t the one causing the issue.

- Also, check for any obstruction or interference between your router and device. Make sure your device is in close enough proximity to the router.
Run Network Troubleshooter
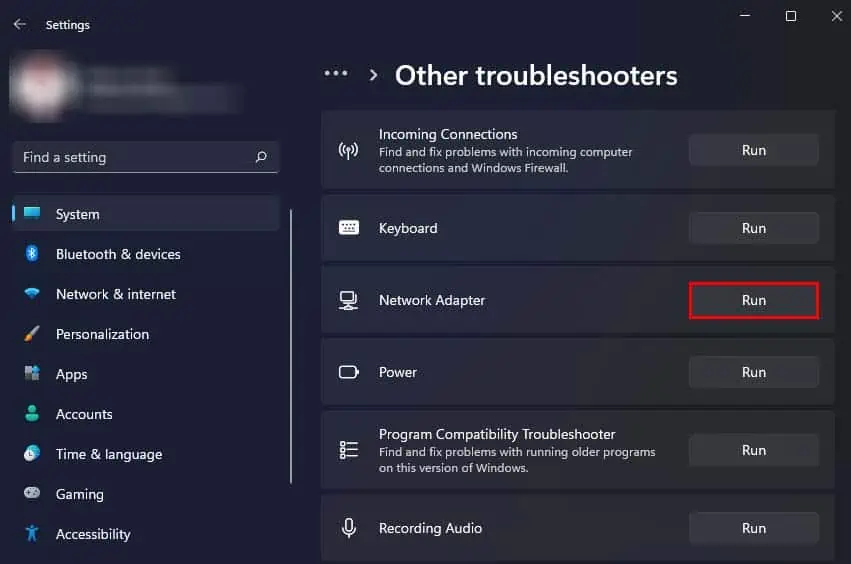
The Network Troubleshooter is a built-in Windows troubleshooter that checks for and fixes basic issues in your network. When facing any kind of network connection issues like your computer not connecting to a network, you can try running this troubleshooter.
- Press Windows + I to open Settings.
- Navigate to System > Troubleshoot > Other troubleshooter.
- Beside Network Adapter, click on Run.

- Follow the on-screen instructions to troubleshoot your network connection.
Reinstall Wi-Fi Driver
If you can’t connect to a Wi-Fi network because the Wi-Fi icon is not present in your system tray, it might be a problem with your network drivers. The network drivers help your system communicate with the network adapter that is used to connect to Wi-Fi networks.
To fix this kind of issue, you can try reinstalling the Wi-Fi drivers.
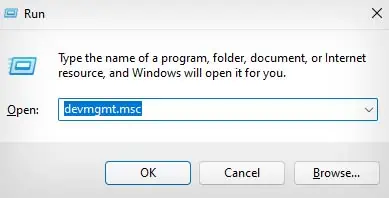
- Open Run Utility by pressing Windows + R.
- Type
devmgmt.mscand press Enter to open Device Manager.
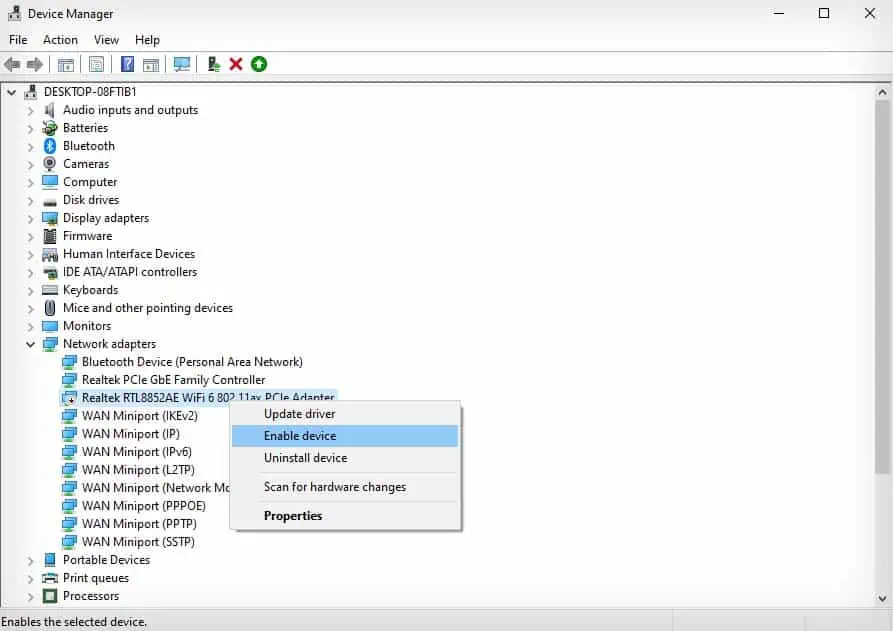
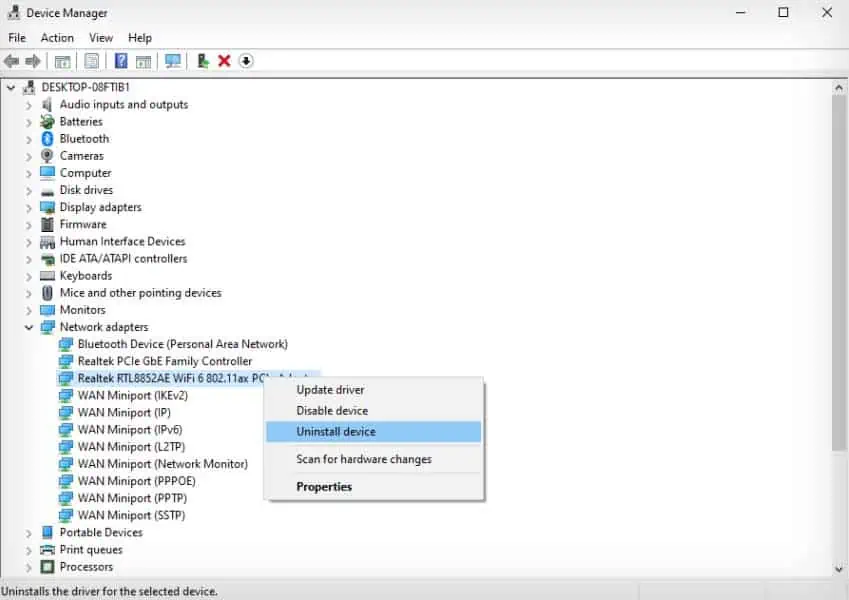
- Double-click on Network adapters and right-click your network driver. (To identify your network driver, you can search for the driver with Wi-Fi in its name.)
- If the driver is disabled, there will be a down arrow in its icon. Select Enable device if this is the case, and check if you can connect to a network. (Skip this step if your network driver is already enabled.)

- Select Uninstall device and click on Uninstall again.

- Restart your computer to automatically reinstall the missing driver.
Check Windows Network Services
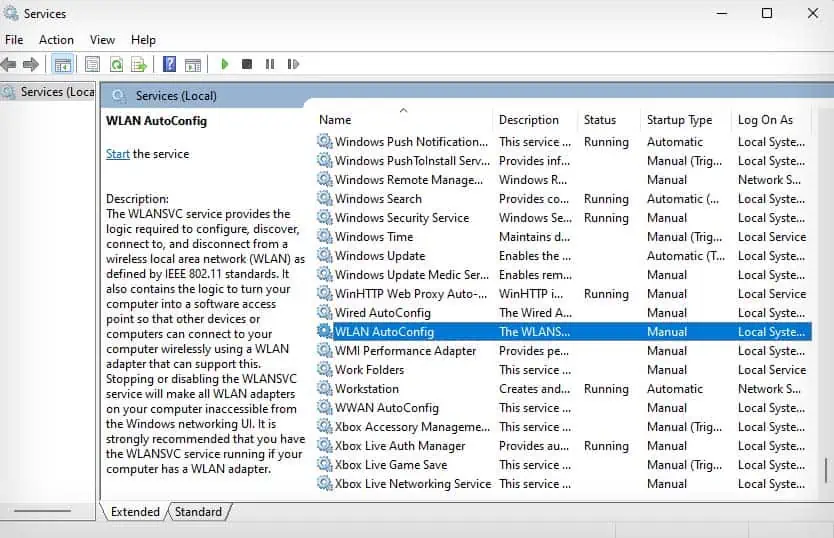
Some important Windows services need to be up and running for your computer to be able to connect to a network. If network services like WLAN AutoConfig or DHCP Client are not running, you won’t be able to connect to a wireless network.
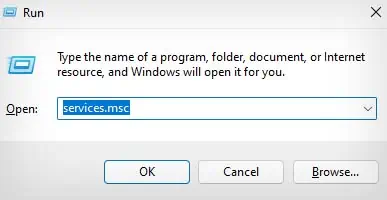
- Press Windows + R hotkey to launch the Run box.
- Type
services.mscand press Enter to open the Windows Services.
- Locate the WLAN AutoConfig service and double-click on it.

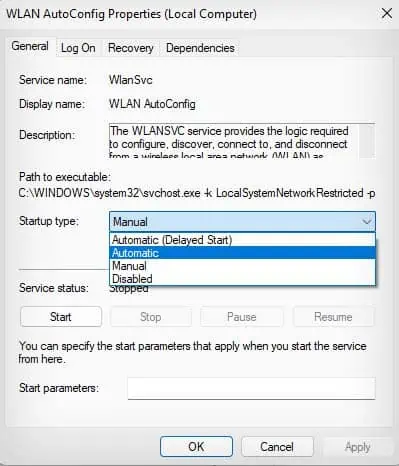
- Make sure its Startup type is set to Automatic from the drop-down menu.

- Click on the Start button if the Service status is Stopped.
- Locate the DHCP Client service and repeat the same steps.
Obtain IP Address Automatically
If you have a static IP address setup in one network, you might be unable to connect to any other network due to IP conflicts. Furthermore, improperly setting up a static IP address also causes you to be unable to connect to a network.
So, you should try switching to a dynamic IP address to fix this kind of issue.
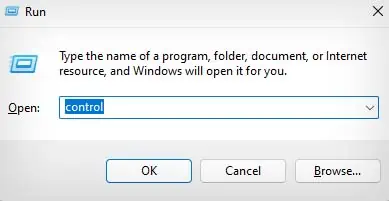
- Launch the Run dialog box by pressing Windows + R.
- Type
controland press Enter to open Control Panel.
- Navigate to Network and Internet > Network and Sharing Center.
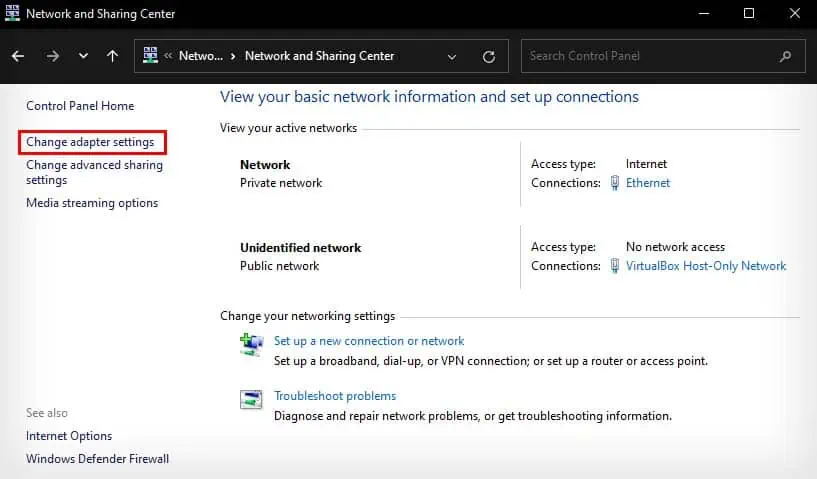
- Click on Change adapter settings option in the left sidebar.

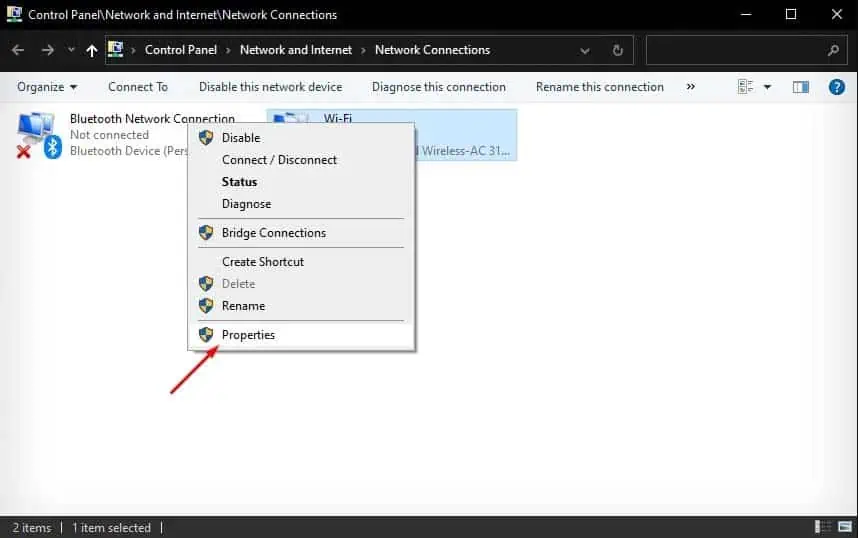
- Right-click the Wi-Fi option and select Properties.

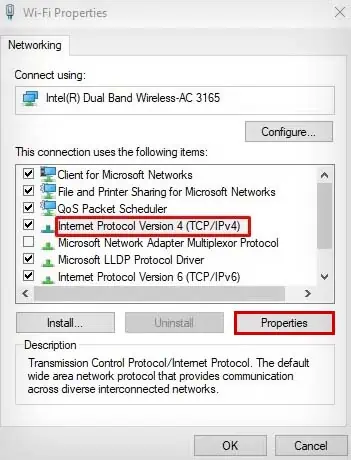
- Select Internet Protocol Version 4 (TCP/IPv4) option and click on Properties.

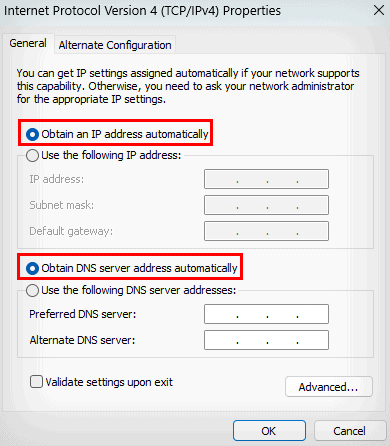
- Select Obtain an IP address automatically and Obtain DNS server address automatically.

- Click on OK.
Perform Network Reset
Another method you can use to try fixing this issue is by performing a network reset. This will delete all the network cache files and network-related data, including Wi-Fi passwords and login information in your computer.
- Right-click the start menu and select Settings.
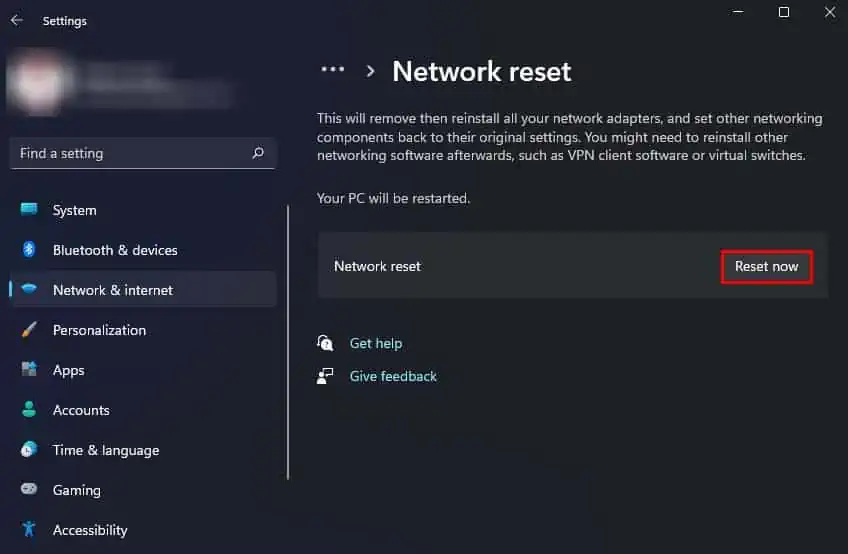
- Go to Network & internet > Advanced network settings > Network reset.
- Click on Reset now and select Yes.

- Close the pop-up box saying your computer will be shut down.
- Restart your computer to finish the network reset process.
Whitelist Device MAC Address
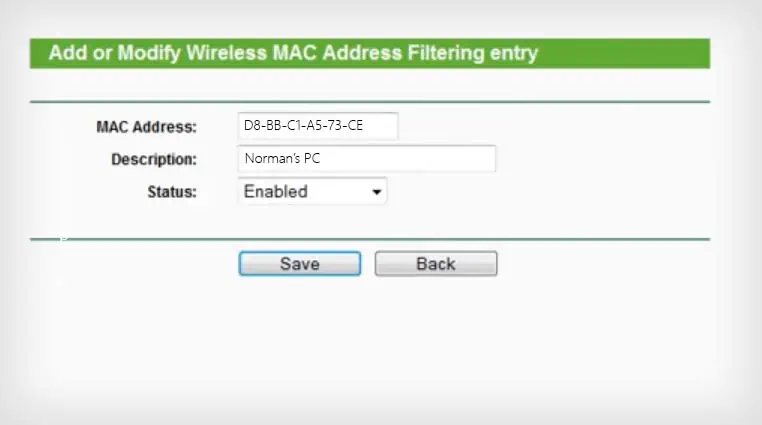
Your computer also won’t be able to connect to a network, if that network has a MAC address filter setup. To be able to connect to such a network, you will need to input your computer’s MAC address in the network’s MAC filtering whitelist.
- Open Settings (Windows + I) on your computer that isn’t able to connect to the network.
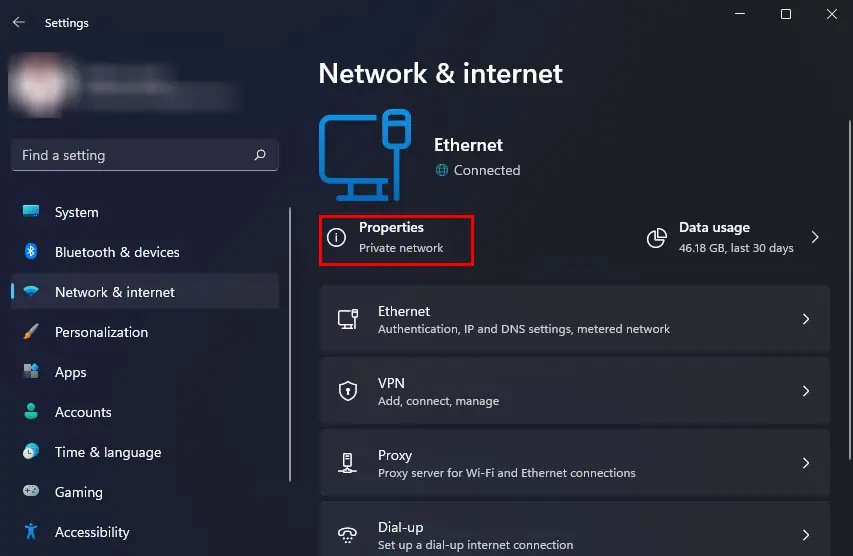
- Select Network & internet, and click on Properties.

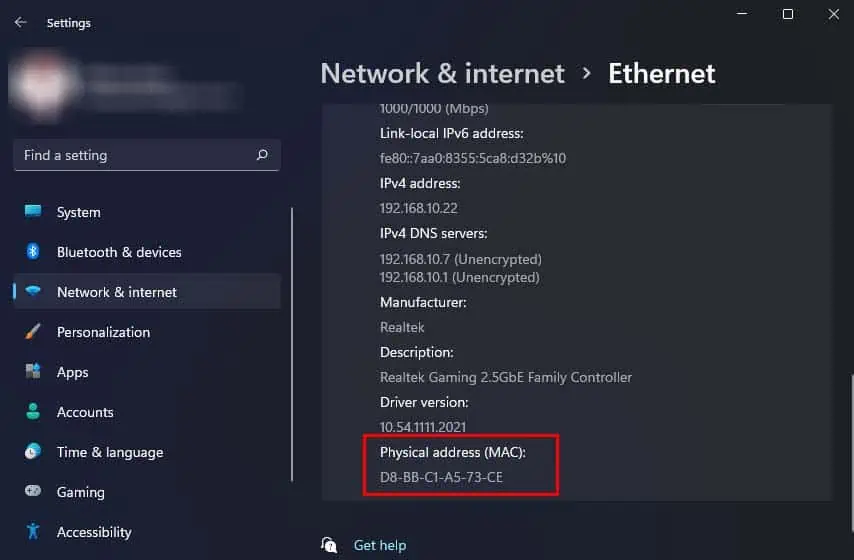
- Scroll down to the bottom, and note down the Physical address (MAC).

- Now, open your router portal on a device that is able to connect to the network. (If you don’t know how to get to your router portal, you can simply enter your router’s IP address in a web browser.)
- If your Internet Service Provider (ISP)has their own unique router portal application, you can also use that.
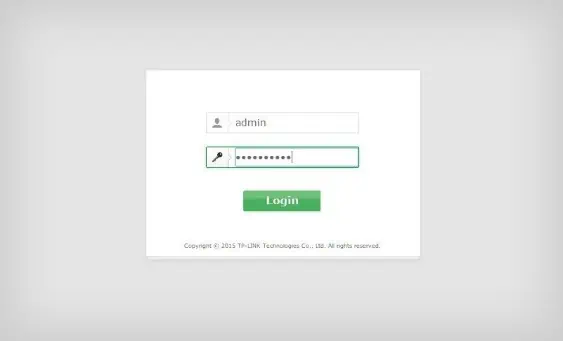
- Login to your router portal if you haven’t done so already. (If you don’t know your router login credentials and have never changed them, the default login username and password should be at the bottom of your router.)

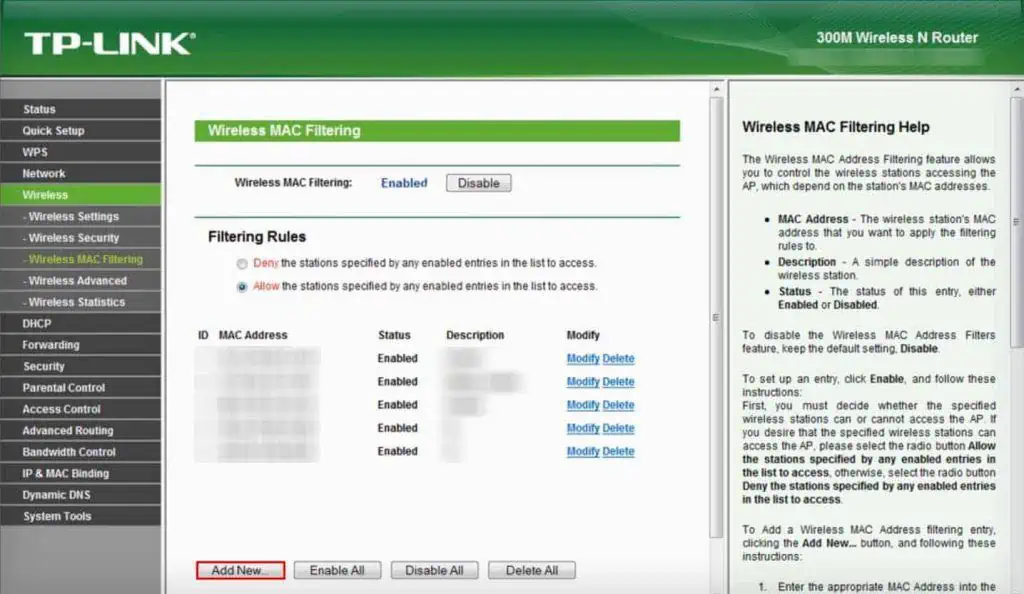
- Search for a setting with MAC Filtering in its name. It should usually be in the Wireless settings section. (Different ISPs have different user interfaces to their router portal.)
- Click on Add New.

- Enter your computer’s MAC address beside Mac Address.

- You can input anything in the Description that can help you identify the device.
- Select Save.
Update Router Firmware
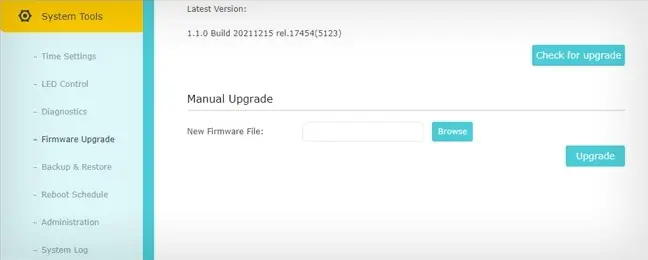
If you still cannot connect to a network, you can try updating that network router’s firmware instead. A firmware update helps patch up any bugs or glitches in the router’s system, and they also carry security features made by the developers. So, you can try updating your router’s firmware to see if it helps fix your issue.
- Open your router portal and log in.
- Go to Advanced, Tools, or similar section, and locate the Firmware update setting.

- Click on Check for Updates. If an update is available, you can click on the Update button to automatically update your router’s firmware.
- Your router will restart a few times during the process.
Check for Hardware Issues
If the above methods still did not fix this issue for you, it might be a hardware problem with your network adapter.
If you know how to perform hardware repairs, you can try checking the connection between the network adapter and the motherboard or try replacing it yourself. Additionally, some desktop computers’ motherboards have an onboard network adapter for Wi-Fi. You can also check it for any hardware issues.
If all else fails visit a repair shop to get it fixed.

