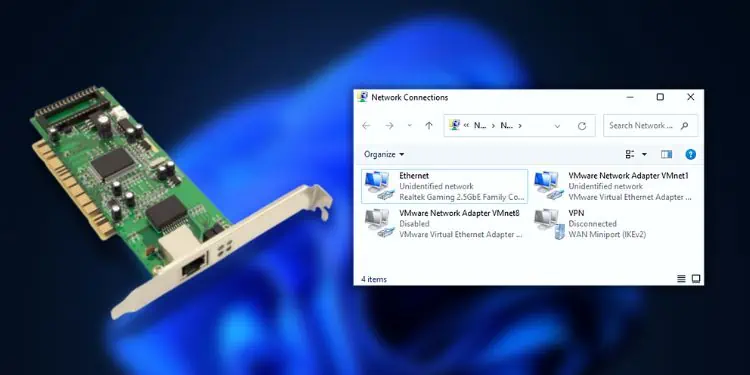
A network adapter is a critical hardware component that connects your device to the internet or other computers. If the device malfunctions, you’re likely going to face slow connections, and in the worst case, the internet will stop working completely.
This can happen due to a corrupted driver, conflicting device, misconfigured settings, or even hardware failure! But there can also be times when there’s an internet problem that might make you think the network adapter is malfunctioning. Whatever the reason, here are 15 possible solutions that should help you solve it.
Check Device Status
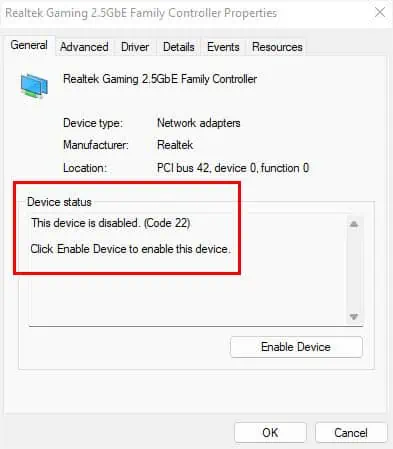
Before doing anything else, you can directly check your device status to know what’s causing the issue. In most cases, you’ll meet with an error code, which can be fixed by following the Microsoft-recommended solution.
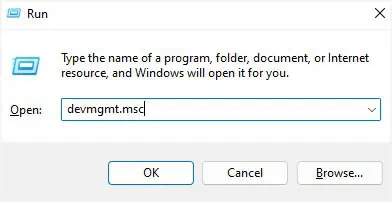
- Open Run using Windows + R. Here, type
devmgmt.mscand hit Enter.
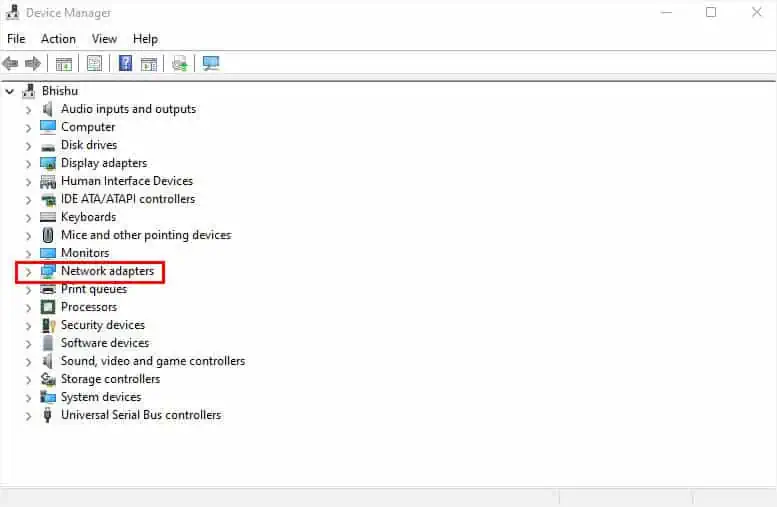
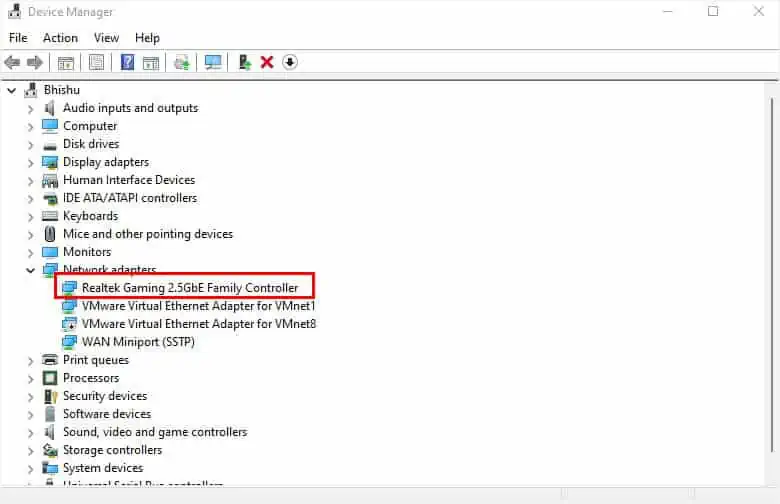
- The Device Manager window should pop up. Once it does, expand Network adapters.

- Double-click on the appropriate driver to launch its properties.

- Under the General tab, check the Device Status section. If it shows “The Device is working properly”, you can try other solutions mentioned below. But if you see a specific error code, check the specific resolution on Microsoft’s official support page.

Run Network Adapter Troubleshooter
If you didn’t get an error code, you can try running the built-in troubleshooter to fix the related network adapter issues. The dedicated tool can fix possible network-related problems for both wired and wireless connectivity. Here’s a complete guide on how to run it on Windows 11:
- Use the Windows + I shortcut to get to Windows Settings.
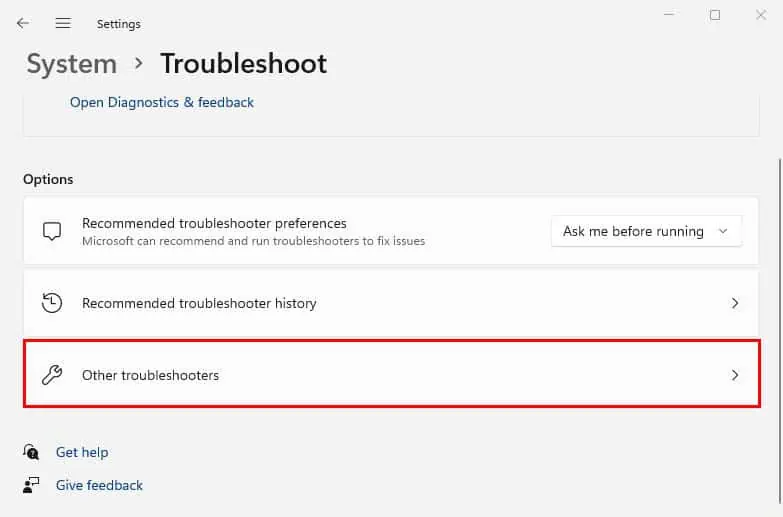
- Then, go to System > Troubleshoot.

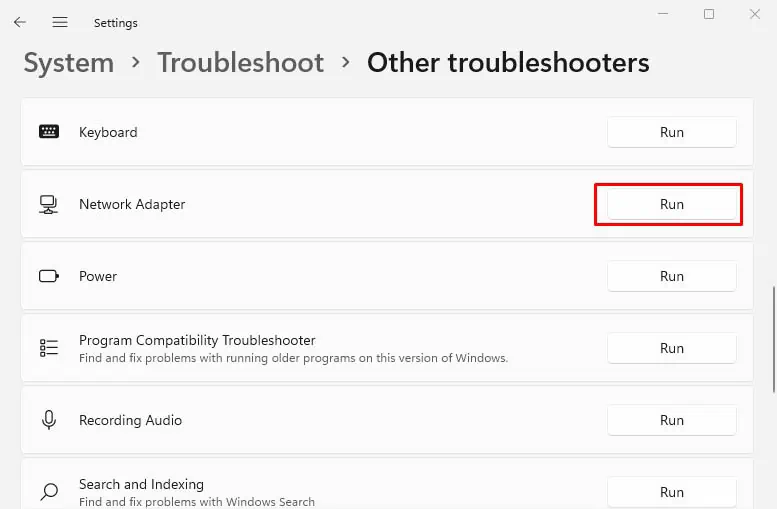
- Navigate to Other troubleshooters.

- Find the Network Adapter option and press the Run button.

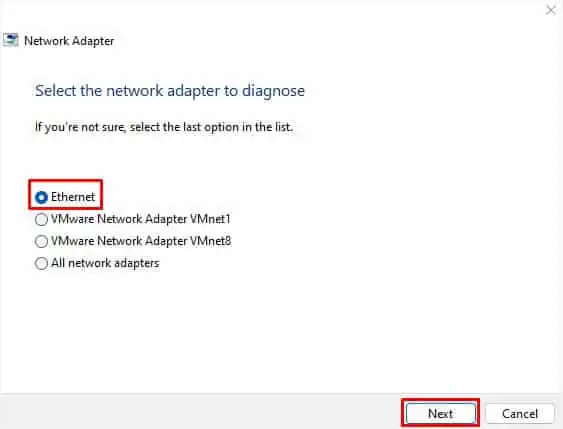
- In the dialogue box, select the problematic adapter and hit Next.
If multiple drivers are facing issues, you may proceed with All network adapters.
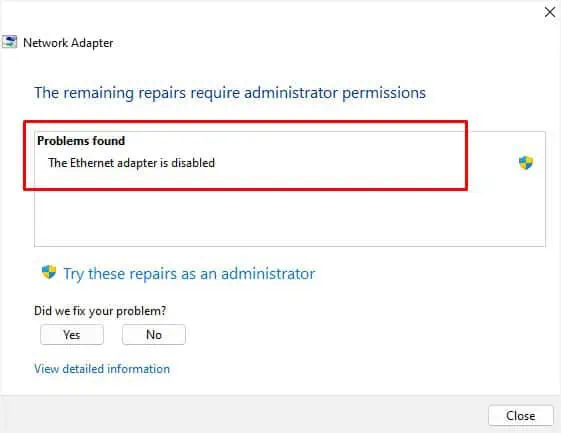
- Finally, wait for the problems to get detected. Once it’s done, you’ll likely encounter a message, or sometimes an error code (like the one in Device Status).

- However, if you get the message, “You can try exploring other options that might be helpful.”, you may close the troubleshooter and move on with the next possible solution.
Note: You might want to run the Internet Connections and Incoming connections troubleshooters if the problems rather lie with your internet.
Run Windows Network Diagnostics
Windows network diagnostics is another built-in Windows tool that investigates possible issues with the adapter and the internet. After running this, you should get a message regarding the actual cause of the malfunction.
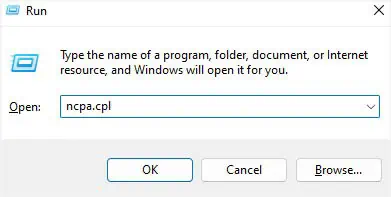
- In the Run dialogue box, execute the
ncpa.cplcommand.
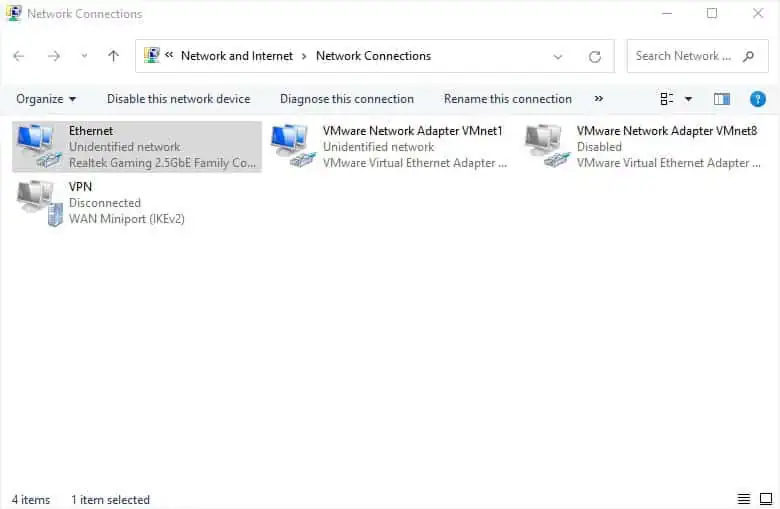
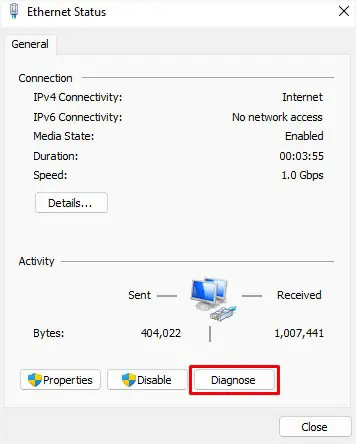
- Double-click on your problematic adapter. This should open your network’s Status dialogue box.

- Here, find and press the Diagnose button.

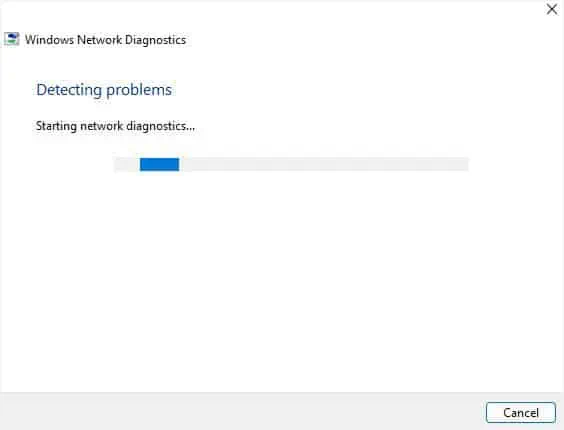
- Now, wait for Windows Network Diagnostics to detect possible solutions for your problem.

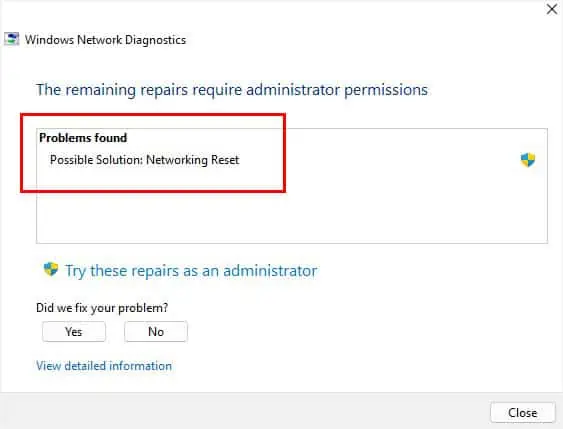
- Then, fix the issue as per the message. You can even find the dedicated solutions in the below-mentioned fixed.

Check the Conflicting Device List
Sometimes, external peripherals or other devices can conflict with your network adapter. You can manually check this on Windows, and resolve the related problem. Follow the below steps on how to do just that:
- Open Device Manager, expand Network adapters, and double-click on your driver.
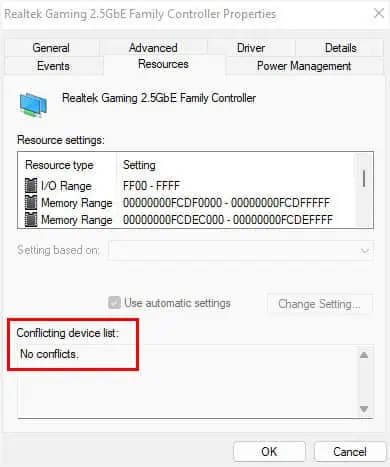
- In the Properties window, switch to the Resources tab.
- Here, check if a device is listed under the Conflicting device list section. If yes, you’ll need to repair or reinstall the peripheral.

Enable, Update, or Reinstall the Drivers
One of the major causes is a corrupted network adapter driver. A simple update can sometimes solve the problem as it fixes compatibility issues and broken codes. But if that doesn’t help, you can try reinstalling the device driver.
Likewise, bugs, power issues, or older firmware can sometimes disable your network adapter. So, before proceeding to update/reinstall the driver, you can try reenabling it.
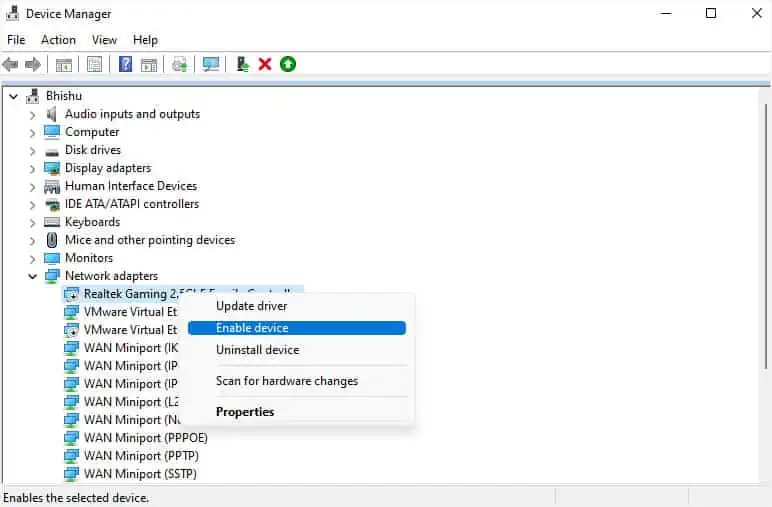
- Launch Device Manager and go to Network adapters.
- Right-click on the troublesome driver and pick Enable device. In case it’s already enabled, disabling and enabling it back can sometimes help.

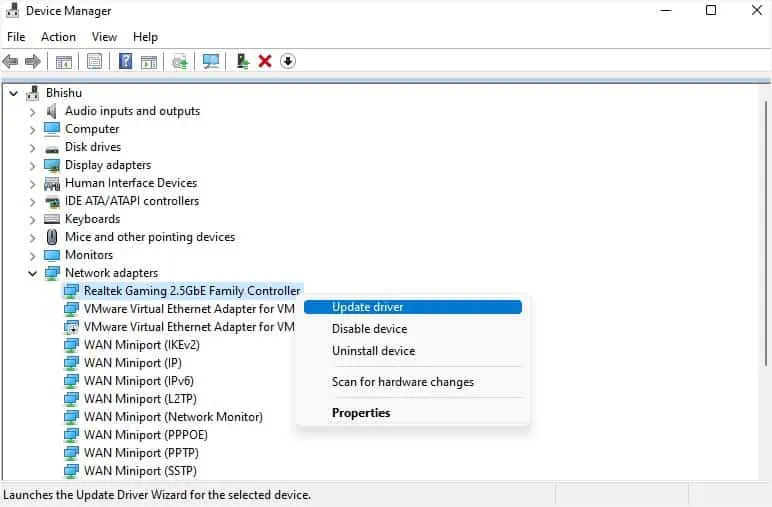
- If the issue persists, right-click on the adapter, and choose Update driver.

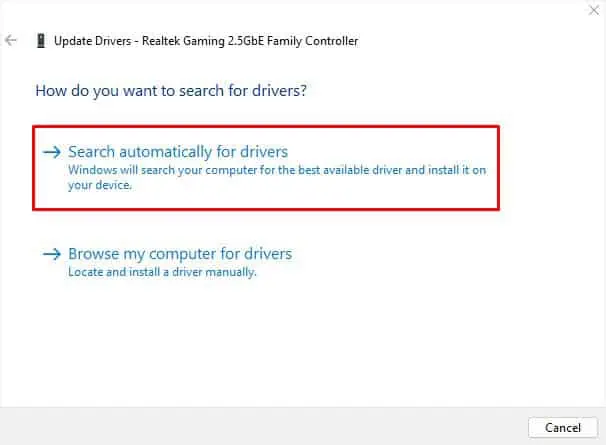
- Once a new dialogue box opens, select Search automatically for drivers.

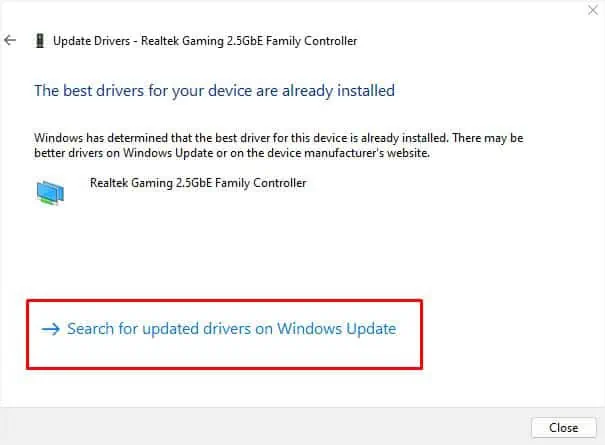
- Wait for a few seconds until the available drivers are detected and installed. But if it cannot find the best drivers, we recommend picking Search for updated drivers on Windows update.

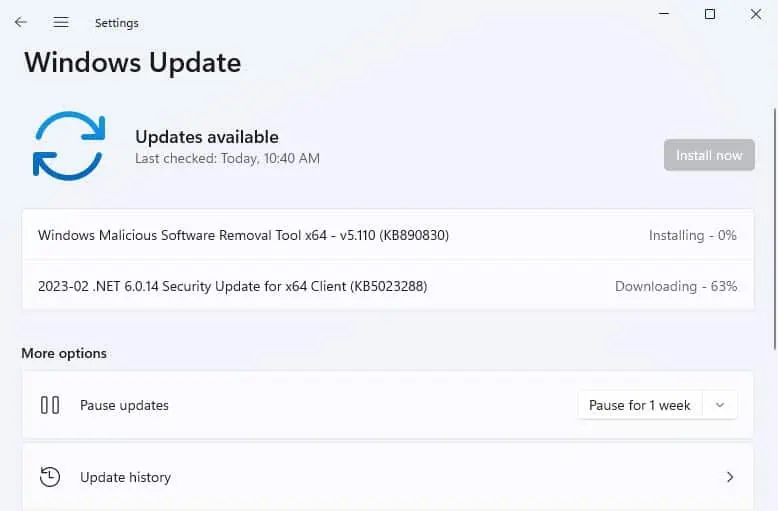
- Now, check and update Windows, which should eventually install the necessary network driver on your PC.

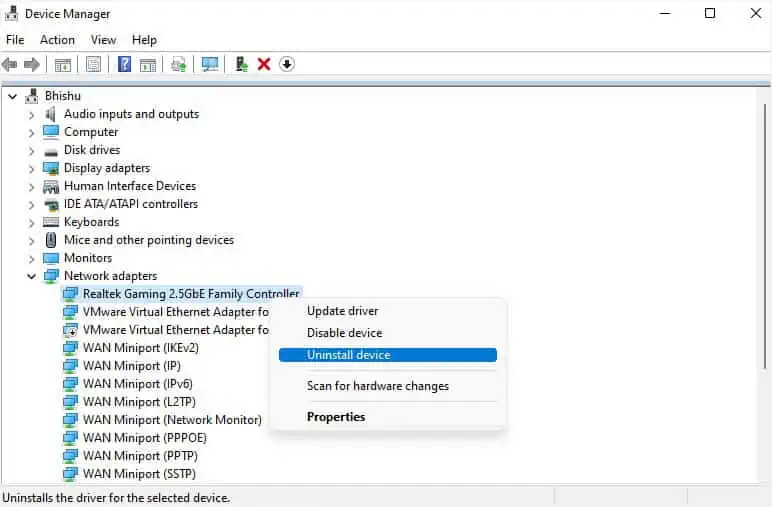
- Even if this doesn’t help, choose Uninstall device.

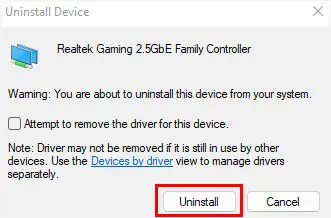
- Hit the Uninstall button in the confirmation dialogue box.

- Now, reboot your PC or laptop. This should install back the required network driver.
Change Power Management
If you have allowed your computer to turn off your network adapter driver to save power, it may also cause conflicts. A simple workaround to this problem would be tweaking the power management settings:
- First, open the problematic adapter’s Properties dialogue box from Device Manager.
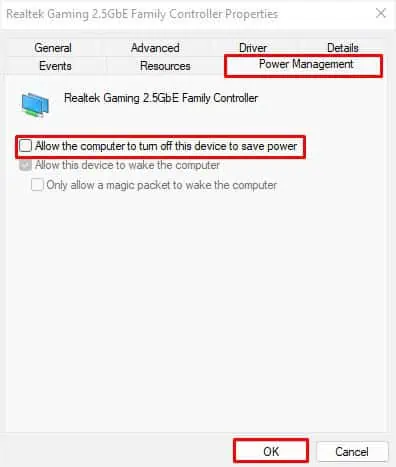
- Then, move to the Power Management tab.
- Now, uncheck the “Allow the computer to turn off this device to save power” option.

- Hit the Ok button to save the changes.
Add Legacy Hardware
If the ethernet or Wi-Fi adapter seems to be missing, a simple solution is to manually add it from the Device manager. This can also come in handy when you encounter issues when updating or installing the drivers.
The following steps may only be available on some systems. In case, you do not find the dedicated option in yours, you may simply execute the hdwwiz.exe command in Run.
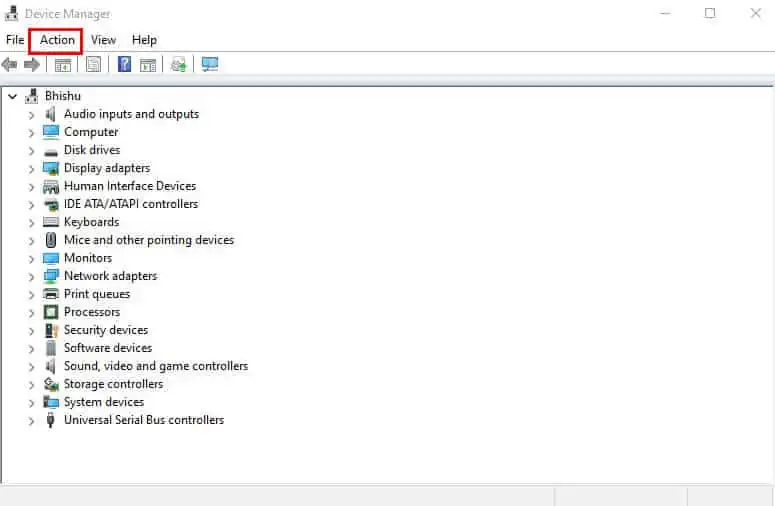
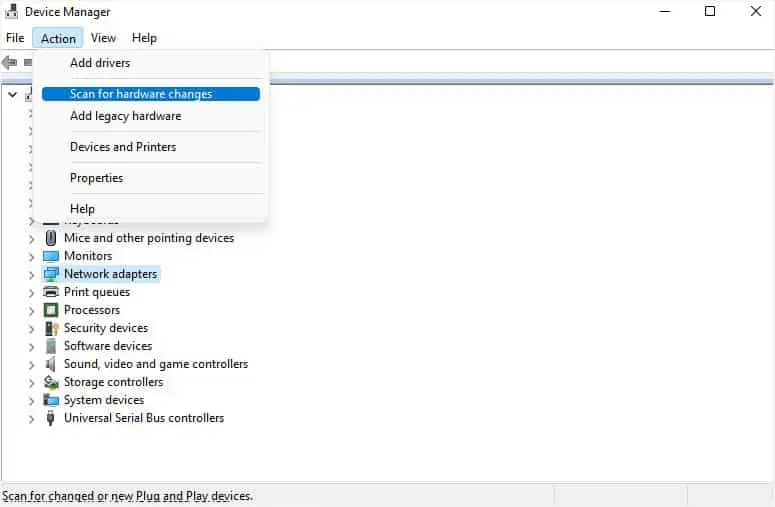
- In the application, pick Action from the menu bar.

- Then, select Scan for Hardware changes. This should fix your network adapter if it wasn’t recognized or broken.

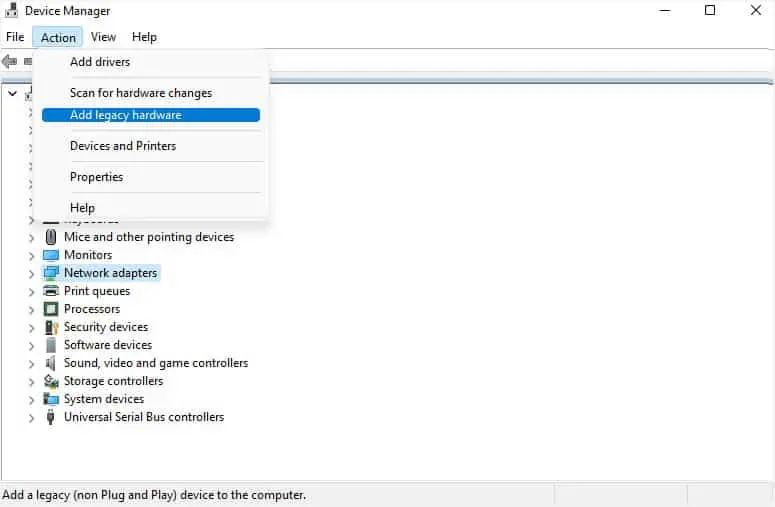
- If the problem persists, choose Action again. This time, pick Add legacy hardware.

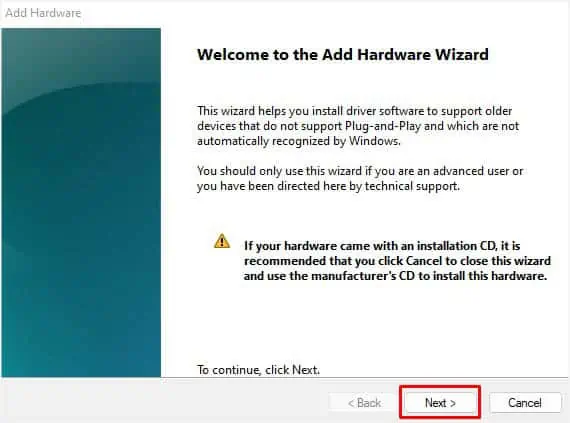
- Once the Add hardware dialogue box opens, click Next to continue.

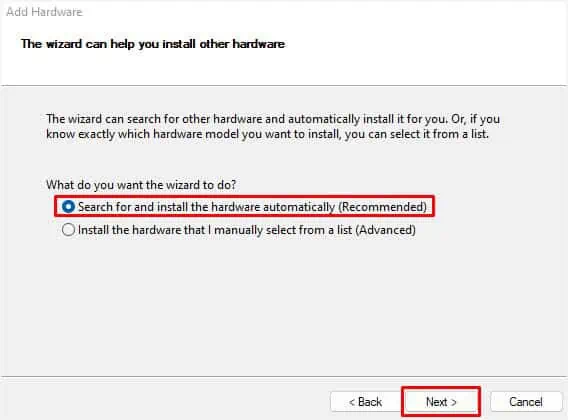
- Now, select the “Search for and install the hardware automatically” option and hit Next.

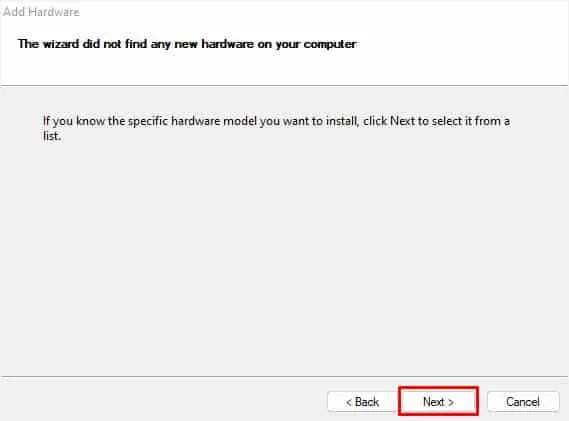
- If the wizard failed to install new hardware, click Next to proceed to the next window.

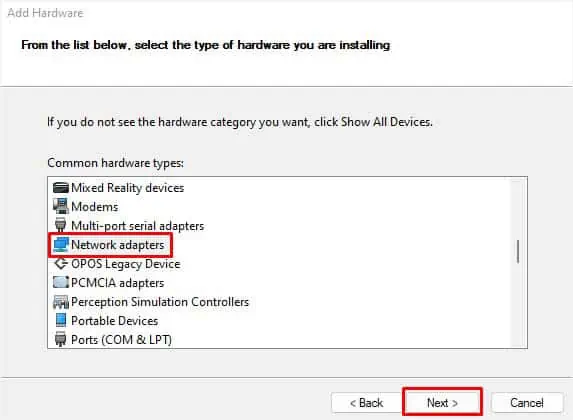
- Here, choose Network adapters from the list and hit Next.

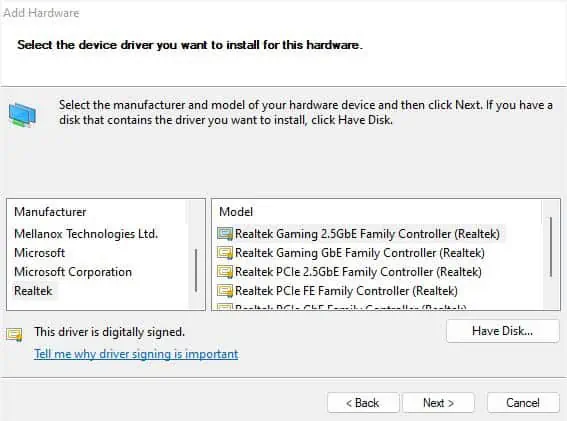
- Then, find and pick the driver manually based on your manufacturer and model. Once done, press the Next button.

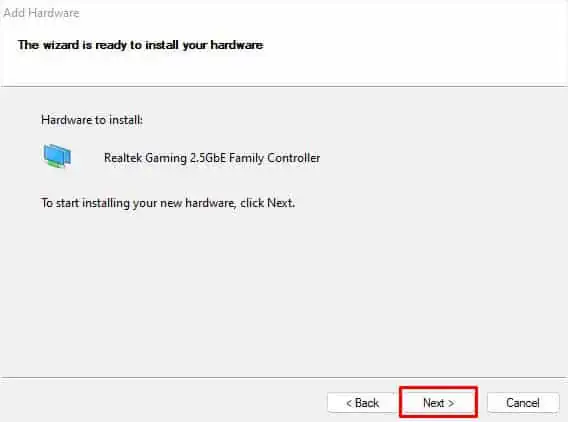
- Again, click Next to start the installation.

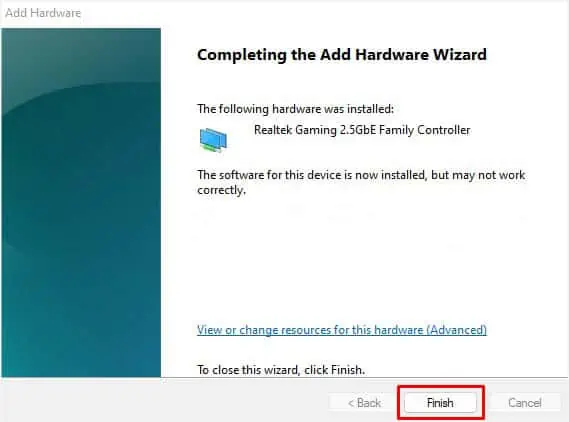
- After a successful installation, press the Finish button on the wizard’s final screen.

- Now, navigate back to Device Manager, and update the recently installed hardware to ensure it works properly.
Additional Tip: If updating, reinstalling, or manually adding hardware doesn’t fix the issue, try downloading and installing the network drivers from your manufacturer’s official website.
Configure Network Adapter Properties
In some cases, you’re met with an “Unidentified network” error when some components within your network adapter go missing. Therefore, it’s a good idea to check whether the client/service/protocol is installed and checked. Here’s how to do it:
- Use the
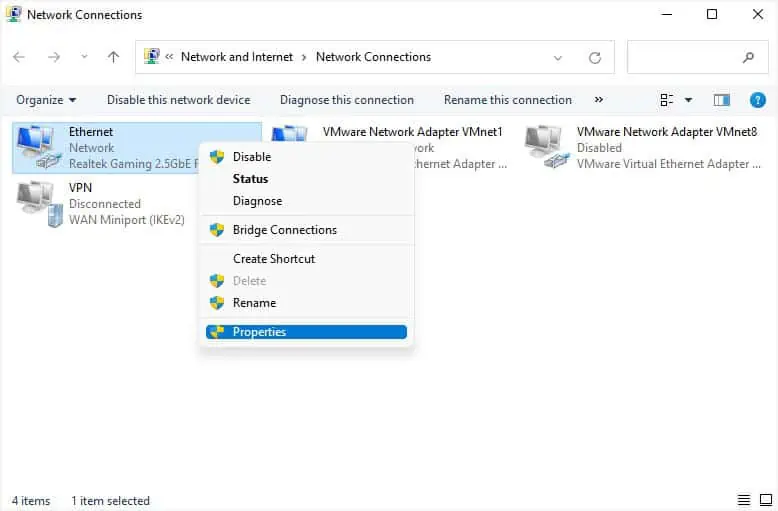
ncpa.cplcommand in Run to launch the Network Connections window. - Right-click on your network adapter and choose Properties.

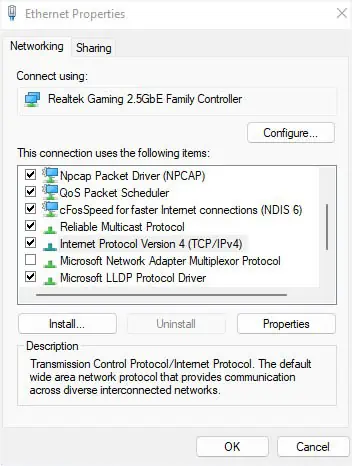
- From the “This connection uses the following items” list, ensure the Internet Protocol Version 4 (TCP/IPv4) is checked. Then, hit Ok.

- If the issues persist, try checking other options to see if they help.
- But if nothing works, press the Install button.

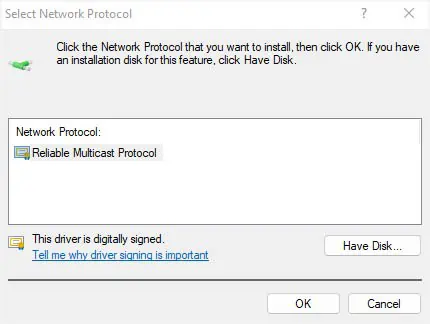
- In the Select Network Feature Type dialogue box, check and install the missing client/service/protocol. For example, we are going to add Reliable Multicast Protocol as shown below.

- Now, close the dialogue box and check if your network adapter is now working.
Check Issues With Windows Services
In some cases, manually configuring services can also cause malfunctions with your network adapter. So, it would be best to set it to Automatic. Alongside this, you need to ensure all the recommended services and their dependencies are running properly.
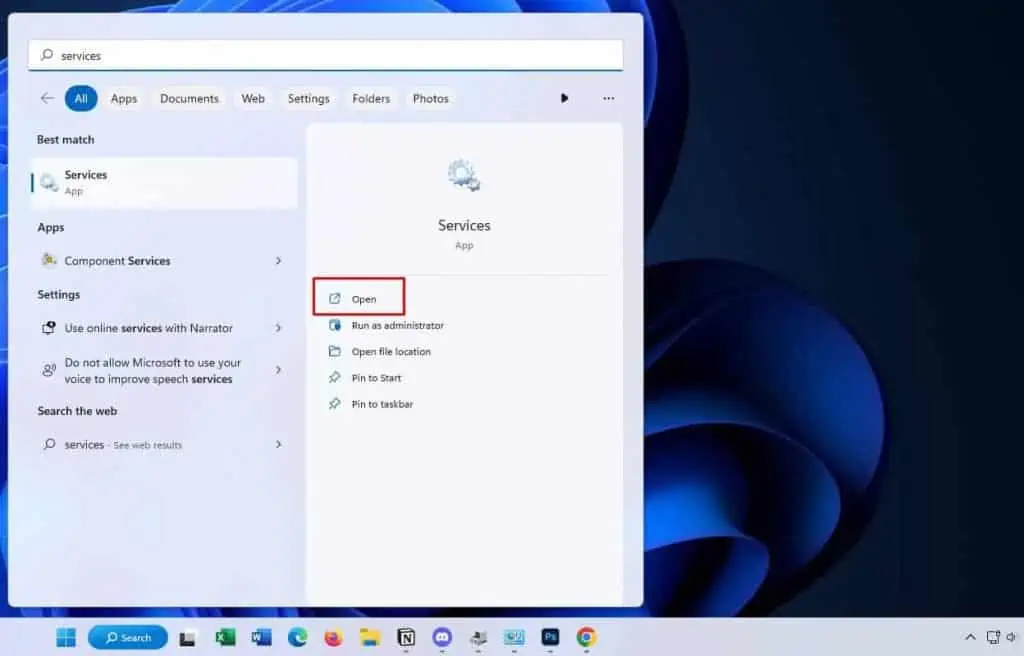
- First of all, launch the Services application from the start menu.

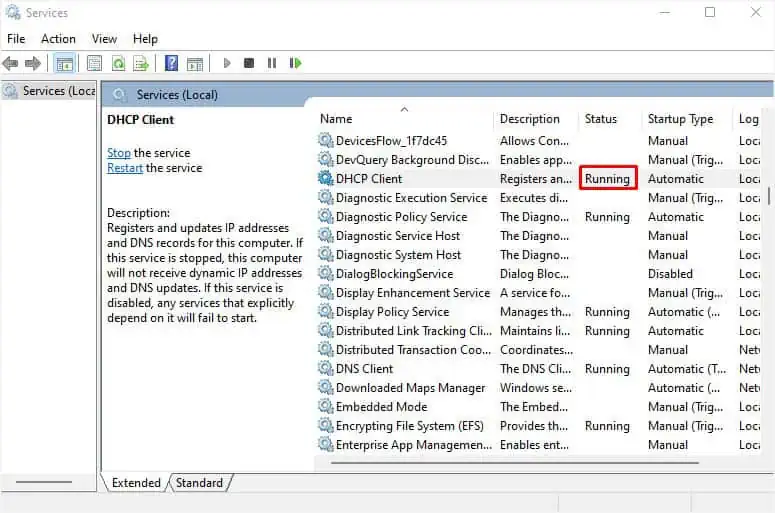
- Now, ensure all the network-related services (DHCP Client, DNS Client, Network Connections, Network Location Awareness, etc.) are running.

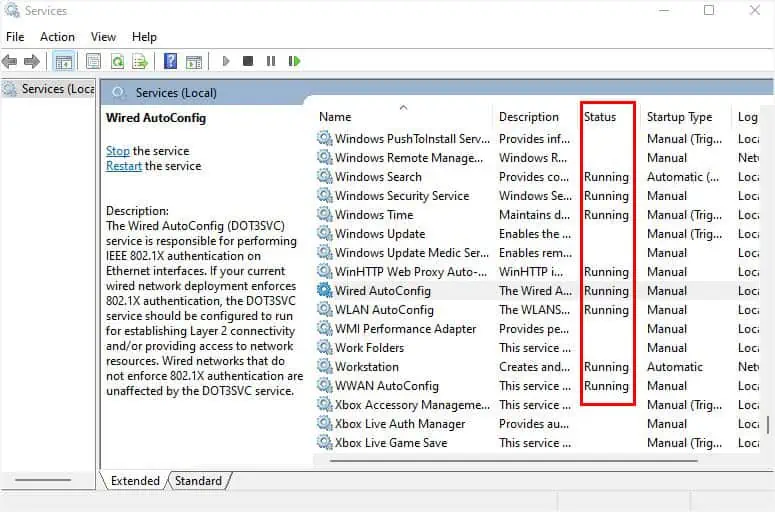
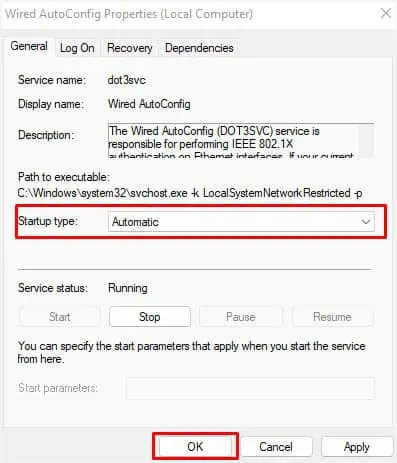
- While you’re at it, also confirm the WWAN Autoconfig (for broadband users), WLAN Autoconfig (for Wi-Fi users), or Wired Autoconfig (for ethernet users) is also running properly.

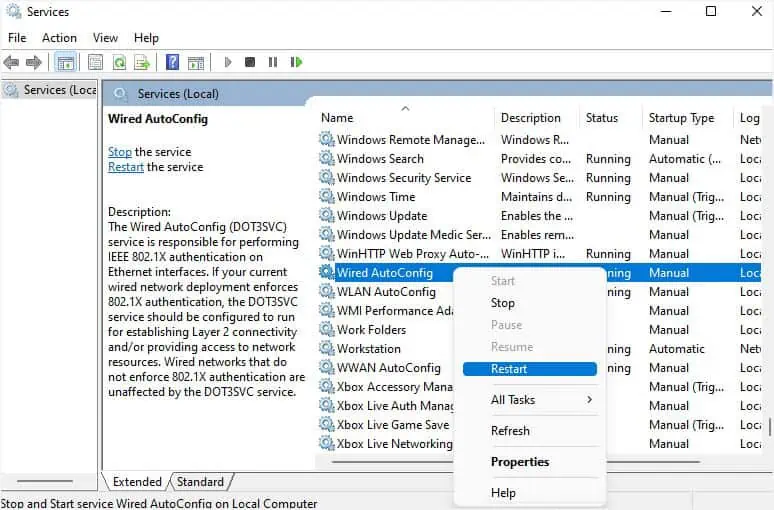
- If not, you can manually start them. Also, you can try restarting each one.

- But if the problem still exists, double-click on each of the services to open Properties.
- Then, set the Startup Type to Automatic, and hit Ok.

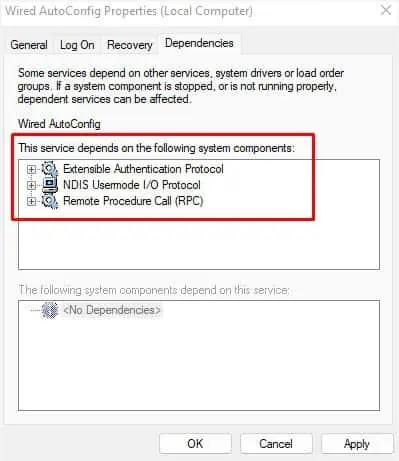
- Even if that doesn’t do the trick, open the Properties dialogue box again, and switch to the Dependencies tab.
- Here, check for the services it is dependent on.

- Next, navigate back to the Services app and ensure that all of these components are running fine.
Configure BIOS Settings
In some systems, you require changing the BIOS settings after installing a new WI-Fi card or NIC (Network Interface Card). Otherwise, the computer will simply not recognize the component.
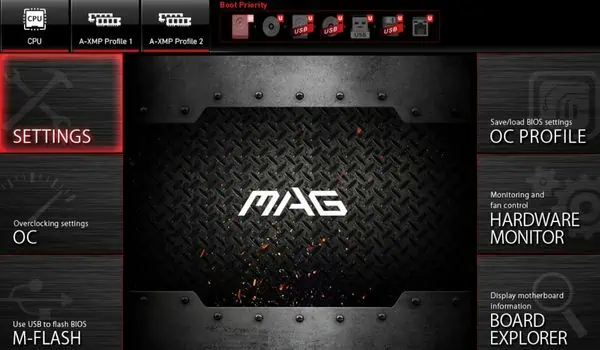
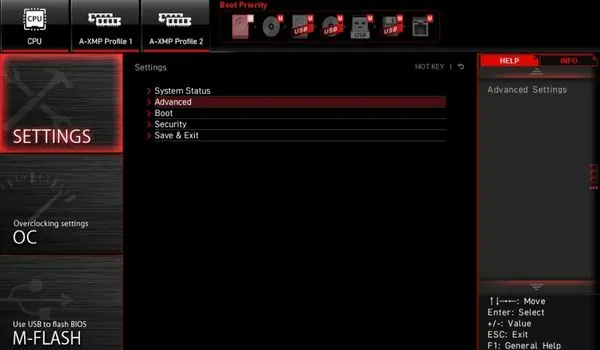
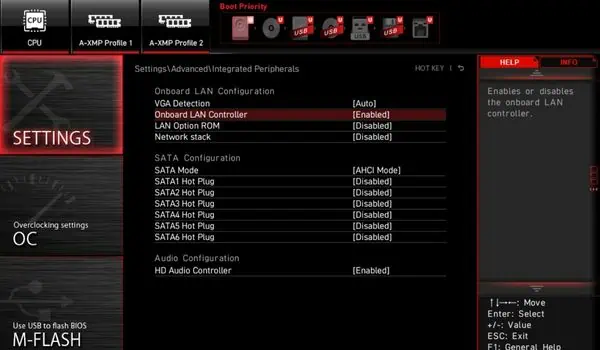
For demonstration, we will enable Onboard LAN Controller on an MSI motherboard. Although the interface and steps might not match yours, the general idea remains the same.
- Restart your PC or laptop.
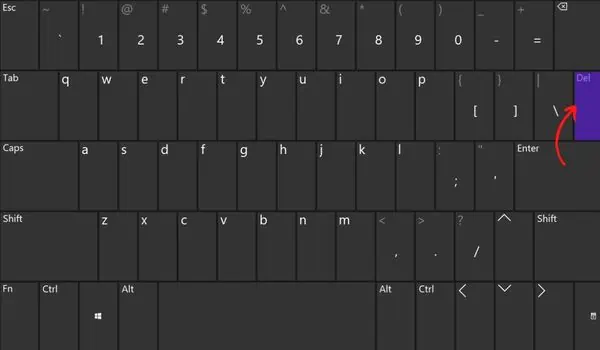
- Once the manufacturer logo appears, hit the BIOS key. For MSI, we are going to press Del.

- Once you’re in the BIOS interface, go to Settings.

- Next, pick the Advanced option.

- Here, pick Integrated Peripherals.

- Under Onboard LAN Configuration, select Onboard LAN Controller.

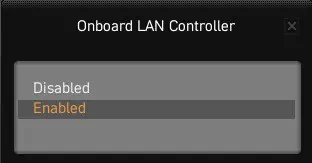
- Now, choose Enabled.

- Then, save your BIOS settings and exit.
- Once your computer restarts, check if the network adapter has started to work.
Reset Network Settings
Resetting your network settings will reinstall the network adapters and also fix issues with other components that might be responsible. Note that this will clear your Wi-Fi passwords, VPNs, and even mobile carrier functionalities.
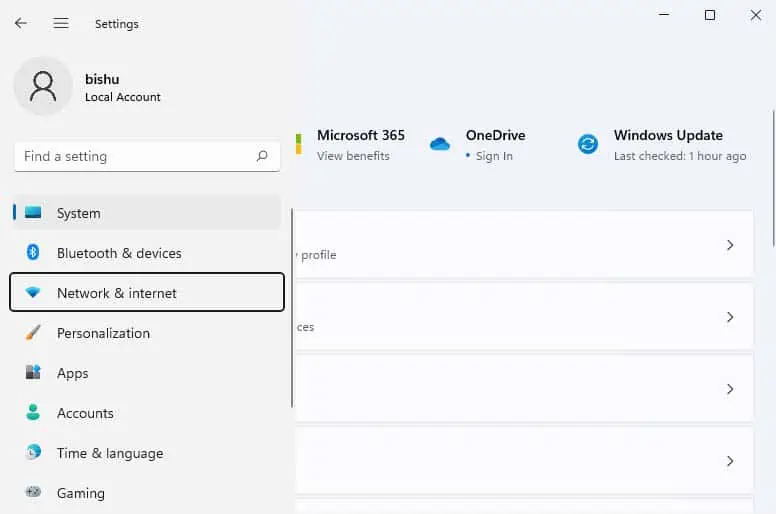
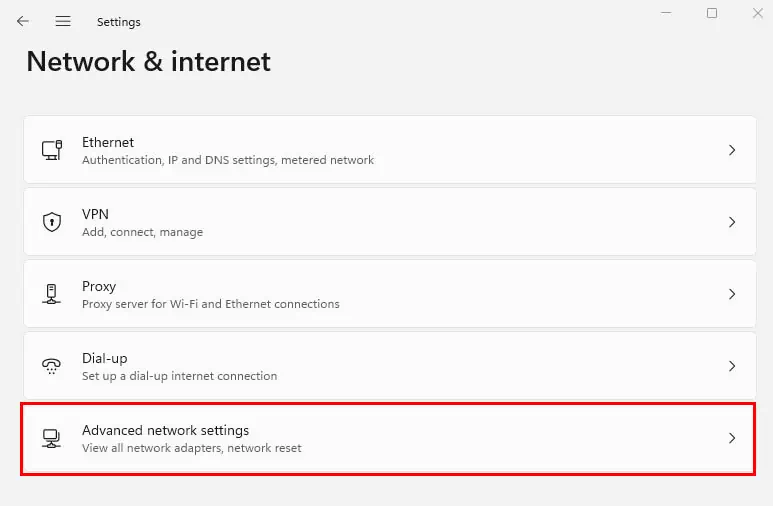
- Open the Settings application and move to Network & internet.

- Next, go to Advanced network settings.

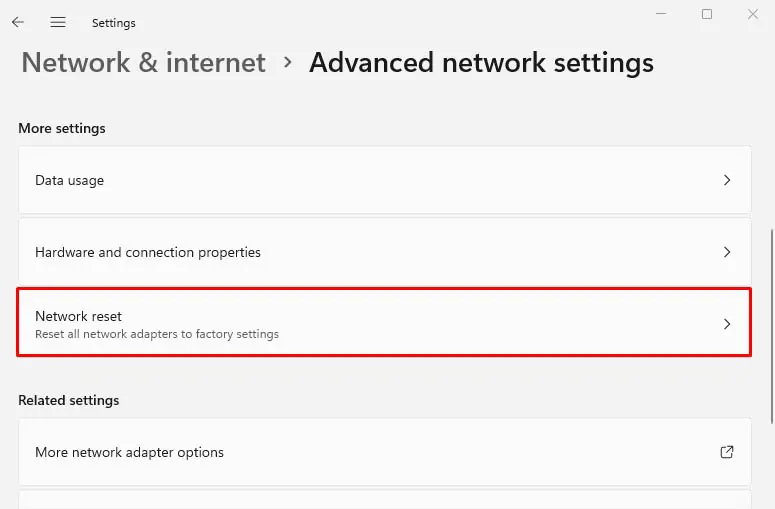
- From the More Settings section, pick Network reset.

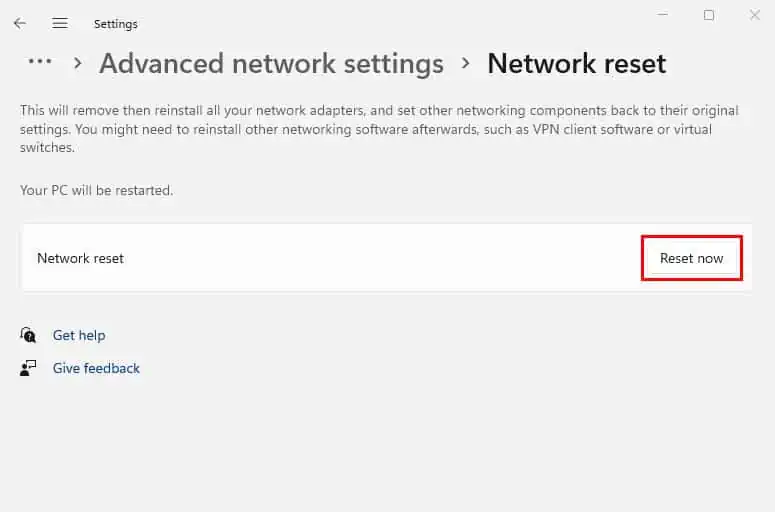
- Then, hit the Reset now button.

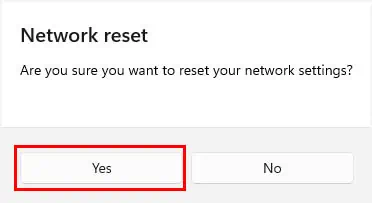
- In the confirmation prompt, press Yes.

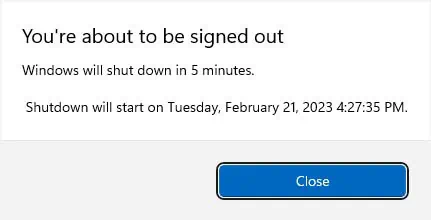
- Now, you’ll likely get the message, “Windows will shut down in 5 minutes.” Before that happens, we advise saving all your work. Instead of waiting for a while, you may even restart your PC yourself.

- Once the PC reboots, the network adapter issue should be fixed, and your internet should also be restored.
Check for Possible Internet Issues
Sometimes, your internet could be facing issues rather than the network adapter. If that’s the case, you won’t notice any error codes and the dedicated driver also seems to function well.
- Power cycle your router, model, and computer.
- For ethernet connection, check whether the cable is properly connected.
- For a Wi-Fi connection, forget the password and reenter it.
- Examine broken ethernet port and wire.
- Use another ethernet cable if required.
- Ensure DHCP is enabled.
- Disconnect from VPN or Proxy connection.
- Manually configure IP address if needed.
- Reset TCP/IP stack
- Try connecting to another network to check if the adapter works.
- Contact your ISP to report your issue and follow the recommended fixes.
Rollback Driver or Perform Windows Restore
If your network adapter stopped working after a recent driver update, you might want to revert it back. Fortunately, this is possible from the Device Manager itself:
- Firstly, launch the tool, and move to the Network adapters section.
- Here, double-click on the troublesome driver to open Properties.
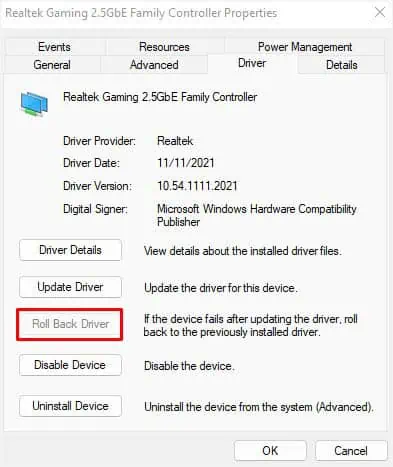
- Go to the Driver tab, and click on Roll Back Driver.

- Once a new dialogue box opens, pick your reason for rolling back, and hit the Yes button.
Likewise, a corrupted Windows update can also lead to the same problem. To fix it, we recommend a system restore. Then, wait until Microsoft acknowledges the problem and a new update is made available.
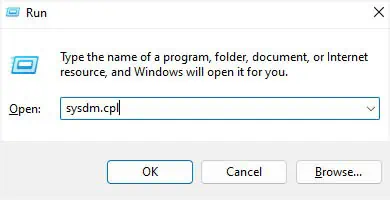
- Navigate to Run, type
sysdm.cpl, and hit enter. This should open the System Properties dialogue box.
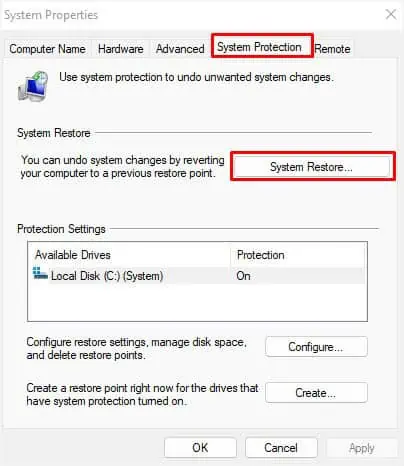
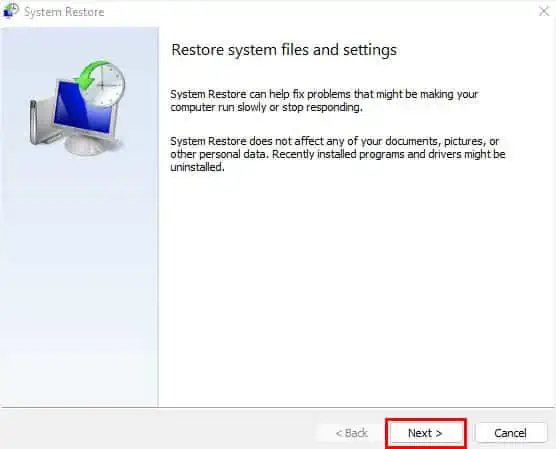
- Switch to the System Protection tab, and press the System Restore button.

- In the new dialogue box, click Next.

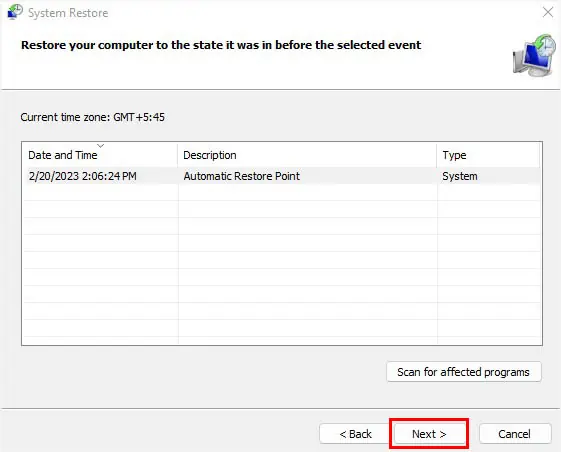
- Now, select the Automatic Restore Point, and press Next again.

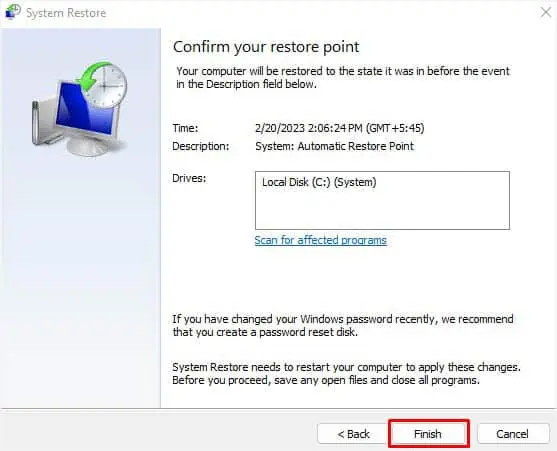
- Hit the Finish button and follow the on-screen steps to complete restoring Windows.

- Log back into Windows and check whether the network adapter is now working or not.
Check for Hardware Failure
The final method is to check your NIC or Wi-Fi card physically. If it’s a USB Wi-Fi adapter, you may simply reconnect it or try a different USB port. But if it’s a PCI adapter, we suggest reseating the component or fitting it on another PCIe slot on the motherboard.
Well, you might have to get a new NIC or Wi-Fi card if the old one has a hardware failure. Before that, we recommend checking your warranty. If it’s not void, you may take to the manufacturer and they may repair or replace it.

