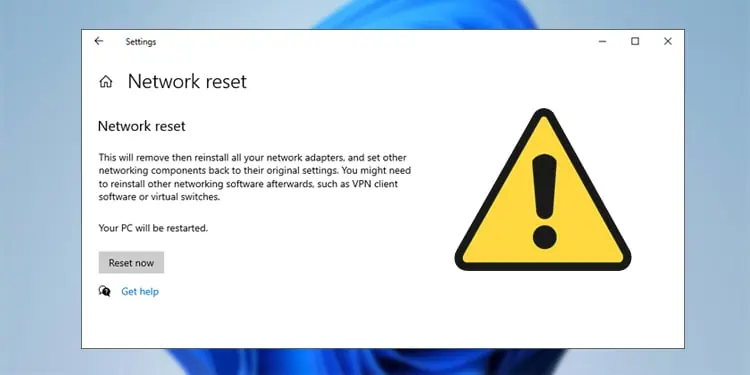
A Network Reset is a common and convenient solution when facing networking issues on Windows. While it does generally help, sometimes it can also lead to more problems due to its automated nature.
In some cases, running the Network Reset utility might not have any effect at all. In other cases, your initial problem might be fixed, but you may encounter new ones like Error Code 56 (Class Configuration).
As stated, it can be hard to figure out what went wrong exactly as the Network Reset is mostly an automated process. We’ll cover how you can troubleshoot in such scenarios in this article.
How to Fix Network Reset Not Working?
The first scenario is where users try to perform a network reset, but it doesn’t work. Simply going through the network reset process manually should be enough to fix the problem in this case.
A network reset basically removes and reinstalls all network adapters and resets the networking components to their default states. This means things like Wi-Fi credentials or static IP configurations will be forgotten, and you’ll also need to reinstall networking programs like VPN clients or virtual adapters.
In order to do all of this manually, we’ve divided the process into three parts with step-by-step instructions. As a general good practice, we recommend restarting your PC and router, as that alone can fix various common problems. Then, proceed to the following sections.
Uninstall Networking Programs
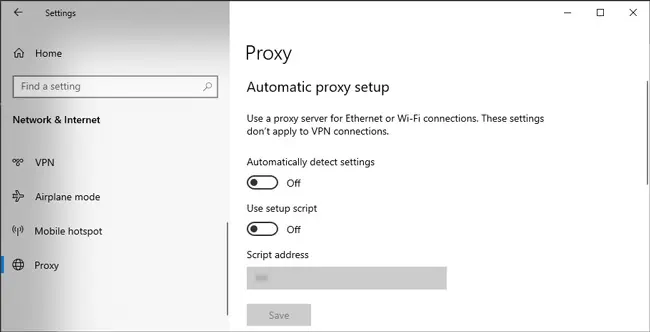
The first step is to disable and forget things like a proxy, VPN and current Wi-Fi connections and uninstall third-party proxy and VPN clients. Here’s how you can do this:
- Press Win + I and click on Network & Internet.
- Go to the Proxy and VPN tabs and toggle off any active connections.

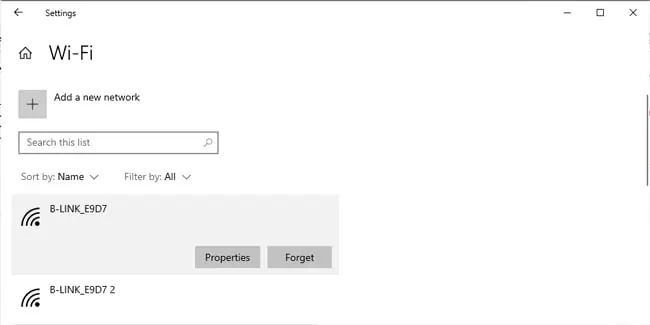
- Next, in the Wi-Fi section, click on Manage known networks.
- Select the Wi-Fi networks you’re having trouble with here and click on Forget.

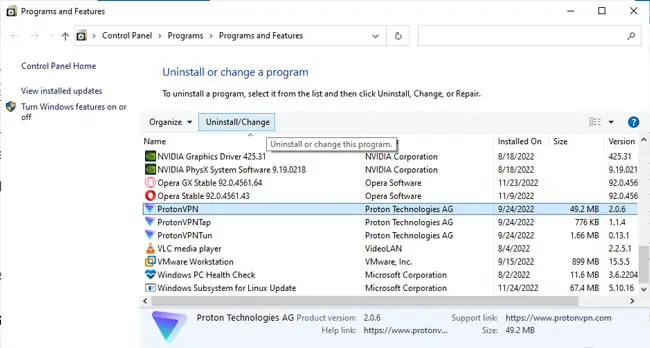
- Press Win + R, type
appwiz.cpl, and press Enter. - Select any third-party proxy or VPN programs you’re currently using and press Uninstall.

- Follow the on-screen instructions to remove the programs and restart your PC afterwards.
- If your networking problem still persists, press Win + R, type
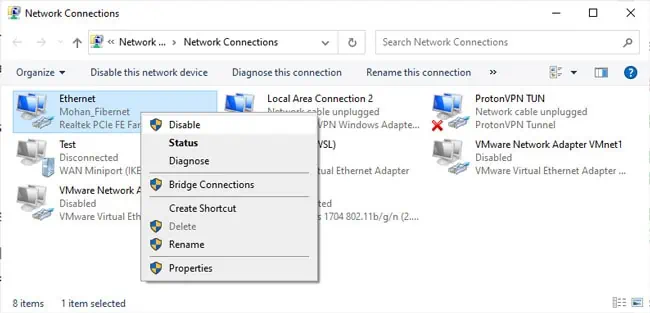
ncpa.cpl, and press Enter. - Right-click your network adapter here and press Disable. Then, re-enable it. If the problem still persists, move on to the next section.

Reset Network Stack
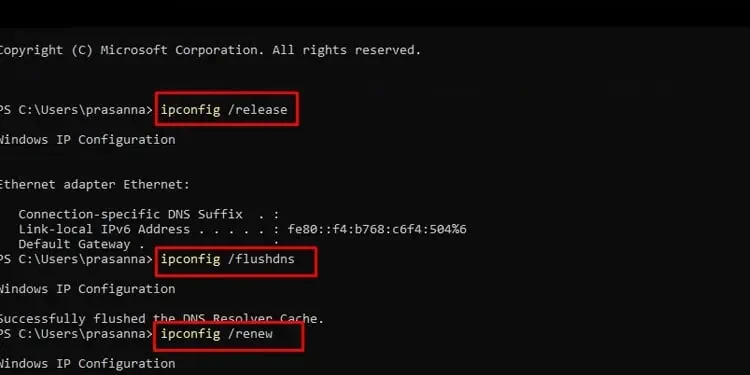
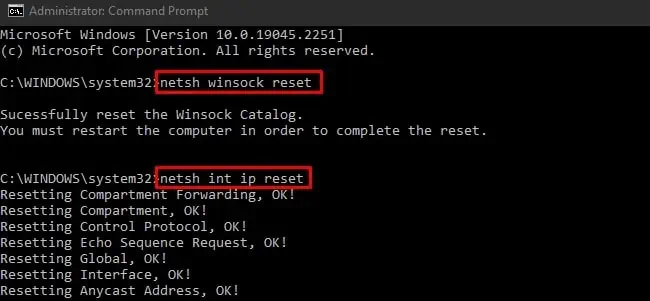
A crucial part of the network reset process has to do with the network stack. Specifically, you’ll need to reset the TCP/IP stack and release and renew the IP address. You should also flush the DNS client resolver cache.
- Press Win + R, type
cmd, and press CTRL + Shift + Enter. - Execute the following commands:
ipconfig /release
ipconfig /flushdnsipconfig /renew
netsh winsock resetnetsh int ip reset
- After running these commands, restart your PC and check if the problem is resolved.
Reinstall Network Adapter Drivers
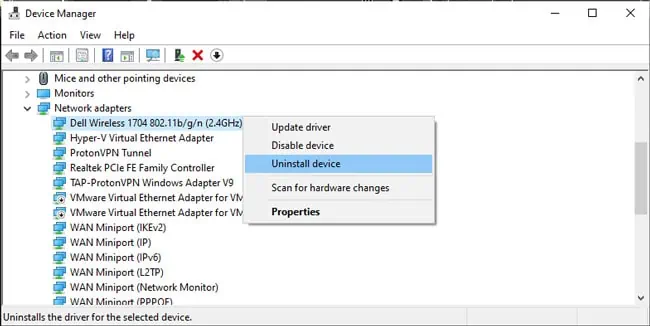
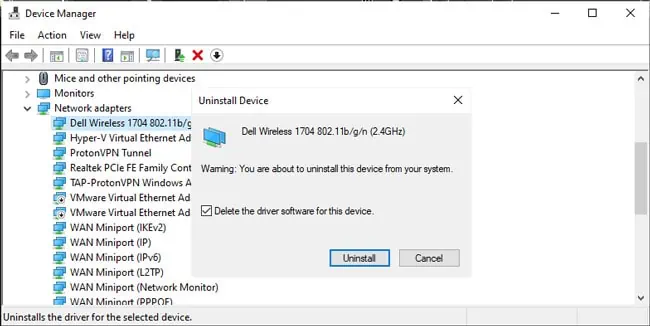
The final step is to remove your network adapters via the Device Managers, including ones set up by VPN or virtualization software. This will uninstall the device driver and reinstall a fresh copy from the driver store, fixing any problems stemming from driver corruption in the process. Here are the necessary steps:
- Press Win + R, type
devmgmt.msc, and press Enter. - Expand the Network Adapters section.
- Right-click a network adapter entry and select Uninstall Device.

- Enable the Delete software driver for this device option and press Uninstall.

- Restart your PC afterwards and check if the issue is resolved.
Troubleshooting Issues After Network Reset
There is also a scenario in that the network reset works, and your initial problem is fixed. But now some other issue has popped up. One such common error after a network reset is Code 56, where Windows has trouble setting up the class configuration for your device. In other cases, you may have Wi-Fi Connectivity issues or trouble with file sharing. Here’s what we recommend in such cases:
- First, check if any third-party VPN adapters or virtual adapters are still present in the device manager. If so, remove them and consider uninstalling the VPN/virtualization software temporarily.
- Next, press Win + R, type
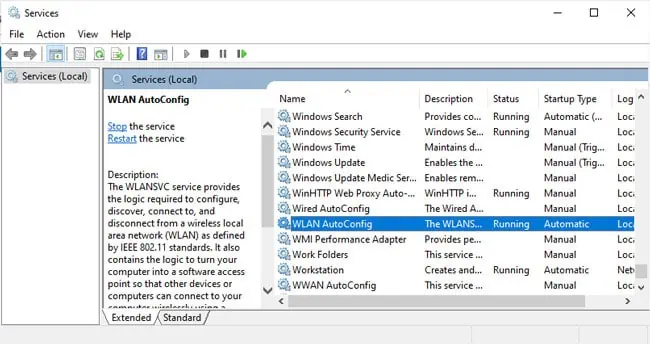
services.msc, and press Enter. - Scroll down to the Wired AutoConfig and WLAN AutoConfig services and ensure they’re running.

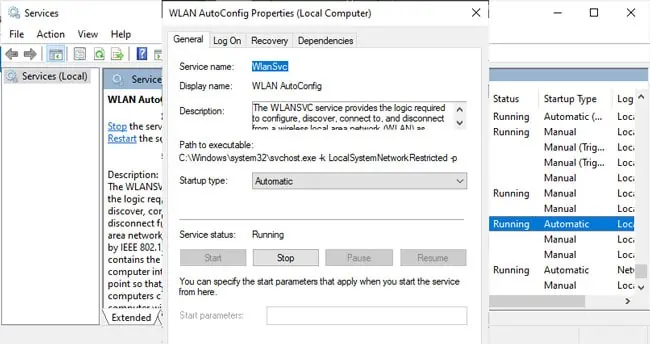
- If not, double-click them. Start the service, change the Startup type to Automatic, and save the changes.

- Next, press Win + R and enter the following:
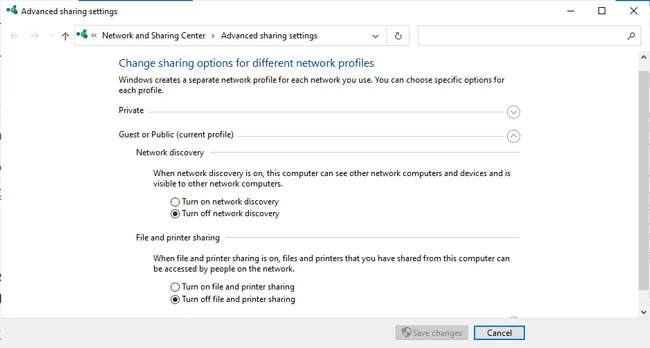
control.exe /name Microsoft.NetworkAndSharingCenter /page Advanced - A network reset will set your network connections to the Public profile. So, configure the network discovery and file-sharing settings to your preference here.

- Finally, you should also address network driver issues. Press Win + X and select Device Manager.
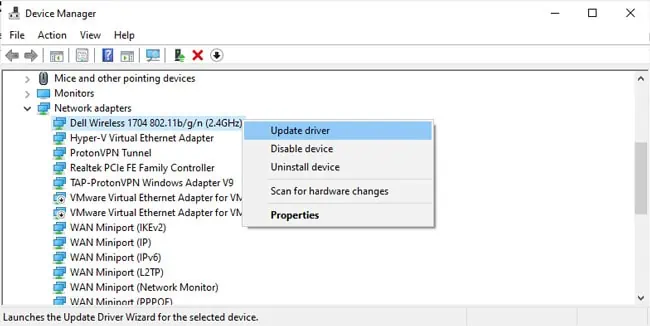
- In the Network Adapters section, right-click your network adapter and select Update Driver.

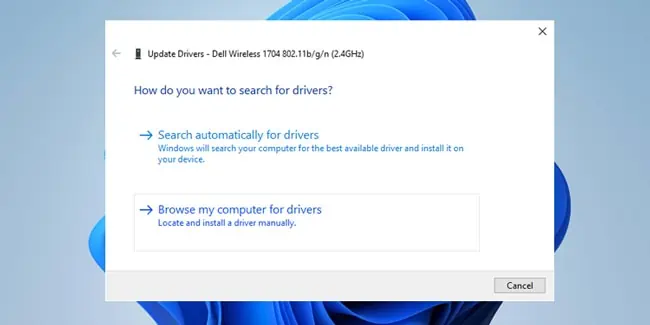
- Select Search automatically for drivers and follow the on-screen instructions.

- If updating automatically doesn’t help, look for the latest driver on your device manufacturer’s site.
- If they have a driver manager tool or an executable installer, download and use those. If they instead provide a set of
.inffiles, launch the Device Manager once again. - Try updating the network adapter driver again, but select Browse my computer for drivers this time.
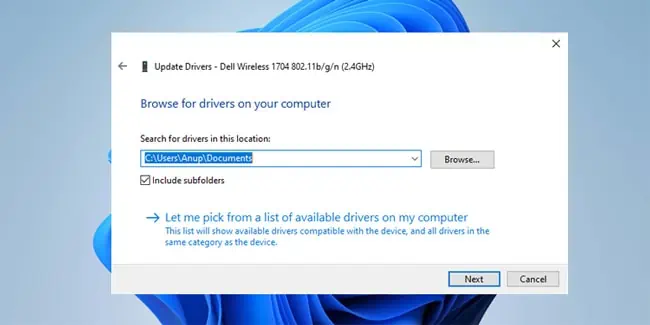
- Select Browse and locate the folder containing the driver files.

- Press Next > Ok and follow the on-screen instructions to update the network driver.

