You’ve built your first rig but despite doing everything right, there’s no display! Well, this is actually quite normal for beginners and there’s nothing much to worry about.
Simply installing the components to the respective motherboard slots isn’t enough. If you’re using incompatible components, the PC won’t even start or even if it does, it’s not good for the long run.
Most starters make blunders when connecting the cables or seating different hardware. If that’s the case, you need to first learn how to properly build a PC, and lucky for you, we have got a step-by-step guide to do just that. If you’re confident about your build but still having an issue, this article should help solve the common mistakes.
Caution: Operating the PC components with bare hands can damage the circuits due to your body’s static buildup. Therefore, you must ground yourself by frequently touching unpainted metal or using an anti-static wrist wrap.
Check Monitor Connectivity
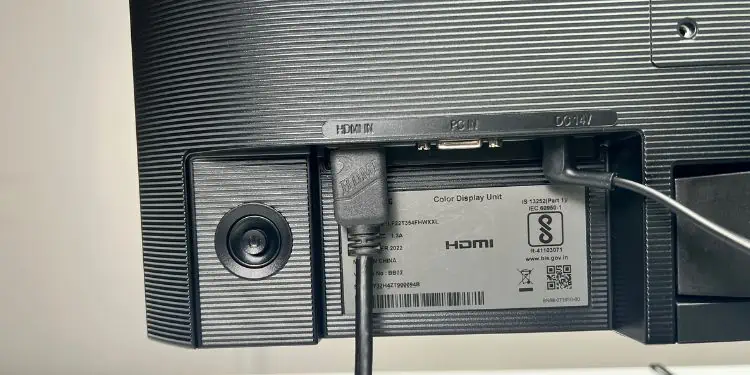
Before anything else, we recommend checking your monitor’s LED. While this varies for different displays, in most models, you’ll see a red light indicating it’s sufficiently powered. If there’s no light, know that it’s a power connection issue. Simply reconnecting the adapter usually solves it.
However, a red light on the display LED doesn’t mean your monitor is getting the video signal. It’s just in standby mode and is often accompanied by a “No signal” message on the screen. In this case, your PC won’t POST and instead throws a beep or error code.
To fix this, simply try reconnecting the cable. If you’re still experiencing a video signal issue, the GPU could also be responsible.
However, if there’s a white/blue light (depending on the monitor), you can confirm there’s no issue with the HDMI, VGA, or DP signal. So, the graphics card isn’t responsible as you can enter the BIOS interface. But you might face difficulties in booting into the OS or proceeding to install one.
Switch Video Output Port
A common mistake most beginners make is connecting the display cable to the motherboard’s port. If you’ve already installed a dedicated graphics card, it’s best to attach the monitor to its video output port.
However, even this varies based on different systems. In some, the onboard graphics is automatically disabled once you install a dedicated graphics card. This means the monitor recognizes the video signals from your discrete GPU without tweaking any settings. In other cases, you’ll need to manually disable integrated graphics from BIOS to avoid conflicts between the two GPUs.
Intel F and KF series processors do not come with iGPU. On the other hand, only those AMD with the ‘G’ suffix support integrated graphics. Therefore, the following steps are only applicable for Intel CPUs (except Intel F) and G-series AMD. For other processors, try reseating the components and ensure the cables are securely connected.
- First, connect the display cable to your mobo’s video port.

- Turn on the PC. Then, check whether the Power-On-Self-Test (POST) initiates.
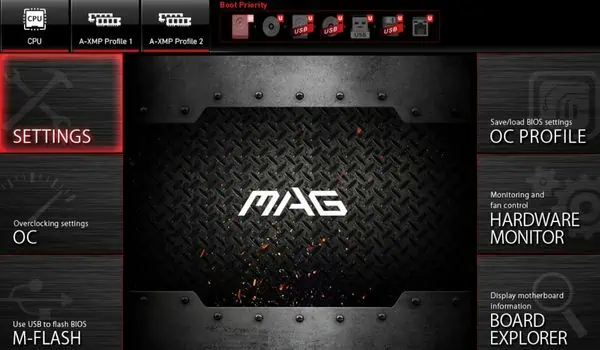
- In case your display works, get to the BIOS and disable onboard graphics. For demonstration, here’s how we are going to do it on MSI with AMD Ryzen 7 5700G processor:
- From the Dashboard page, select Settings.

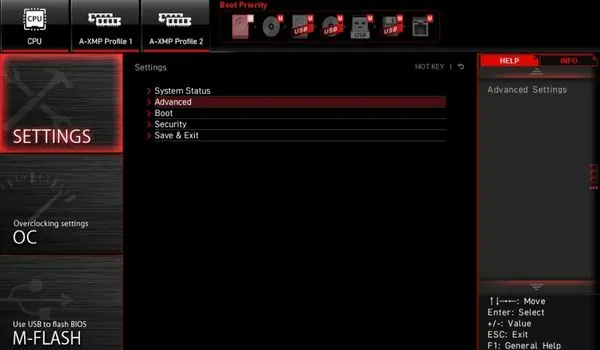
- Next, go to Advanced.

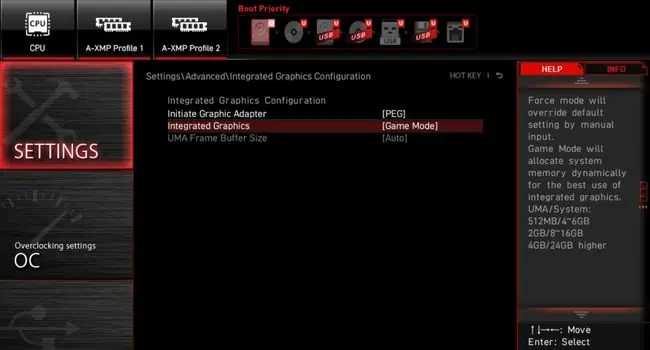
- Find and choose Integrated Graphics Configuration.

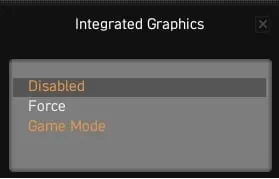
- In the next window, pick Integrated Graphics.

- Click on Disabled and save your settings.

- From the Dashboard page, select Settings.
- Then, connect the display cable to your dedicated GPU and start the computer. Now, the monitor should detect the video signal and you can proceed forward.

Check Power Issues
If your PC is not turning on at all, it’s possibly due to insufficient power. While most starters tend to ignore this fact, connecting your power supply to a bad outlet can often cause this issue. Therefore, a quick fix to this is to use another wall outlet or switch.
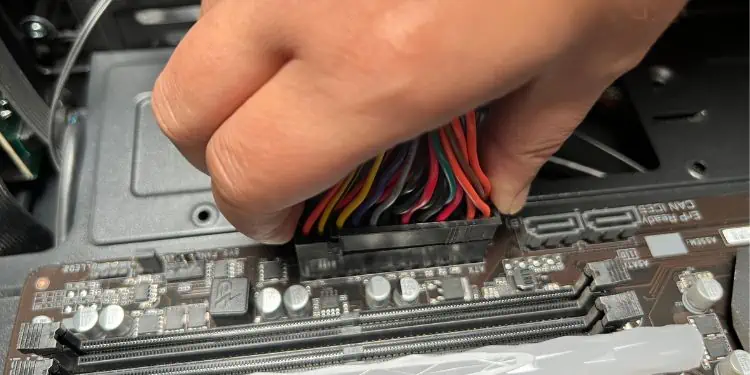
Another common problem is loose connections with the PSU or motherboard. It’s essential to plug in the ATX 24 power connecter securely applying a little more force. Otherwise, your motherboard will not be powered and hence no components are going to function.
Along with that, it’s essential to connect all the other cables (CPU, SATA, PCIe, Molex, Fan, etc.) to the appropriate motherboard headers. If you haven’t securely attached them, your components might not get sufficient power.
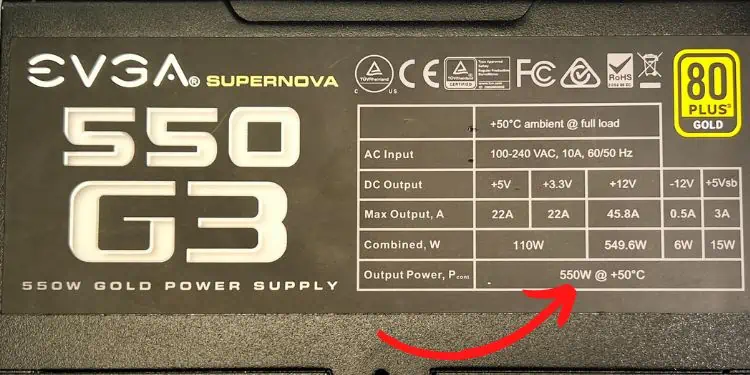
The final thing to consider is a good PSU. If you’ve got high-end components, know that the power, current, and voltage requirements also increase. This means a low-end power supply won’t be sufficient to run your computer. For example, some high-end INTEL or AMD CPUs require more than 200W power. In such a scenario, a low-end PSU (suppose 250W) won’t be enough.
The general rule of thumb is to buy a high-wattage PSU if you’re looking to build a high-end gaming rig. You can even go through our dedicated guides to getting a 600W or 750W power supply. Along with the wattage, you also need to consider a trusted brand. Do not opt for one just because it’s cheap.
Additional Tip: After building a new rig, it’s always a good idea to check the POST operation by assembling the components outside the casing and disconnecting additional components. This way, you get to tinker with each part and fix the possible issues accordingly.
Identify POST, Beep, or LED Codes
Some motherboards have pre-built BIOS POST card that lets you diagnose problems when encountering POST issues. It displays two hexadecimal digits on its VGA screen. These hex codes differ based on BIOS. So, you’ll need to look up your user or online manual to identify the exact cause and work on the recommended solutions.
Another possible way to determine the cause behind the no-display problem after a new PC build is to check the beep code. If your motherboard has an internal speaker, connect it to the dedicated header, usually labeled “SPEAKER” or “SPK”. Now, listen to the beep pattern and refer to your manual to diagnose the issue.
If you do not find either of the components on your mobo, you may purchase one online or from the nearest hardware shop at a reasonable price. In fact, these are even going to come in handy when you encounter issues in the future.
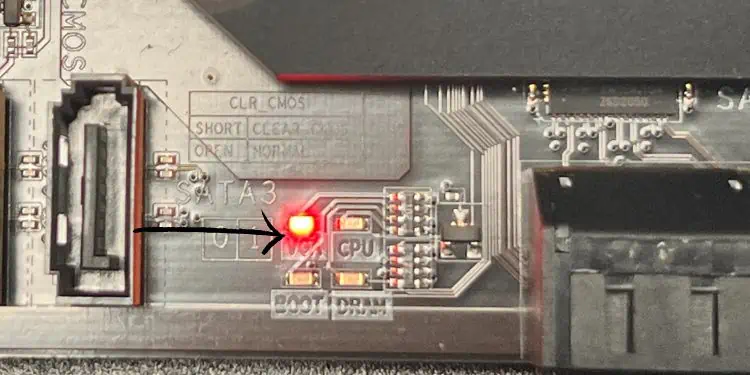
Interestingly, some motherboards are equipped with POST LED Indicators. Usually, they are four in number (BOOT, VGA, CPU, DRAM) and let you identify issues with the main PC parts (RAM, Graphics Card, Hard Drive, or Processor). If the light in one of them is blinking, know there’s an issue with that part and requires troubleshooting.
- Try reseating the graphics card.
- Try reseating the CPU (in case there’s an issue with the iGPU).
- Check if any dirt is preventing the GPU from sitting properly.
- If the issue persists, it might be a hardware failure. It’s best to seek help from the manufacturer’s support page for further troubleshooting or you may even require replacing the components.
Check Compatibility
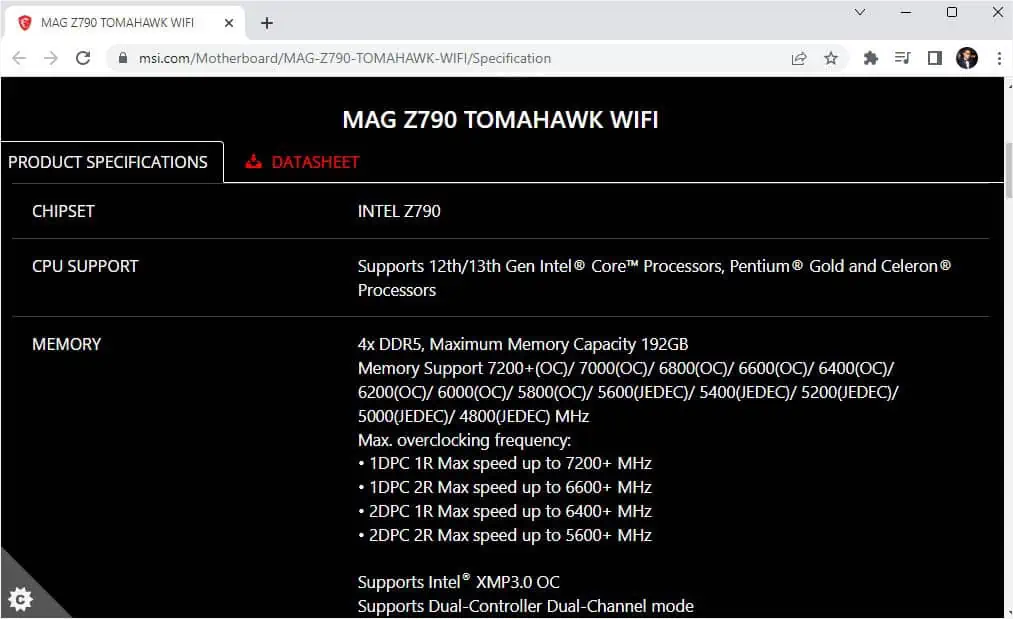
One of the most important questions when building a PC is–are you using compatible components? It’s absolutely necessary for each part to match the motherboard specification or else your PC won’t boot and hence no display!
Indeed, this can be surprising for most beginners. We always recommend getting the CPU first and then looking for the best motherboard that matches your need. Basically, manufacturers produce different boards for Intel and AMD. Thus, an Intel chip simply won’t work on an AMD motherboard and vice versa.
One YouTube user even tried installing an AMD CPU into the Intel motherboard. As expected, the system didn’t show any signs to run.
Alongside the processor, it’s also essential to get compatible memory sticks based on your AMD or INTEL motherboard. In case you’re equipped with incompatible parts, your PC likely has no display. The faults can lie anywhere. So, we advise referring to the specifications online to confirm you’re using the appropriate parts.
Update Your BIOS
Updating BIOS adds compatibility to your new components and can even fix related bugs. If the motherboard is outdated and can’t recognize your CPU, GPU, RAM, or other parts, it’s a good idea to flash a new BIOS.
In most cases, your PC won’t even POST when using an incompatible device. In such a case, you can’t expect to update your BIOS and add compatibility. Even though your computer starts for some reason, flashing a new BIOS version will do more harm than good. So, we highly discourage getting incompatible components just because it has a low price tag.
In this section, we shall discuss the necessary steps to update BIOS on an MSI motherboard. The steps vary based on your system.
- Firstly, use another PC to download the compatible BIOS version for your motherboard.
- Unzip and copy the update file to a flash drive of a minimum 8 GB capacity and formatted in the FAT32 file system.
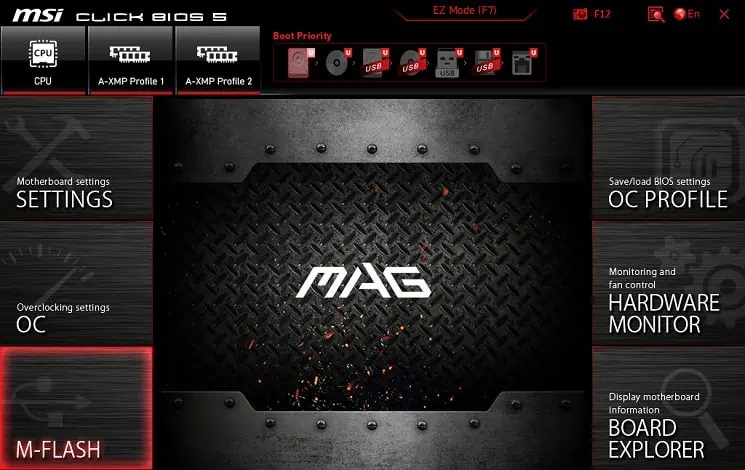
- Now, insert the drive into your primary PC and select M-Flash.

- In the confirmation prompt, hit Yes.
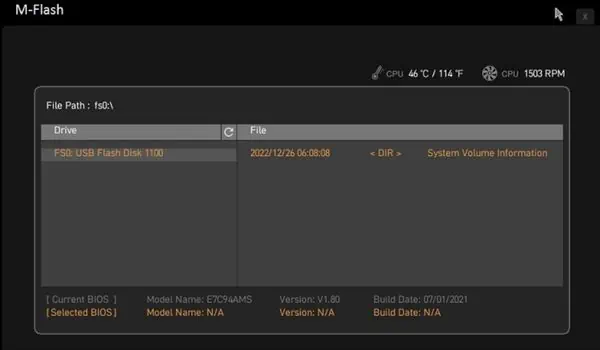
- Now, wait for the computer to enter BIOS. Once you’re in the dedicated window, select the update file.

- Then, press Yes to start the update.
- Now, your computer should flash the new BIOS and reboot.
Reseat the Components
If there’s still no display, you might have seated the components wrongfully. Indeed, there are certain rules when installing your RAM sticks, graphics card, and even the CPU!
Often, beginners miss out on this which may lead to a NO POST problem. If that’s the case, you might require reseating all these components. Let’s discuss each of them in brief.
CMOS Battery or Jumper
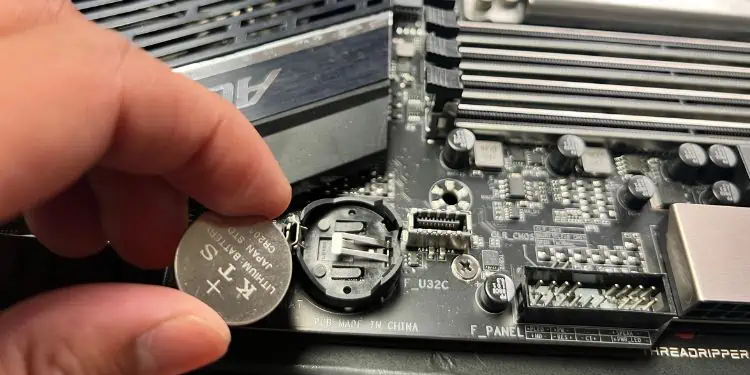
Before moving on to the main hardware components, we recommend reseating the CMOS. In some mobos. you can find a battery, which is easily removable. On the other hand, some motherboards come with a jumper (one with three pins and a cap). Either of these components clears your BIOS when reseated.
To reset the battery, all you have to do is press the lock that holds it in place. This will pop the silver-colored cell out of the slot. Wait for about a minute and reinsert it in place (keeping the ‘+’ side facing upwards).
But if it’s a jumper, it’s much more simple. Just move the cap from position 1-2 to 2-3 or vice versa.
RAM Sticks
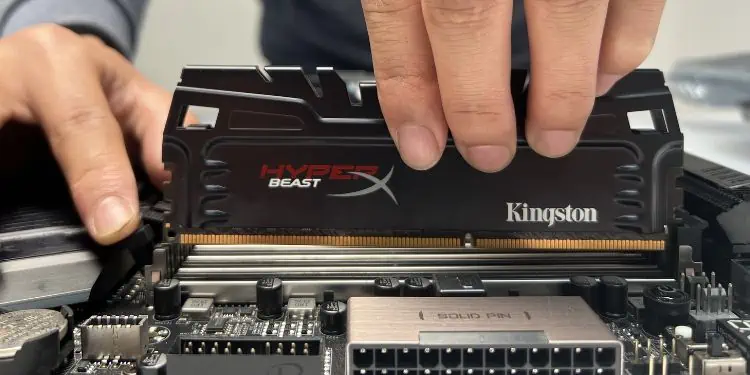
Your computer heavily relies on RAM to do all the major tasks as it holds the necessary information required for the CPU to execute. If there is light and the fans are also running but your PC doesn’t start (instead beeps continuously), it’s a sign that your memory module is not properly seated or is failing!
Seating your RAM can actually be tricky! Modern motherboards come with at least four memory slots. While installing one is usually enough, it’s always better to opt for a dual channel.
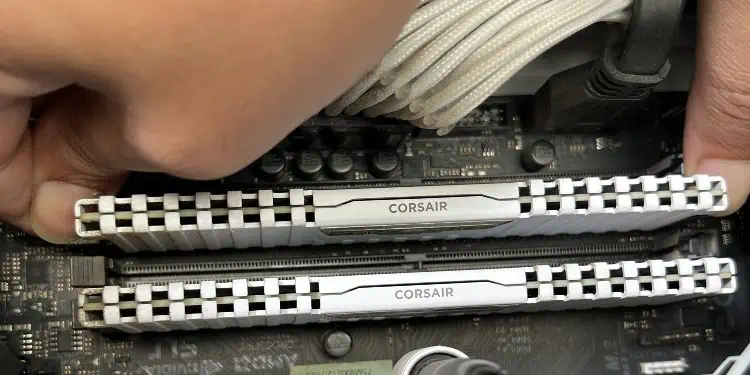
This is also the reason most manufacturers have indicated the recommended seating position within the mobos and its manual. As a general rule of thumb, you should always place the sticks in an alternate fashion.
For example, if you have seated the first module on the first slot, skip the second, and proceed to place the other stick on the third slot. However, this varies based on the motherboard and you may require placing the memory modules in second and fourth slots.
Graphics Card
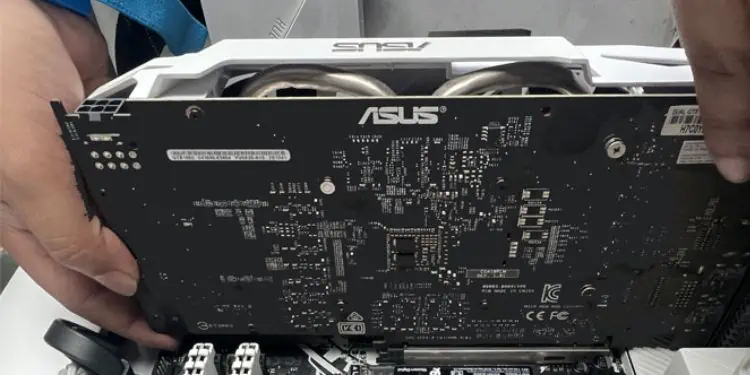
The graphics card is responsible for sending display signals to your monitor. If the dedicated GPU isn’t properly connected, the integrated graphics should do the job. However, this isn’t applicable for CPUs that don’t support iGPU. In such cases, you require installing a graphics card.
Well, you can find different graphics cards in the market. So, the real question is what type of GPU do you possess? Some low-end products get enough power from the PCIe slot (75 W) and do not require an additional PSU connection.
However, the mid-end and high-end GPUs are power-consuming and can come with multiple power ports. You’ll need to ensure all the cables are securely connected.
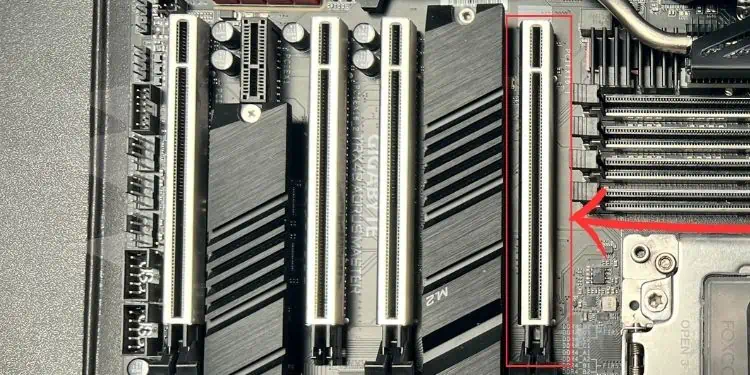
A common mistake we have seen among starters is they tend to put their graphics cards a bit further from the CPU. While this is completely fine if your motherboard manual says so, professionals will always recommend attaching the card to the first PCIe slot.
Often, users have fixed the no-display issue after seating in a different slot. But this can vary on your system. So, we suggest checking the manual before making any changes.
CPU
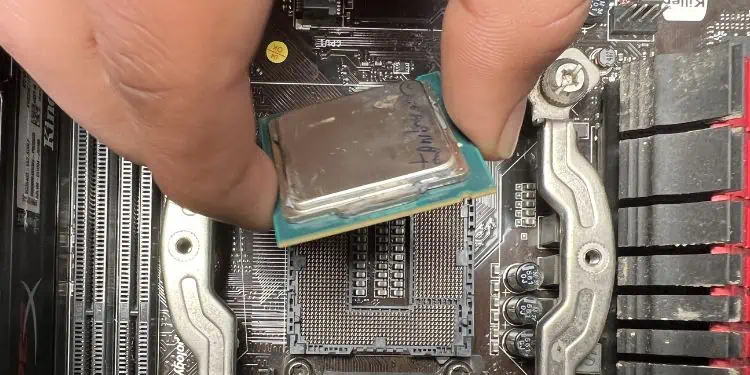
If you haven’t seated the CPU correctly, the pins might get bent and in the worst case, you might brick the motherboard. Like any other component, the processor also fits in just one dedicated position. Also, this varies based on Intel or AMD.
- First of all, remove the heatsink from the top of the processor.
- Now, push down the retaining plate lever and pull it back to reveal the socket.

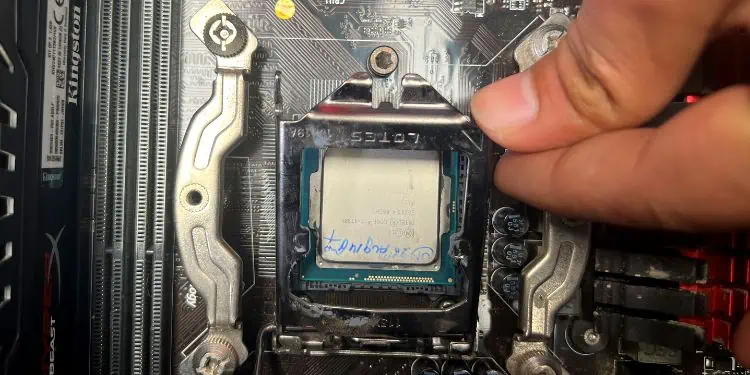
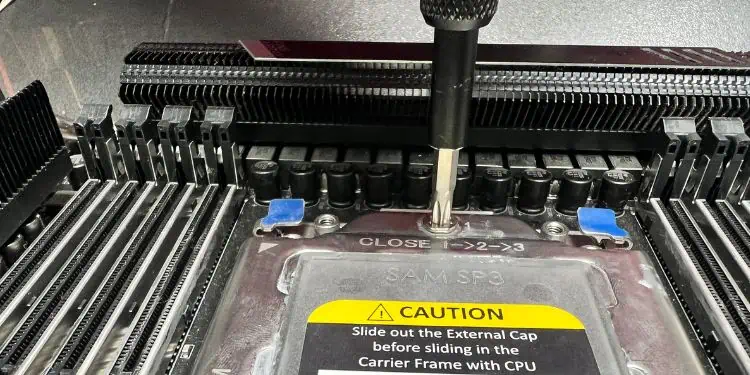
In some motherboards, you might require untightening the screws to slide out the external cap before pulling back the retainer, as shown below.
- Note the triangle so that you do not have any issues when refitting the CPU after its removal.
- Now, carefully unseat the CPU and also clean the thermal paste on its heat spreader.
- Align the processor with the triangle and fit it properly.

- Then, push back the retainer plate lever and reapply the thermal paste.
- Finally, reinstall the heat sink, start your PC, and check if the POST operation now initiates.
Final Words
In this article, we have only discussed the common problems that can happen with beginners. If you’ve properly followed our guide, you should have fixed the display issues by now.
While there’s a very thin chance for components to get damaged on arrival, it could still happen. So, you can always seek professional help from the nearest hardware shop. If any of the parts are actually damaged, you need to report them to the manufacturer asap.
Since every PC is built differently based on the motherboard and its specifications, there may lie other vital errors. To fix this, we would have to know further about the problem and also the system you’re trying to build. We’d appreciate it if you provide the exact details in the comment section below, and we’ll definitely look into it further.

