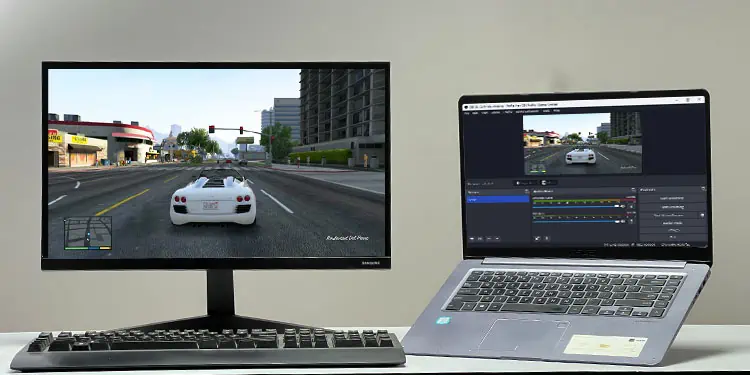
Even though your recording process with OBS may seem smooth and free of lags or stutters, there is still a possibility of encountering choppy video output.
Such situations can occur if OBS runs out of memory when encoding the recorded video, especially if the video is recorded at high resolution and high FPS.
Sometimes, the media player may not support encoding or have issues decoding the recorded clip, resulting in choppy or laggy video playback. In such a case, you can try to play the recorded clip using a media player like VLC.
Run OBS as Admin
Running OBS as an administrator gives the application higher privileges so it can access more system resources. This might fix the issue if OBS is not getting enough system resources.
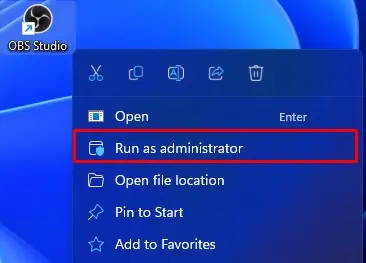
- Right-click on the OBS executable file.
- Click on Run as administrator.

- Click on Yes when it asks for confirmation.
- Try recording the screen to check if the recording is choppy.
Change Process Priority
Similar to running OBS as an administrator, setting the process priority to a higher value will allow all OBS background processes to have privileged access to system resources. To set a higher process priority,
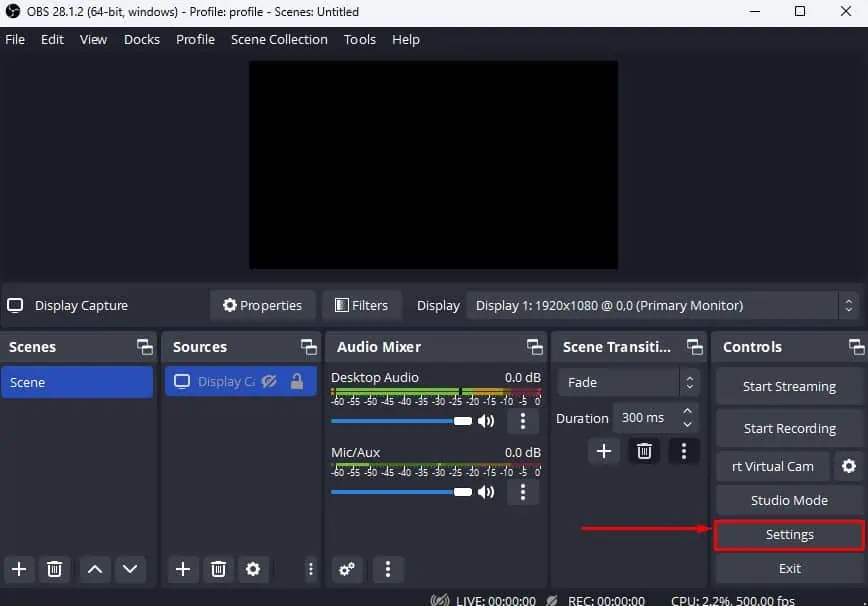
- Open OBS studio.
- On the lower right, click on Settings.

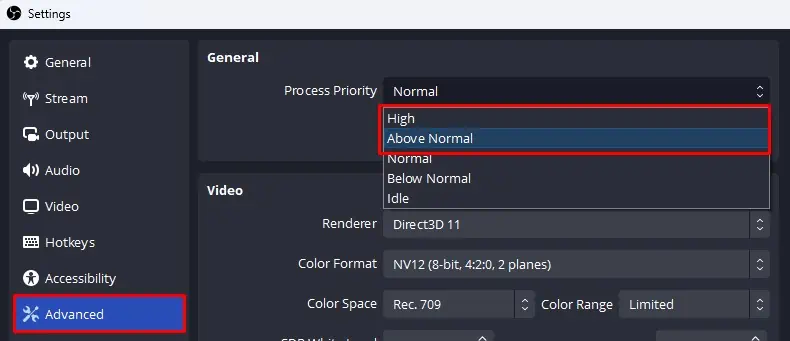
- Go to the Advanced tab.
- Set Process priority to Above Normal or High.

Check Background Processes
Some background processes might be hogging significant system resources, leaving OBS little room to work with. In such cases, OBS might record choppy or low-resolution recordings.
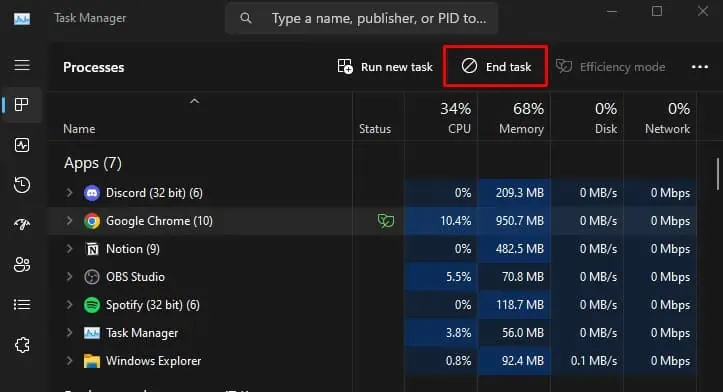
To ensure this is not happening to you, we recommend that you check and clear any background process that’s using high CPU, RAM, or Disk usage from Task Manager.
- Press Ctrl + Shift + Esc.
- In the Processes tab, check if any application is taking high CPU, RAM, or disk usage.
- Make sure you check Background processes as well.
- Click on the process that is taking high system usage and click on End task.

- Now, try recording using OBS.
Disable Game Mode and DVR
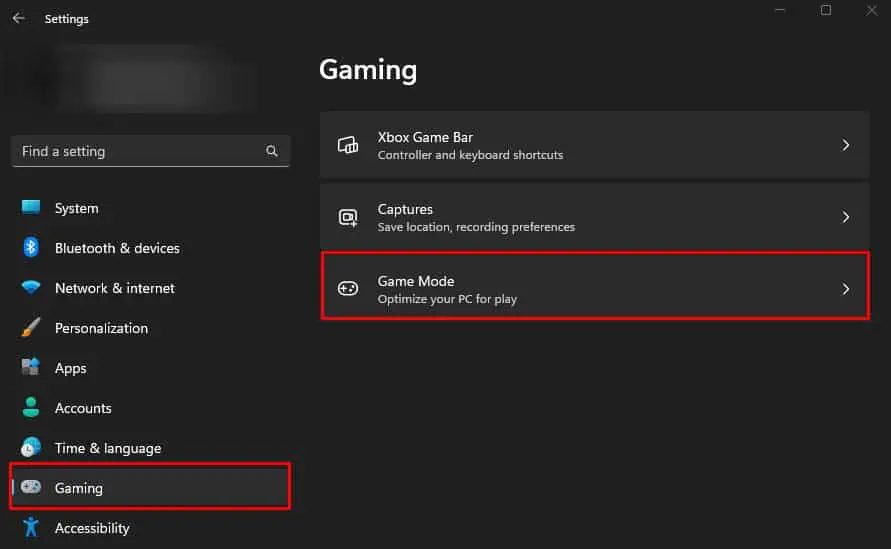
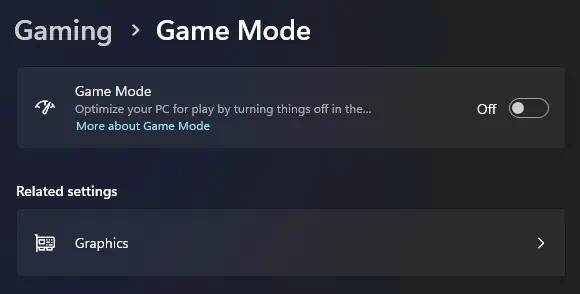
Although enabling game mode optimizes your PC for gaming, it is reported to introduce lag and performance issues with OBS in older version of Windows. So, we recommend that you disable the Game Mode.
- Press Windows + I key.
- Go to Gaming > Game Mode.

- Set Game mode to Off.

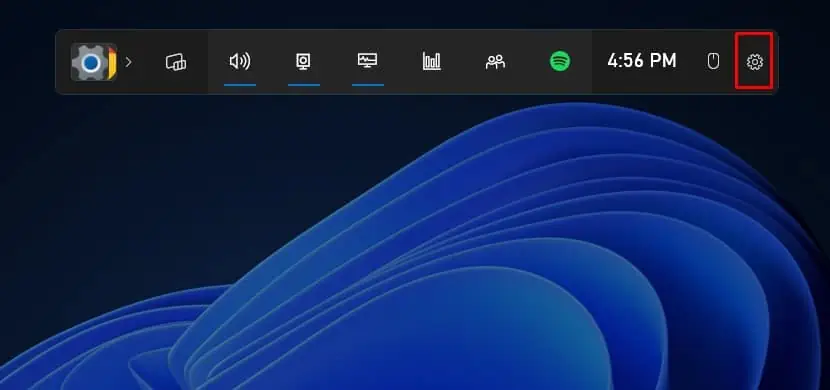
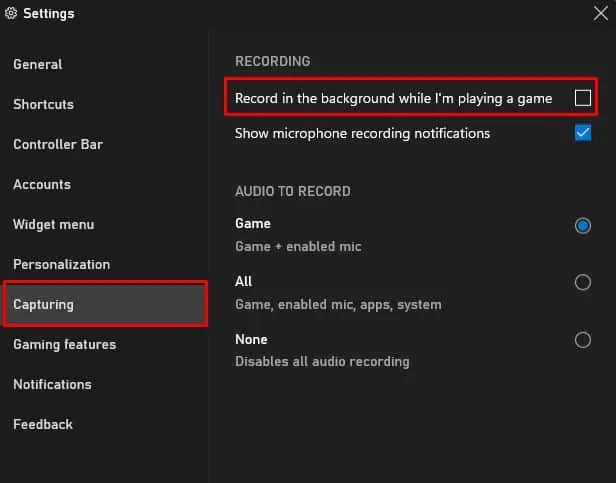
Like OBS, Game DVR also records your gameplay. Running the two simultaneously can cause conflicts when using hardware encoding like NVENC. To make sure this does not happen, disable Game DVR.
- Press the Windows + G key simultaneously.
- Click on the gear icon to open Settings.

- Click on Capturing and disable Record in background when I’m playing a game.

Change OBS Recording Settings
The final output of the recording also depends entirely on the settings used to record. Even on a high-end system, the recording might be choppy if you have extreme recording settings.
Few settings to keep in mind when recording is,
- Resolution
- Recording Quality
- Encoder
- Common FPS value
Recording screen with a high resolution, quality, and FPS demands more system resources. This might result in encoding lag.
To avoid this, here are some OBS settings that we recommend.
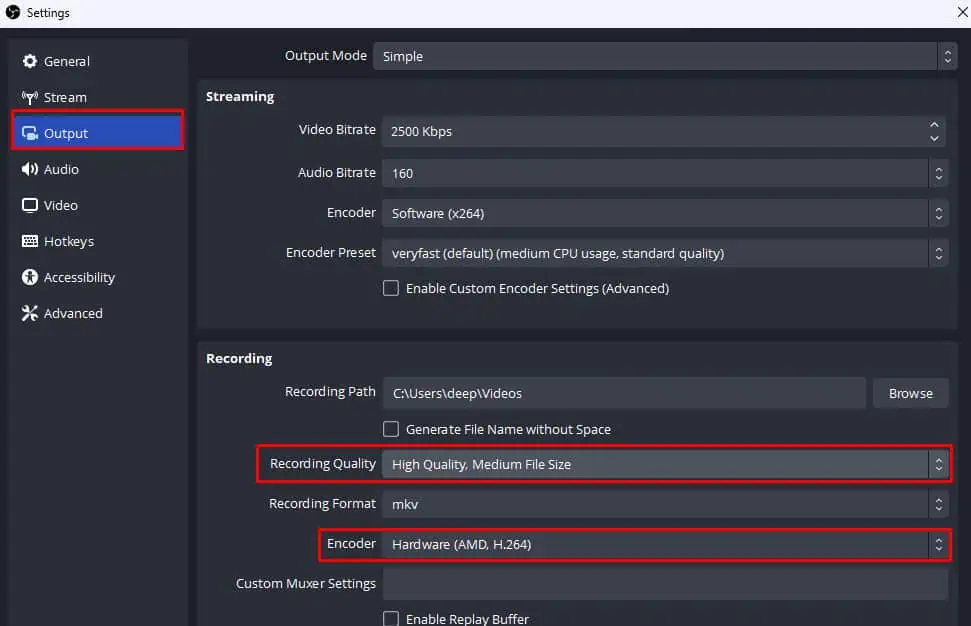
- Open OBS settings.
- Go to Output.
- Set Recording quality to High quality.
- Set Encoder to Hardware if you have a dedicated GPU. If not, set Encoder to Software.

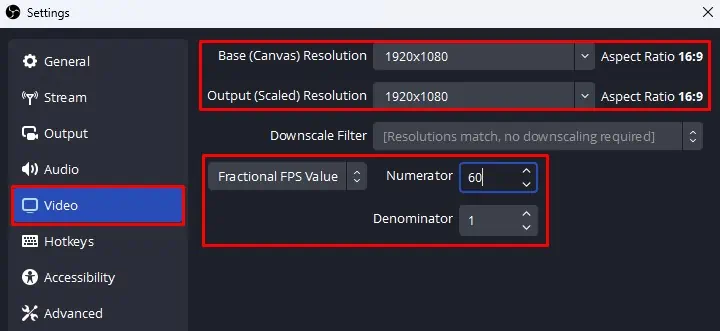
- Go to Video and set Base and Output resolution to your monitor’s resolution. You can lower output resolution if you have a low-end system.
- And set common FPS values to 60. If you are getting stuttering at 60, lower it to 30 to see if the output video lags.

- Save all these settings and try recording.
Lower In-Game Settings
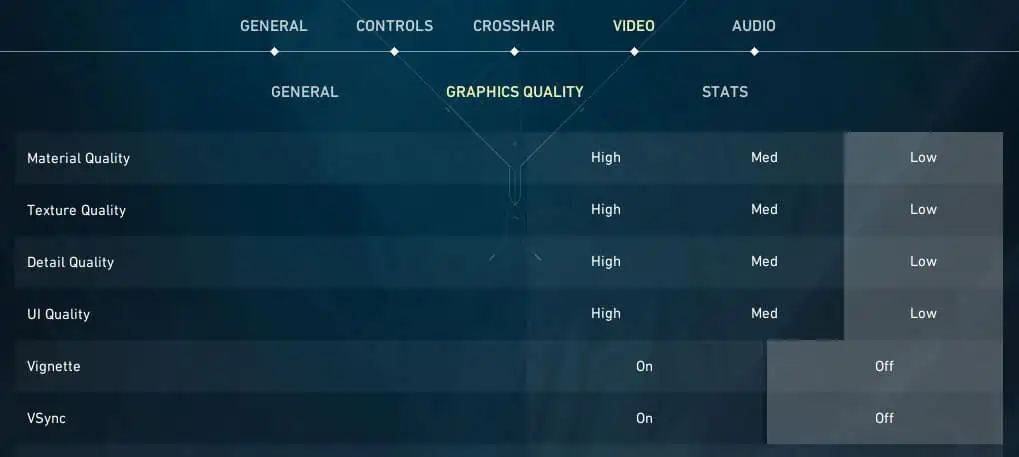
Running games at max or ultra settings will take high memory and CPU usage. Furthermore, recording this video will also take up a considerable amount of system resources. This will simultaneously result in OBS to record choppy videos.
To fix this try running your games on a lower setting.
- Open your game settings.
- Go to Graphics or Display.
- Here lower your in-game settings.

- Make sure that you lower in-game resolution as well
I also recommend that you cap your FPS to 60. To limit your in-game FPS, you need to tweak some settings.
On AMD Graphics Card
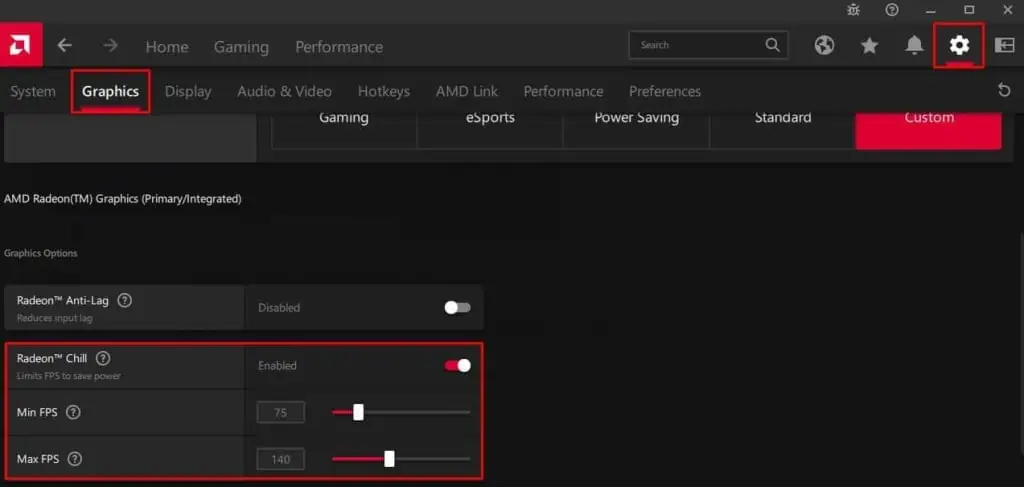
- Open AMD Adrenaline Software.
- Click on the gear icon.
- Go to the Graphics tab.
- Enable Radeon Chill.
- Here, set the Minimum and Maximum FPS values.

On NVIDIA Graphics Card
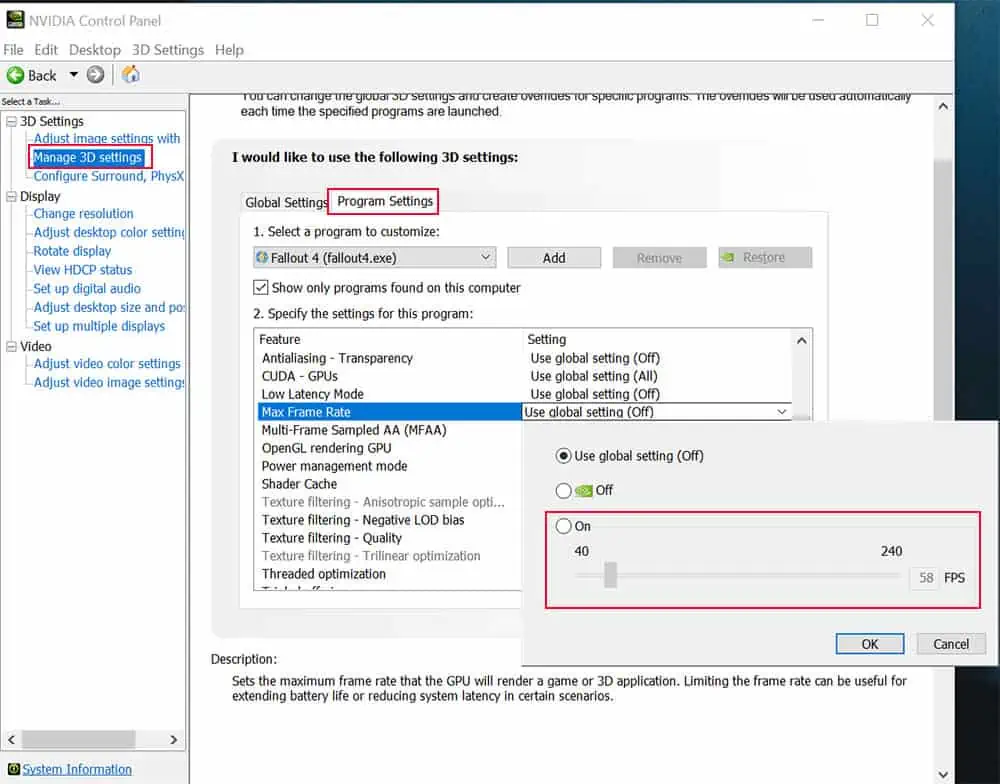
- Open NVIDIA Control Panel.
- Expand 3D settings and select Manage 3D settings.
- Click on Global settings.
- Now, scroll down and set the Max frame rate to On.

- Set the maximum frame rate value and click on OK.
Create New Profile
By creating a new profile, OBS will set all its settings to its default values. So, if the above method does not work, you can try creating a new profile.
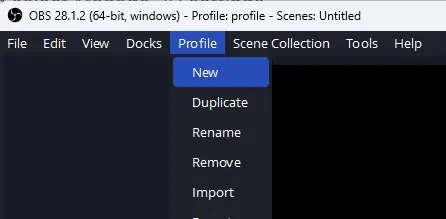
- On the top part of the OBS window click on Profile.
- Click on New.

- Enter a profile name and click on OK.
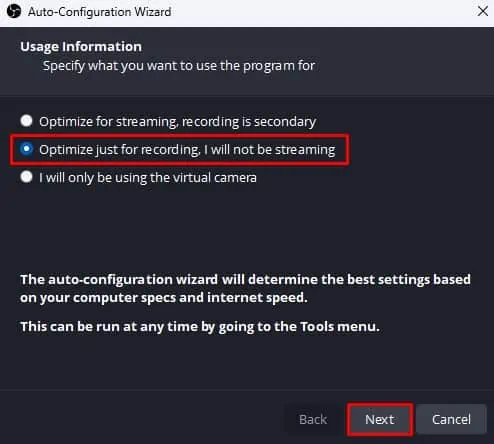
- Check Optimize just for recording and select Next.

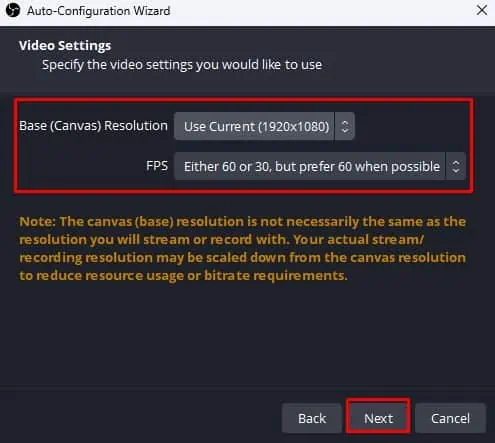
- Set the Base resolution as your monitor’s resolution and FPS to Either 60 or 30.

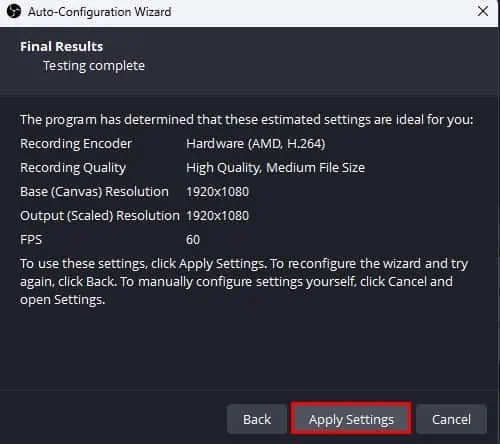
- Select Apply Settings.


