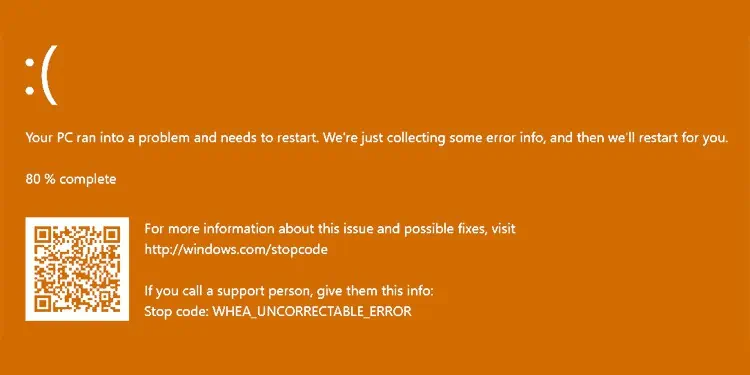
The infamous Blue screen of Death has troubled a lot of us for a long time. But you can sometimes get an Orange Screen of Death crashing your PC and hindering your workflow.
OSoD is quite rare and is most generally caused by issues with the graphics devices, drivers, and settings. Updating the drivers or tweaking a few graphics settings solves the issue usually. But it is not limited to only the drivers.
So, in this guide, we have compiled the workable fixes for most of the causes to solve the issue of OSoD in your PC.
Fixes For Orange Screen of Death on Windows
Most of the time, the OSoD error goes away after restarting the PC. If it still persists, you can try resetting the graphics driver by pressing Win + Ctrl + Shift + B. You will see the screen blink with a beep sound.
But, if you are stuck on the boot loop with the OSoD, boot your system in safe mode to perform the fixes.
- Power off your computer by pressing the power button for around 10 seconds. Do this 3 times to open the recovery environment.
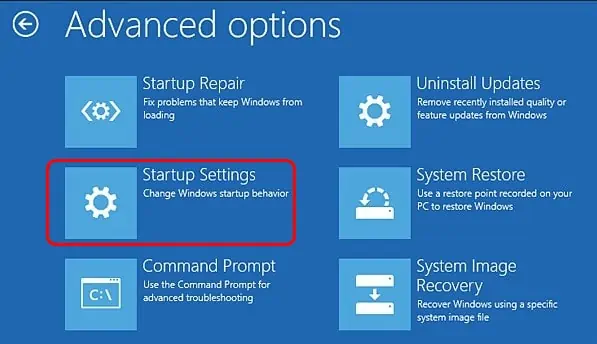
- Navigate to Troubleshoot>Advanced Options>Startup Settings.

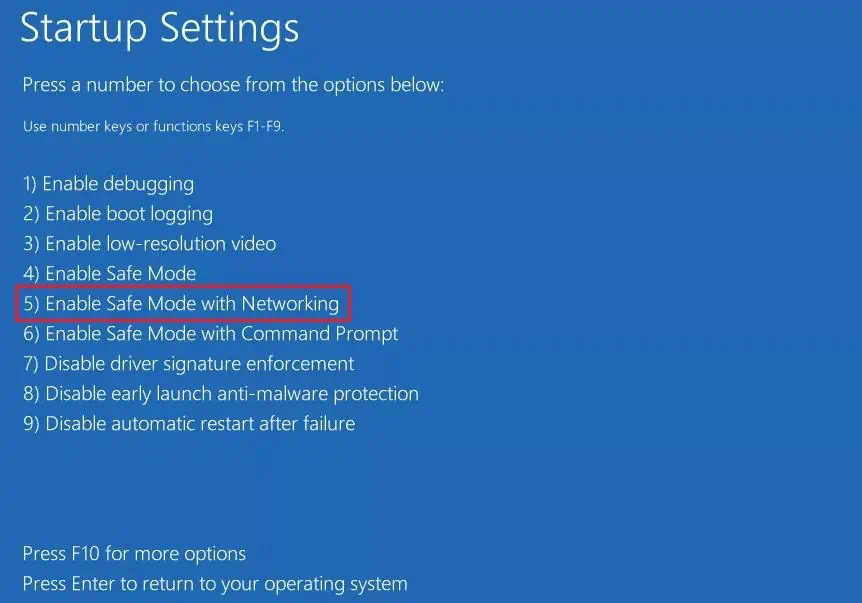
- Click Restart and press 5 or F5 to boot your PC in Safe mode with networking.

Now, let’s move on to the fixes straight away.
Look into the Dump Files
The first thing to do is to find the particular cause of the error. Windows stores the details of the error in dump files. You should go through the file to find what failed or interfered with your system resulting in the OSoD.
Let’s see how to analyze the dump file.
- Download WinDbg Preview from Microsoft Store and install it.
- Search WinDbg in the search bar and right-click on WinDbg Preview to open it with administrative privilege.
- Go to File and choose the Open dump file option.
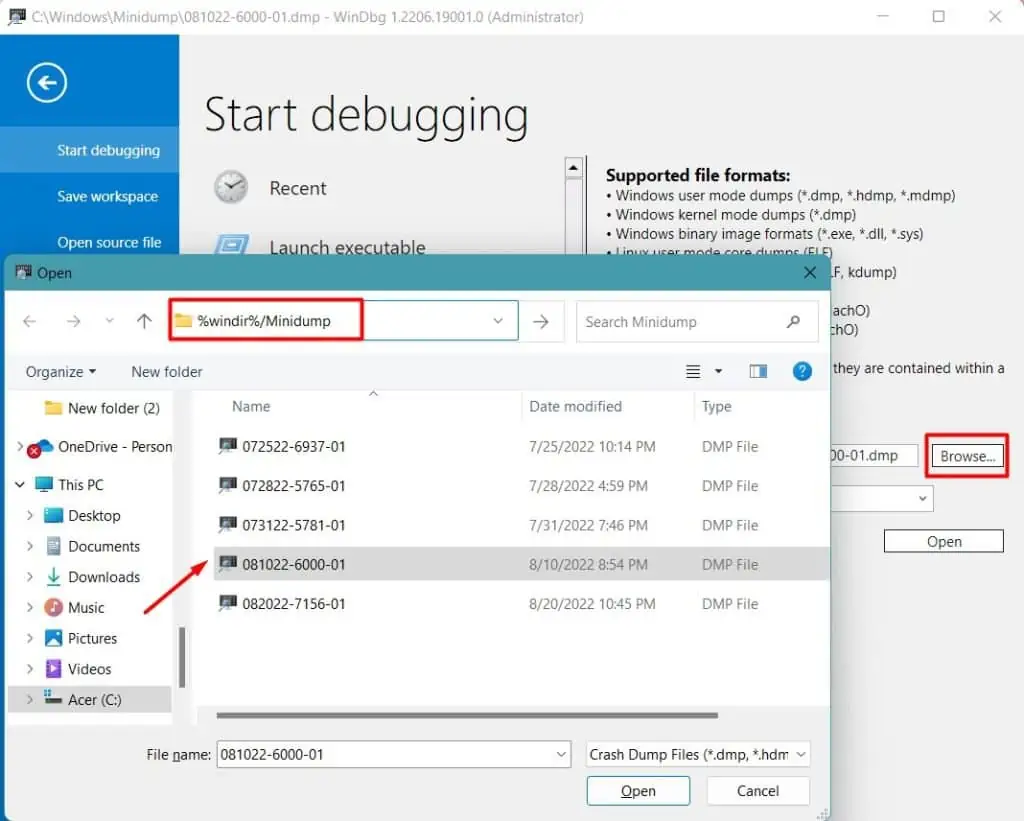
- Click Browse and enter
%windir%\Minidumpto get to the Minidump folder.
- Select the recent dump file and let the system process it.
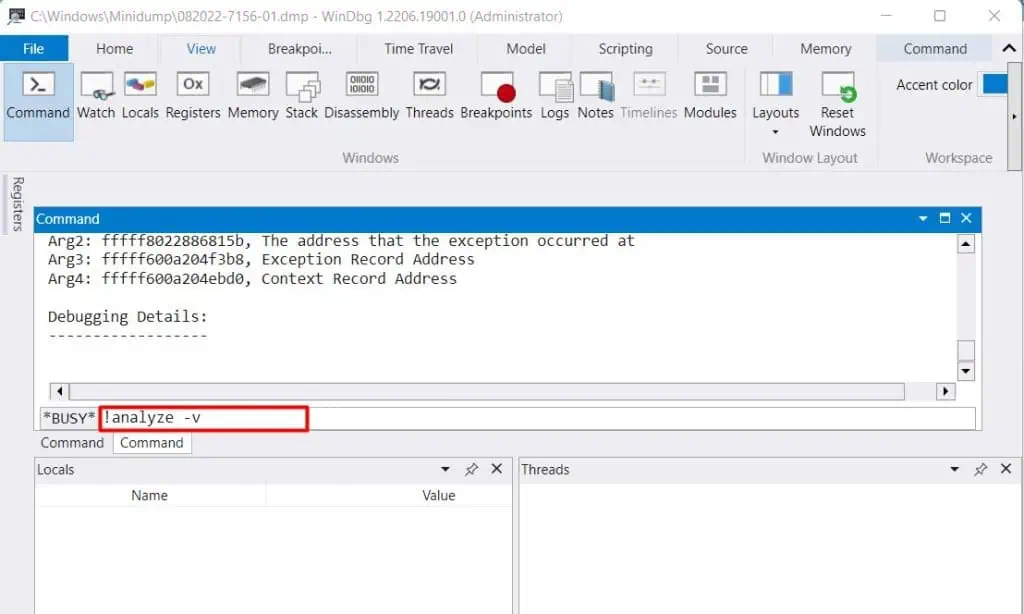
- Click on View and choose Command to open a terminal.
- Type
!analyze -vto analyze the error details.
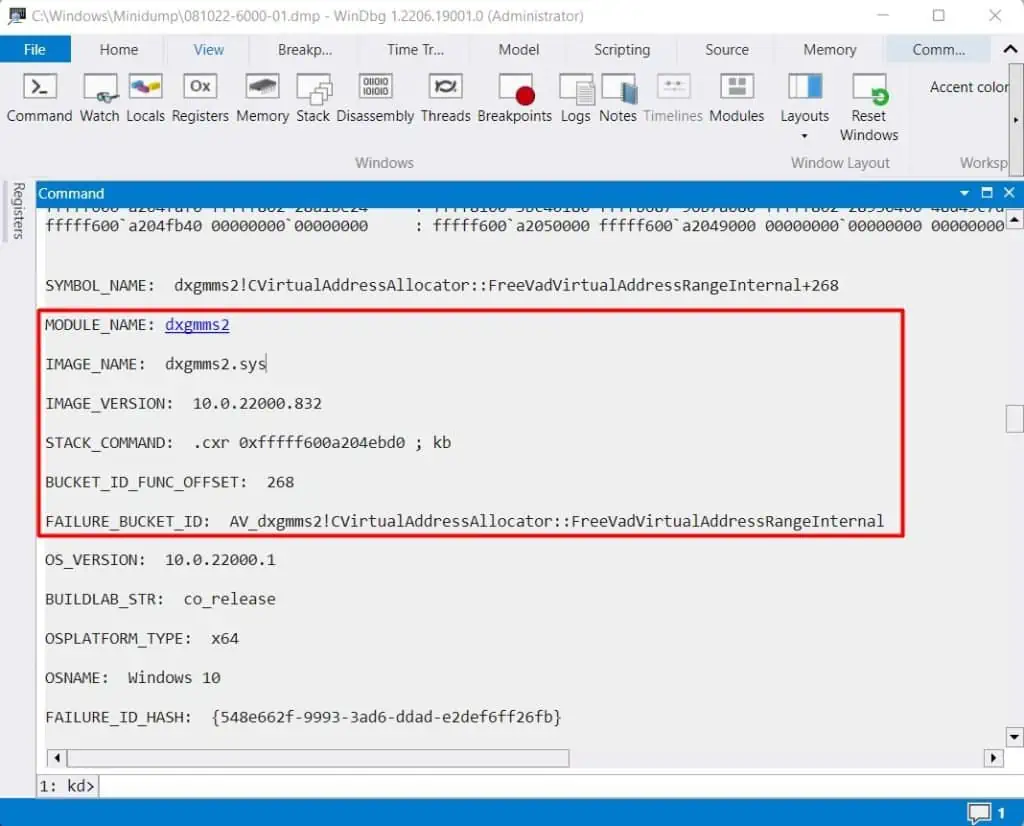
- Look for the Module name and related details to find the culprit. You can search for the details on the internet or post them in the Microsoft forum to understand the cause.

After you find the program, process, or driver responsible for the OSoD, you can update or remove it to fix the issue.
Unplug External Peripherals
Sometimes, the external peripherals connected to the system may bring compatibility issues or hinder the drivers. Especially, the multimedia devices and cables can cause the OSoD on your system.
In such a case, you should remove the peripherals and reboot your system. If the Orange screen problem is fixed, insert the hardware individually to find the culprit. You can resolve the issue by updating its driver or changing the component.
Uninstall Display Drivers
As we have mentioned earlier, the OSoD appears due to graphics issues in the PC. This may be caused by faulty GPU or graphics drivers.
So, you should first uninstall the display drivers. But simply removing them does not delete their registry entries and cache. You should use the Display Driver Uninstaller to perform a clean uninstallation.
Let’s see the way to do it.
- Download DDU and extract it on your PC.
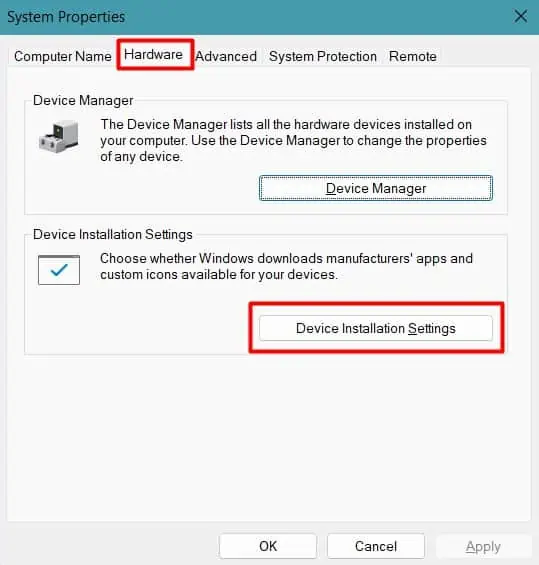
- Press Windows + ‘R’ and enter
systempropertieshardware. The Hardware tab of System Properties will open up. - Go to Device Installation Settings and select No. This will prevent Windows from installing the drivers automatically.

- Press Windows + ‘I’ to open Settings and find Recovery.
- Click Restart now in the Advanced Startup options.

- When the PC reboots, navigate to Troubleshoot>Advanced Options>Startup Settings.
- Click Restart and press 5 or F5 to boot your system in Safe mode with Networking.
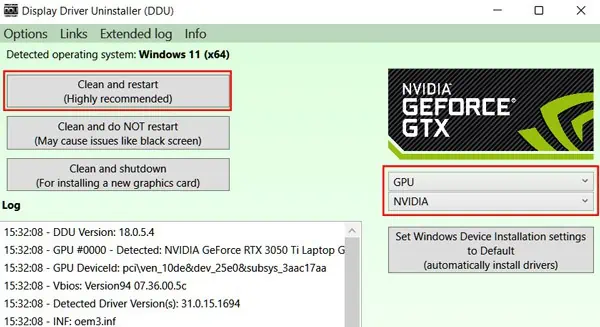
- Open Display Driver Uninstaller.
- Select the device type and model.
- Click Clean and Restart.

After the drivers are completely removed, go to the manufacturer’s website and download the latest one. Install it and see if the OSoD appears again.
Disable Hardware Acceleration
Hardware acceleration lifts off some load from the CPU by using other system resources such as the GPU. However, sometimes, the error because of hardware acceleration can cause issues with DirectX and display drivers. As a result, you will see the Orange screen on your PC.
You will have to disable hardware acceleration to fix the problem.
Let’s see how you can disable the hardware acceleration of the system.
- Press Windows + ‘R’ and type
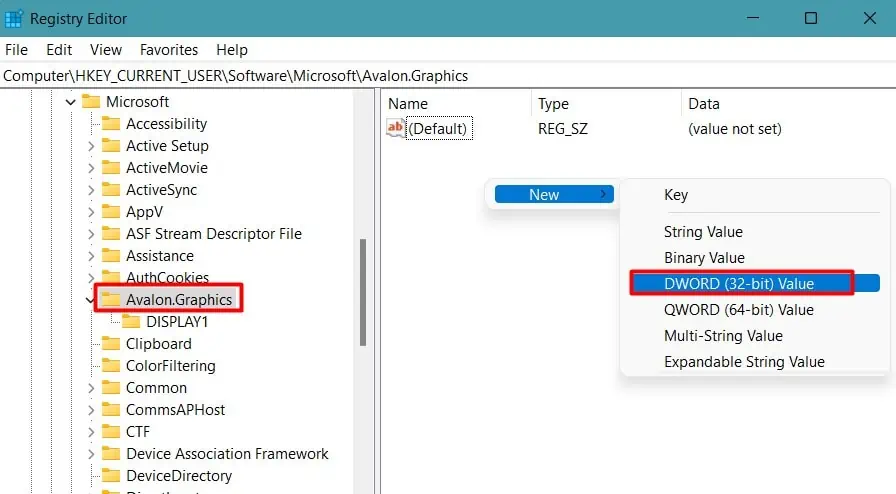
regeditto open Registry Editor. - Go to HKEY_CURRENT_USER>Software>Microsoft>Avalon.Graphics.
- Right-click on the blank window on the right.
- Click New and choose DWORD (32-bit) Value.

- Name the entry as
DisableHWAcceleration. - Double-click on it and set the value to 1 to disable Hardware acceleration.

- Click Ok to save the configuration.
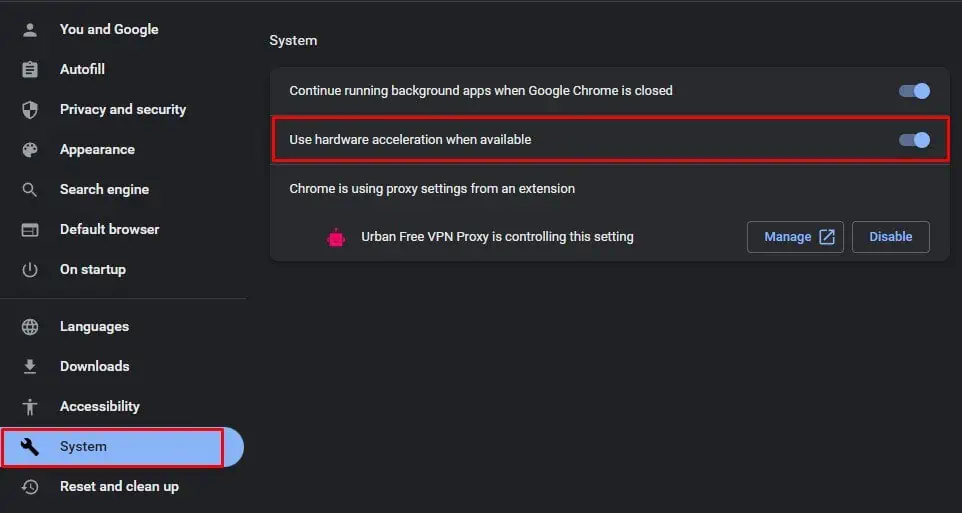
Similarly, Google Chrome has its own hardware acceleration settings, which you will have to turn off as well. Let’s see the way to do it.
- Open Chrome and click on the three vertical dots on the right side.
- Select Settings.
- Go to the System menu.
- Change the Use hardware acceleration when available option to disable.

Reboot your system and examine the occurrence of the OSoD again.
Disable Overclocking and Undervolting
Overclocking can boost the performance of a system significantly. But it also exerts an additional load on the CPU or graphics card and causes it to overheat, thereby decreasing its lifespan. In addition, the unstable overclock settings can cause more damage than benefits.
Similarly, Undervolting reduces the temperature of your system in a great way, but sometimes it may be unstable. The unstable undervolt settings may cause insufficient power input to the CPU and GPU. Thus, you will see the OSoD.
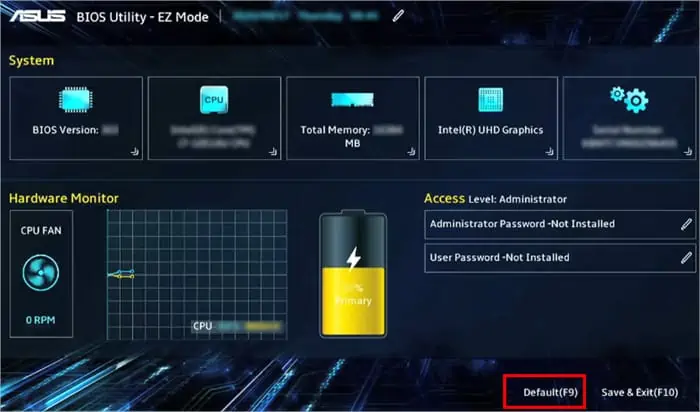
If you have overclocked or undervolted your GPU and CPU, you should revert the settings to default. Usually, deleting the application used for the purpose or resetting BIOS should fix the issue.
Let’s see how you can do it.
- Reboot your system and press F2, F12, or the associated key repeatedly to boot into the BIOS page.
- Find the respective button to load default configurations and press it.

- Save the settings.
- If you have used an application to overclock and undervolt, restart your PC and remove the program.
The settings for some GPUs like AMD can be reverted by going through their desktop application, such as AMD Radeon Software. See if the OSoD appears again after changing the settings.
Repair Corrupted System Files
If the system files handling the graphics driver are corrupted, then you will see the Orange screen error. Let’s move on to repair them.
- Search command in the Windows search bar. Right-click on the Command Prompt option and select Run as administrator.
- Type
DISM online /cleanup-image /restorehealthto perform a DISM scan that repairs the DLL files by downloading them from Windows update.
- Run SFC scan with command
sfc /scannow. It replaces the damaged files with the healthy ones provided by the DISM scan.
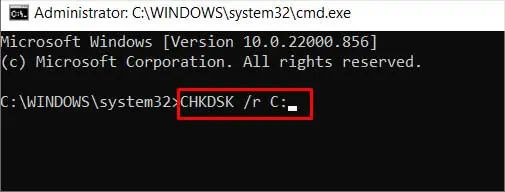
- Restart your PC and run
chkdsk /r /xto repair the storage disk error.
After the system reboots, see if the error appears again. You can also open a command prompt by navigating to Troubleshoot>Advanced Options>Command Prompt in the recovery environment if the system does not boot till the desktop.
Perform Windows Update
Windows continuously fixes the bug in the drivers and Operating system through Windows updates. So, if the issue lies in the drivers, system processes, or OS, performing a Windows update should solve the problem.
Let’s see how you can do it.
- Press Windows + ‘I’ to open Settings.
- Find Windows Update and click Check for Updates.
- Download and Install the available updates.

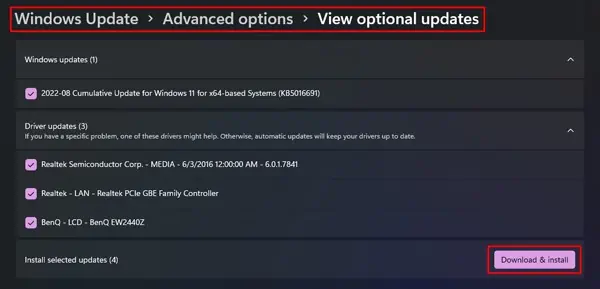
- Similarly, navigate to Advanced Options>Optional Updates.

- Install all the updates, if available.
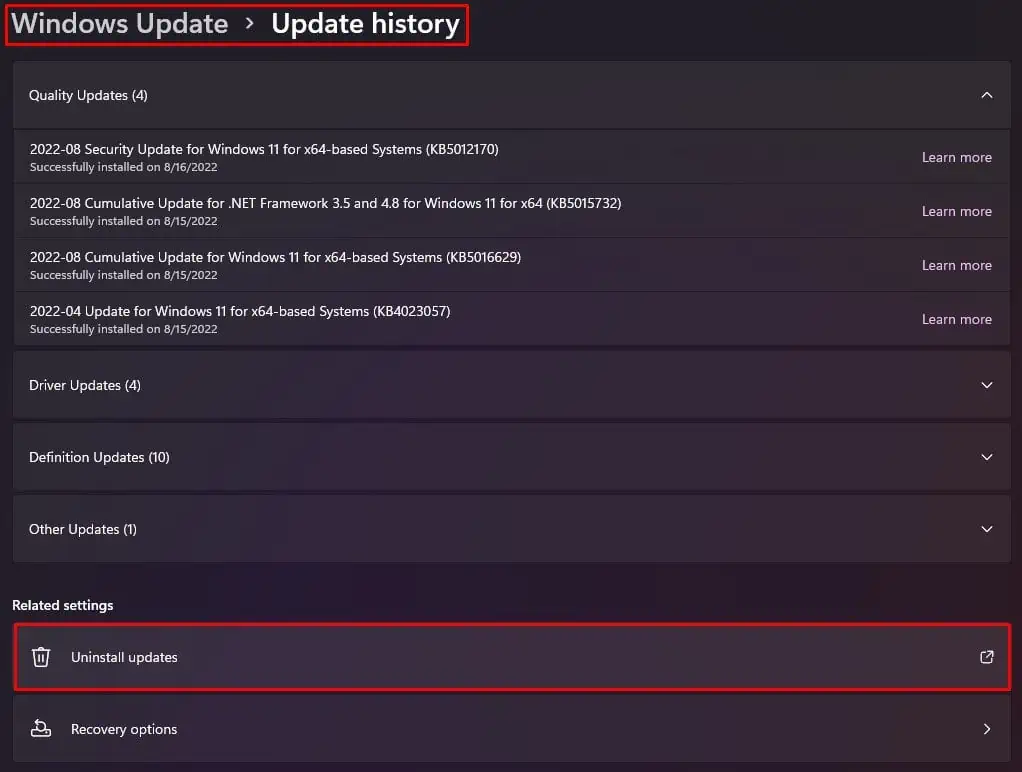
- If the problem started after a recent update, go to Update History on the Windows Update page.
- Find Uninstall Updates.

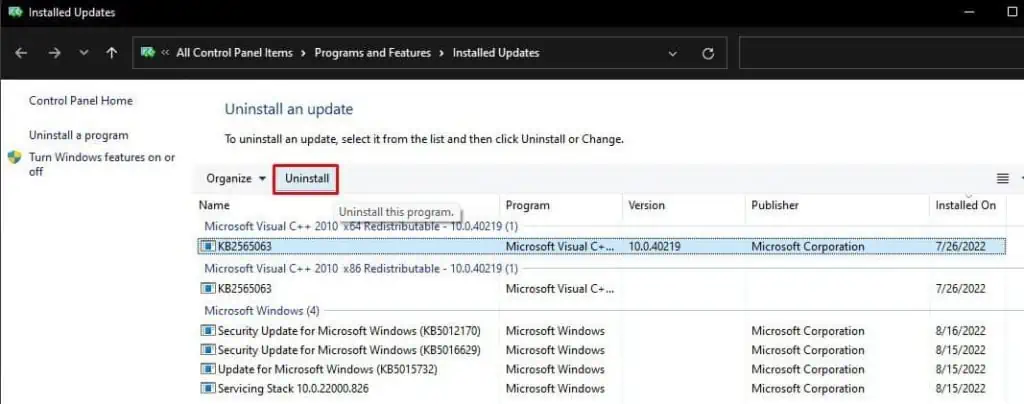
- Select the latest update and click Uninstall.

Restart your PC and look whether the OSoD has vanished.
Update Intel Graphics Command Center
Intel Graphics Command Center optimizes the graphics configuration and programs for better performance of GPU-intensive applications using Intel graphics. But sometimes, the application settings or the program itself may have some bugs.
If you use a computer with Intel Motherboard having integrated graphics and Intel GCC, you should update the program. Let’s see how you can do it.
- Download Intel Driver & Support Assistant and Install it.
- Open Intel DSA and search for the latest drivers.

- Find the one for Intel GCC and install it.
- You can also uninstall the program and re-install the new one by downloading it from the Microsoft store.
See if the problem is still there.
Run Games in Default Settings
Playing games in low graphics settings is no fun. But if it affects your PC, there is no choice other than that. Intense game settings cause a heavy load on the system and can result in the OSoD.
So. you should consider running the games and graphics-intensive programs in their default settings.
Observe the occurrence of the Orange screen error again after changing the configurations.
Uninstall Third-Party Applications and Heavy Programs
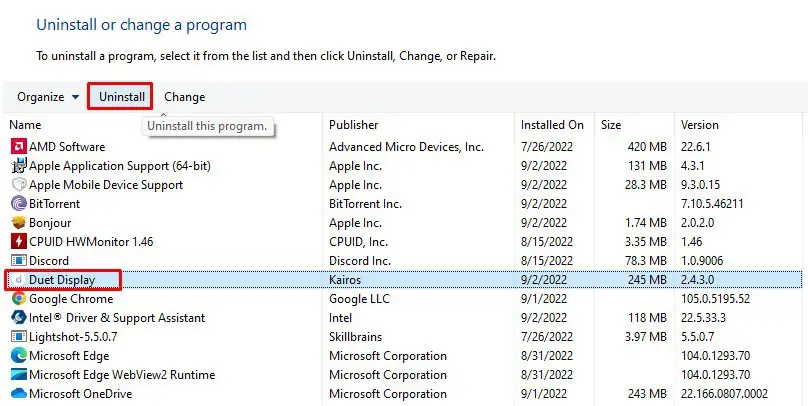
If you are using third-party applications that use the graphics drivers and configurations of your system, they may be hindering the PC’s functionality. Programs like softOSD and Duet Display changes the display configuration and may interfere with the graphics drivers.
So, you should try uninstalling such programs to fix the OSoD. Similarly, if you have installed heavy programs on your PC, try uninstalling them as well. Let’s see how you can do it.
- Press Windows + ‘R’ and type
appwiz.cplto open Add or Remove Programs. - Select the particular application and click Uninstall.

- Press Ctrl + Shift + Enter to open Task manager.
- Under the processes tab, look for softOSD.exe or similar processes for other applications.
- Select it and click End task.
See if the Orange Screen of Death still persists.
Optimize Your PC for Lowering Temperature
Most users have experienced system crashes by OSoD due to overheating. Every computer heats to a point. But when it crosses the temperature threshold, then it decreases its performance by thermal throttling and may even malfunction.
So, you should proceed to decrease the heat produced by your PC. You should regularly clean your PC, use a cooler room with proper air circulation, proper cooling fans, and change the thermal paste. In addition, you should use a hard surface to place the laptop instead of the bed and mattress. Also, using a dedicated GPU for graphics-intensive work can reduce the CPU temperature and load significantly.
We have a dedicated guide to help you keep your PC’s temperature within the limit.
Reseat GPU and RAM
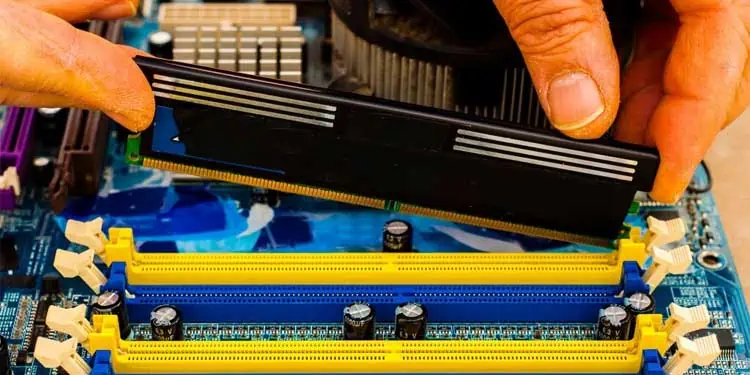
The OSoD can show up if the RAM or the GPU is not properly seated. You can disassemble your system and reinsert the hardware to fix the issue.
- Power off your system and remove all the power cables.
- Remove the screws from the side panel to get to the motherboard. If you are using a laptop, you can unscrew the RAM compartment or the back panel to access the memory.
- Press the lock to remove the RAM and disconnect the GPU accordingly.

- Clean the GPU and RAM properly.
- Try using a single RAM at a time by changing the slot to rule out the bad memory. Power on your system to check the RAM each time.
- Re-install the hardware safely.
- Assemble the side panel and restart your PC.
See if the OSoD still appears. You can also run Memory Diagnostic test to check any issues with the physical memory and proceed to rectify them.
Perform System Restore
Sometimes the drivers and programs may get infected with malware, or the system files might be corrupted.
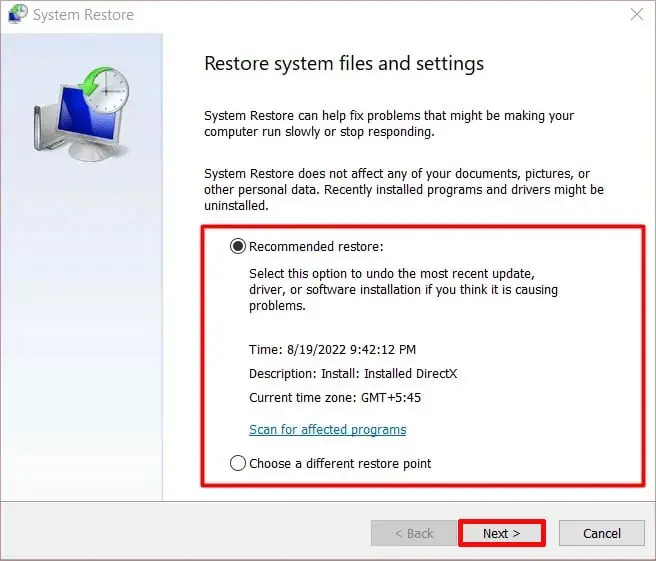
Performing a system restore to an earlier healthy state can fix the Orange Screen issue. Let’s see the way to do it.
- Press Windows + ‘R’ and type
rstrui.exeto open System Restore. - Use the recommended restore point or choose the one you created earlier if any.

- Click Finish to start restoring your PC.
After the system restarts, look if the OSoD error has been solved.
Reset PC
Resetting Windows is the last option if the above fixes do not work out for you. To add to it, resetting your PC can help if the system is stuck on the OSoD loop. Please follow the instructions below to reset your PC.
- Shut down your computer by pressing the power button directly for around 10 seconds. Doing this 3 or more times will open the Recovery environment.
- Go to Advanced Option.
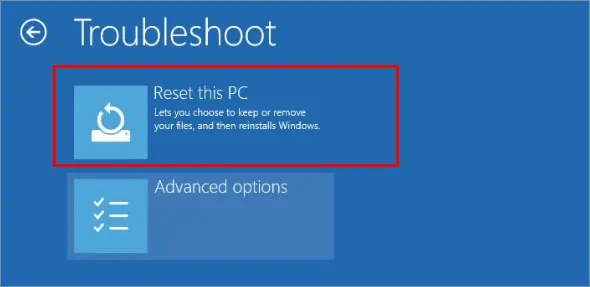
- Click Troubleshoot and select Reset this PC.

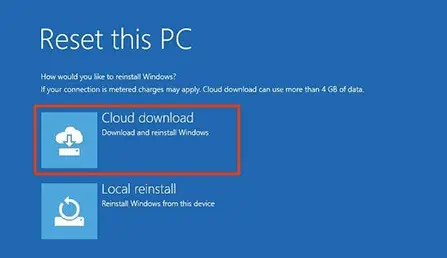
- Follow the instructions and select Cloud download if you have an internet connection. This will download a fresh OS directly from Microsoft. If not, you can choose Local reinstall.

The Orange screen of death should be fixed now. You can also perform a clean installation of Windows after backing up your files.

