In the course of overclocking, we increase the CPU’s operating frequency above its factory specifications to push an edge in performance. While you’re at it, you need to adjust three important factors—base clock (BCLK), core voltage, and core multipliers.
When even one of them is misconfigured, the overclocking will simply not work. For instance, if you overvolt the CPU, its temperature starts to rise, and the computer crashes or throws a BSOD error. In the worst case, the overheating issue may even kill the processor.
Although misconfigured settings could be one of the causes, you may have missed out on a few other things too. Without further delay, let’s get right into each of the solutions that should help fix it.
Caution: Overclocking the CPU with proper examination and using the correct settings is completely safe. Despite that, it can void the component’s warranty and can even reduce its life span in the long run. So, if you know what you’re doing, you can consider overclocking the CPU, but only at your own risk!
Check Requirements
Before anything else, it’s essential to check whether your build meets the CPU overclocking requirements. If you proceeded without a proper understanding, it’s very likely that your system didn’t support the changes in the first place.
- You need to have an unlocked CPU.
- Your motherboard should support overclocking.
- You need to install enough cooling equipment to prevent the CPU from overheating.
- The Power Supply Unit (PSU) should handle the CPU’s high power requirement even after overclocking.
Locked vs Unlocked CPUs
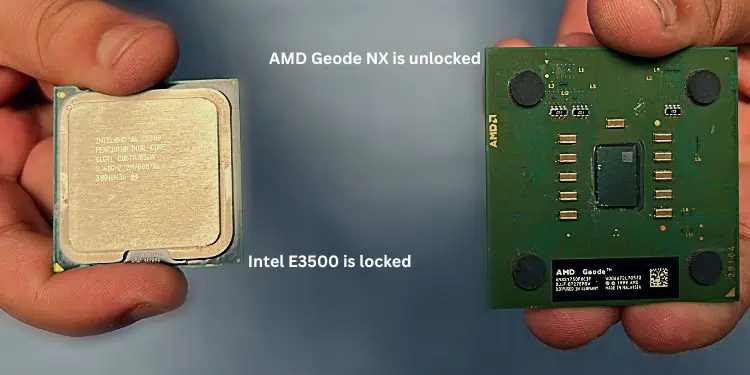
Not all CPUs are recommended for overclocking. These are called ‘locked’ processors as the manufacturers have disabled custom tuning. Unlike unlocked CPUs, you cannot tinker with their power, voltage, memory, and other key values.
Among the two most popular manufacturers, all AMD Ryzen chips are unlocked while a few Intel Core products are locked. If you’re running an Intel processor, know that only the K and X series allow overclocking. To confirm that your desktop or laptop processor is unlocked, you can directly check the list on the official Intel website.
Note: A locked CPU can also be overclocked by either improving the motherboard’s FSB (Front-side Bus) speed or manually unlocking the multipliers. However, both these techniques are tricky and the manufacturers have also restricted users from doing so.
For example, ASRock’s BFB Technology allows tweaking the power limits, which has made overclocking possible even on non-K series Intel processors.
Motherboard
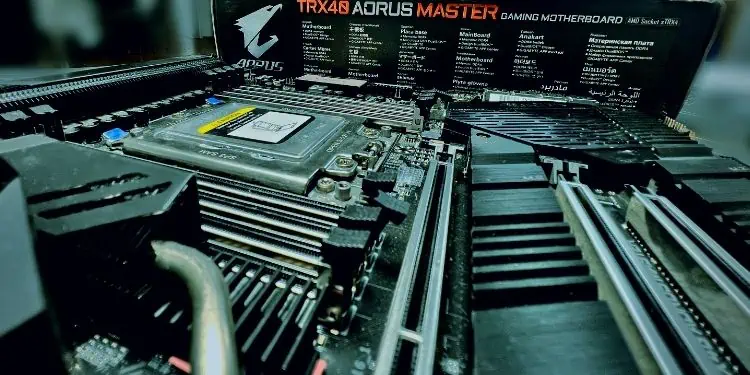
Like the CPUs, not all motherboard support overclocking. Ensure that the mainboard has enough VRMs (Voltage Regulator Modules), a power module responsible for providing enough supply voltage to the chipset and microprocessor. The higher the VRMs, the more stable will be the overclocking.
Basically, there are different ways to know whether your motherboard supports overclocking. The simplest method is to identify using the letters used in the chipset name. Intel users should look for a Z-series or X-series while AMD users should consider a B-series or X-series motherboard.
Cooling System
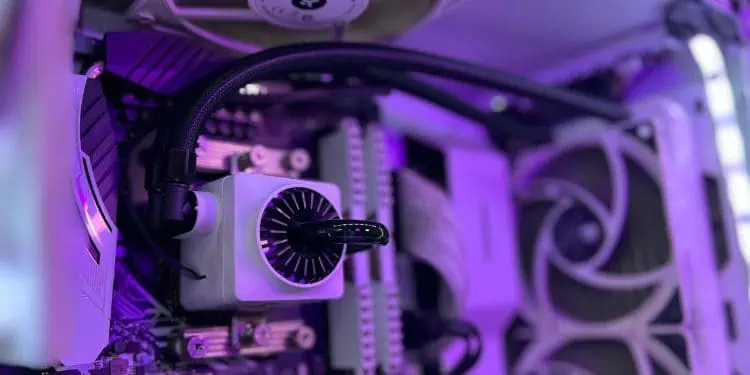
When you crank up the CPU voltage, it’s imminent that you’ll experience overheating. Therefore, cooling is one of the decisive factors in pushing the processor to a higher level.
The general idea is to get coolers that help reduce the overall system temperature such that the CMOS chips can run at higher clock rates. Experts claim that air cooling solutions can provide a speed boost of 30 to 80 MHz and liquid coolers from 50 and 100 MHz. While the latter is considered the most efficient, you can still opt for a high-end air cooling system.
These days, you can even find cooling solutions that can operate below the freezing point. With the right coolers, a significant amount of temperature can be reduced in no time, which allows better overclocking. Thus, if you’re experiencing overheating issues after overclocking, we recommend improving your cooling setup.
Power Supply
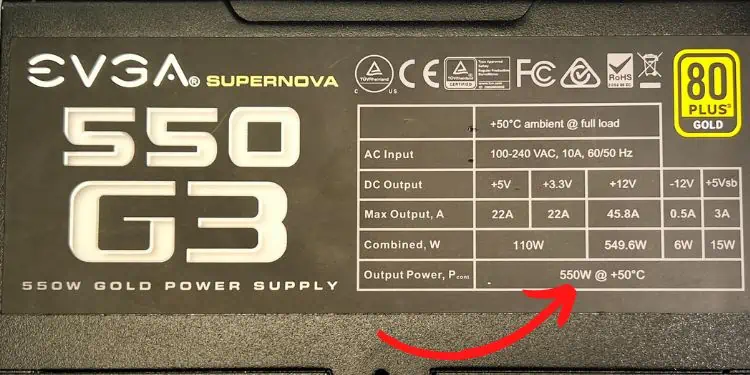
Also, you should consider a high-wattage PSU that can provide constant voltage and stable electricity to your CPU. If the power supply is too weak, your system overheats or sometimes, may not even start. In fact, it’s hazardous to install a bad power supply as it can damage the CPU and other vital PC components.
Any PSU of 500 to 600 W, or higher (from a reliable manufacturer) should be sufficient when overclocking the CPU. However, this can be different based on your system’s target power requirements.
Readjust All CPU OC Settings
Here’s a fact you need to mug up—“Overclocking is not the same for everyone.” We have noticed most users copy the exact OC values from different guides or videos on the internet and tend to overclock too much.
Even if the specifications match, you need to know that every chip is built differently. Their CPU supports higher frequencies doesn’t mean yours can handle the same. For example, if one chip is able to boost 20% of the advertised frequency, another same model may only support overclocking up to 10%.
In order to achieve optimal settings for your processor, you need to try out different frequencies and voltages on your own. Although there’s no hard rule, every device has a limit and you need to increment the values in small numbers.
If you’ve misconfigured the OC settings, you can reset them and start adjusting the values one step at a time. But make sure you run a stress test each time to check the system’s performance.
For demonstration, we are going to overclock the AMD Ryzen 7 5700G (with a base clock speed of 3.8 GHz and max boost up to 4.6 GHz) in an MSI MAG B550M Mortar motherboard. Since your BIOS interface may be different, we recommend checking your manual and following the steps accordingly.
Step 1: Reset Your BIOS Settings
As your OC settings are probably causing the issue, we recommend reverting it to the factory settings. If you do not remember them, it’s completely fine. You may simply reset the BIOS using the below guide:
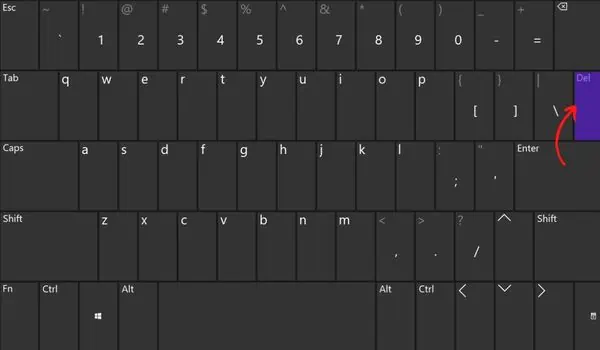
- Restart your computer and use the boot menu key (for MSI motherboard, you may press Del) to enter BIOS.

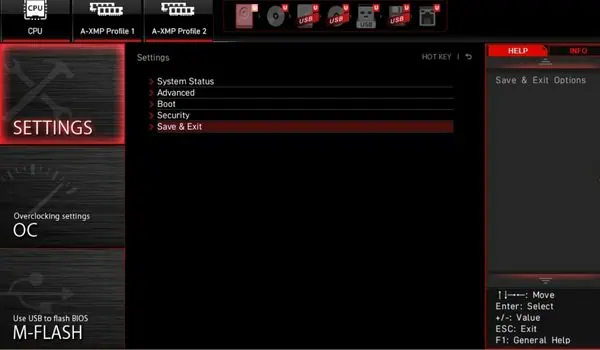
- Here, go to Settings.
- Then, move to the Save & Exit section.

- Pick the Restore Defaults option.

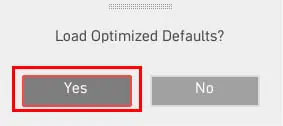
- Once the confirmation prompt pops up, hit the Yes button to reset your BIOS.

Additional Tip: Sometimes, your PC may not start and rather throw an error message or the display won’t work at all. If that’s the case, we recommend removing the CMOS battery and waiting for at least a minute to reseat it. Doing so also resets your BIOS configuration to factory settings.
Step 2: Perform Benchmark Test
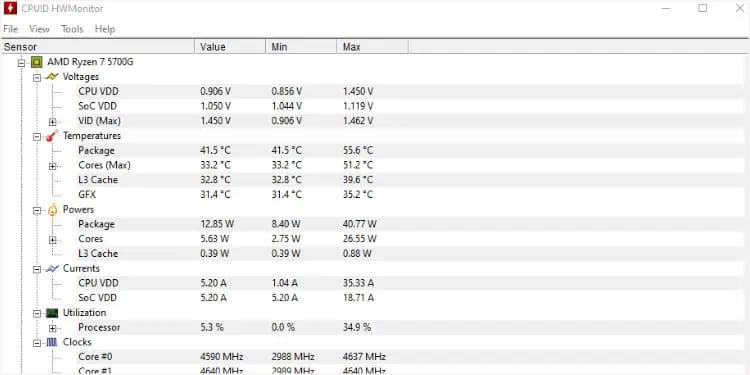
CPU Benchmarking involves running a series of tests to measure the performance of your current system. Since you can’t find a dedicated BIOS utility for this purpose, you need to install a reliable program, like MSI Afterburner, CPUID HWMoinitor, Cinebench, etc.
While running a benchmark test, note down the starting and peak values of CPU temperature, voltage, and the overall benchmark score so that you can compare them after setting new values.
Step 3: Configure OC Settings
The next step is to readjust the CPU Ratio (Core Multiplier) and Core Voltage. Some motherboards also support tweaking the base clock (BCLK). Apart from these parameters, you can even edit other values, including NV/Soc Voltage, 1P8 Voltage, VDDP Voltage, and more.
As mentioned earlier, you need to increase these operational settings one at a time. It’s best to increment the voltage by +0.05 V and the multiplier by 1.
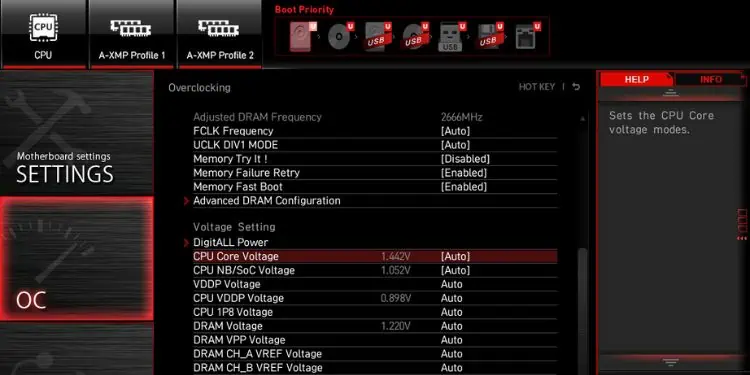
Experts prefer keeping the voltage at 1.35 to 1.41V. While it’s possible to increase this further, we do not recommend going beyond 1.5V. If you do so, more power is sent to your CPU through the EPS connector, and this may overheat or even damage the component.
Usually, the base clock for most CPUs is 100 MHz, and when you multiply this by the ratio, you get the actual frequency. Mathematically,Base Clock(BCLK) * CPU Ratio = CPU Frequency
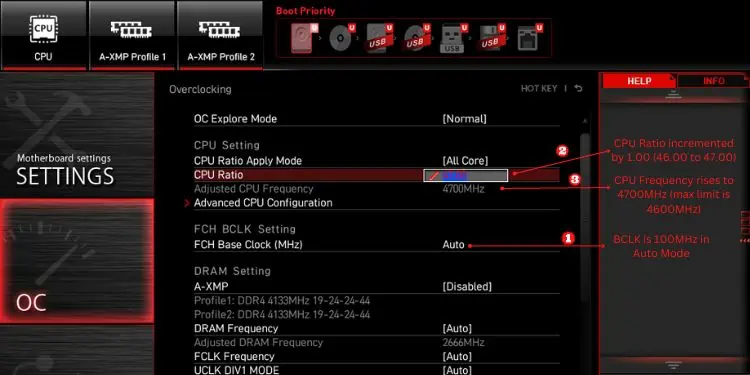
As per the example above, the FCH Base Clock (MHz) is set to 100. When we adjust the CPU Ratio to 47 (max limit is 46), the Adjusted CPU Frequency becomes 4700 from 4600 MHz. Note that we have only increased the multiplier by 1.
You’ll also notice the value changes to a red color indicating that it’s hazardous to push the frequency further. However, such a feature is only available on some mainboards.
Step 4: Run Stress Test
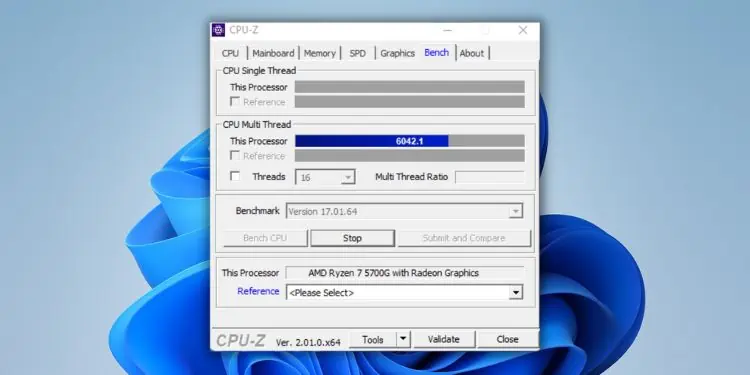
After you’ve incremented the voltage and frequency, save the changes and reboot your computer to see if it boots up. Then, we advise stress-testing the overclocked CPU frequency to check how your PC performs under extreme conditions.
Basically, this method is used to determine how stable your system becomes after pushing the processing power to its maximum limit. Although it’s quite similar to running a performance benchmark, the actual process varies slightly. While benchmarks only run for a while, you can perform stress tests for a longer period – hours or even days!
We recommend running it for at least an hour to determine whether the configured OC settings are ideal for your CPU. If not, you’ll have to revert it.
Step 5: Readjust & Repeat the Process
If your computer is easily able to handle the stress, it means you can overclock your CPU further. So, get back to the BIOS screen and start increasing the values in smaller increments, as discussed earlier.
Once you’ve done that, rerun the stress test to determine if your PC can handle these OC settings. If it does, navigate to the BIOS again and overclock your CPU further. Repeat the steps until the stress test fails. Now, you need to underclock/undervolt to the previous configuration.
Update BIOS
When you update the motherboard’s BIOS, it can either make or break the overclock settings. Note that you should only consider flashing a new version when it’s absolutely required to fix some bugs or add compatibility to newer hardware. So, if the overclocking has suddenly stopped working or your system is facing frequent black screens, here’s what you can do:
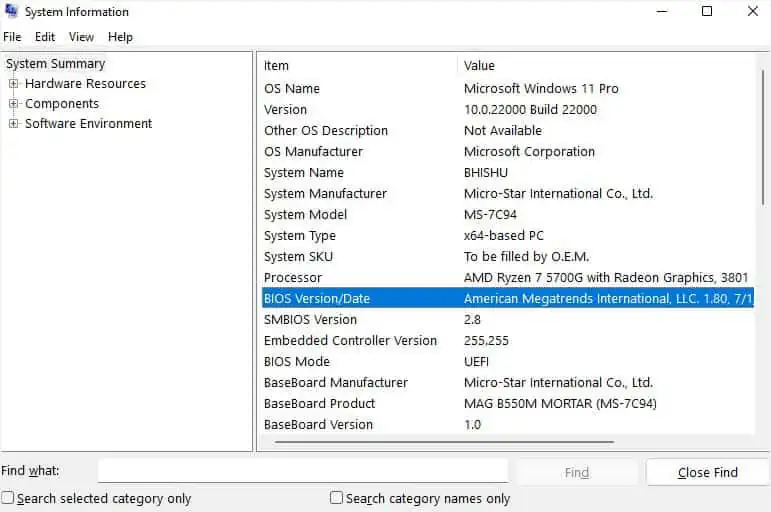
- First, check your motherboard model and the currently running BIOS version. You can do it easily using the System Information utility as shown below.

- Get to the manufacturer’s website and download the latest baseboard version available. You may utilize another PC if yours is not turning on.
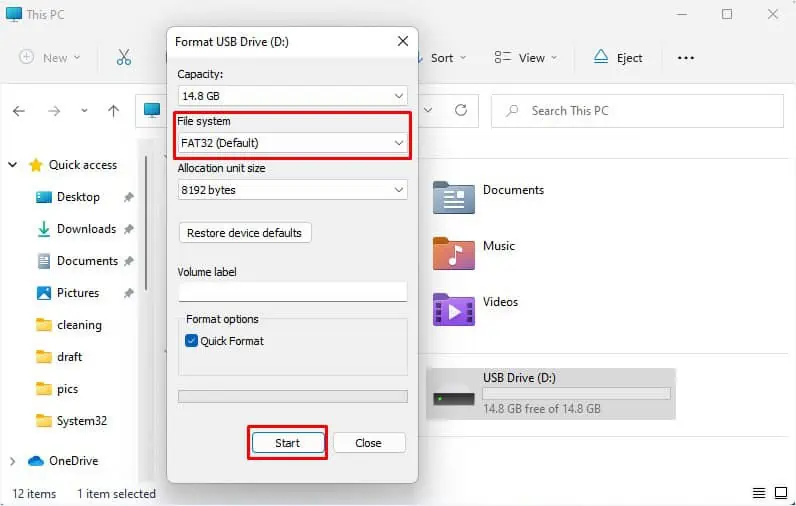
- Insert a USB flash drive of at least 8 GB free capacity, and format it in FAT32.

- Now, extract all the files and transfer them to the inserted drive.
- Next, safely remove the flash drive and reboot your system.

- Get to the BIOS using the boot menu key and reinsert the flash drive.
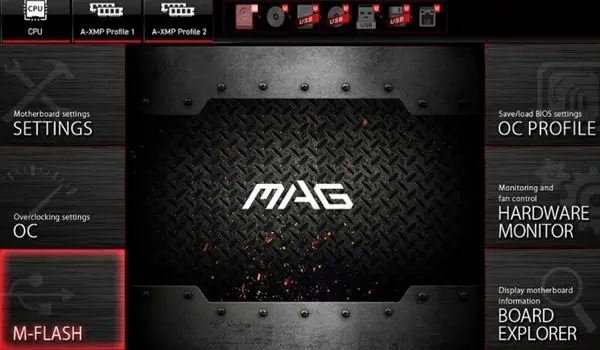
- Once you’re in the BIOS, navigate to the M-Flash section. It may take at least a minute to enter its interface.

- Finally, select the BIOS flash file and proceed with the on-screen steps.
- Once the PC restarts, get to the BIOS interface again and redo the overclock as discussed above.
Set Your Power Plan to High Performance
Sometimes, the overclocking won’t work even after your system meets the requirements and correctly configured voltage and frequency. In that case, we suggest checking and adjusting your power plan.
If you’ve set it to Power saver, the PC attempts to save energy by reducing your CPU’s speed. This makes overclocking kind of worthless. Instead, we recommend choosing either High or Ultimate Performance so that you can take maximum benefits of your overclocked settings:
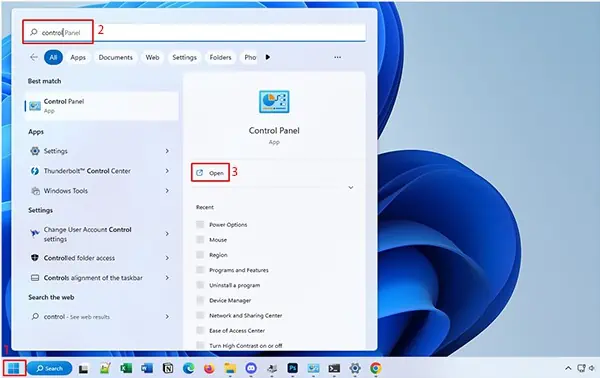
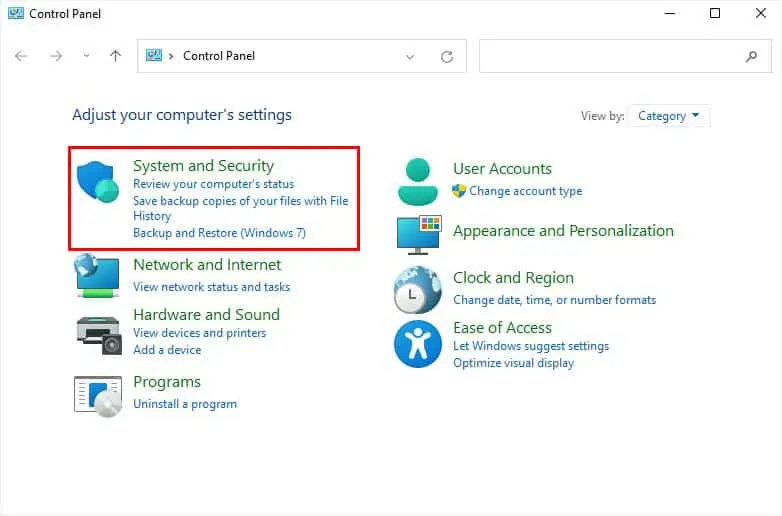
- Open Control Panel from the Start Menu.

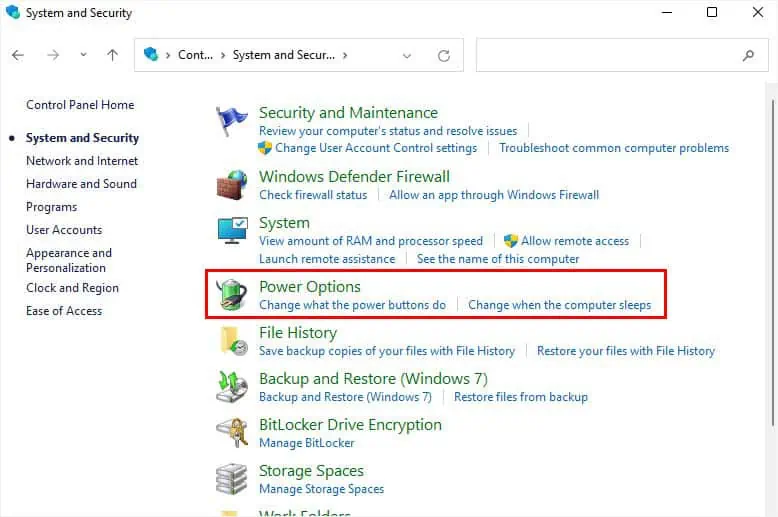
- Go to System and Security.

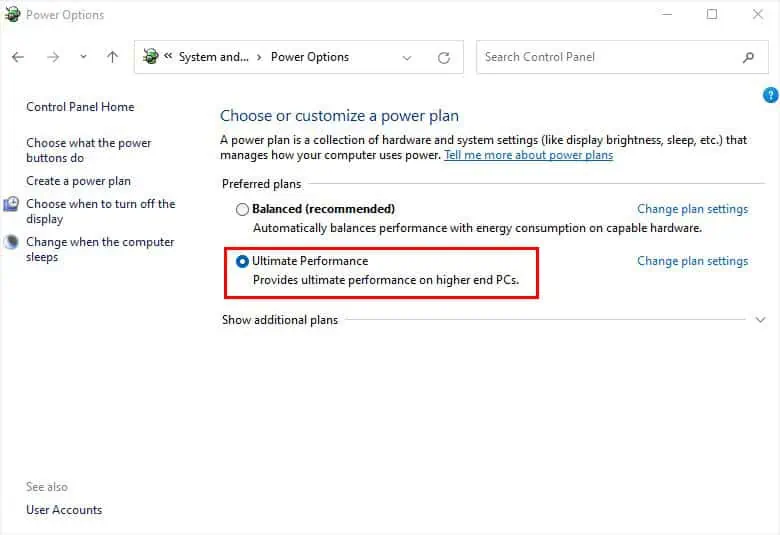
- Choose Power Options.

- From the Preferred plans section, choose Ultimate Performance.

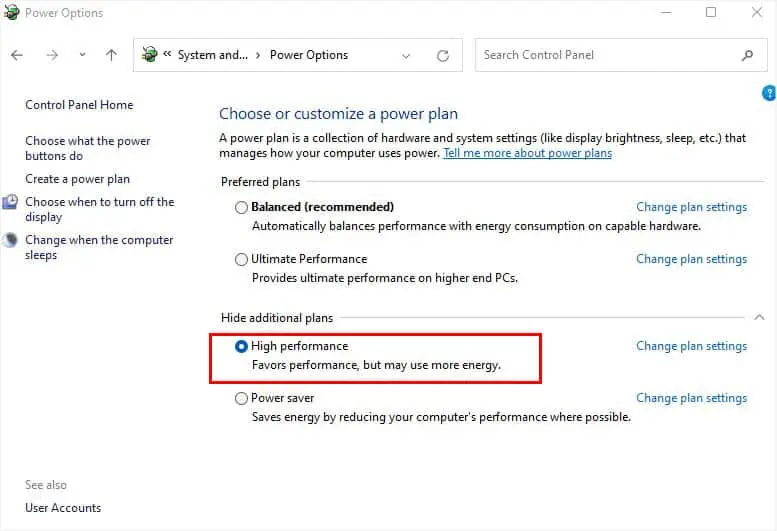
Otherwise, expand Show additional plans, and pick High Performance.
- Now, check your CPU frequency to confirm that overclocking is now working.
Configure Intel Turbo Boost or AMD Precision Boost
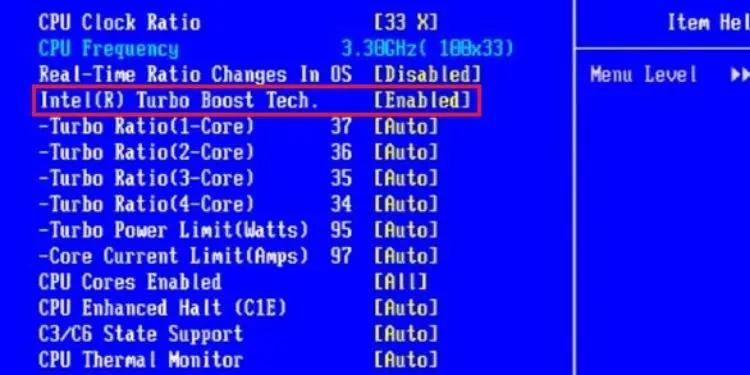
Intel’s Turbo Boost and AMD’s Precision Boost/Turbo Core increase the CPU speed to higher frequencies than the actual certification at a safer temperature. They are also called algorithmic overclocking and their major advantage is maintaining system stability.
While most motherboards have these features enabled by default, some require to be adjusted manually in BIOS. Also, the working of these technologies entirety depends on your mainboard.
In some models, the overclocking settings won’t apply without turning on the Turbo Boost or Prevision Boost. On the other hand, the features need to be disabled in some systems in order to run the manual OC configuration. So, we recommend enabling/disabling the available setting to see if this solves your problem.
Try Disabling Thermal Throttling in BIOS
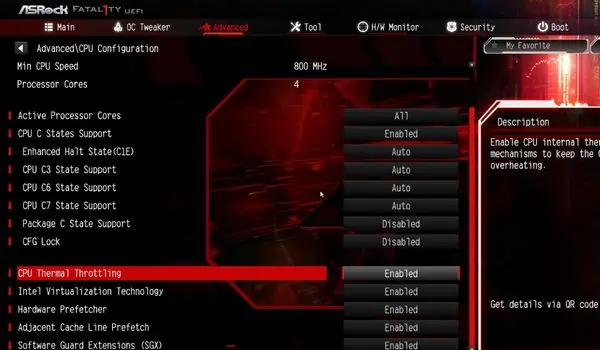
Most modern CPUs have thermal throttling enabled by default, which cools down the chip when its temperature starts to rise. However, it works by lowering the clock speeds, which makes the overclocked settings kind of useless. If your BIOS allows toggling thermal throttling, we suggest turning it off to check if this helps you out.
Caution: Disabling thermal throttling can lead to overheating and may even cause permanent damage to your CPU.
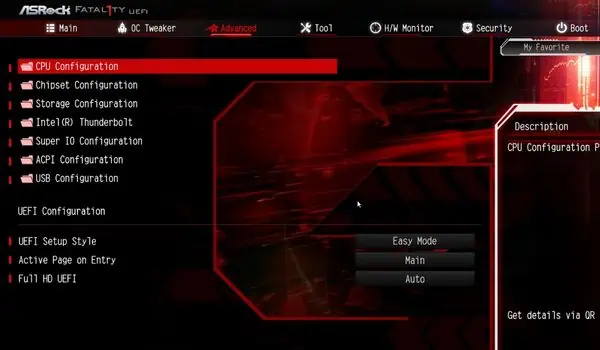
Before making any changes to this critical setting, ensure you have an advanced cooling system. Also, we recommend performing a stress test for a few hours after disabling it to see how the overclocking settings work out. For demonstration, we are going to tweak this on the ASRock Z370 motherboard:
- Restart your computer and press the F2 key as soon as the ASRock logo appears.
- Once you get into BIOS, navigate to the Advanced section.
- Next, go to CPU Configuration.

- Here, look for CPU Thermal Throttling and disable it.

- Save and exit the BIOS screen.
- Once your PC reboots, run a CPU stress test using any reliable software to analyze your computer’s performance. If the overclocking works and the temperature is also handled well by the coolers, you’re good to go. But in case you notice a sudden rise in the CPU temperature, revert the changes immediately.
Try Third-party OC Software
When it comes to overclocking a CPU, most users prefer doing it from the motherboard’s BIOS. However, you may even utilize dedicated applications provided by the manufacturer. Intel users can use Intel Extreme while those who have Ryzen can opt for the Ryzen Master utility.
If overclocking is not working on BIOS, it’s best to opt for such software or any other reliable third-party tool. Reportedly, some users have fixed the issue by adjusting OC settings on ThrottleStop. But as always, do perform a stress test after tweaking the base clock, multiplier, and voltage values.
Replace Your CPU or Motherboard
If you’ve tried everything and the overclocking still doesn’t work, either your motherboard or CPU may have failed. You’ve probably used the overclocked components for too long, and it’s time to replace them.

