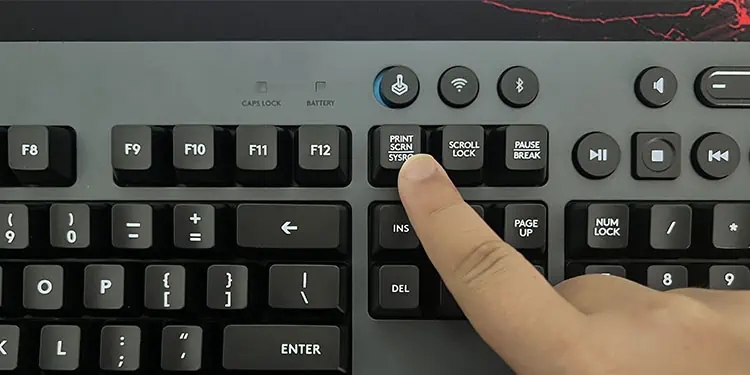
The Print Screen key offers a quick way to save your screenshots either to the clipboard or your local drive. However, there are some situations where this function may not work. It can happen if the key itself is not working properly or your system is not executing the Print Screen function.
If the key is not working, it mainly indicates hardware damage unless the key has been remapped. On the other hand, if the key is intact, other applications are likely preventing you from taking screenshots. It is also possible that your system is capturing or storing the screenshots, but you are unable to find them.
Make Sure You Are Using Print Screen Properly
There are many ways to take a screenshot with the Print Screen key, although you may need to use other keys together with it. All such methods provide different results. So, it is possible that you are not using the proper way to get the screenshot as per your need.
- Pressing only the Print Screen key does not save the Screenshot to your local drive by default. It only saves it to the clipboard and you need to paste it to an image editor like MS paint or photoshop first to be able to save it.
- The print screen key works together with other shortcut keys like Ctrl, Alt, etc., to provide more screenshot options. Also, in some laptops, the Print Screen key is integrated with a Function or another key, so you may need to press Fn + Print Screen.
- Windows key + Print Screen – Takes a screenshot of the entire screen and saves it to the Pictures/Screenshots folder as well as the clipboard.
- Alt + Print Screen – Takes a screenshot of only the active window and saves it to the clipboard.
- Ctrl + Print Screen – Takes a screenshot of the entire virtual screen if you are using a multiple-monitor setup and saves it to the clipboard.
- If you use third-party screenshot tools, these tools may overwrite the Print Screen function with their custom settings. In such scenarios, you need to go to their official sources to look for the instructions.
Sort Screenshot Folder on Date Modified
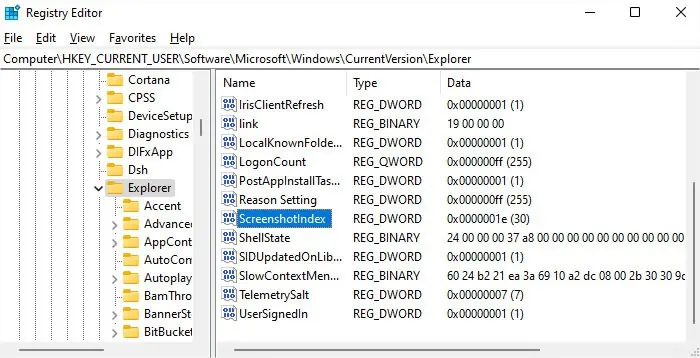
Whenever you use the Windows key + Print screen to capture a screenshot, your system saves it along with an index that increases by one every time you autosave a screenshot.
Some broken updates can reset this index. And if you had removed some screenshots earlier, you may not be able to find new screenshots. For instance, if you have five screenshots with index 1,2,6,7,8 and the index resets to 1, the next time you take a screenshot, your system will save it with index 3, not 9.
If you have hundreds of screenshots with deleted files randomly in the middle, finding the new screenshot can be difficult and you may think that the print screen function is not working.
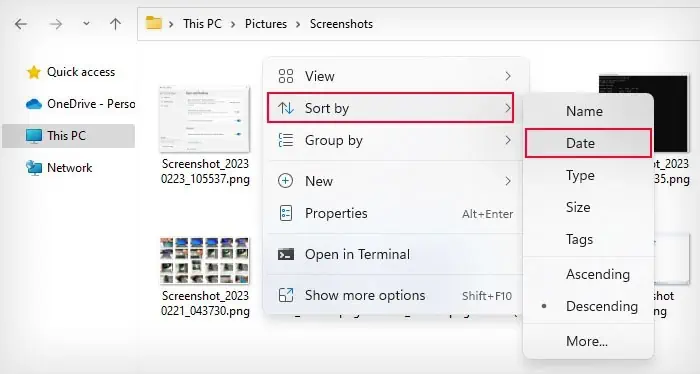
You can sort the files according to their creation date to be able to find them easily.
- Go to the Screenshot folder in any of the following location:
Pictures\ScreenshotsC:\Users\‘username’\Pictures\ScreenshotsC:\Users\‘username’\OneDrive\Pictures\Screenshots
- Right-click on an empty area and select Sort by > Date.

- Check the initial or the last few screenshots depending on whether the files are sorted in ascending or descending order.
If the screenshots are there, you can also try setting the screenshot index to the final index in the folder. This way, you can find the screenshots even while sorting the folder by name.
- Take note of the largest index number in the folder.
- Open Run by pressing Windows + R.
- Type
regeditand press Enter to open the Registry Editor. - Navigate to
Computer\HKEY_CURRENT_USER\SOFTWARE\Microsoft\Windows\CurrentVersion\Explorer - Look for and double-click on ScreenshotIndex.

- Check Decimal and set the value data to the index number you noted earlier. Click OK.
Now any new screenshots should follow the original pattern.
Check Pictures Folder Inside OneDrive Directory
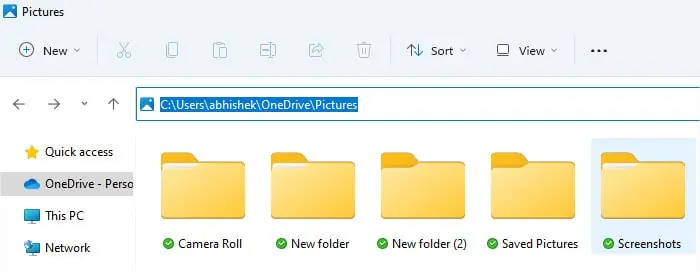
If you have synced your Pictures folder to OneDrive, the Pictures folder where screenshots are automatically saved may not be the same as the Pictures folder you see inside this PC. All synced folders are stored inside your user profile’s OneDrive folder. So, you should check there to look for your screenshots.
- Open Run by pressing Windows + R.
- Type
%userprofile%and press Enter to open the User Profile folderC:\users\‘username’. - Go to OneDrive > Pictures > Screenshots.
- Look for your screenshot.

Change OneDrive or DropBox Settings
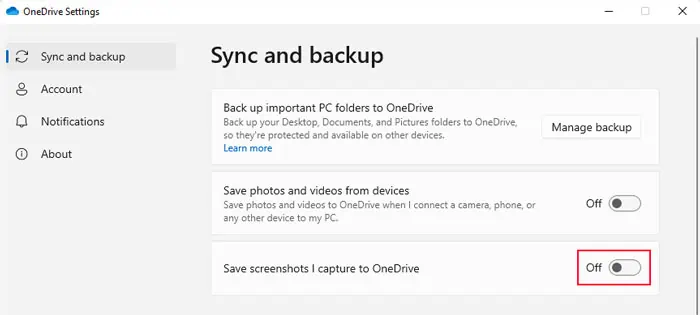
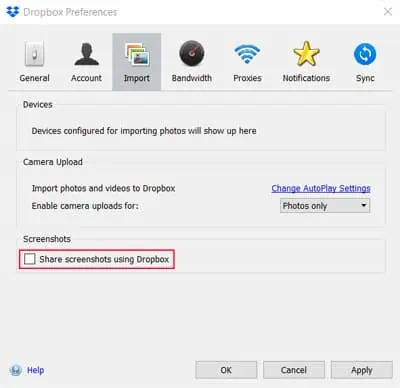
The Cloud Storage syncing utilities like OneDrive and DropBox include an option to save your screenshots to those cloud storage. If such an option is enabled, the screenshot may not be saved to the clipboard after you press the Print Screen key, especially if you use third-party screenshot tools. So, you need to disable this option.
On OneDrive
- Click on the OneDrive icon from the system tray.
- Click on the gear icon and go to Settings.
- Under Sync and backup, uncheck Save screenshots I capture to OneDrive.

On Dropbox
- Open Dropbox from the system tray.
- Click on the gear icon > Preferences.
- Go to the Import tab and uncheck Share screenshots using Dropbox.

End Background Processes
Some applications such as third-party screenshot and movie capture tools can conflict with the default Print Screen functions on Windows. They can disable the key or remap it to perform some other tasks instead.
In such cases, you can check for the applications on the Task Manager and disable them to resolve the issue.
- Press Ctrl + Shift + Esc to open the Task Manager.
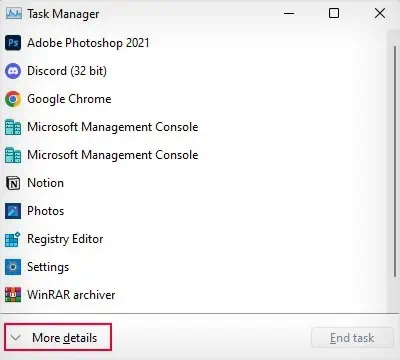
- Click on More details if only a few applications show on the program.

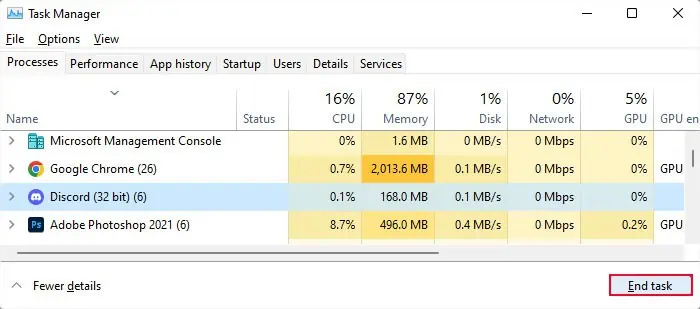
- On the Processes tab, look for any recording and screenshot tools under Apps and Background Processes.
- If you suspect a program, right-click on it and select End Task. Make sure not to haphazardly end any programs you don’t know. You can search on the internet for more information on the programs if necessary.

- If the print screen key works properly after ending the application, it is definitely responsible for the conflict.
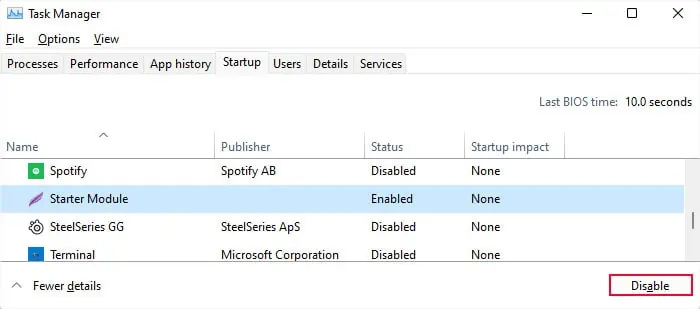
- After determining the culprit, go to the Startup tab. Look for the app and if it’s there, select it and click Disable.

You can also uninstall the app if you don’t need it anymore.
Change Print Screen Key Shortcut for Snipping Tools
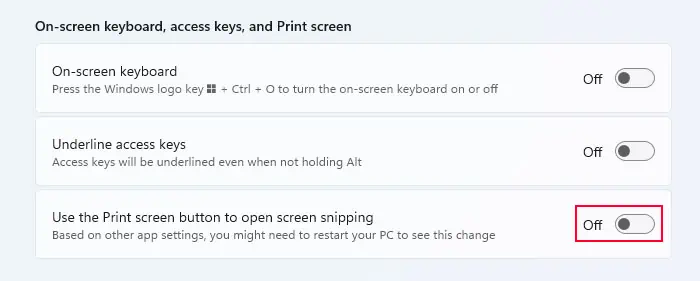
Windows also includes an option to use the Print Screen key to launch the Snipping tools app. So, if pressing this key leads you to the snipping screen, this option is on. You can disable it to get the default function of the key.
Or, if the key is not working at all even if this option is Off, you can enable it to use the Snipping tools instead.
- Open Settings and go to Accessibility or Ease of Access > Keyboard.
- Toggle on/off Use the Print screen button to open screen snipping.

Use Snipping Tools
Windows comes with a better screenshot feature, the Snipping Tools. It allows more options while taking a screenshot and if the Print Screen key doesn’t work while taking the screenshot, it’s better to use this method instead.
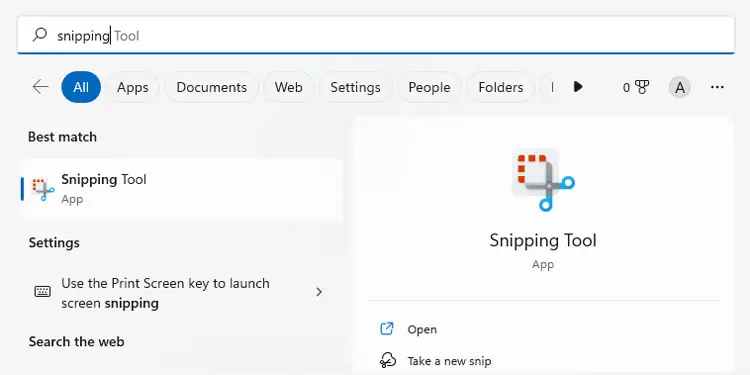
You can use the Windows + Shift + S shortcut to open this application. Or you can search for it on the search bar. Windows also provides other methods to take screenshots, which you can try out as well.
Check for Key Damage
If you experience any difficulty when pressing the key such as it requires more effort, or the key is stuck, this is the likely reason.
You can also use another keyboard or open an on-screen keyboard (Ctrl + Windows key + O) and see if the print screen button there works. If so, your Print Screen key is definitely damaged and you need to repair it.
If you are using an external keyboard, follow these steps.
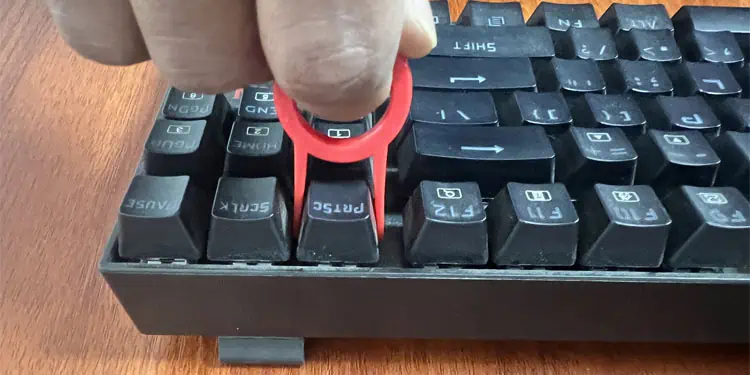
- Use a keycap puller to pull out the Print Screen key.

- Check if the keycap as well as the switch (mechanical keyboard) or the rubber dome (membrane keyboard) have any damage.
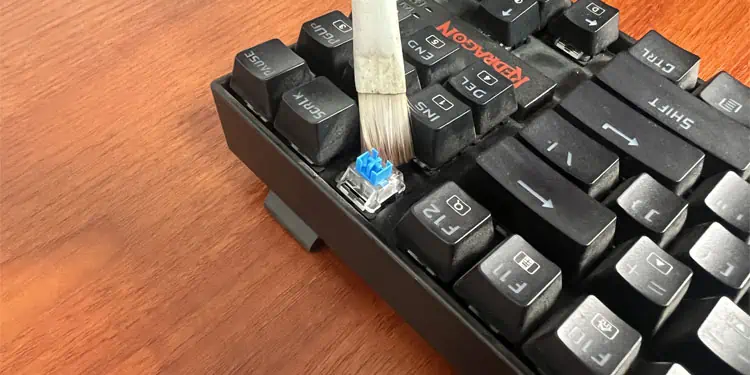
- Clean the key if it has a lot of dust or grime. You can use a soft-bristle brush for this purpose. Be careful while cleaning if you have a membrane keyboard as the rubber dome may be detachable.

- If you could see any damage to the key’s components, you need to replace them. You can easily get a replacement keycap or standalone membrane.
- But if the switch or the membrane strip (the same rubber membrane is spread over the entire keyboard) is damaged, it’s better to seek professional help.
- After checking and cleaning the key, put back the keycap and press it down to lock it in place.
Laptop keyboards also contain retainer clips and the keycaps are more difficult to remove. So, we recommend referring to our article on how to fix broken keys on laptops for more in-depth steps. But since the process can cause further damage to the key parts, you should take the laptop to a hardware specialist for proper repair or replacement.
