If your printer is printing blurry pages, it might be time to refill the ink. You will generally get indistinct texts and images when your printer is running low on ink.
Your printer may also generate double vision or blurry printouts when used extensively for a long time. In such a case, the printhead shifts from its actual position and gets clogged with ink residues over time. So when you start printing, it results in a blurry printout.
Besides this, incorrect print settings can sometimes lead to blurry text and images.
Change Paper Settings
You should always use papers that are compatible with the printers. Using incompatible and glossy papers can cause the printouts to appear blurry. Not all papers can accept ink from your printer.
Similarly, if the papers are moist, they can not absorb the colors properly, which results in blurry prints.
You can try replacing the current papers with another type of paper and see if the issue persists. After inserting the new papers, make sure you change the paper type from the printing preferences.
On HP Printer
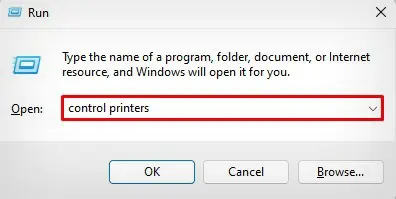
- On your Windows computer, press the Windows + R shortcut.
- Once the Run application launches, type
control printersand press OK.
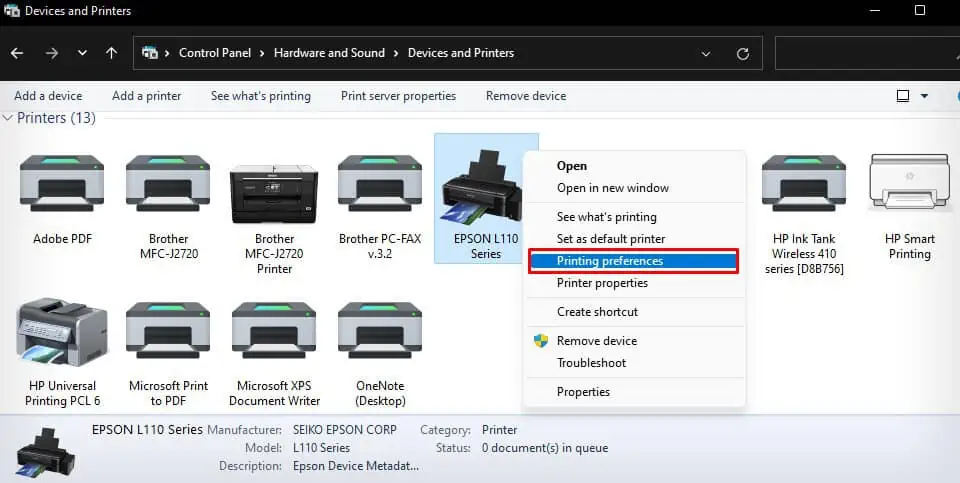
- Right-click the HP printer.
- Open Printing preferences.

- Click Paper/Quality.
- Select the proper Paper Type from the drop-down.

- Click OK.
On Epson Printer
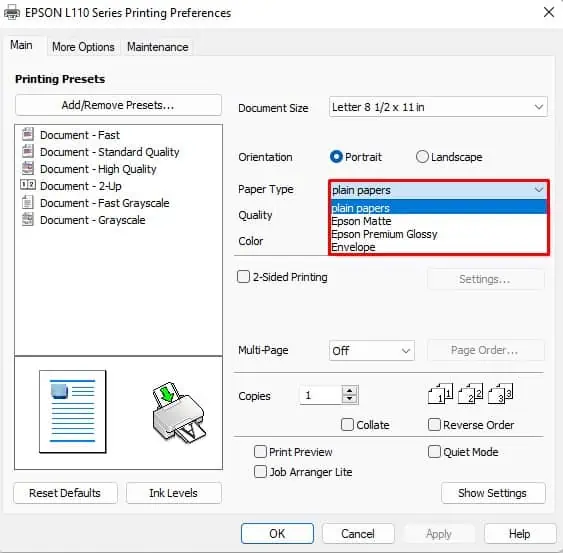
- Right click Epson printer and open Printing preferences.

- Select the correct Paper Type.

- Click Apply > OK.
On Brother Printer
- Open Printing preferences of your Brother printer.

- Select correct Media Type.

- Click OK.
Print in High Quality
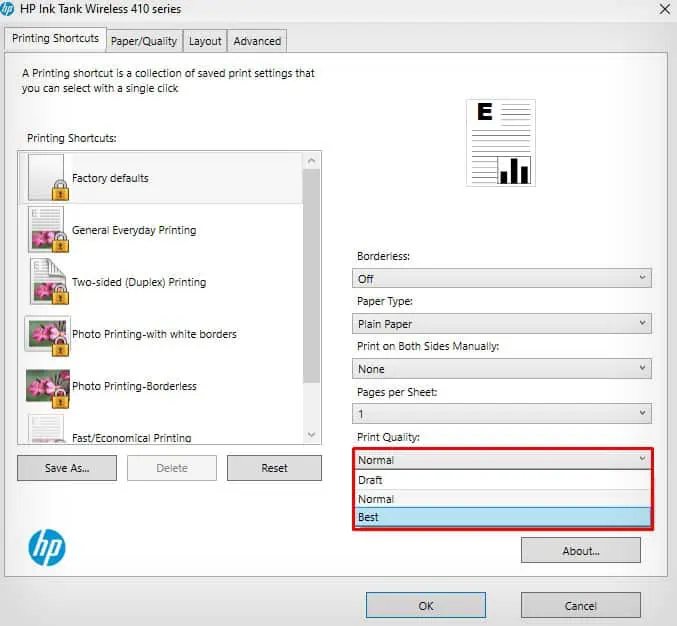
You can generally print in three qualities on your printers—Draft, Normal and Best.
If the quality is set to draft, you may have to compromise on the print quality. A low-quality print can cause text and images to appear blurry. So, set the print quality to Best and try printing again.
On HP Printer
- Open Printing preferences of your HP printer.

- Choose Best in the Print Quality dropdown.

- Press OK.
On Epson Printer
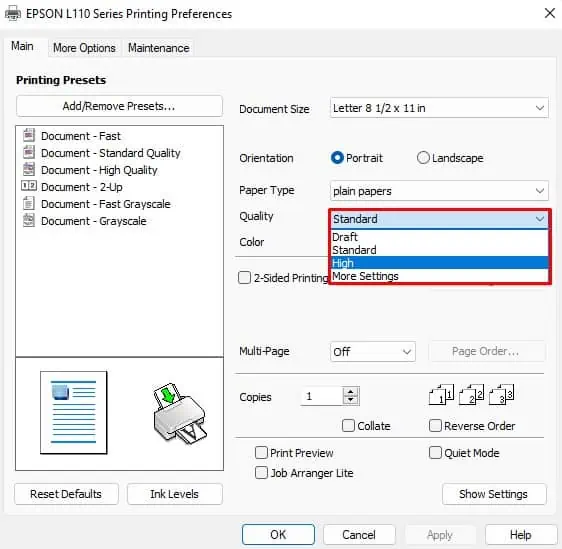
- Open Printing preferences of your Epson printer.

- Choose High from the Quality drop-down.

- Press OK.
On Brother Printer
- Open Printing preferences of your Brother printer.

- Select Best from the Print Quality drop-down.

- Click Apply > OK.
Check and Refill Ink
You can also get a blurry printout if your printer is running low on ink. Printers can not produce vivid quality printing with low ink levels. So, you should always check if you have sufficient inks on your printer and fill it if they are on low levels.
Further, if you are going to refill the ink, always use genuine ink from your manufacturer.
On HP Printer
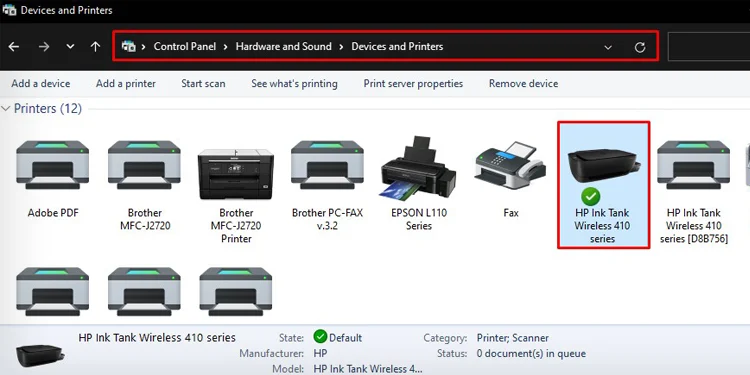
- Double-click HP printer on the Devices and Printers window of Control Panel.

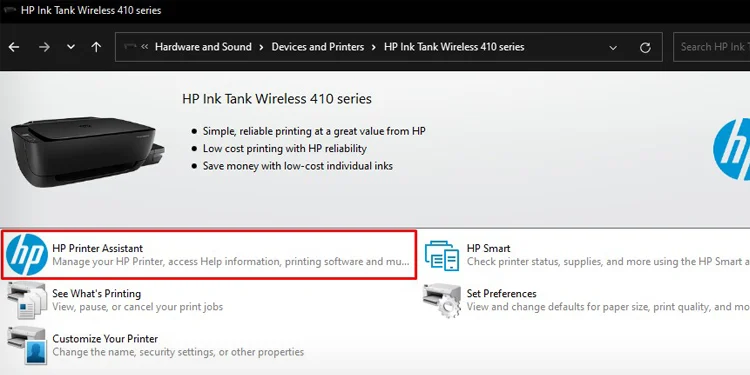
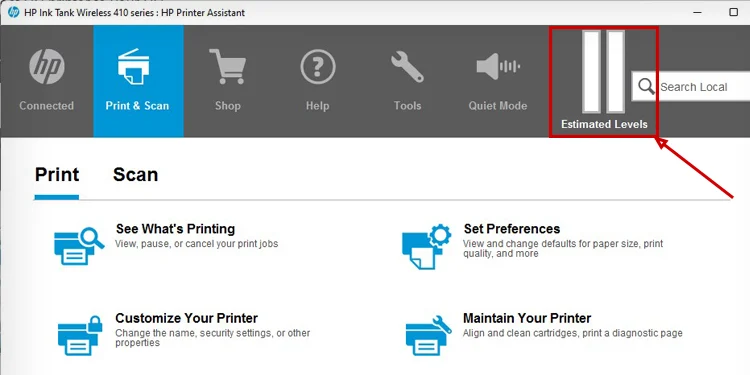
- Launch HP Printer Assistant.

- Click Estimated Levels.

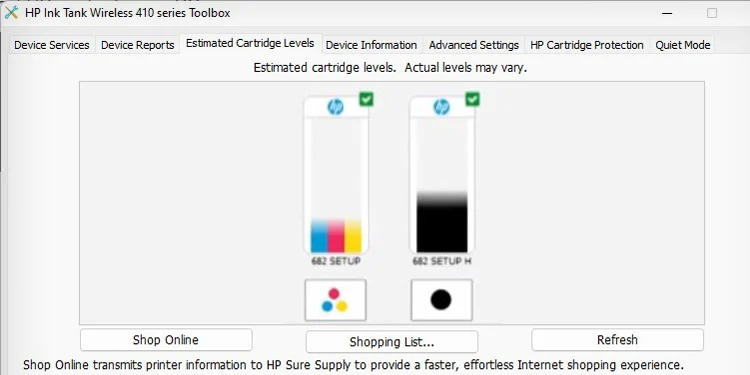
- Select Estimated Cartridge Levels.

- Check the ink levels. Consider refilling the ink if the ink levels are insufficient. You may refer to this guide on how to refill ink in an HP printer.
On Epson Printer
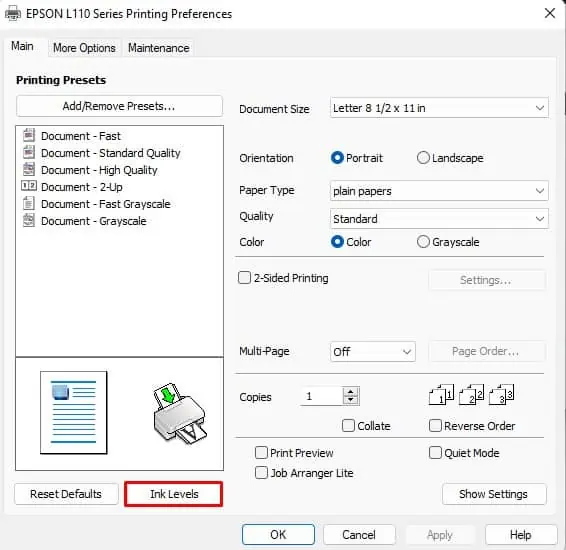
- Open Printing preferences.
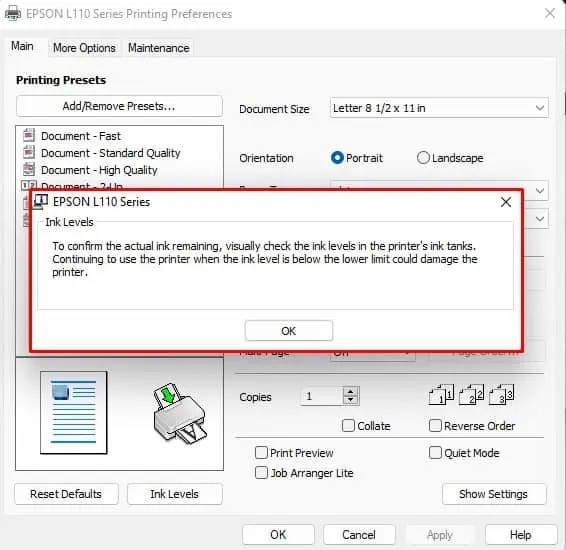
- Click Ink Levels.

- Follow the instructions to check the ink.

On Brother Printer
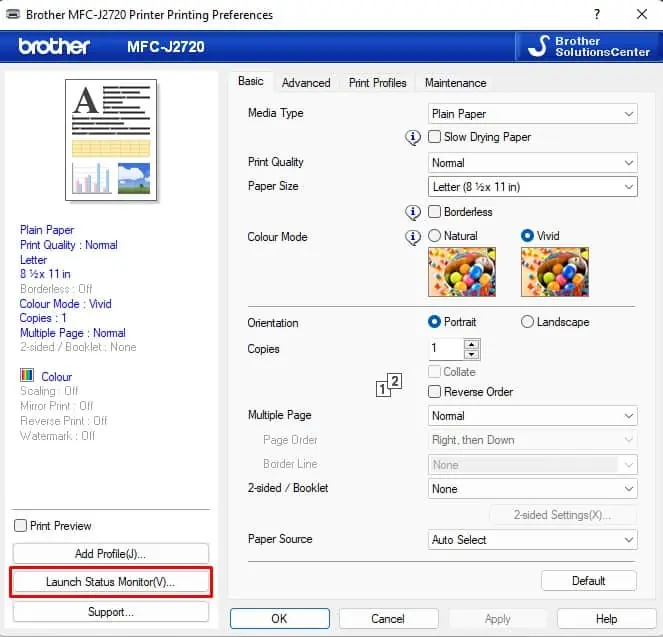
- Open Printing preferences.
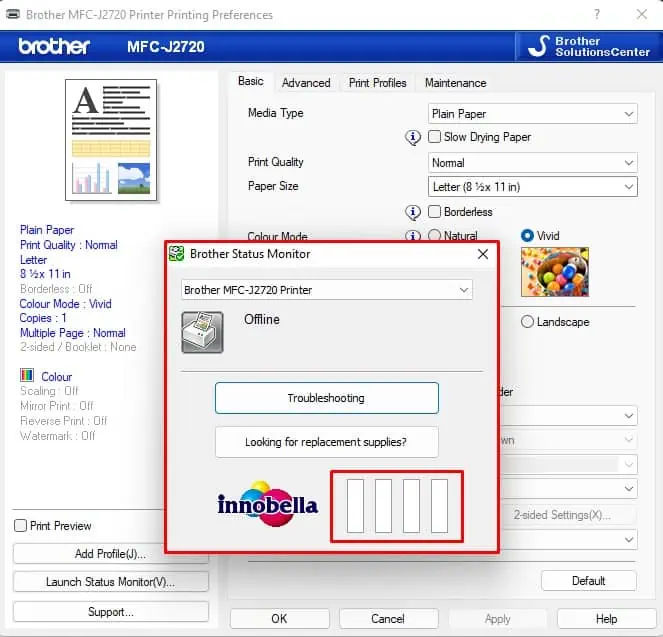
- Press the Launch Status Monitor button.

- Check the ink.

Align Printhead
Printhead is a component that sprays ink onto the papers during the printing process. Being the most movable part of your printer, it is obvious that the printheads misalign itself in the long run.
Similarly, if you are using the printer for the first time after changing the cartridges, you need to align the printhead. Otherwise, you may get misaligned or blurry printouts.
On HP Printer
- Double-click HP printer on the Control Panel window.

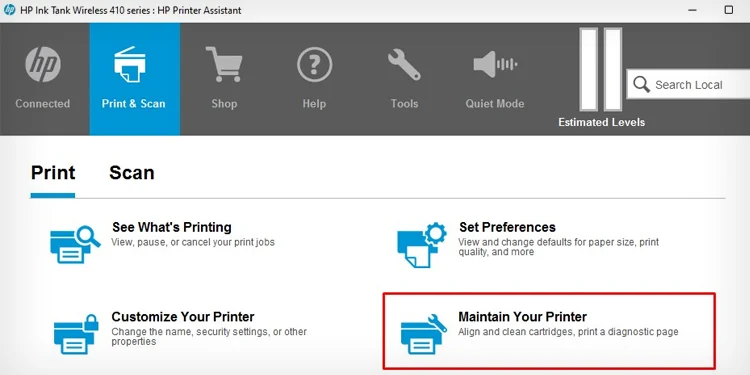
- Launch HP Printer Assistant.

- Click Maintain Your Printer.

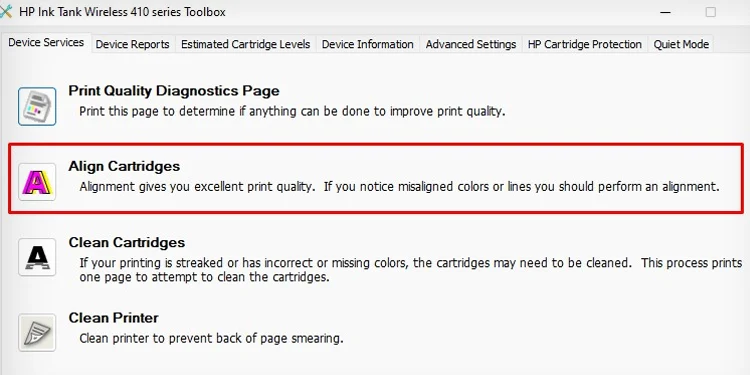
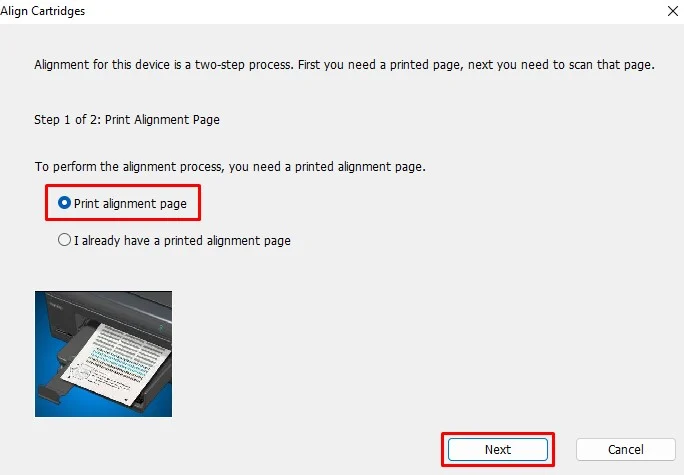
- Select Align Cartridges.

- Press Print alignment page.

- Click Next.
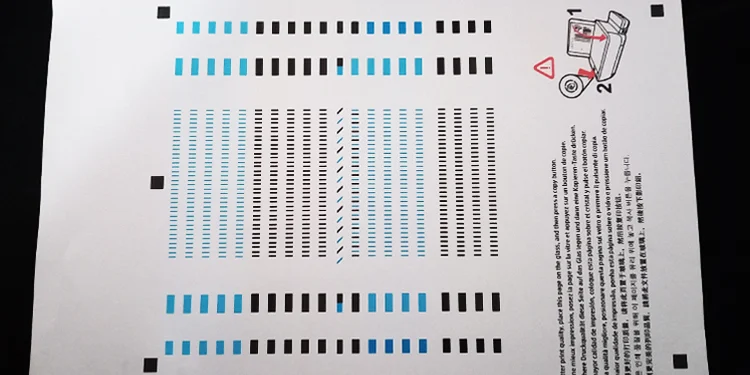
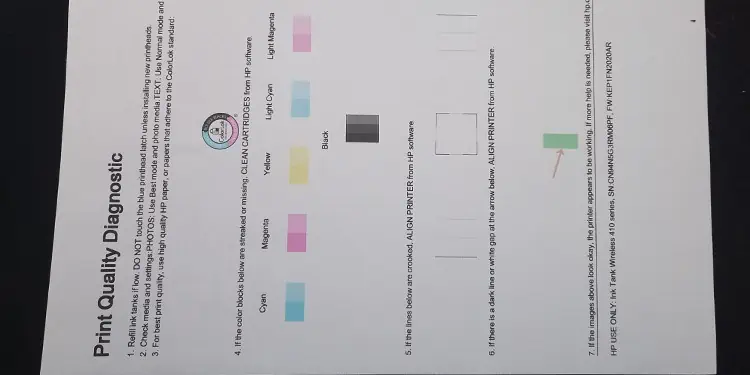
- You will get this kind of printout after the alignment process is complete.

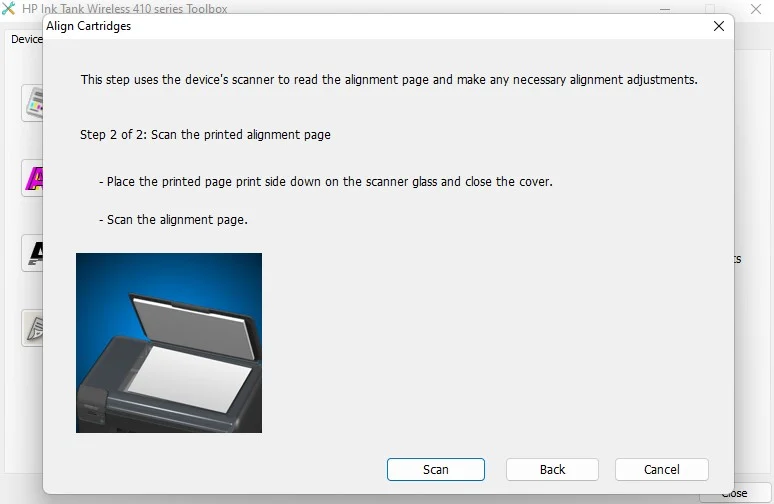
- Lay it down on the scanner assembly.
- Click Scan and wait till the process completes.

On Epson Printer
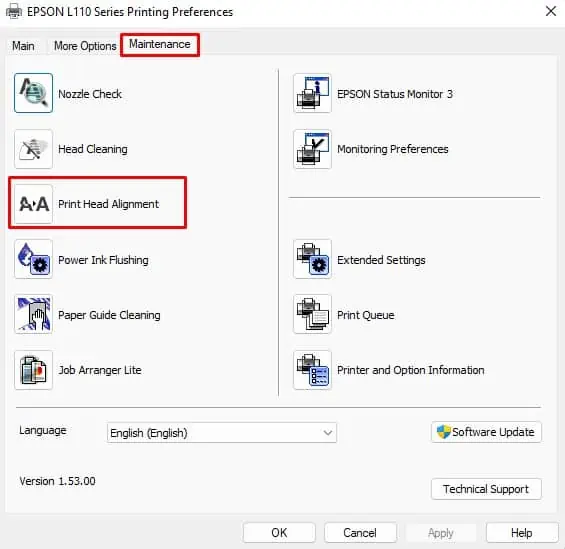
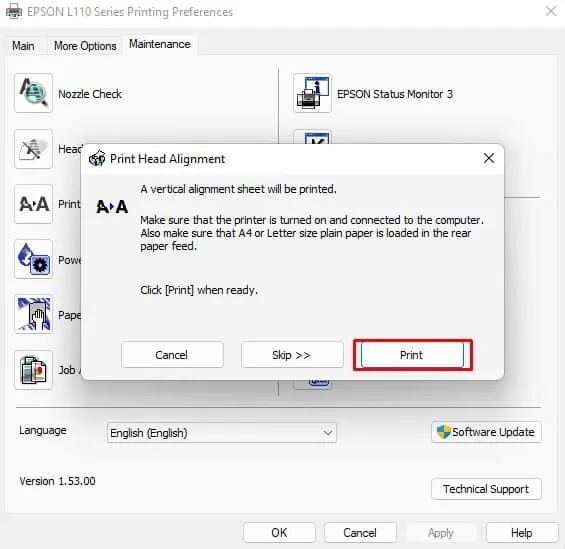
- Open Printing preferences.
- Click the Maintenance tab.
- Choose Print Head Alignment.

- Press Next > Print.

- Follow the instructions and complete the process.
On Brother Printer
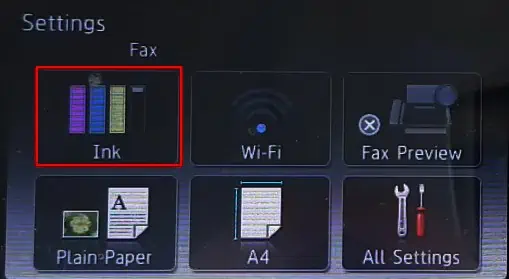
- Use the touch panel to open printer Settings.

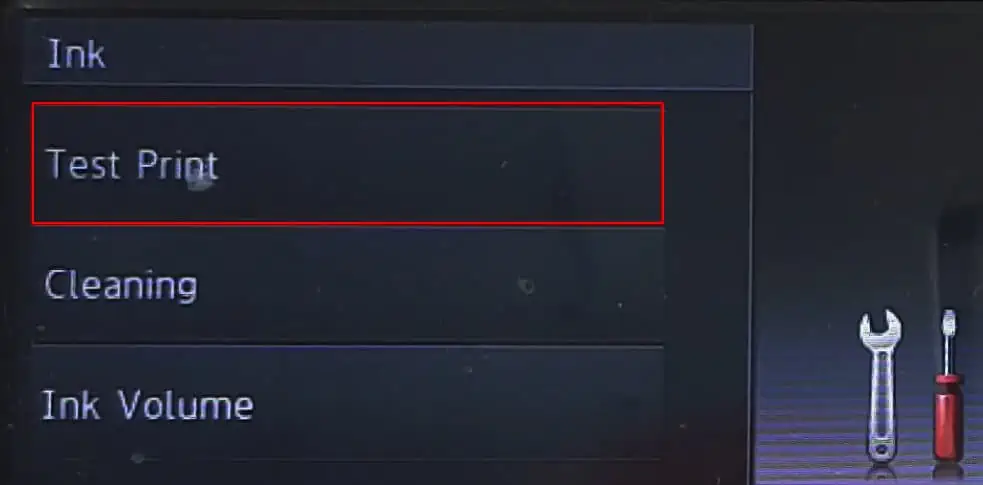
- Choose the Ink menu.

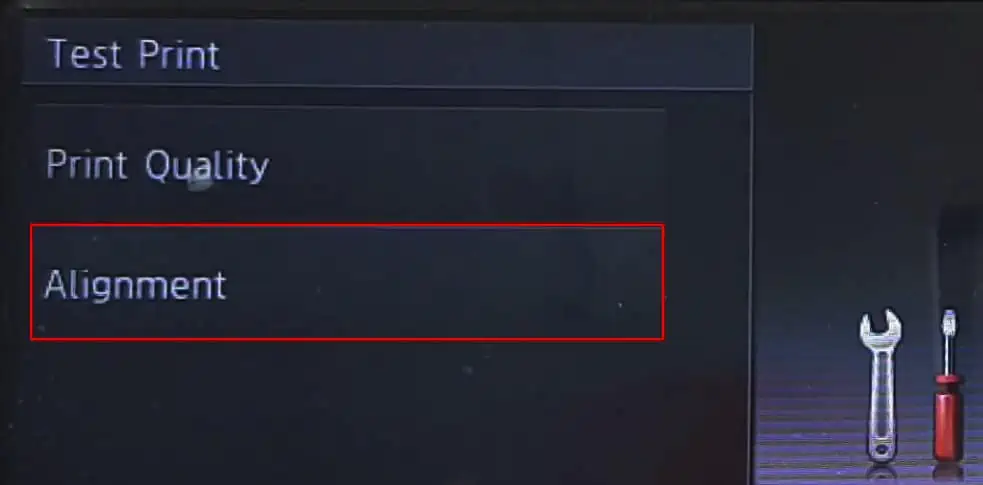
- Select Test Print.

- Go with the Alignment option.

- Press OK.

You may also refer to our other guide on how to align the printheads of HP printers and learn more methods on head alignment.
Clean Printhead
When the printhead is clogged, it can’t spray ink correctly onto the papers. As a result, if you start getting a blurry printout, cleaning printheads would be the right course of action.
On HP Printer
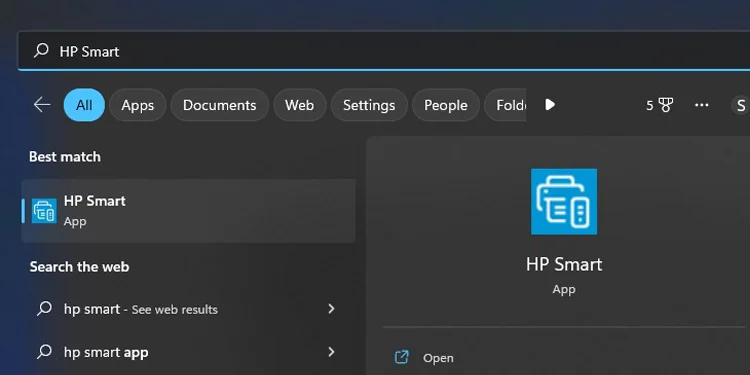
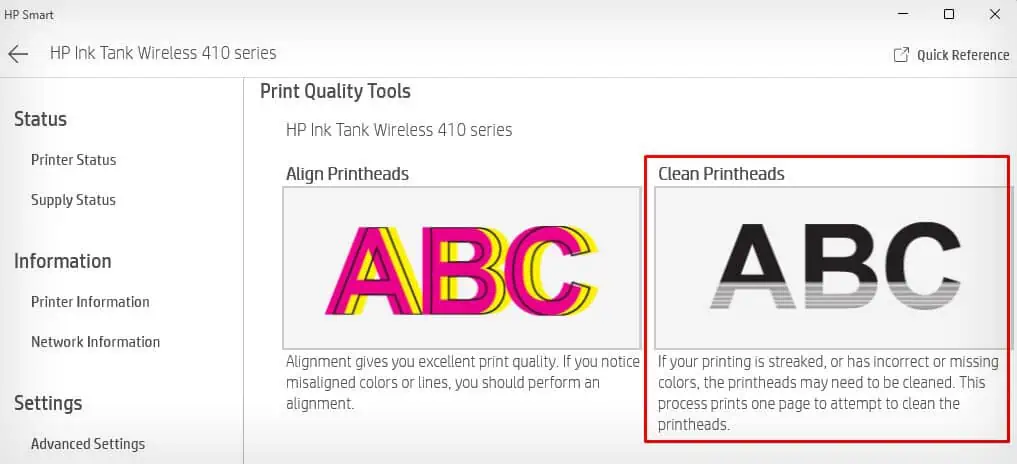
- Download and launch HP Smart.

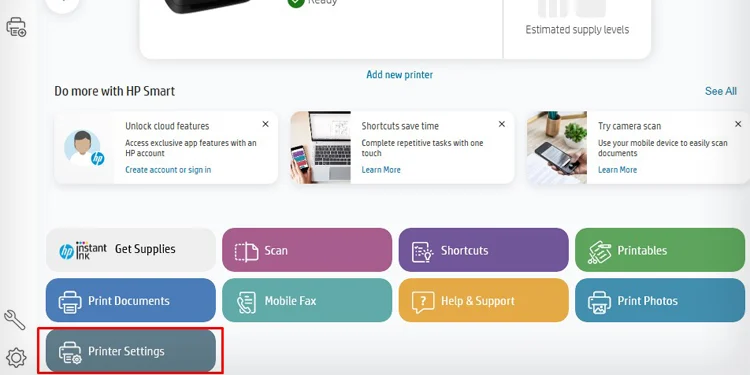
- Press Printer Settings.

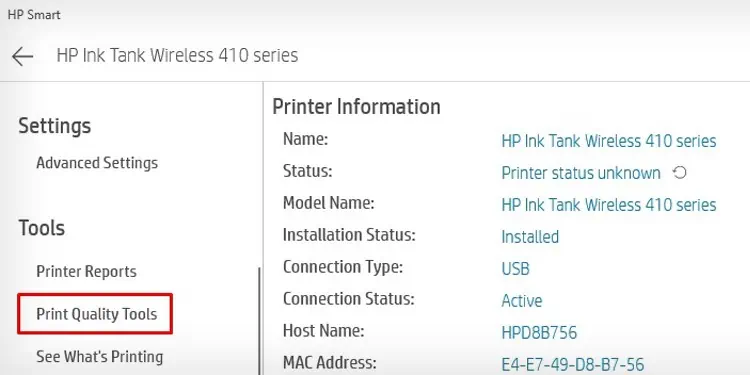
- Go to Print Quality Tools.

- Click Clean Printheads. Wait for a while.

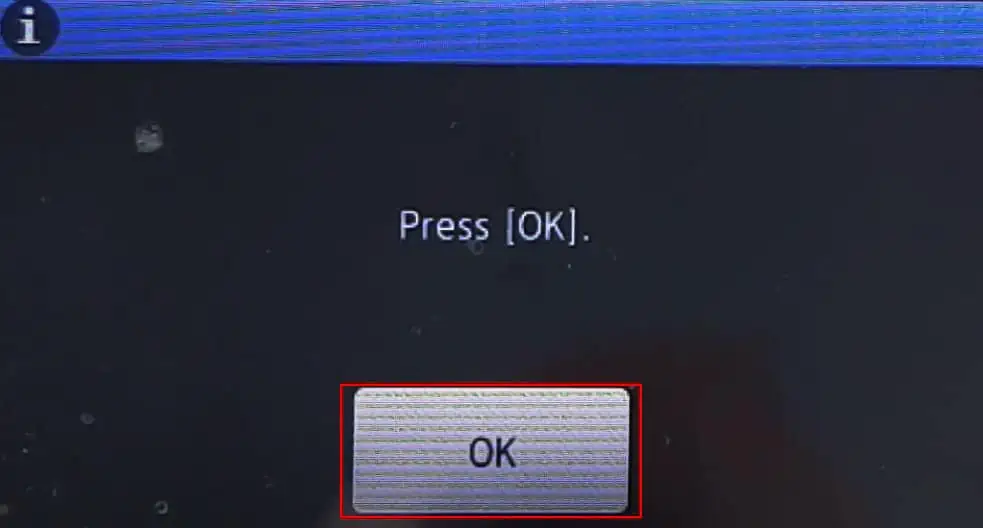
- The cleaning process will complete after the printer ejects a quality report.

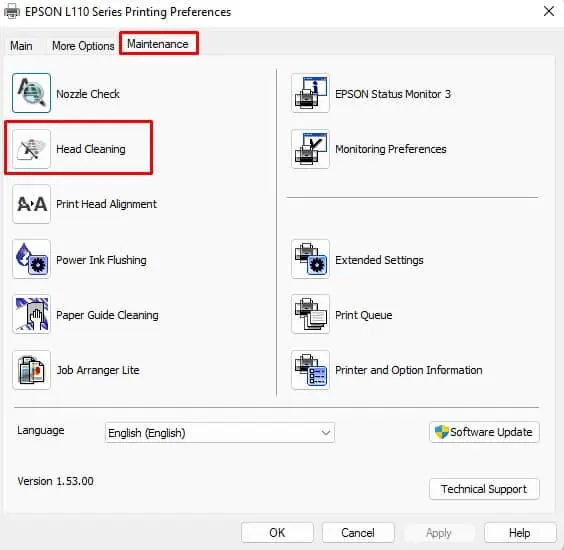
On Epson Printer
- Open Printing preferences.
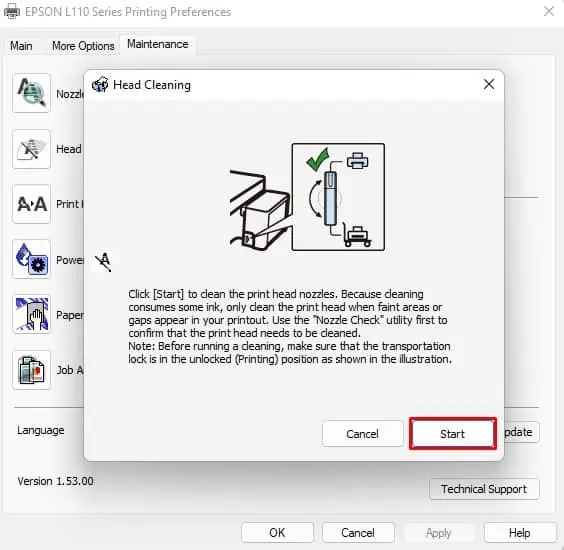
- Click Maintenance tab > select Head Cleaning.

- Click Start.

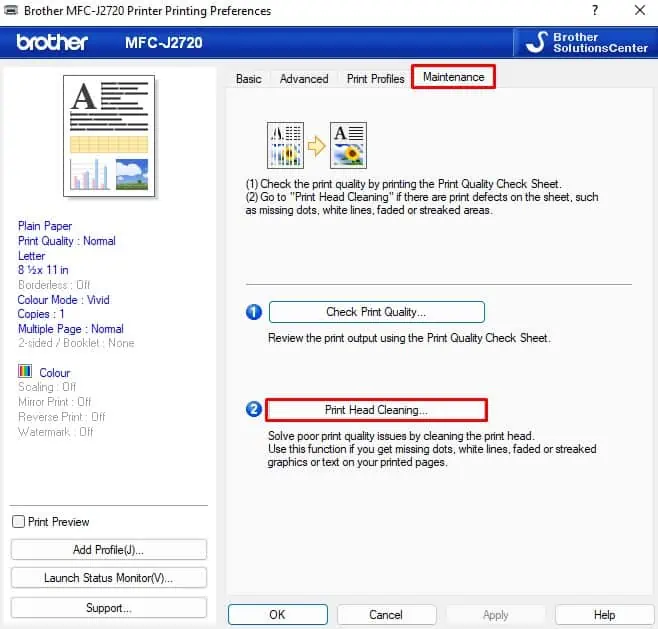
On Brother Printer
- Right-click Brother printer and open Printing preferences.
- Go to Maintenance.
- Click Print Head Cleaning.

Clean Printer Rollers
Printers have pickup and feed rollers to intake papers from the paper tray and feed them to the printer. They need to rotate smoothly so that the papers can pass properly through the printer.
However, when these rubber wheels get jammed due to dust, debris, or any foreign bodies, they can prevent the papers from passing correctly. This ultimately interferes with the ink-spraying process of the printer and results in blurry printouts.
So, you need to check and clean the rollers to prevent the printer from printing blurry.
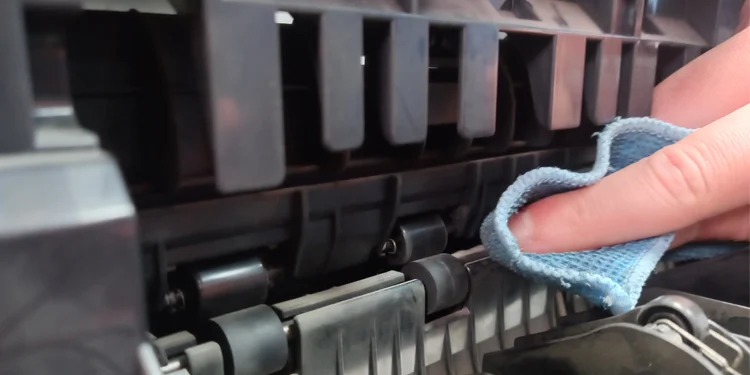
You can use a blower or dip a lint-free cloth in distilled water and clean the rollers.
If you want to learn about how to clean the rollers of a printer, you can refer to this in-depth guide.
Clean the Encoder Strip
Encoder Strip is a thin plastic strip that stretches horizontally from left to right on the carriage assembly area. It helps the carriage assembly slide properly during printing and helps the printhead correctly spray the ink onto the papers.
Over time, paper dust and ink residues can accumulate over the strip and interfere with the proper movement of the carriage. In such a scenario, if you try to print a document, you will get blurry pages.
- Unplug your printer from the power supply.
- Open all the printer doors that give you access to the carriage assembly area. Generally, you need to open the front door, cartridge access door, and top door to access the area.
- Locate the encoder strip.
- Move the carriage either to the left or right side.
- Now, get a container with Isopropyl Alcohol or distilled water and dip a lint-free cloth into it. Squeeze it properly.
- Use your thumb and forefinger to hold the cloth and gently slide it from left to right over the strip.
- You can slide the cloth all the way left and right three to four times.
- Once the cleaning is complete, close all the printer doors.
- Power on your printer and try printing again.
Warning: Always be careful and gentle while you are cleaning the strip. Do not attempt to clean the encoder strip if you do not have hands-on experience working with the internals of the printer. If you bend or break the strip, you might damage the printer.

