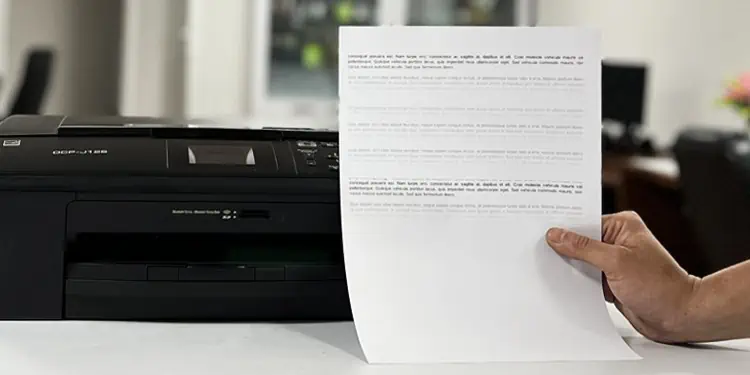
A printer should not print faded texts unless you are using faded fonts in your document. However, if you encounter undesired faded texts, it indicates either a depleted ink cartridge or a clogged printhead.
When the printer is running too low on ink, you may have problems getting clear and vivid text. Similarly, a printhead that is clogged can not spray inks efficiently, leading to the problem. At times, a printer may also print faded texts when it is running on ink/toner saver mode.
Adjust Print Quality Settings
Most printers provide you an option to choose what type of print quality you want out of your printer. You can opt for either Draft quality, Best quality, or Normal quality.
If the printer is set to print on draft or normal quality, you might not get the printout as expected. You can try changing the print quality to Best and see if that solves the problem.
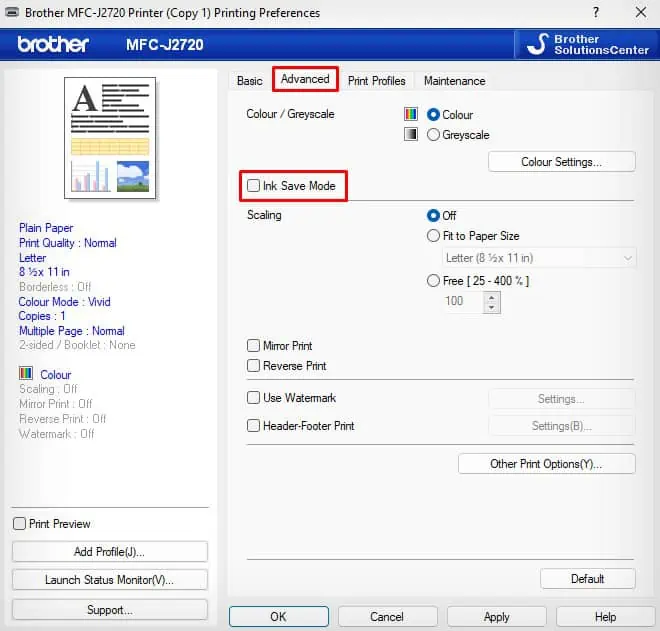
Besides, if your printer has a toner-saver mode or ink-saver mode, consider disabling these modes.
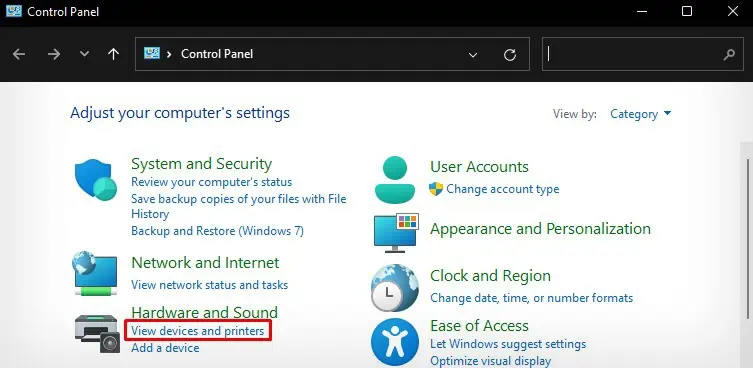
- On the Control Panel, click the View devices and printers menu.

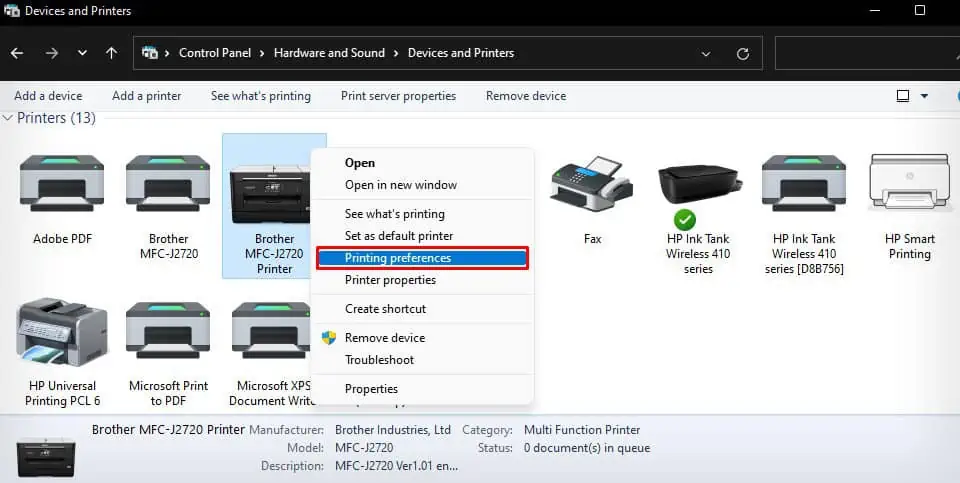
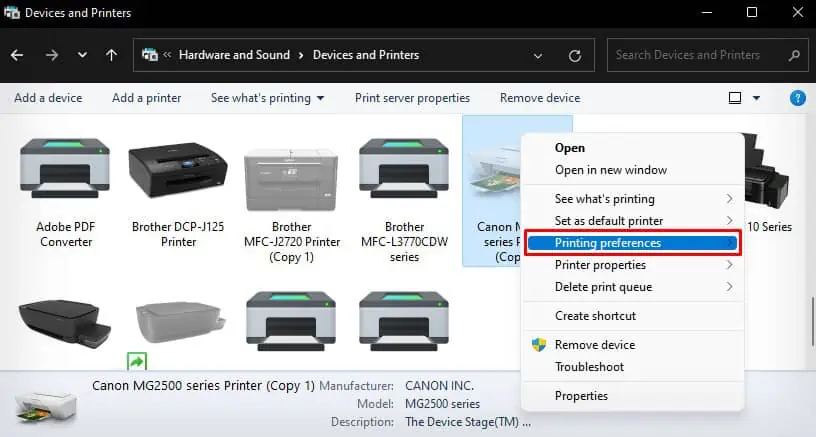
- Right-click the printer, then tap Printing preferences.

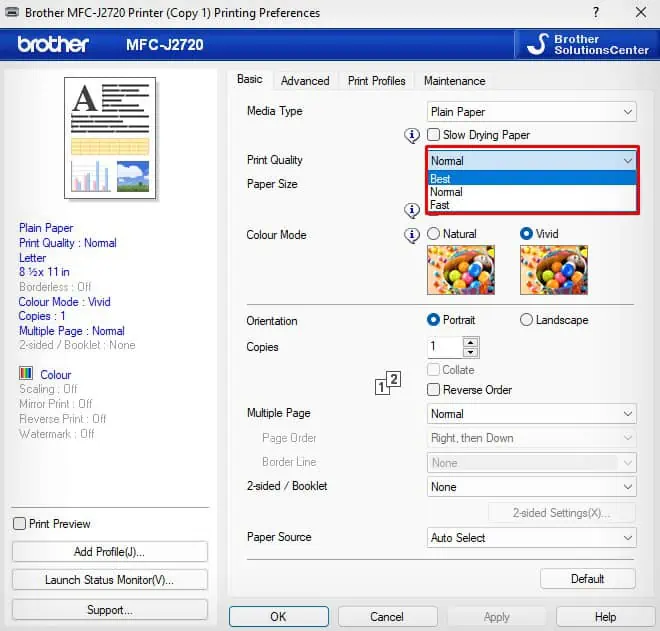
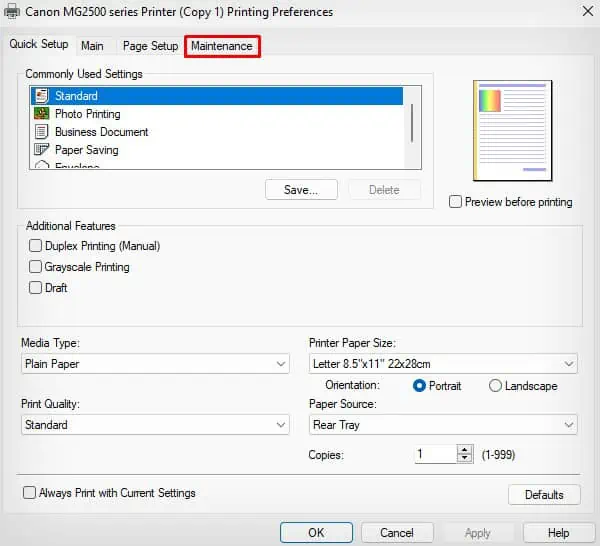
- Choose Best in the Quality drop-down.

- Then go to Advanced settings and uncheck Ink Save Mode.

- Click Apply > OK.
Change the Paper Type
You may also run into a problem if you are using glossy, moist, or low-quality papers incompatible with the printer. Such papers generally fail to soak the ink correctly and you may observe faded text on the printout.
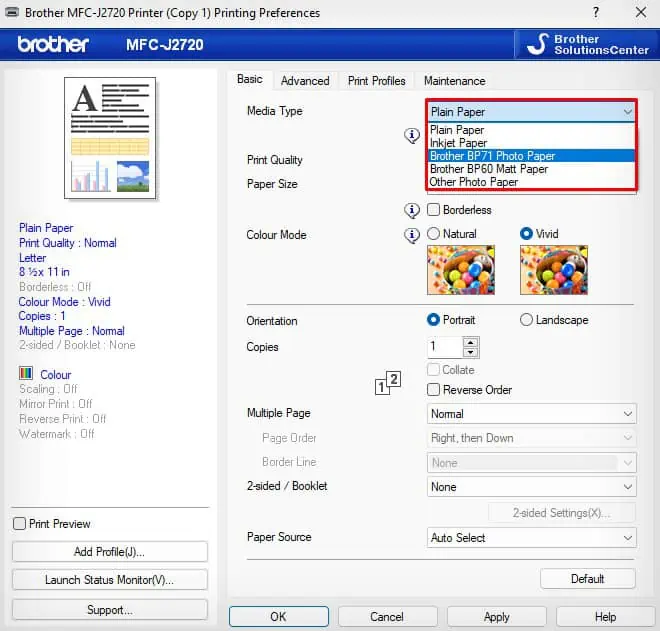
I suggest you prepare a new stack of printer-compatible papers and use it for printing. Once you insert the papers, follow these steps to change the paper type.
- Open the Printing preferences of the printer from the Control Panel.

- Choose the Paper Type. Make sure the selected paper type and actual paper in the paper tray are same.

Check Ink Levels
Now that you have verified everything is fine with the print quality settings and paper type settings, let’s check the ink level of the printer.
It is obvious that your printer produces faded and dull printouts when it is running low on ink. So, verify the ink levels and refill it if necessary.
Let’s see how to check the remaining ink in the Brother printer. You can follow similar steps for printers from other manufacturers.
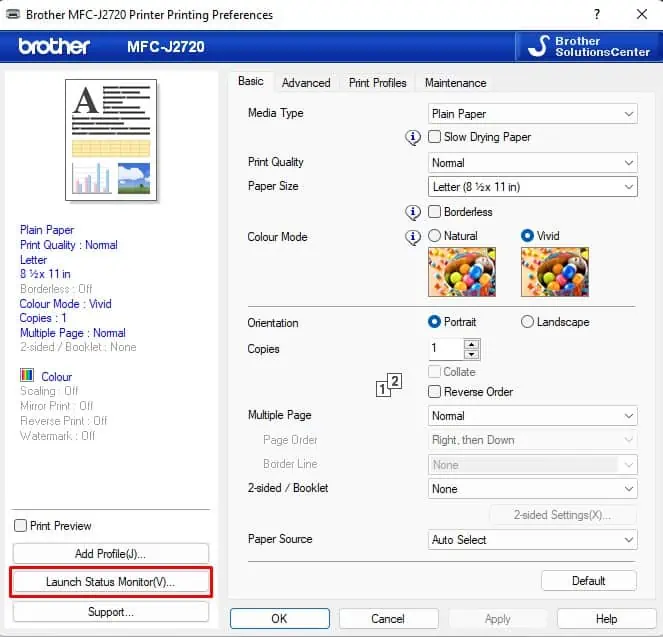
- Open the Printing preferences of the printer.

- Tap the button: Launch Status Monitor.

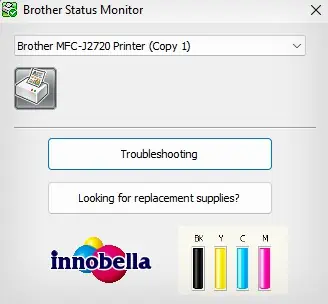
- See the remaining ink. If necessary, refill it.

- If refilling is not possible, change the ink cartridges.
If you need help, you can consult this comprehensive guide on how to check ink on HP, Brother, Epson, and Canon printers.
Clean Printheads
Printers utilize tiny holes on the printhead to sprinkle ink onto the paper. These holes (nozzles) should never get clogged for the proper operation of the printer. However, foreign bodies like dust and ink residues can get attached to the nozzle over time. As such, the ink can not get correctly into the paper and the printer runs into issues like printing faded texts.
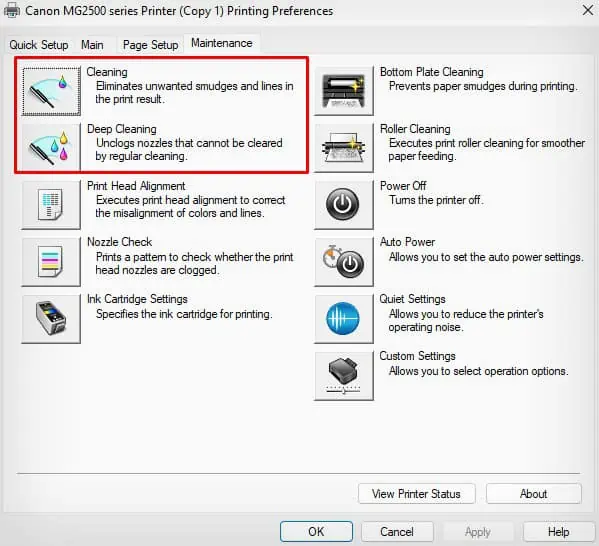
I recommend you run an automated head cleaning tool from the printer manufacturer to resolve this issue. Here, I will demonstrate how to clean the printheads of a Canon printer. You can follow similar steps for other printer models too.
- Launch Printing preferences of your printer.

- Go to the Maintenance tab.

- Run Cleaning and Deep Cleaning one after another. You may run about 3 clean cycles for better results.

Clean Your Printer
If you are still not able to get good results, consider cleaning the internals of your printer as well. The printer can print faded texts when there is anything blocking the paper path. It is possible that the papers can not pass efficiently through the paper rollers. So, it’s best that you give your printer a thorough cleaning.
Open all the access doors of the printer and blow all the dust out of your printer with the help of a blower.
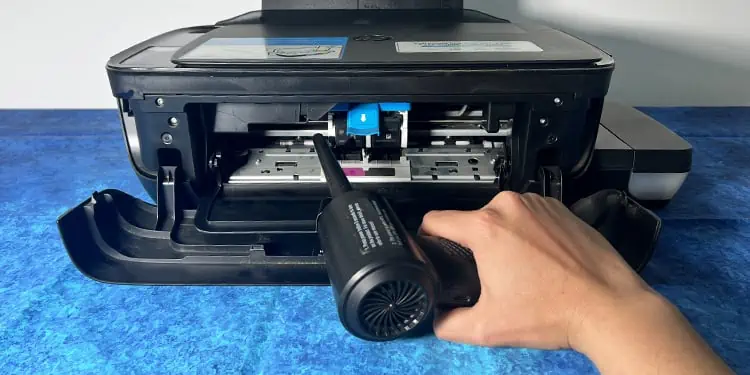
Then take distilled water, a piece of lint-free cloth, and clean the paper rollers.
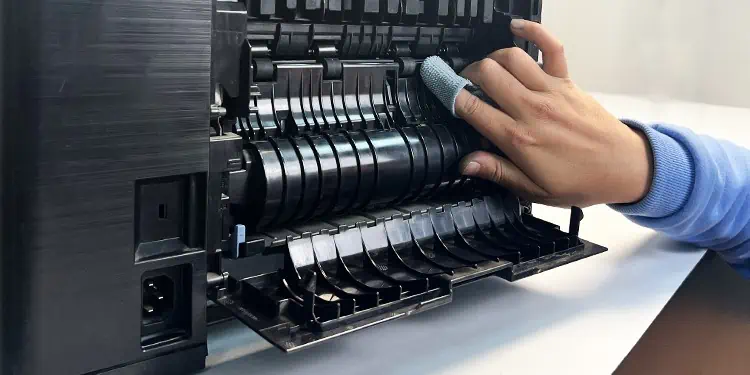
In the case of a laser printer, I suggest you remove the drum unit of the printer and clean the transfer rollers.
Make sure you use only dry lint-free cloth to clean the transfer rollers. Avoid touching the roller with your hands to avoid other print problems like stains in the printout and blurry printouts.
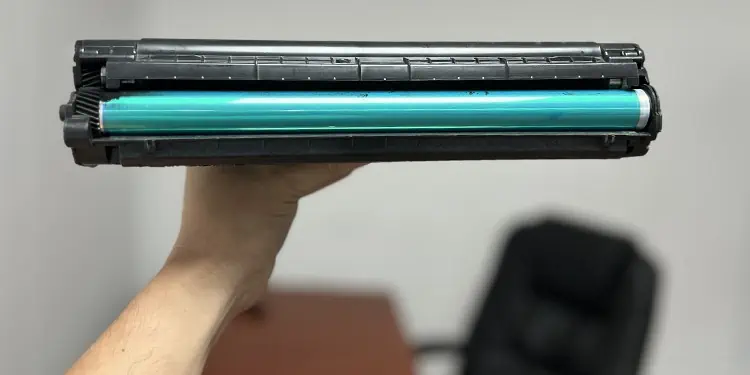
Further, clean the corona wire in the drum unit, by sliding the cleaner tab to the left and right a few times.
If you like a detailed guide, I have written a comprehensive article on how to clean a printer.
Service the Printer
If nothing seems to work, maybe it’s time to contact a professional to service the printer. Your printer might be facing a fatal error other than discussed in the post.
Probably the transfer roller or drum unit of your laser printer might be defective or the printhead of your inkjet printer might have been damaged.
A professional will help you sort out the problem. If your printer is still under the warranty period, you can claim the warranty for cost-free repair.

