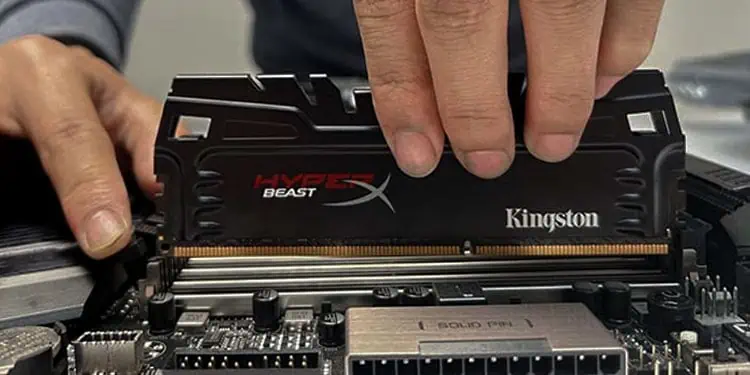
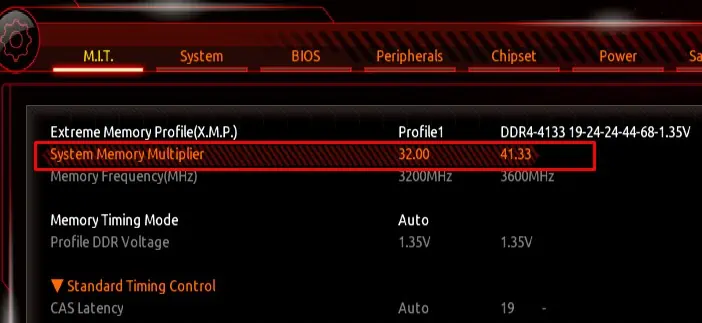
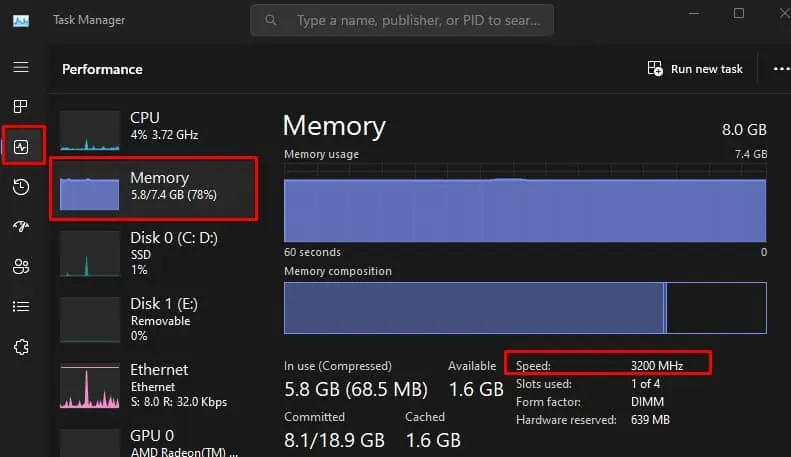
The advertised RAM speed is the maximum speed supported by that particular RAM stick. However, by default, your system will not run at this speed. To make use of it, you need to enable memory profiles.
In some cases, the RAM stick still might not run at its full speed even after you enable memory profiles. If you have a CPU or motherboard that supports lower RAM speed, it will restrict the RAM from reaching its advertised speed.
Check CPU and Motherboard User Manual
Before we begin, it’s best to check the maximum RAM speed supported by your system’s motherboard and CPU.
So let’s start by finding out the CPU and motherboard model in your system.
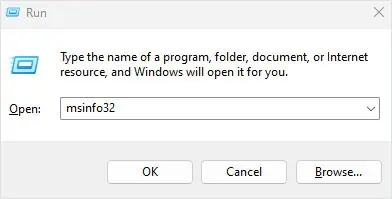
- Open Run by pressing the Windows + R key simultaneously.
- Type
msinfo32and then press Enter. It will open the system information Window where you will get all the details about the system.
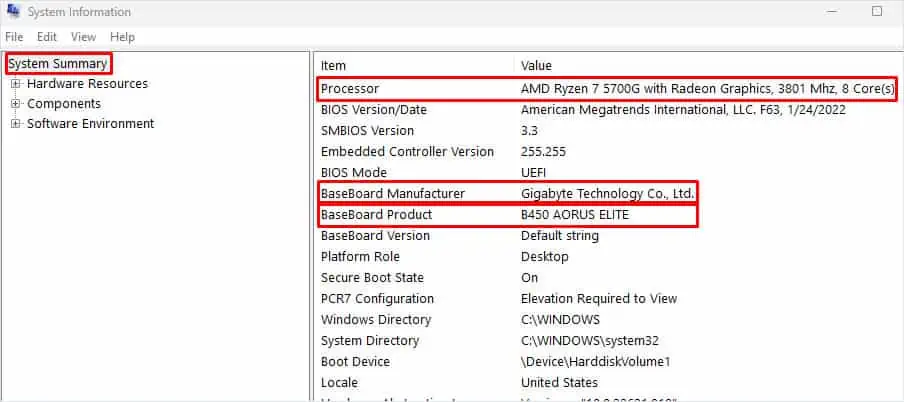
- The values corresponding to BaseBoard Manufacturer and BaseBoard Product are the motherboard manufacturer and model. The value corresponding to Processor is the processor in your system.

After finding the motherboard and the CPU model, visit the motherboard manufacturer’s official website and search for your motherboard’s specification list or user manual. In that, find out the RAM speed supported by your motherboard. Also, check if there is support for XMP, EOCP, or DOCP.
For instance, the B450 Aorus Elite motherboard offers a maximum frequency of 3600 MHz (on overclocking) and supports XMP.
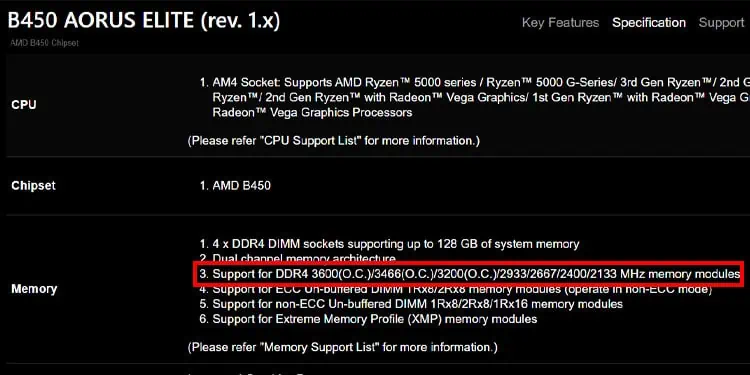
After that, visit your CPU manufacturer’s website and check the CPU specification or user manual for your processor to determine the maximum RAM speed supported by your processor.
For instance, AMD Ryzen 7 5700G supports a maximum RAM speed of 3200 MHz.
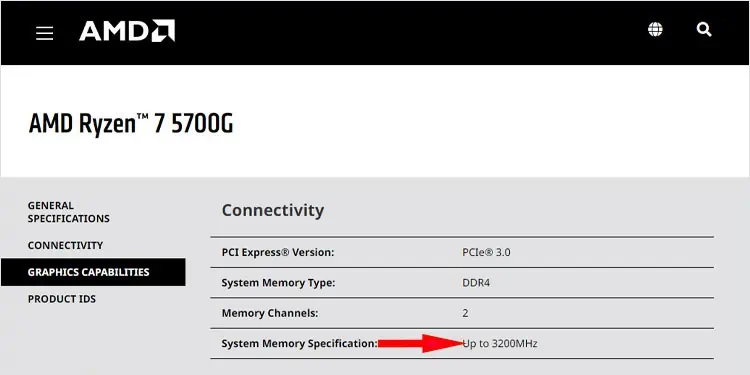
Choose Suitable RAM Speed for Your PC
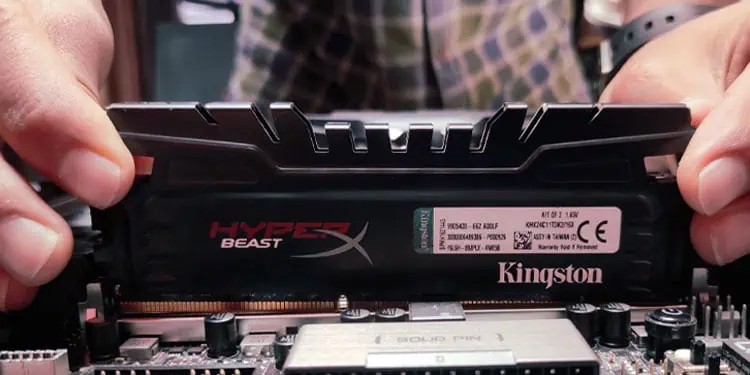
Now that you know the Maximum RAM speed for both the motherboard and the processor, it’s time to set the RAM speed.
In my case, my motherboard and CPU support a maximum RAM speed of 3600 and 3200 MHz, respectively. So it’s best to stick to the RAM speed of 3200 MHz, although my RAM supports 4133MHz.
Your system might be able to handle slightly higher values than the recommended amount, but there is a chance of system instability.
This may result in a random system crash, higher system temperature, or even a Blue Screen of Death (BSOD) error.
Enable Extreme Memory Profile
Enabling memory profiles allows the RAM to run at a higher speed. Increasing RAM speed allows faster communication between the RAM and the CPU. This means the CPU can access data in the RAM much faster, allowing applications to have a smooth performance.
- Turn on the system and repeatedly press the BIOS key to enter your motherboard’s BIOS. Depending on the motherboard, the BIOS key could be different.
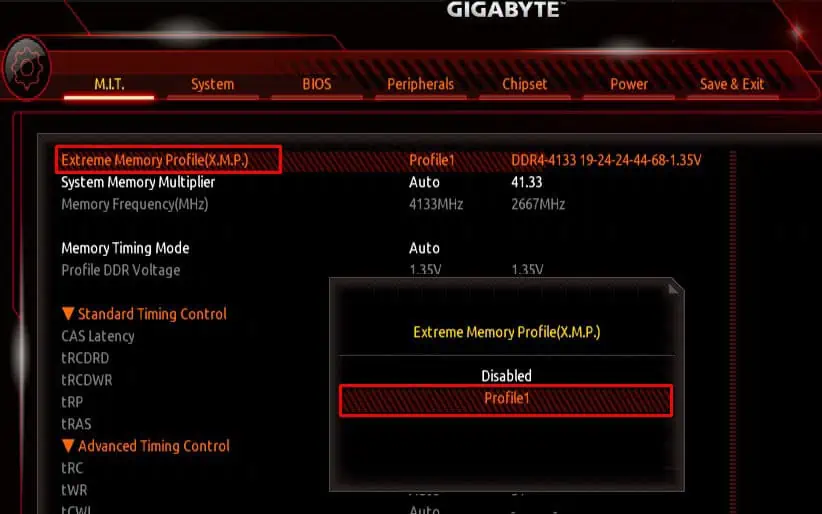
For most desktops, the BIOS key is the Delete key. If you do not know the BIOS key, you can search the internet for the BIOS key for your motherboard. - Once in BIOS, you will need to search for settings named Memory Profile or eXtreme Memory Profile for the Intel system and EOCP and DOCP for the AMD system.
- Enable Memory Profiles, XMP, EOCP, or DOCP depending on the motherboard.

- Now, set the System Memory Multiplier. The base clock is 100MHz, so set the multiplier accordingly.

- Go to Save and Exit.
- Now save the changes made and exit the BIOS.
Now that you have enabled memory profiles, you can check if it worked from within the OS.
- Boot into Windows.
- Press Ctrl + Shift + Esc to open the Task Manager.
- Go to the Performance tab and Click on Memory.

- Here, you can see the speed of your RAM.
Don’t Mix RAM Sticks with Different Speed
If your PC has multiple RAM sticks with each stick running at a different speed, the system will automatically operate on a lower RAM speed.
For example, if you have a system that has two RAM sticks, one memory module has a specification of 4GB DDR4 2600 MHz, and the other has a specification of 4GB DDR4 1300 MHz.
Your PC will have a total of 8GB RAM but will operate on a lower compatible RAM speed of 1300 MHz. It may be one of the reasons your RAM stick is not running at full speed.

