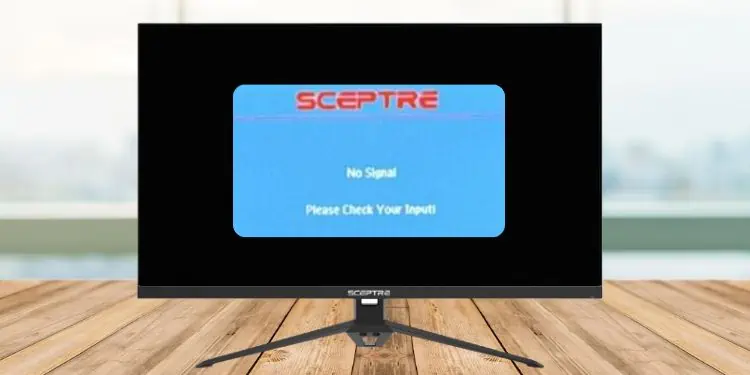
A ‘No signal’ error message means that your Sceptre monitor isn’t getting the appropriate video information from the input source. While it’s mostly followed by the “Please check your input” message, it is possible to get a black screen or some other errors.
Incorrect input sources, misconfigured projection settings, loose/damaged cables, and corrupted drivers may all lead to this issue. In these cases, you can try simple solutions to fix the problem yourself.
However, the problem can also arise due to faulty hardware components. Your RAM, graphics card, monitor, power supply, or even the motherboard could have gone damaged, which may require professional assistance. But before making any conclusion, let’s start the troubleshooting process.
Examine Power and Cable Connectivity
The most common cause of no signal in the Sceptre monitor is a loose cable or no power at all. So, before moving on with the other solutions, I first advise checking all the cable connections:
- First, examine the LED on your Sceptre monitor (usually at the bottom-right in the bazel). No light means that your display device is not receiving any power. If there’s any light (red/green/amber/orange/blue) and an error on the screen, the monitor is getting the power. Hence, the issue rather lies with the video cables or input source.

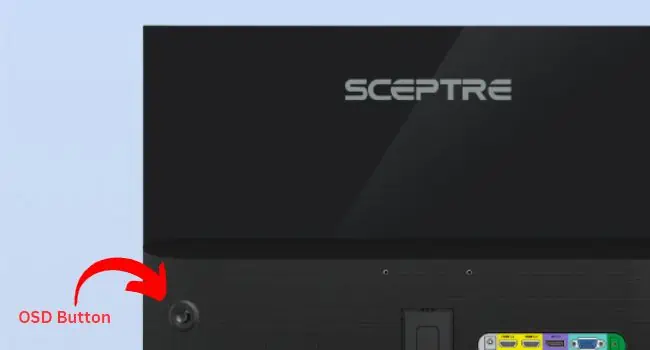
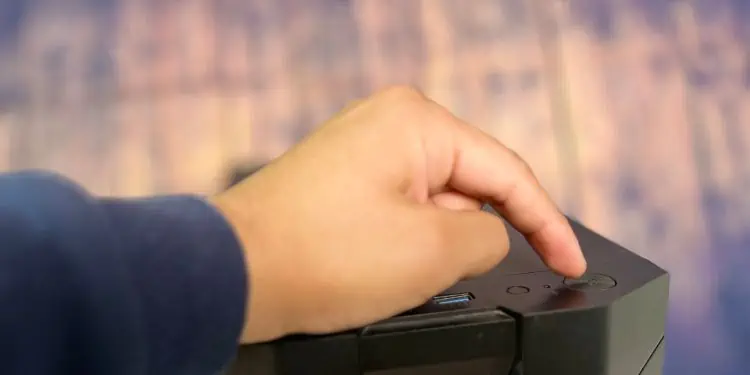
- If you’re experiencing a no power/LED issue, ensure the power button is pressed. It should be located somewhere near the LED. Do not confuse this with the On-Screen Display button (which is usually located at the back). This is a common mistake but if you’re unaware of it, this basic fix should work for you.
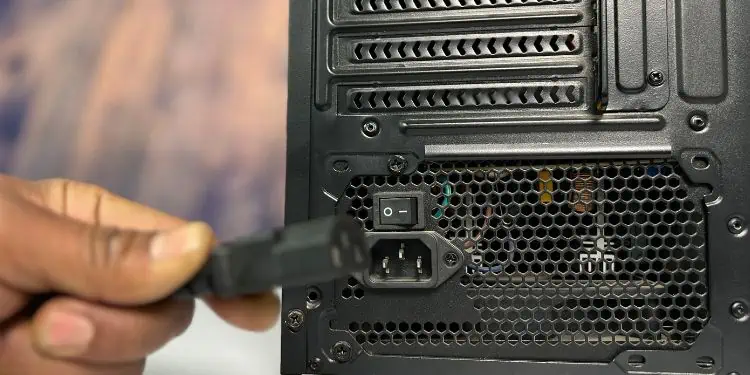
- If there’s still no light, replug the power cord. While you’re at it, examine both the power port and the cable for possible damages. In case the cord is faulty, you need to replace it with a genuine one. But if the port is faulty, you need to contact the manufacturer.

- Sometimes, faulty electric outlets could also be responsible. In that case, trying another outlet can help.
- While you’re at this, make sure your area is not experiencing a low voltage or power surge. If your monitor is not turning on (while PC is working fine) after a power surge, it could mean that the internal components might have been damaged. Even in this case, you need to contact the nearest service center.
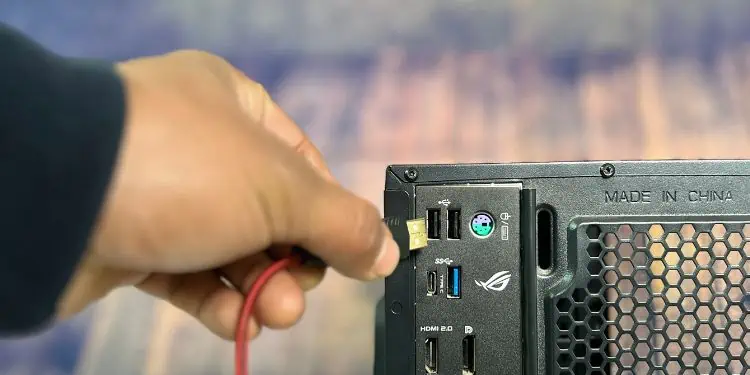
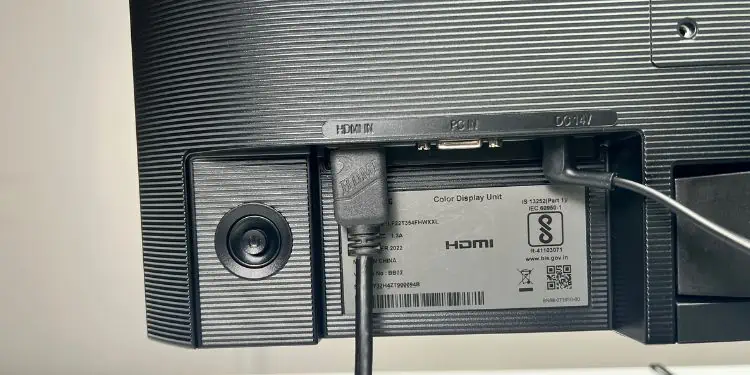
- If there’s a light on your Sceptre monitor but no video (just a black screen or No signal message), first examine the video cable that connects the monitor to the input source. In case it’s just a loose connection, replug it on both sides. But if you notice any sort of damage, I advise using another cable.

- In case you’re using a dedicated graphics card, make sure you’ve plugged the cable into the port here. In most cases, the integrated GPU gets disabled after installing a dedicated card. So, connecting the cable to one of the motherboard’s ports could also lead to a ‘No signal’ error.
- Some Sceptre models support multiple video interfaces and ports (could be HDMI/HDMI, HDMI/VGA, HDMI/DisplayPort, etc.). So, if one of the ports is faulty, you may utilize the other one. Ensure you have securely connected the cable to the respective port.
Change Input Source
In Sceptre monitors supporting multiple interfaces, you need to set the correct input source. While this is automatically configured in newer models, it is still a common problem with older ones.
However, conflicts can still happen (even in the newer models) if you have connected multiple input sources and the Auto feature is not enabled. For example, if you have joined one port with your laptop and another with a gaming console, the Sceptre monitor will not switch to the one you want. Instead, you have to configure this manually:
- First, make sure the monitor is receiving a valid signal. If necessary, connect another input source.
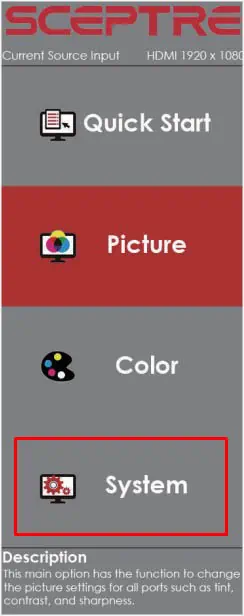
- Locate and press the OSD button (usually indicated by a book symbol at the back).

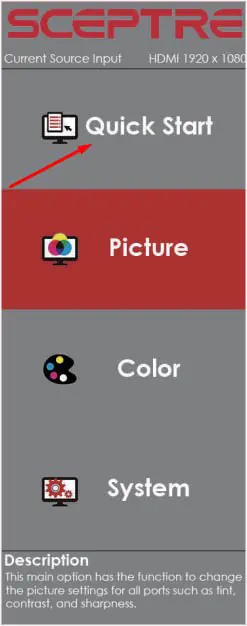
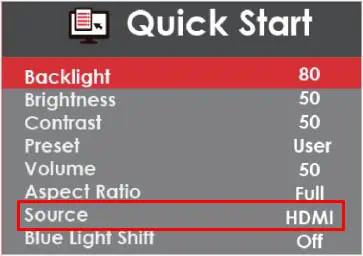
- Once the OSD menu pops up, select Quick Start.

- Use the buttons that perform up and down functions to get to the Source field.

- Hit the OSD button again to select this option and change the input source. Your monitor should work normally now.
- If you find Auto here, I recommend setting the Source to this option.
Check Projection Settings
If you’re using your Sceptre monitor as an external display for a laptop, it’s essential to choose the appropriate projection setting.
Despite choosing the correct input source, the projection setting on your laptop could be configured to ‘PC Screen Only’ leading to this problem. Here’s a quick way to fix this:
- Select the system tray from the Windows taskbar to navigate to the Action Center.
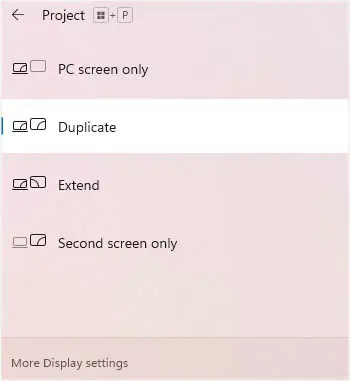
- Here, select Project.
In case you do not find it, you may directly use the Windows + P hotkey.
- Once the Project window pops up, select one of the preferred options and the no signal issue should be solved:
- Duplicate: Mirrors your laptop screen on the Sceptre monitor
- Extend: Expands your current laptop screen to two (or more)
- Second screen only: Turns off the laptop screen and displays the video on the Sceptre monitor

Perform Hard Reset
As mentioned earlier, power surges can lead to unwanted hardware problems. Sharing my personal experience, I recently had a power cut in my area that completely turned off my PC. Later, I was able to start the computer, but there was no display on my Sceptre monitor.
All I did was reconnect the power supply cable, and this fixed it. Upon further investigation, I came to know that the power cut had disrupted my PSU.
Clearly, this wasn’t a good sign for my power supply. Understanding the risk, I immediately added a USP to my setup. Now, I do not have to worry about possible hardware failures due to power outages.
If you’re also in a similar scenario, try replugging the PSU’s power cord. For some users, power cycling their monitor has also helped in fixing the no signal issue on their Sceptre monitor. In case neither helps, you may try performing a hard reset:
- First, force shut down your computer. To do so, press and hold the power button for 3 to 5 seconds.

- Now, turn off the power supply switch and remove its cord. While you’re at it, unplug the power adapter from its electrical outlet as well.
- Next, disconnect all the peripherals from the PC’s ports.

- Navigate to your Sceptre monitor to unplug both the power and data cables.

- Once all the unplugging is done, press and hold the PC’s power button for at least 10 seconds. This should dissipate the residual electrical charge, which can help resolve possible glitches causing issues to your display device.
- Finally, replug everything and start your computer.
Identify the Problem Using POST Beep or Light
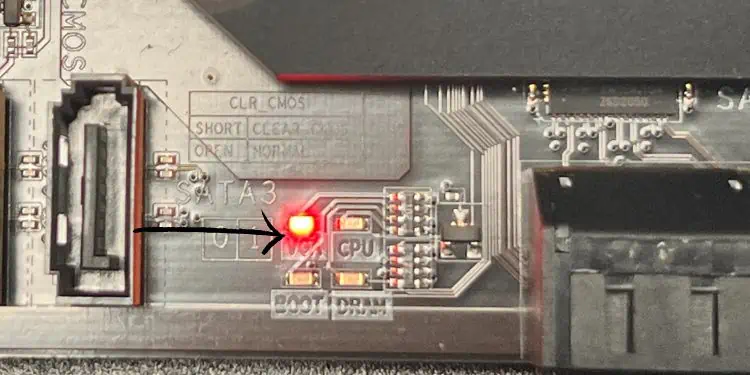
If your PC isn’t able to complete the POST (Power-On-Self-Test), you do not get a ‘No Signal’ error but instead, you may get stuck in a black screen.
Even though you’re able to turn on your system with all the other components functioning properly, there won’t be any sign of video on the Sceptre monitor. In such a case, I suggest checking for a possible red light on the POST LED Indicator (if your motherboard has this feature).
- CPU: Your processor has gone bad or isn’t compatible with the motherboard. If you’re experiencing the problem after recently building your PC, it could even indicate that you haven’t seated the chip accurately.
- DRAM: This indicates that you have a faulty RAM slot or stick(s). Some common causes include using incompatible sticks, one of the two being faulty, and improper seating/placement.
- VGA: This is an indication that there are issues with your graphics card. You’ll need to check the power connection and use the correct PCIe slot. Also, ensure that the card is seated properly.
- BOOT: You may see a red light in this indicator when there’s no operating system or the boot drive isn’t detected by your system. This could be due to an improper connection or a failed storage drive.
Moving on, some motherboards have in-built speakers that produce beep sounds in certain patterns (called the beep codes) that indicate the exact cause. So, if yours doesn’t have the four LED indicators, you may hear these codes to understand what could have interrupted the video signal.
While the LEDs only indicated problems with four components, this will further help you find problems with other components. For your comfort, I’ve accumulated the common beep codes in motherboards having AMI BIOS below.
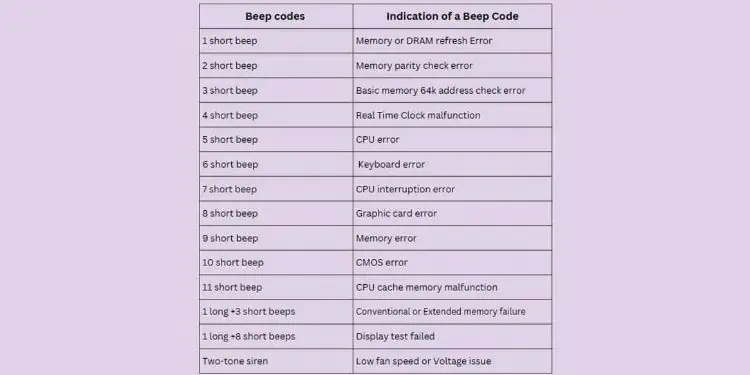
Do note that the beep codes might vary based on the motherboard manufacturer and model. Thus, I recommend referring to your manual to understand what the beep code could be telling you. It should show which component has failed, its exact reason, and the possible solution.
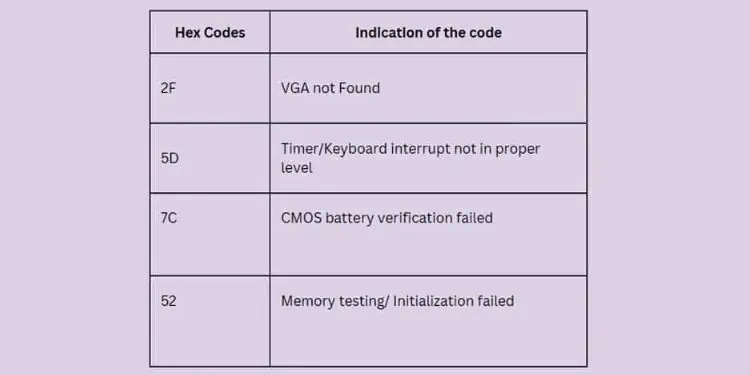
Moreover, some circuit boards might include a HEX POST indicator that displays hexadecimal values to identify the possible problem. As with the beep codes, the hex value’s meaning can vary based on different models. Check your motherboard manual to find which components could be causing signal problems based on these hex values.
Identify Issue Using Another Device
Some low-end motherboards might not feature any option to check for POST-related problems. In that case, you may connect your display device to another input source to know where the issue lies.
For instance, if you’re using the Sceptre monitor for your PC, connect it to a laptop. In case there’s still no signal, know that the display device is faulty. However, if the monitor gets the signal from your laptop, you now know that your former input source has issues.
Also, you may connect another display device (if available) to your PC to check whether the Sceptre monitor is faulty. Even if this device doesn’t get the signal, you now know that the problem is definitely with the input source.
Adjust Refresh Rate
An unsupported refresh rate can also possibly cause the “No signal” or “Singal out of range” errors. Usually, this happens when the input source sends signals at a higher refresh rate that’s not compatible with the monitor.
Sceptre recommends connecting your computer to a CRT monitor first to change the refresh rate. This is because a CRT monitor will try to display exactly what your GPU is sending rather than adjusting to the equivalent refresh rate like the modern display devices. So, even if there’s an incompatibility, it should show the display without any errors.
If you do not have a CRT screen, you may use any other monitor that’s compatible with the input source’s refresh rate. You may utilize your television as well.
In case you do not have an additional display device, try booting your computer in safe mode. This should start the PC with just the essential drivers, and hence there shouldn’t be any conflicts due to unsupported refresh rate.
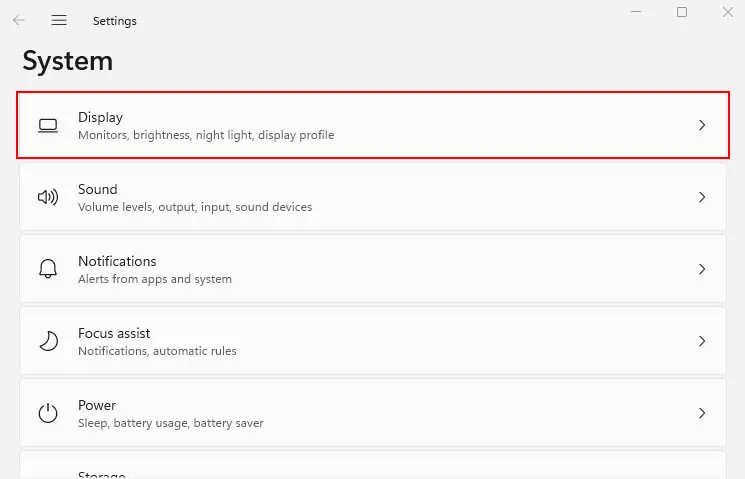
- Once you’re able to access Windows, open the Settings app from the Start Menu.
- Navigate to System > Display.

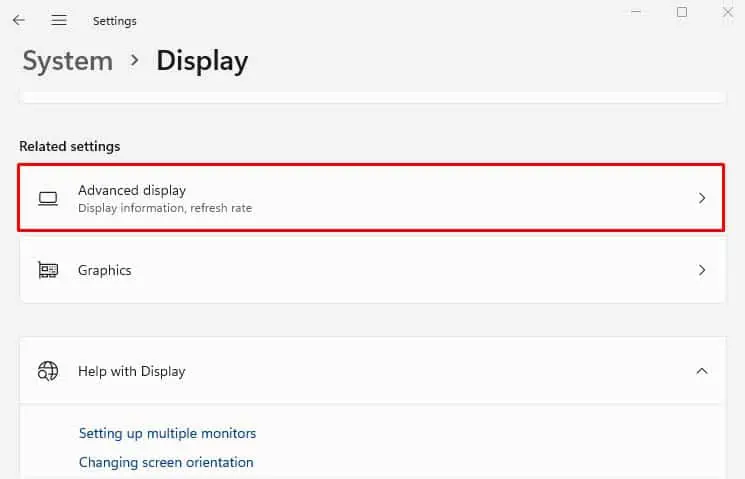
- Scroll down and choose Advanced display.

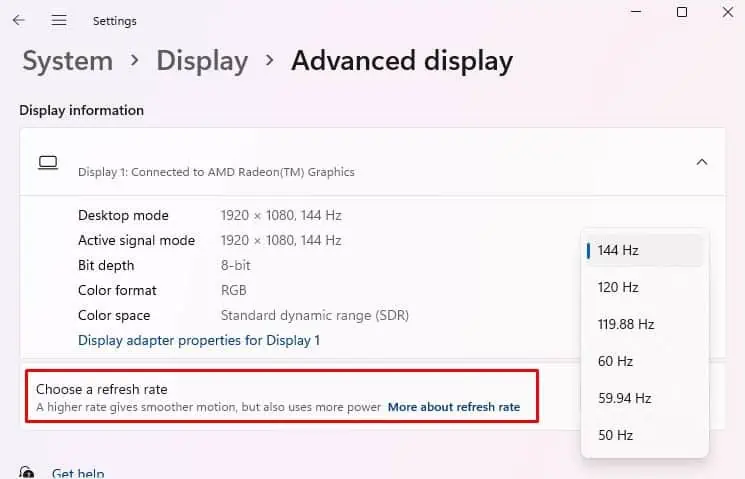
- Now, set the Choose a refresh field to the one supported by your Sceptre monitor.

Update or Reinstall Monitor and Graphics Card Drivers
Outdated and corrupted drivers might cause communication issues between the input source and your display device. Along with that, it may even cause problems with the configured display settings.
As earlier, use a working display device or enter safe mode to update your monitor and graphics card drivers. Once you’re able to access the Windows screen, follow the below instructions:
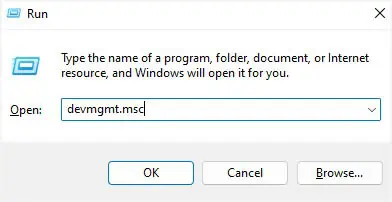
- Press Windows + R to open Run and execute the
devmgmt.exeto launch Device Manager.
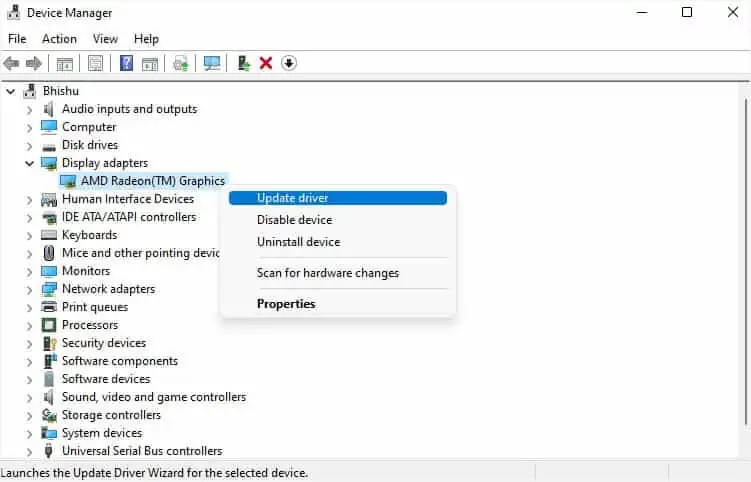
- Go to Display adapters, right-click on your graphics card driver, and choose Update driver.

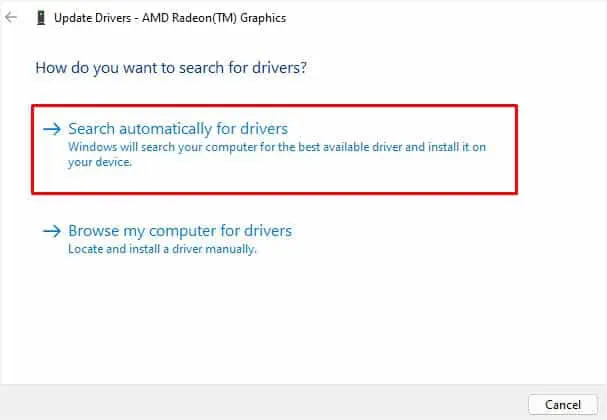
- Select Search automatically for drivers and wait for the display adapter to be updated.

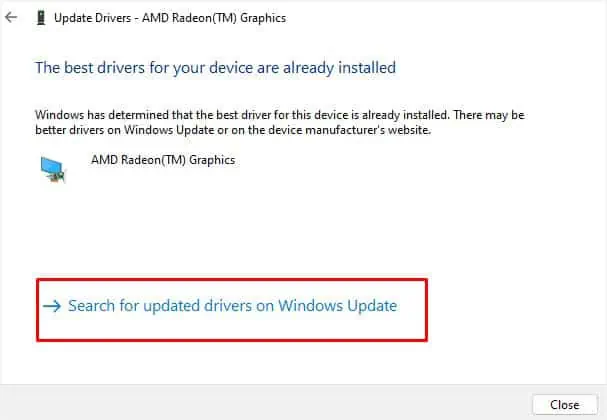
- In case that didn’t help, pick Search for updated drivers on Windows update.

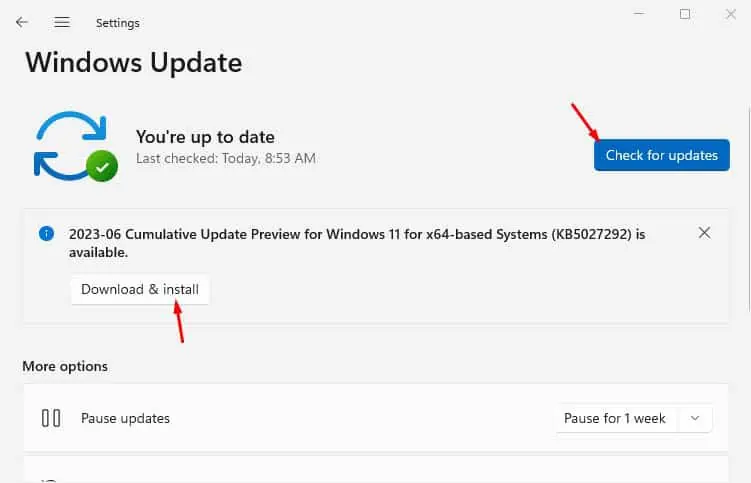
- Once you’re in the Windows Update window, check for the latest update available to download and install it.

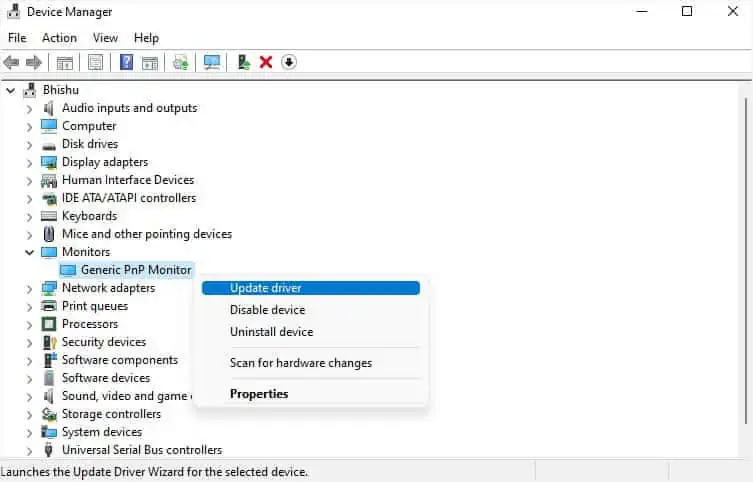
- Even if this doesn’t solve the no signal problem, get to the Device Manager window again. This time, expand Monitors, right-click on your Sceptre monitor driver, and choose Update driver.

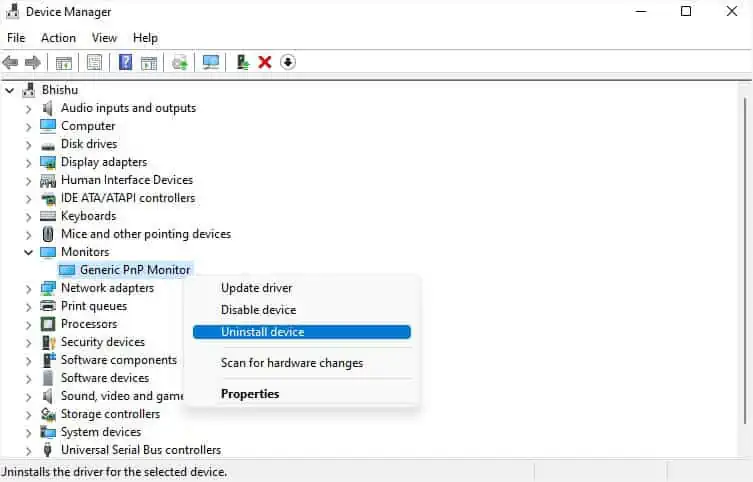
- If updating both the monitor and graphics card drivers didn’t fix the problem, this time choose Uninstall device in succession.

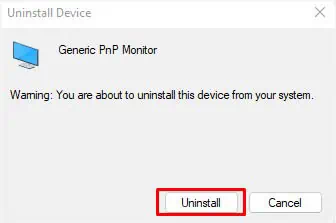
- In the confirmation popup, hit the Uninstall button and restart your computer. This should install the necessary driver and fix the possible corruption leading to the no signal problem.

Well, updating drivers manually from the Device Manager may not always help. So, it’s best to install the latest one from the manufacturer. Here’s a simple demonstration of how to update graphics drivers manually:
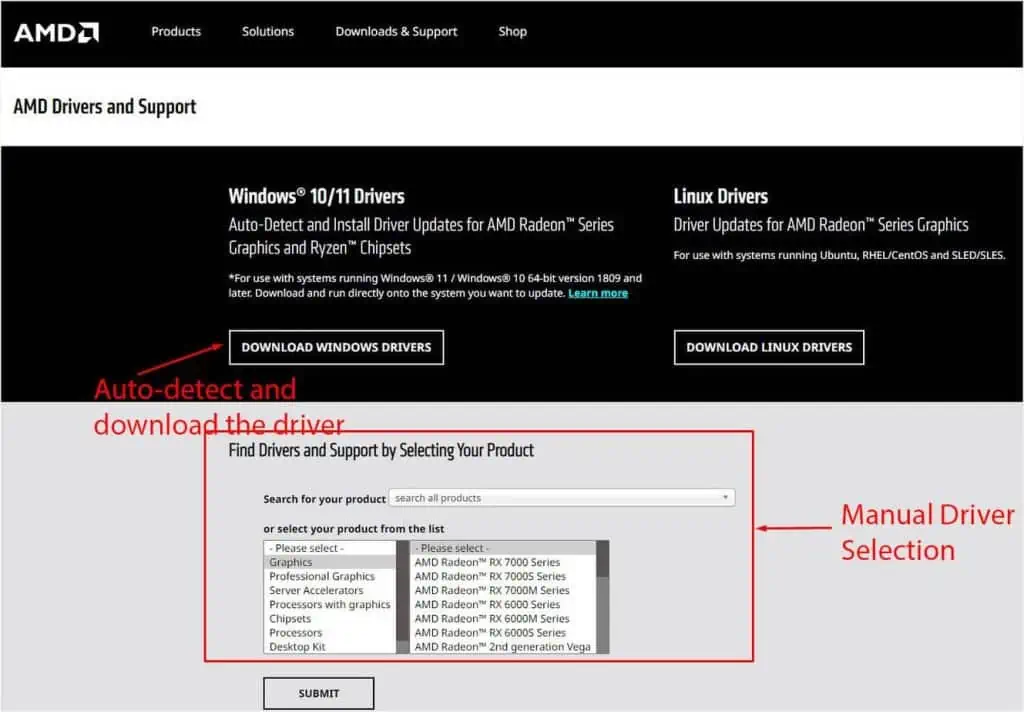
- First, navigate to the manufacturer’s official website. Since I’m going to install AMD graphics on my PC, I’ll navigate to AMD’s Driver and Support page.
- You can either manually select the driver or simply pick Download Windows drivers. This should auto-detect the drivers required for your PC.

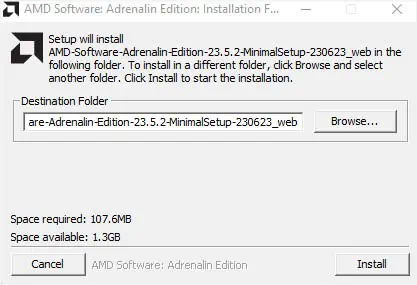
- Once the download is complete, run the installation file to start the graphics card driver update.
- Follow the on-screen instructions and this should solve the no signal issue.

Reset Your Sceptre Monitor
Sometimes, misconfigured or corrupted settings (power, backlight, brightness, and colors) can lead to a dimmed screen (sometimes, even a black screen). This might make you think that the Sceptre monitor is not getting the video signal. To fix this, you may access the OSD menu to reset to its factory defaults.
- First of all, ensure that the monitor is getting a video signal. If your current input source is facing problems, connect it to another one.
- Navigate to the back of the monitor and press its OSD button.
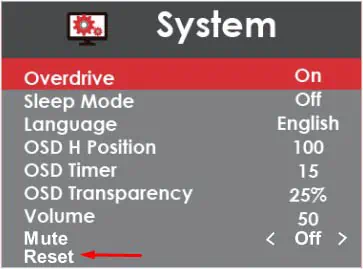
- Once you see the OSD menu on the screen, use the up/down buttons to get to System.

- Next, click on Reset and this should take the monitor back to its factory settings.

- You may connect your Sceptre monitor now and check if the no signal issue persists.
Reseat or Reinstall Hardware Components
Before testing hardware failure and incompatibility, I recommend reseating/reinstalling the faulty component. As explained earlier, check the POST LED or hear the beep code to find the one causing the no signal problem. But if your motherboard doesn’t support this feature, you’ll need to reseat each of them.
Important: If you’re experiencing the no signal/display issue after a fresh PC build, it could be due to incompatibility. In that case, I recommend checking your motherboard manual to confirm that you’re using compatible components. You may even use an online parts picker tool (I use PCPartPicker and recommend the same).
- First of all, force shut down your PC by holding the power button for at least 5 seconds.
- Again, hold the power button for 10 seconds to discharge the capacitors.
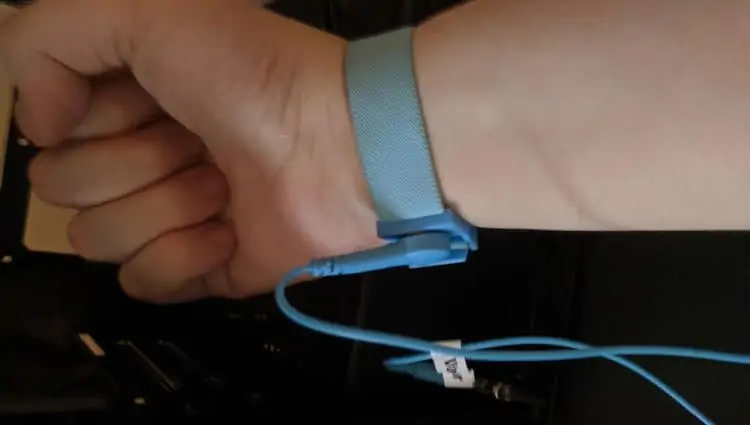
- Now, wear an anti-static wrist wrap to ground yourself before tinkering with the internal components. Here’s a detailed article that should help you out.

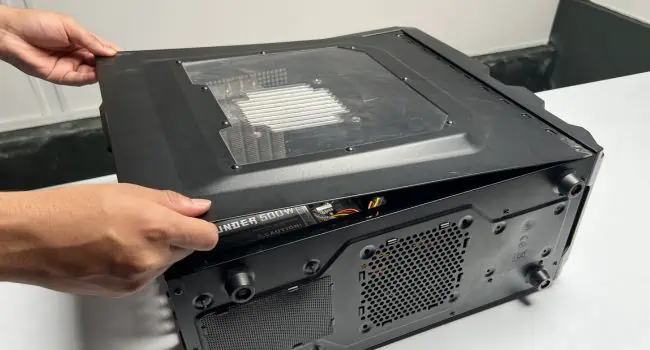
- Untighten the screws and open up the PC case.

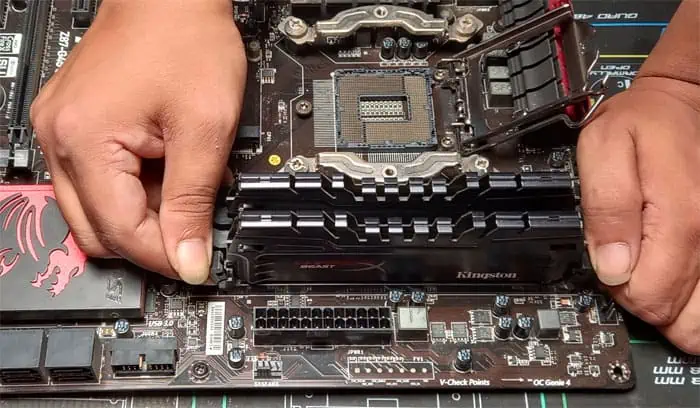
- First, navigate to each RAM slot and slide the locks that hold the sticks in place.

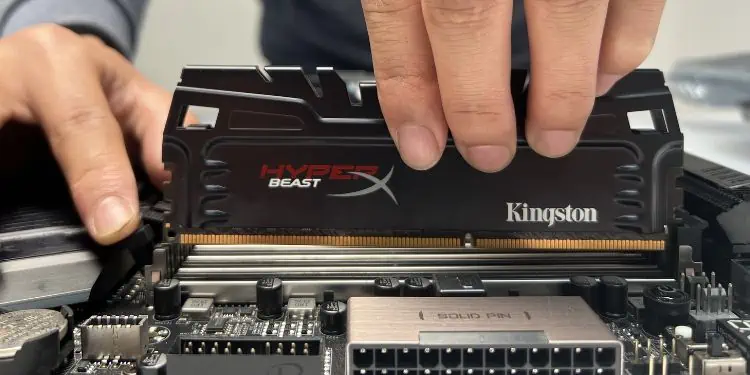
- Then, carefully pull out each stick from its respective slots.

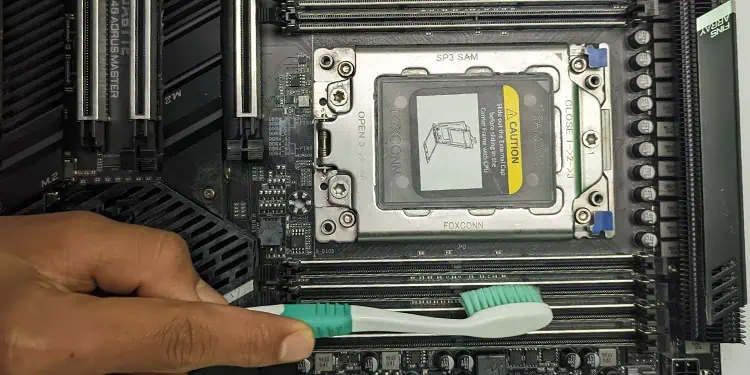
- Now, clean the slots using a soft-bristle brush to ensure no dust is accumulated, preventing the sticks to be properly seated.

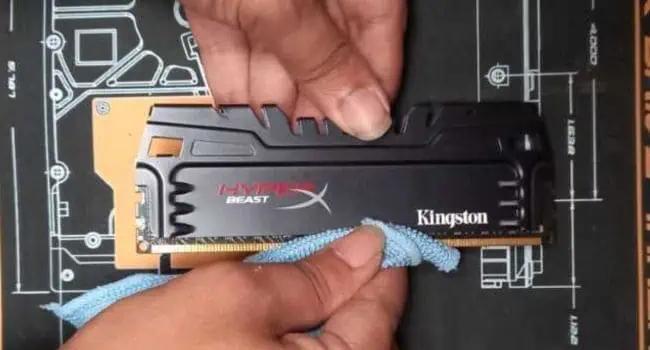
- Also, use a clean microfiber cloth to wipe each stick. While you’re at it, you may even use a pencil eraser in short strokes to clean the golden contacts.

- Next, reseat the DRAM sticks back to their respective slots. You may even refer to the user manual to know the right slots. This could be the 1st and 3rd or the 2nd and 4th (usually alternative slots).
- Close the casing and start your PC to check if the issue persists.
- If you face the same problem, try removing each RAM stick turn-by-turn to know if only one of them has failed. Personally, I was able to solve this when the DRAM LED was showing red light with ‘No signal’ on my Sceptre monitor. It was indeed a RAM failure, and I had to replace it.
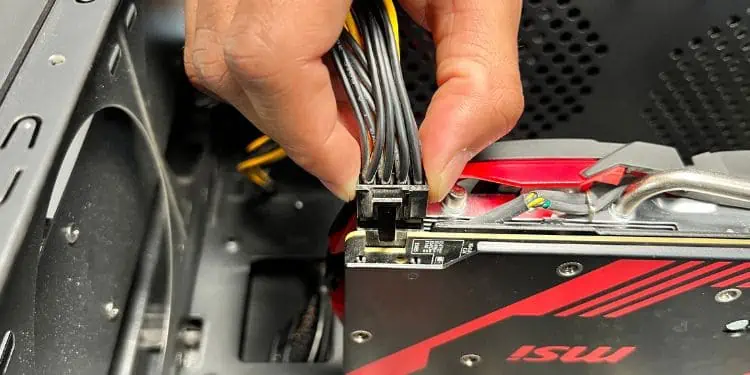
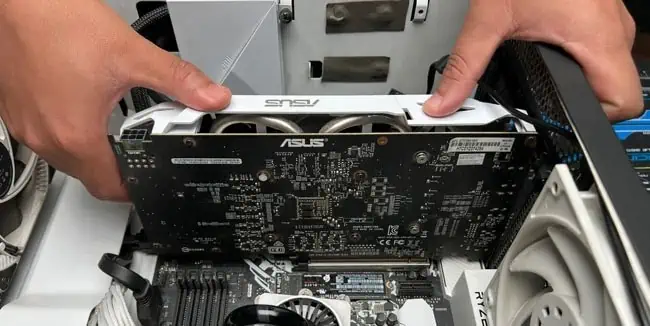
- If reseating RAM didn’t help or you’re seeing a red light on the VGA indicator, navigate to your graphics card and ensure the power cables are securely connected.

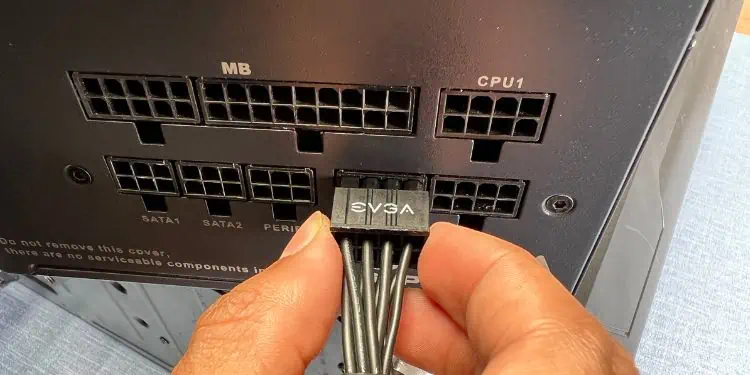
- In case you own a modular PSU, I recommend checking the connection in its VGA port as well.

- Start your PC and test the monitor to see if this helps.
- If it still doesn’t work, you’ll need to reseat the graphics card and reinsert the power cables securely. It’s always recommended to use the first PCIe slot.

- Even if reseating didn’t solve your issue, I recommend enabling the integrated graphics from your BIOS settings. If your Sceptre monitor gets the signal, it probably means that your dedicated graphics card has failed.
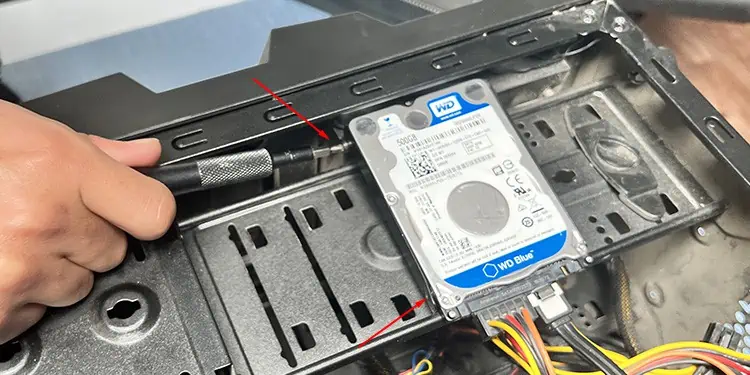
- If you’re not facing issues with the RAM or graphics card, it could be due to a storage drive as well (indicated by the BOOT light). So, I recommend ensuring that the SATA cables are properly connected. But if you have an NVMe SSD, ensure that it is correctly seated and the screws are tightened. Reinstall it, if required.

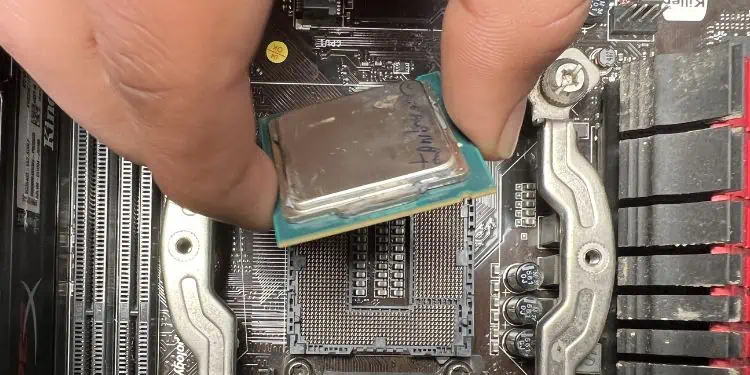
- In case none of this helps or you’re seeing a red light on the CPU indicator, you’ll need to reinstall the CPU. We have dedicated articles on how you can do this on AMD or Intel motherboard.

Additional Tip: If the BOOT LED is still red, it could also mean that there’s no operating system in your storage drive or it’s failing to recognize it. If you recently made changes in the OS or updated it, try performing a system restore. Even if that doesn’t help, I suggest reinstalling Windows.
Reset and Update BIOS
If you believe you’re using compatible components but still getting the ‘No signal’ or black screen on your Sceptre monitor, it could be due to outdated BIOS.
This is usually the case with new components that require updating to the latest or compatible version. It’s probably because your BIOS isn’t able to communicate well with the newly installed component.
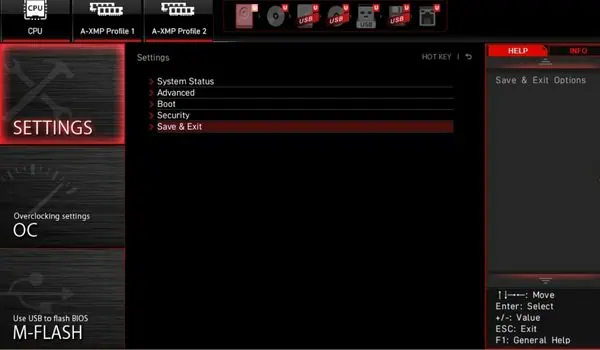
But before making changes to the BIOS, make sure you create a backup of the current settings. Then, try resetting the settings to see if the corrupted configuration was the culprit. While the steps vary on every motherboard, here’s a quick demonstration on MSI that should give you a general concept.
Note: In case you’re unable to boot into BIOS due to no signal issue, you’ll need to use a compatible monitor.
- Restart your PC and use the Del key to enter the BIOS interface. This might be different from yours. Refer online to get the dedicated BIOS key.
- Then, go to Settings > Save & Exit.

- Find Restore Defaults or a similar option and click on it.

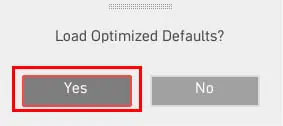
- In the confirmation dialogue box, press Yes to confirm loading the optimized defaults.

- Finally, save the changes and reboot your PC. If you have used another display device, switch back to your Sceptre monitor and check if this solves the problem.
In case resetting the BIOS didn’t help, here are the required steps to help you update the BIOS:
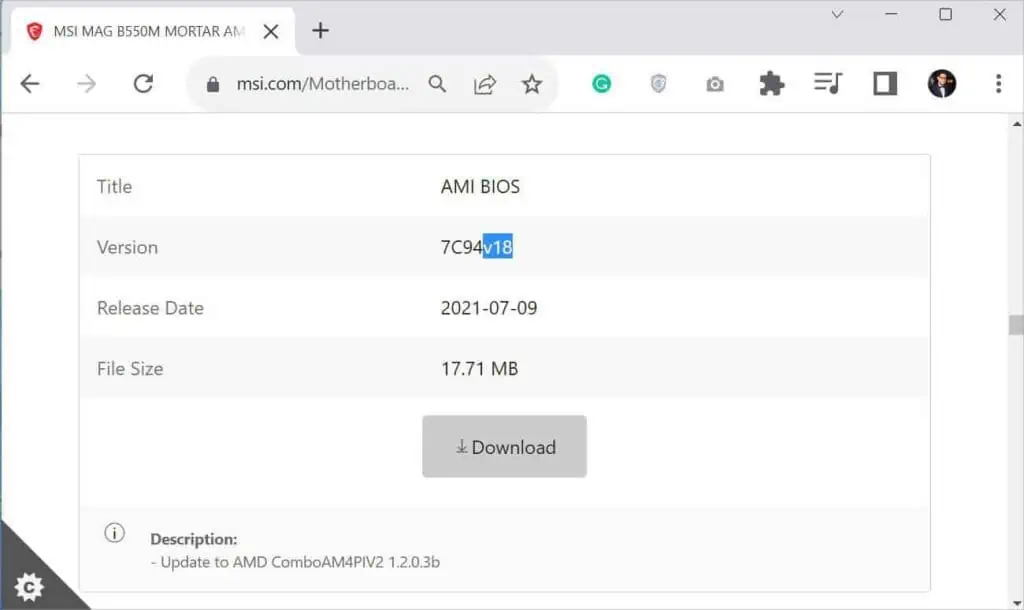
- Use a working PC and monitor to download the latest BIOS version based on your model.

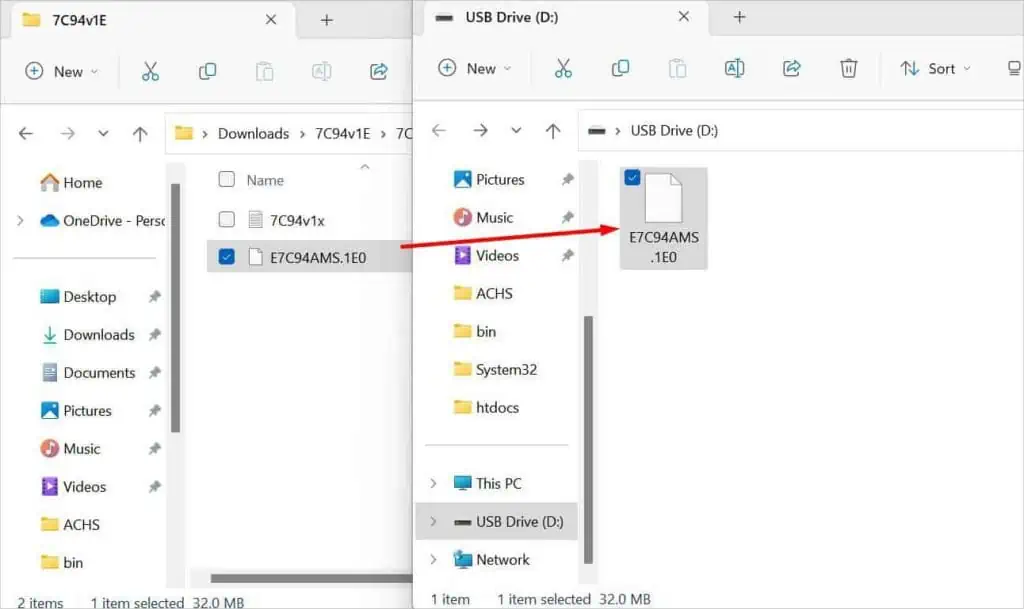
- Next, transfer the file to a FAT 32-formatted USB flash drive.

- Then, get to the BIOS on your troublesome PC and insert the flash drive containing the BIOS file.
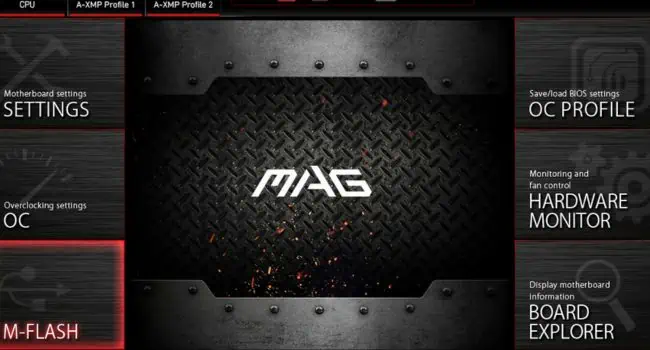
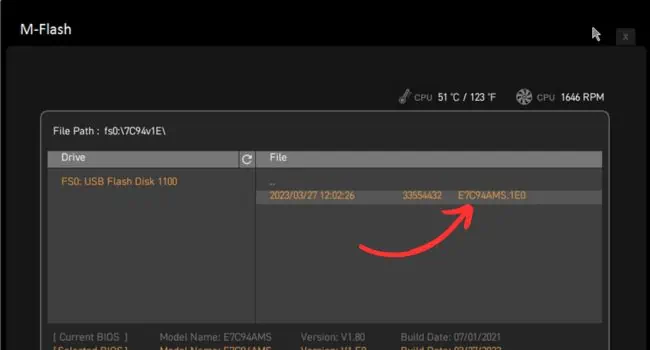
- Navigate to M-Flash or a similar feature (different for every motherboard).

- Pick the file and start the update. This should be completed within 5 to 10 minutes, or even faster. But when you’re at it, make sure you do not encounter any power interruptions.

- Once the BIOS is updated to its latest version, reboot the PC, connect your Sceptre monitor (if needed), and check if the no signal problem is solved.
Repair Monitor or Other Hardware Parts
In case the Sceptre monitor is not getting the signal even after trying out every possible solution in this guide, it’s probably a hardware failure. The issue could be with your monitor or even the internal components, which you should have figured out by now.
Since repairing hardware parts can be risky and might void the warranty, I would rather recommend contacting the nearest service center (if it’s a fault with the PC components). But if there’s an issue with the Sceptre monitor, approach them via their official contact page.
In case you have a warranty available, you can even claim it online. Here’s their Warranty Claim Request form, where you can enter the valid reason why you’re trying to return the monitor.

