The search feature on the start menu or taskbar as well as the file explorer are the most convenient means of looking up apps and files in your system. However, since this feature relies on many processes and services, it may stop working if the corresponding processes encounter any problems.
In such situations, the search app may not work at all or it may not help you search for all the items or contents in your system. In either case, you will need to check all the components involved in a search process and troubleshoot any issues with them.
Restart Windows Explorer and Some Other Apps
The search process on Windows depends on a few processes such as Windows Explorer, Search Indexer, and CTF Loader.
So, any issues with any of these programs can prevent the search from working properly or working at all. You can restart these services to take care of any temporary issues with them.
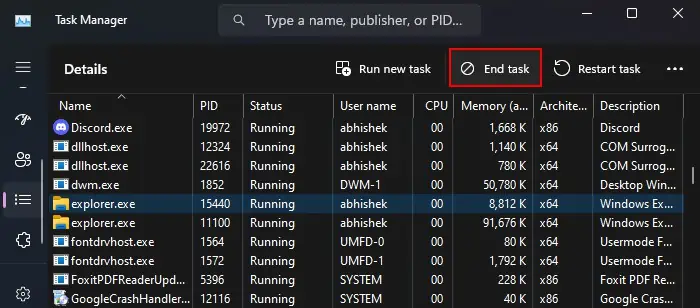
- Press Ctrl + Shift + Esc to open the Task Manager.
- Go to the Details tab.
- Search for and select the following processes and click End Task.
explorer.exectfmon.exeSearchIndexer.exe
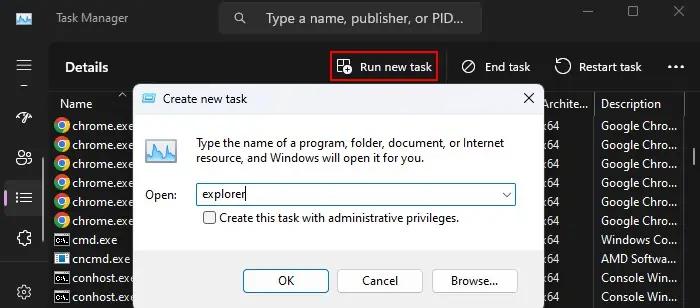
- Then, click on Run new task or File > Run new task.
- Type
explorerand press Enter to reopen this process.
- Do the same for
ctfmonandSearchIndexeras well.
Run Search and Indexing Troubleshooter
Windows comes with a dedicated troubleshooter for the search and indexing process that checks for issues with all the components involved in this process. It will also try to automatically resolve any problems it is able to detect. Even if it can’t do so, it will still show the problem, which you can try resolving yourself using the relevant method in this article.
- Open Windows Settings by pressing Windows key + R.
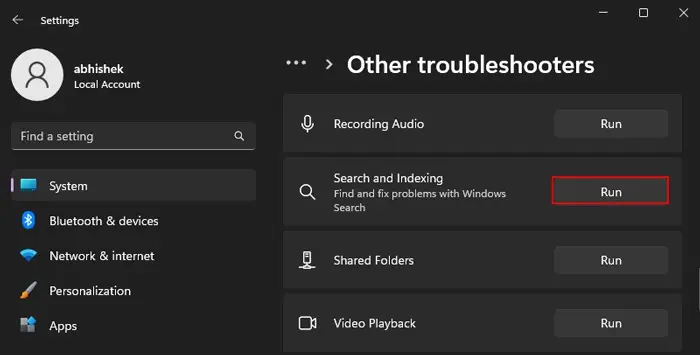
- Go to System > Troubleshoot > Other troubleshooters.
- Click on Run next to Search and Indexing.

- Follow the on-screen instructions.
Check Some Windows Services
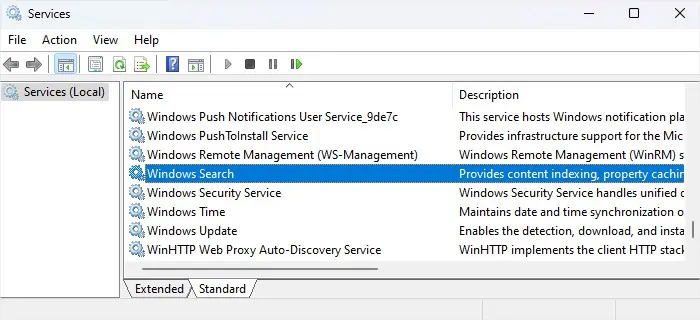
If the Windows Search service is not working, the search engine won’t be able to look for your files, folders as well as many apps. So you need to make sure that it starts properly.
- Open Run by pressing Windows + R.
- Type
services.mscand press Enter to open Windows Services. - Look for Windows Search and double-click on it.

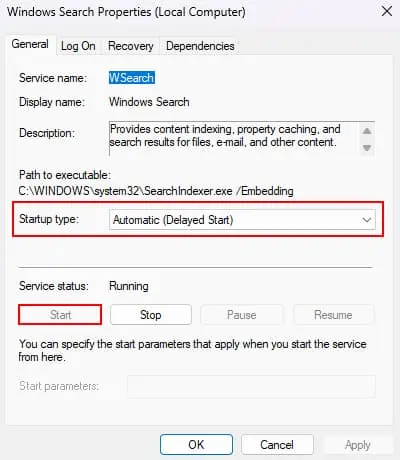
- Set its Startup type to Automatic (Delayed Start) and click on Start if the status shows Stopped.
- Click OK.

Rebuild Search Index
If your search is not showing all the files and folders you need, your system likely has not indexed them. In such cases, you need to rebuild the search index while including all drives.
- Open Run.
- Type
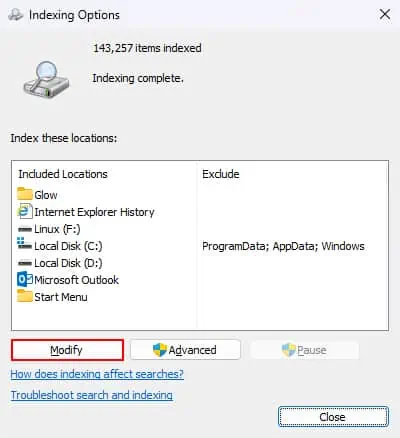
control srchadmin.dllorcontrol /name Microsoft.IndexingOptionsand press Enter to open Indexing Options. - Click on Modify.

- Check all options and select OK.
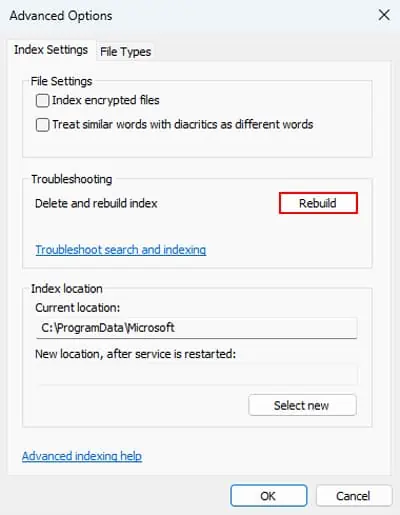
- Go to Advanced and click Rebuild.

It may take a long time for the index to be rebuilt depending on the number of your files and folders. You can keep track of the progress on the Indexing Options program.
Update or Rollback Windows
Sometimes, there may be minor bugs in the Windows update that prevent processes like the search engine from working properly. If this issue starts occurring right after an update and does not go away after a restart, you need to report it to Microsoft and then wait for further updates or bug fixes.
After Microsoft rolls out an update that addresses this issue, you need to install it as soon as possible.
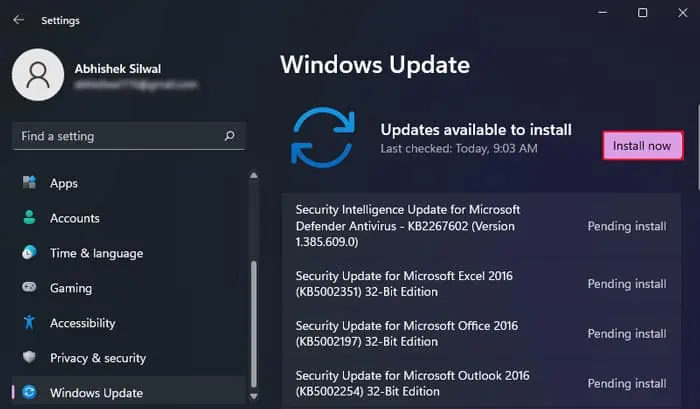
- Open Windows Settings and go to Windows Update.
- Select Install now if updates are available or Check for updates to scan for available updates. If you click Check for updates, it lists some updates, click Install now.

- Restart as necessary.
If no further updates are available, you can roll back the system by uninstalling the latest Windows update.
- Open Run.
- Type
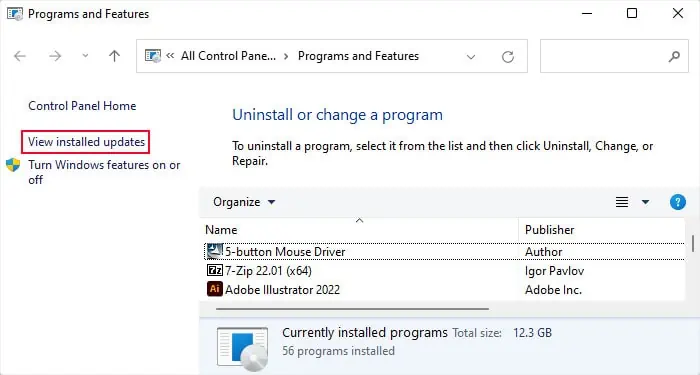
appwiz.cpland click OK to open Programs and Features. - Select View installed updates.

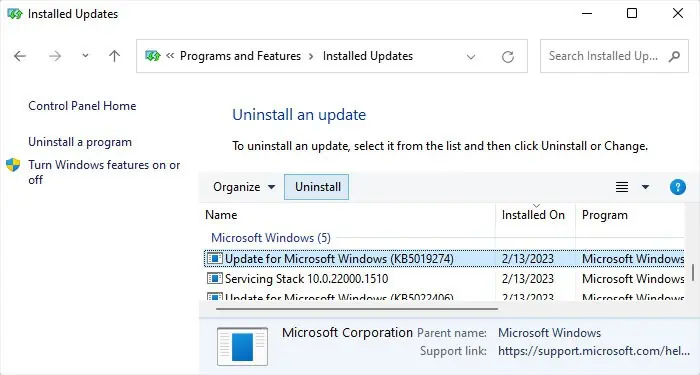
- Scroll down to Microsoft Windows.
- Look for the latest update under this category depending on the Installed On column.
- Select it and click Uninstall > Yes.

Reset Windows Search
If the above methods were not enough to resolve your issue, your only remaining option is to reset the Windows Search altogether. Since the search feature is integrated with multiple system packages and components, Microsoft has provided a Powershell script for this purpose.
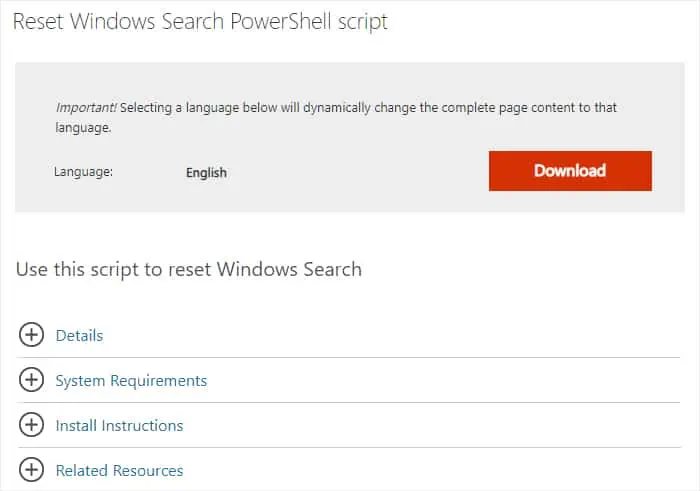
- Go to the Reset Windows Search PowerShell script download page on Microsoft’s platform.
- Click on Download to download the script.

- Now, you need to change the script execution policy of your system to be able to run this script.
- Open Run.
- Type
powershelland press Ctrl + Shift + Enter to open the Elevated Windows PowerShell. - Type the following cmdlets and press Enter after each:
Get-ExecutionPolicy(Note down the current execution policy. It may be RemoteSigned or Restricted)Set-ExecutionPolicy -Scope CurrentUser -ExecutionPolicy Unrestricted
- Type
Yand press Enter.
- Then, go to the download location of the script.
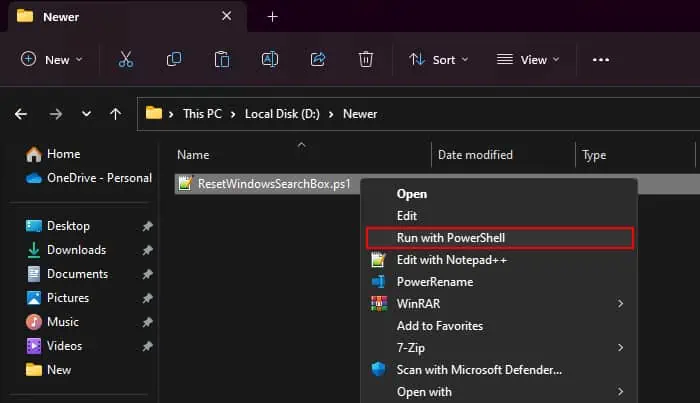
- Right-click on it and select Run with PowerShell or Show more options > Run with PowerShell.

- Click Yes if prompted.
- Go back to the PowerShell prompt and revert back the policy using one of the cmdlets below depending on the previous execution policy.
Set-ExecutionPolicy -Scope CurrentUser -ExecutionPolicy RemoteSignedSet-ExecutionPolicy -Scope CurrentUser -ExecutionPolicy Restricted
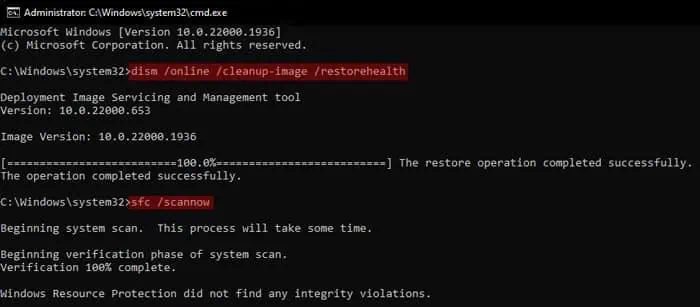
- Then, it’s best to run the DISM and SFC tools just in case since you made changes to your system components.
- Open Run.
- Type
cmdand press Ctrl + Shift + Enter to open the Elevated Command Prompt. - Type the following commands and press Enter after each:
dism /online /cleanup-image /restorehealthsfc /scannow
