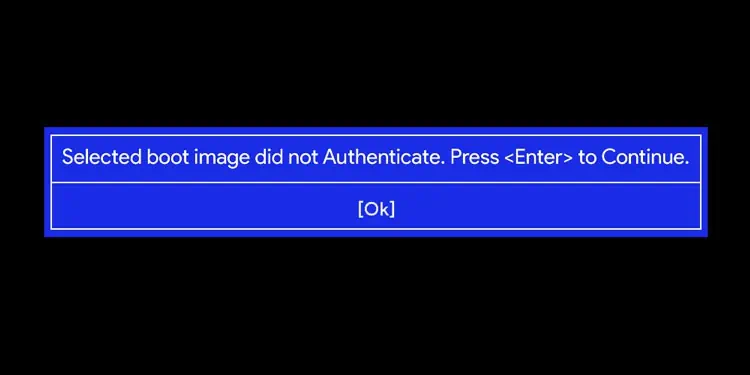
The “Selected boot Image did not Authenticate” error occurs whenever you are trying to boot your PC from an external drive when Secure Boot is enabled. It also occurs when you attempt to boot to an Operating System (OS) that does not support this option, regardless if it’s on a single-boot or a multi-boot system.
The reason for such an issue is that this boot mode uses security keys to make sure that the bootloader is loading only trusted OS into your system. So, whenever you boot using a USB drive or to an incompatible OS, Secure Boot restricts the authentication.
In some cases installing another OS to your PC or updating the UEFI enables the Secure Boot option. So you may encounter this issue in such a scenario even if you had previously disabled the option.
How to Fix “Selected Boot Image Did Not Authenticate” Error?
There are a few possible solutions for the “Selected boot Image did not Authenticate” error. Most of our steps are for an HP device as this issue has been reported mostly by HP users. For other devices, you can use similar steps to troubleshoot the error.
Disable Secure Boot
As we mentioned earlier, this issue results due to Secure Boot restricting access to the boot image, you need to go to your BIOS and disable the setting. Here are the necessary steps for the method:
- Restart your device and get to your BIOS by pressing the BIOS key.
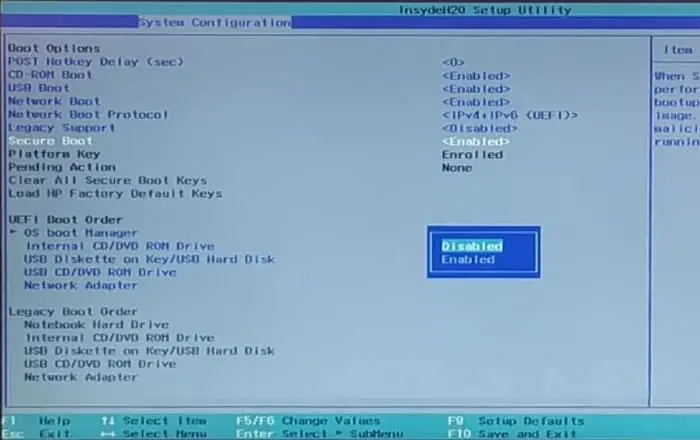
- Navigate to the Secure Boot option. To do so on an HP laptop on legacy BIOS settings:
- Go to System Configuration > Boot Options.
- Select Secure Boot and set it to Disabled.

- Press F10 to and select Yes to save the changes and exit the BIOS and restart the PC.
- On the next boot, try booting to the device or image that showed the error and check if you still encounter it this time.
- You may need to enter a 4-digit code to confirm the changes to the BIOS. It should be displayed on the screen, so just type the numbers and press Enter.
If just disabling Secure Boot doesn’t resolve the issue, you may also need to enable Legacy Support on the BIOS.
Power Cycle Your PC
If the above method was not successful, it is possible that your system didn’t actually save the changes you made to the BIOS. You should try power cycling or hard resetting your PC to resolve the issue.
Doing so turns all hardware components off and on again and drains all charge from the capacitors inside the device. This process properly resets all the components and can be helpful in resolving most minor problems with your BIOS or storage disks potentially responsible for the issue.
- Shut down your PC and disconnect all peripheral devices.
- Remove the AC cables as well as the removable laptop battery.
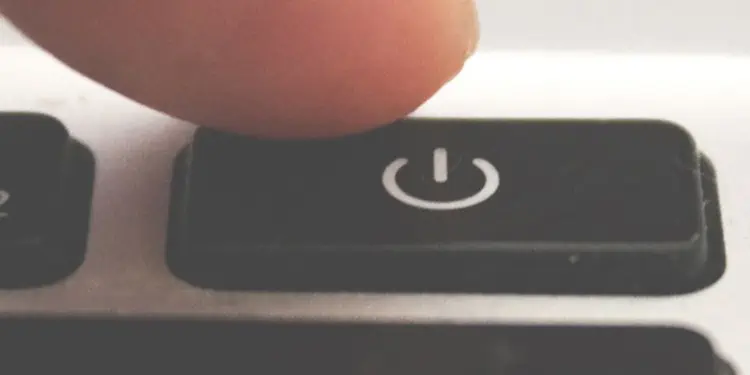
- Press and hold the power button for 30 seconds.

- Reconnect the AC lines, battery, and the essential peripherals like keyboard and mouse.
Power up your computer. If you still encounter the error, perform the above method again and check if you can boot this time.
Run Startup Repair
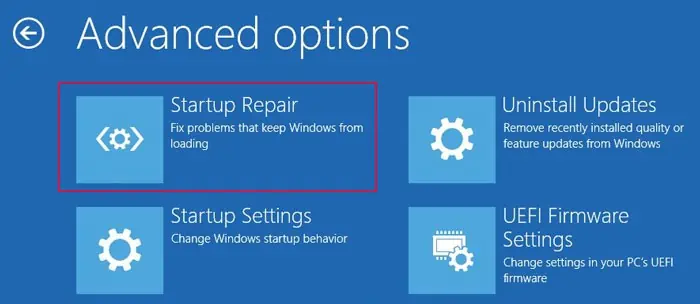
It is also possible that the issue occurred due to errors on your bootloader. You need to run Automatic repair or Startup repair to resolve such issues. To do so,
- Boot using the normal windows OS on your PC.
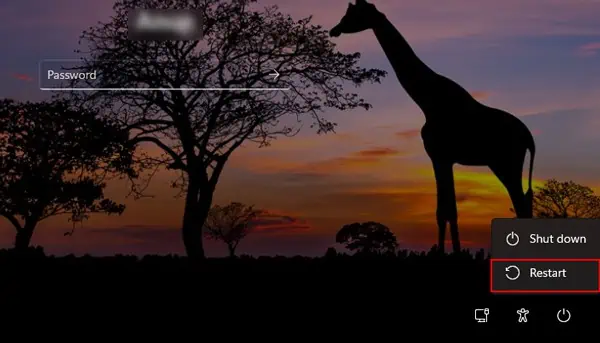
- Click on the power icon on the lock screen or start menu.
- Press and hold Shift and select Restart from the power menu to boot to Windows Recovery Environment (WinRE).

- If you can’t boot to your Windows OS, you may need to use a recovery disk to access the WinRE. You need to follow the on-screen instructions and click on Repair your computer when on the Install screen to do so.
- On WinRE, go to Troubleshoot > Advanced options > Startup Repair.

After restarting, check if you still encounter the issue.
Perform Hardware Diagnostics
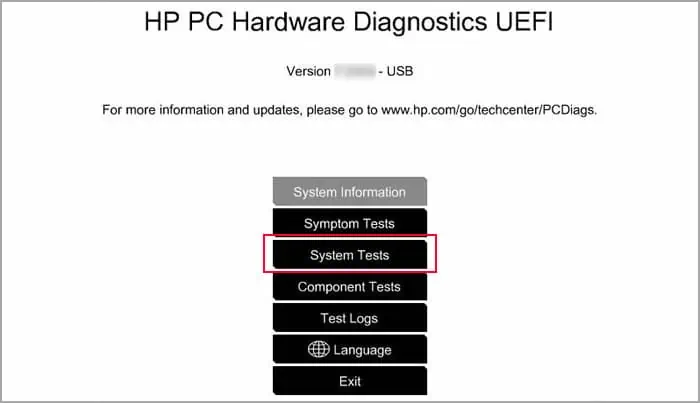
Most PCs including HP contain diagnostics utility in their UEFI. You need to run such tools and check if any of your hardware is failing and resulting in this issue. To do so on an HP device,
- Restart your PC.
- As soon as it starts booting, press the Esc key repeatedly.
- On the menu, press F2 and then select System Tests.

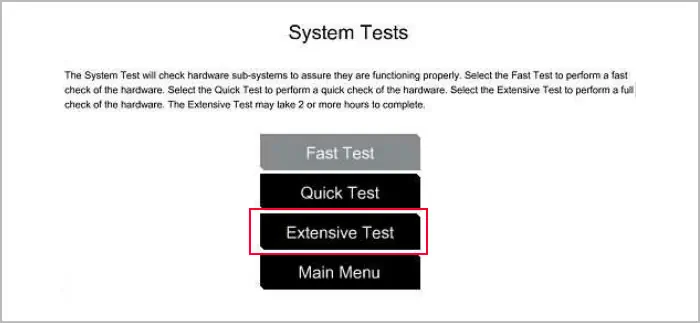
- First, select Fast Test and then Run once.
- If none of your components have issues, select Continue > Run once.
- If the diagnostic detects any hardware failures on both these tests, you need to note down the failure ID to determine the problematic hardware.
- If Fast Test did not show any errors, you can also try running Extensive Test > Run Once after re-performing steps 1-3.

If any of your devices is failing, you need to take it to a hardware expert for repair or replacement.
Recreate Installation Disk or Clean Install OS
If all the previous methods are not of use, the OS image you want to boot to itself may have issues. If you encountered the issue while trying to boot to the USB image, you can format the device and install the bootable OS on the device again.
However, if you encounter the issue on an Operating System of your device, you need to perform a clean install. The method to do so depends on the OS, so we recommend you visit their official websites to learn the proper steps if necessary.
