Steam’s disk usage indicates that data is being written to your storage device. In general, disk usage on steam shows the volume of data unpacking done after it is downloaded.
Therefore, if you notice slow speeds in the disk usage indicator, there must be some issues pertaining to your network or the storage device. Most of the time, the issue also gets triggered by glitches in the steam app.
So today, we will give you some ideas on how to boost the disk usage indicator on steam.
How To Fix Slow Disk Usage On Steam
Downloading a game with a large file size will undoubtedly take some time. Steam usually unpacks these files only after they have been downloaded in bulk. As a result, low or even no disk usage speeds are not uncommon during the writing process. However, if this issue is seen persistently, you can follow these fixes.
Pause and Resume the Download
To begin with, pause the download for a while and then resume it again. The Steam client is pretty sensitive to network fluctuations; thus, the download and unpacking of the files can be affected by this.
Also, ensure that your internet connection is stable. Once resumed, the application will start the download when a stable active internet connection becomes available.
Clear the download cache
The steam client creates a hidden folder where it stores temporary files and downloads. These are known as the download cache. Clearing out these cache files can help solve the issues of slow downloads and disk usage.
- Open the steam client.

- Click on the Steam tab.
- Click on Settings.

- Go to the Downloads tab.

- Click on the Clear Download cache button.
- Click on OK to confirm.
Clear the Steam App cache
An application’s app-cache stores files that can be loaded and accessed when the app is not online and is also used to reduce the loading time. If this app-cache stores excess junk and temp files, it can turn out to be ineffective.
Clearing out the app cache can solve plenty of steam issues, including this one. Steam recreates another cache folder after it is deleted; thus, there is no harm in deleting it.
- Press Windows Key + R, type
resmon, and hit enter to open Resource Monitor.
- On the Processes section, search for
steam.exe.
- Right-click on it and select End Process tree.

- Open the file explorer and go to the directory where you have installed the Steam client.
It is usually installed atC:\Program Files (x86)\ - Find the Steam folder and open it.
- You will see the
appcachefolder in the directory. Right-click on it and delete it.
Perform Disk check
The reason behind the slow disk usage could be because of some logical errors in the storage device. The drive volume where the downloaded files are parsed can get corrupted. When this happens, there will be no writing going on in that volume, or the writing speeds will be slow.
Chkdsk can be useful if the drive is having such issues of logical error and to fix the bad sector. Here’s how to use this utility.
- Press Windows Key + X, and open the Terminal (admin).
- Now, type this command and hit enter.
Chkdsk <Drive-Letter> /r
For instance, to run the chkdsk scan on E: drive, use the command as,Chkdsk E: /r.
- Type Y and hit enter.
- Restart the computer. The
chkdskscan will start during the restart. - Wait for a few minutes and check the disk usage indicator in the Steam client after the process is completed.
Reinstall the App
Most of the time, the steam client generates the issue. If the software is outdated or corrupted, it can generate many functional issues. To resolve this, users can reinstall the client.
To do this on Windows, follow these steps.
- Press Windows Key + I to open up the Settings.
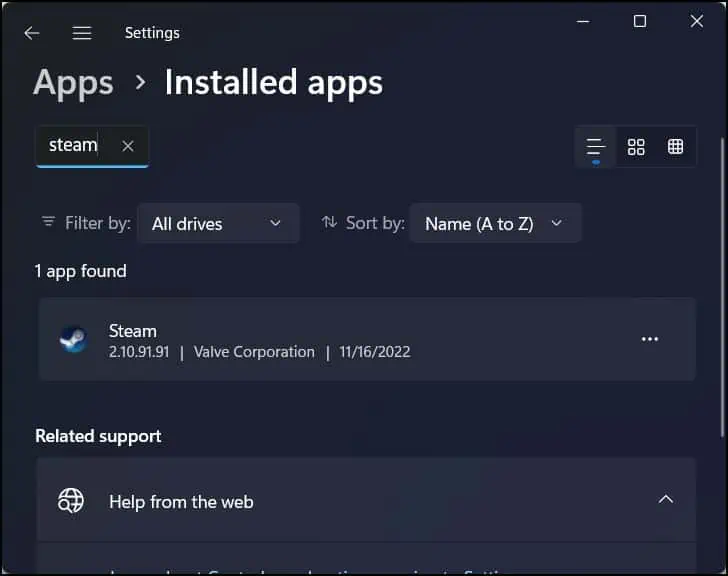
- Go to Apps > Installed apps.

- Search for Steam in the list of installed apps.
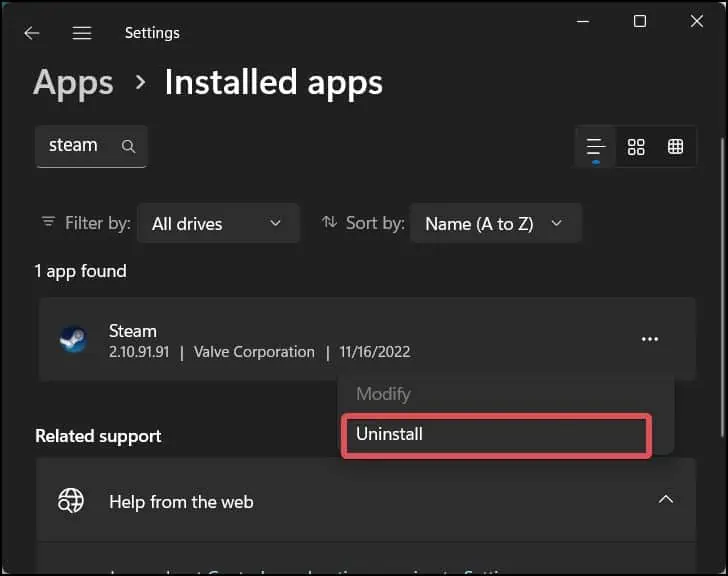
- Click on the three horizontal dots on the side of the Application and select Uninstall.

- Now, go to the Steams website to download the client’s installer.

- Click on the Install Steam button and download steam.
- Open the executable file and install steam.
Reset Network Configurations
If there is some problem in the network settings on your computer, the download speeds will get affected, and that will ultimately give slow or sometimes no disk usage speeds.
Client-server applications such as the Steam create Sockets to communicate. Resetting these sockets will revert the network changes made by Steam and establish a new connection with it to the TCP/IP traffic.
- Press Windows Key + R.
- Type
cmdand press Ctrl + Shift + Enter to open Elevated Command Prompt. - Now, execute the command
netsh winsock reset
- Restart your device and then check download and disk usage speeds.
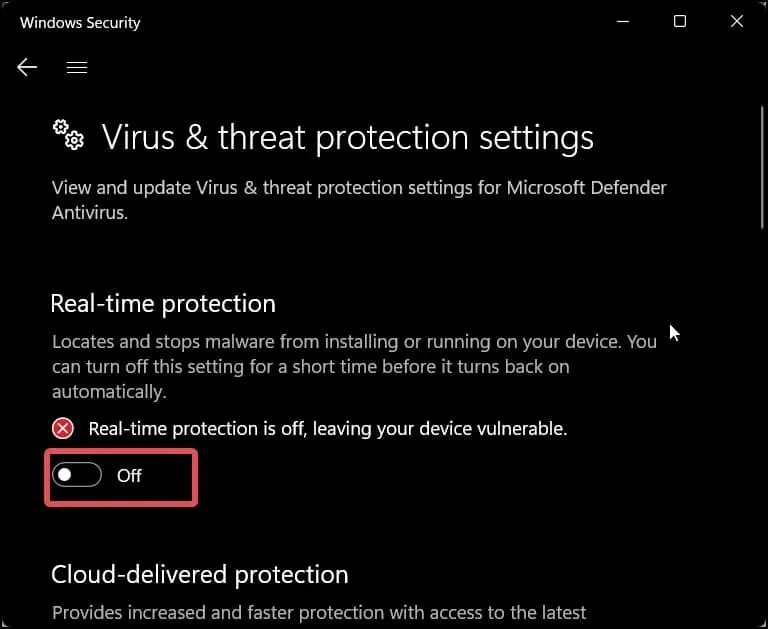
Disable Antivirus Software
It can be possible that the game that you are about to install might be blocked by the antivirus software, and therefore, the writing process has been halted. This might have caused the slow disk usage on Steam. To resolve this, you can disable the antivirus software for the time being.
We are showing you how you can disable the Windows defender software. However, the process for disabling other antivirus software is also similar.
- Press Windows + R key to open Run.
- Type
windowsdefender://threat/and hit enter.
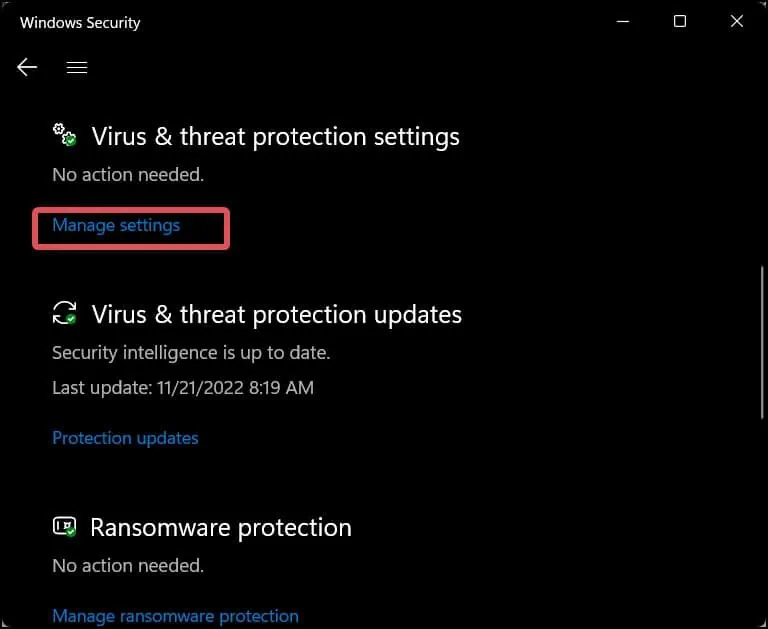
- Click on Manage Settings.
- Click on the Real-time protection slider and set it to off.

- Click on yes to give the final confirmation.
- See if this does any help to the disk usage speeds. Once the job is done, you are advised to re-enable the Real-time protection by following the same prescribed process.

