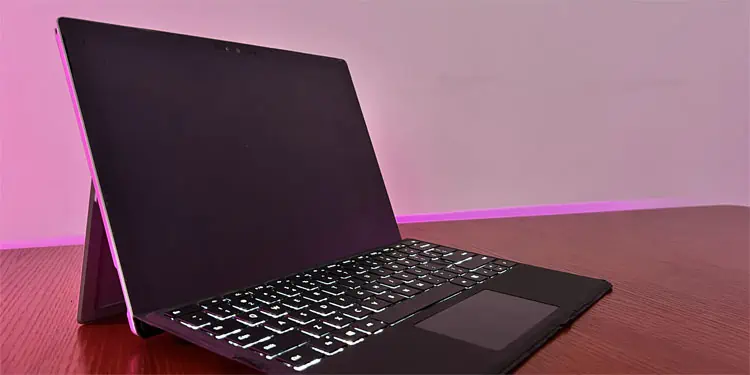
The black screen on your Surface can point to various types of issues, the common one being the Modern Standby sleep mode. In this mode, the system keeps running the background processes. While it is a good feature, in some situations, the display does not recover from the sleep state, resulting in this issue.
Other than that, your Surface laptop will also show a black screen if the internal display connection is not secure or there are some issues with the display drivers. Sometimes the device does not turn on at all, especially due to battery or charging issues, and you might mistake it as a black screen error.
Use Hotkey to Restart Display
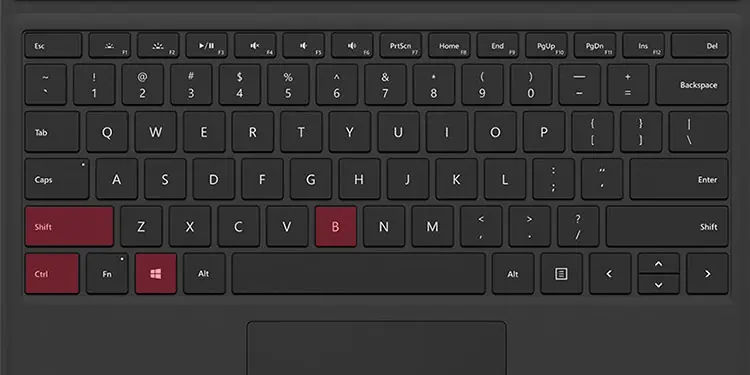
In case your Surface laptop keeps showing a black screen after waking from sleep or connected standby, your display hasn’t woken up yet. In such cases, you can use a hotkey combination, Windows + Ctrl + Shift + B, to restart the display and wake it up properly. After pressing this hotkey, you should hear a beep sound and the screen should flash before turning on.
Force Restart Surface Device
You can also try force restarting the Surface to take care of any temporary issues causing the blank screen. To do so, press and hold the power button for 30-40 seconds until you see the logo, and then release it. You may need to do so 3-5 times before resolving the issue.
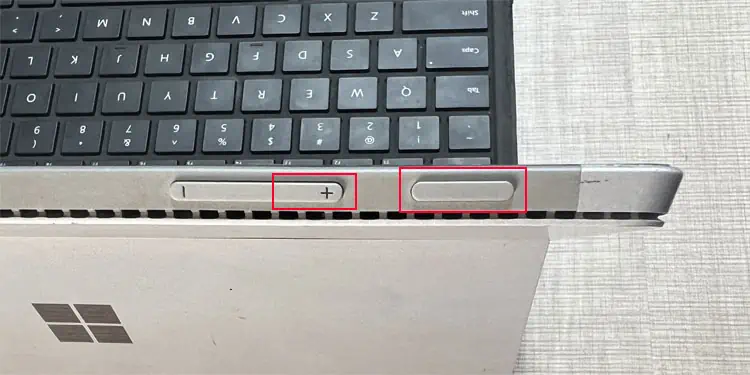
On older Surface devices like Surface Pro 2/3/4, Surface Book, Surface 2/3, and Surface RT, you can also force shut down the system and then power up the device for a more complete restart. To shut down the device forcibly, press and hold the power and the Volume-up button for 15-20 seconds (even if the Windows logo appears before this time). Then, wait for 10 seconds and then boot up the Surface.
Troubleshoot Charging Issues
It is also possible that your device is not powering up after pressing the power key. You can tell this as the backlight changes the screen to a different shade of black. In such cases, first, connect the charger to the Surface laptop in case the battery is completely drained.
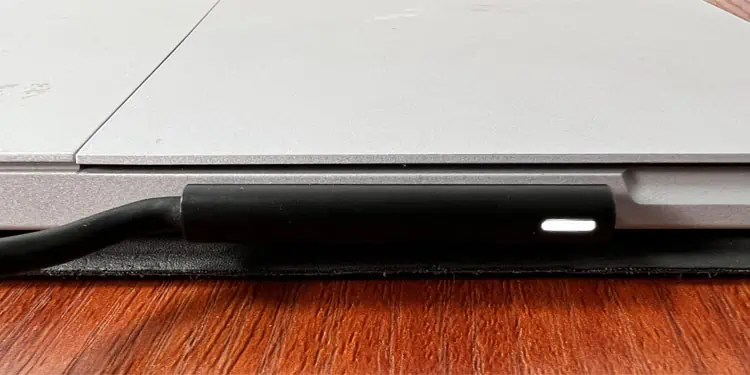
If the power indicator on the charger starts flashing, you need to clean the connector and the port. Use a pencil eraser as well as a cotton swab dipped in rubbing alcohol to clean the pins on the connector.
If the power indicator does not glow at all, the laptop is not receiving any power from the charger. Check the connections on all the parts of the charger (power brick and the AC socket) and make sure they are working properly. Also, make sure to use a genuine charger as something like Surface Dock will not charge the battery if it does not hold any charge. If applicable, you can also try using another charger to charge your device in case the previous one is damaged.
And if the indicator glows without any fluctuation, power up the Surface after a few minutes and see if you see any display.
Troubleshoot Windows Explorer Issue
If you see the mouse cursor on the screen when the rest shows black, it shows that Windows Explorer is not running properly on your system. In such cases, you need to restart or start it.
- Press Ctrl + Shift Esc to open the Task Manager. It should open even when Windows Explorer is not running.
- Go to the Details tab.
- Look for
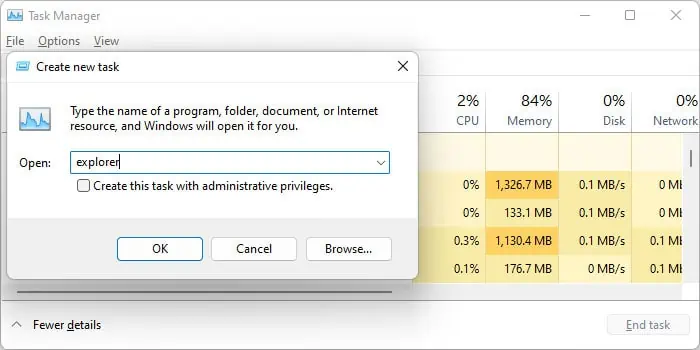
explorer.exeand select it if it’s there. Then, select End Task > End process. - Tap on File > Run new task.
- Type
explorerand tap OK to open Windows Explorer.
If you encounter this issue every time, you need to check a registry setting.
- On the Run new task window, type
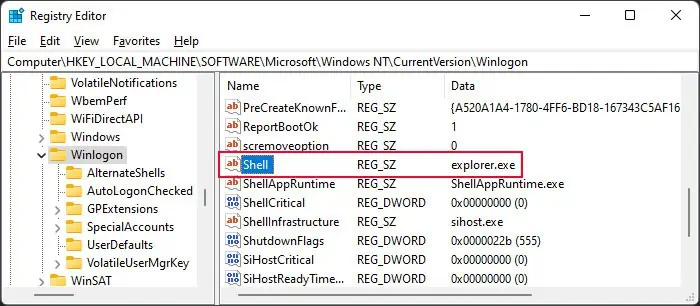
regeditand tap OK to open the Registry Editor. - Navigate to
Computer\HKEY_LOCAL_MACHINE\Software\Microsoft\Windows NT\CurrentVersion\Winlogon - Double-tap on Shell, set its Value data to
explorer.exe, and tap OK.
Reset Windows from Recovery Image
If your Surface laptop shows a black screen after having displayed the Surface or Windows logo, it indicates corrupt system files. The easiest way to resolve such issues is by resetting Windows from a recovery image. However, keep in mind that it will delete all data on your system drive and restore it to its factory state.
You will need to use a different computer to create the recovery disk.
- Go to Microsoft’s Surface Recovery Image download webpage.
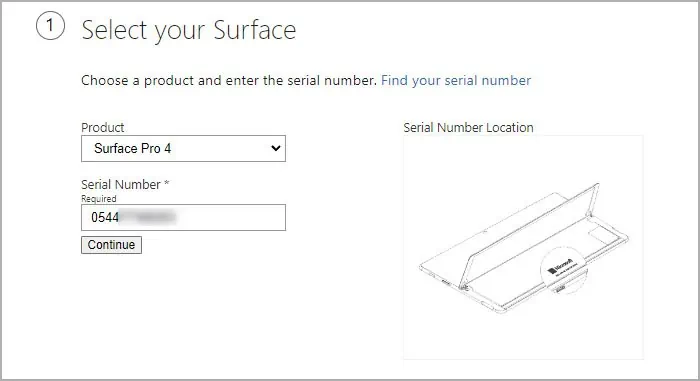
- Read through the instructions and enter your Surface model and serial number under Select your Surface. You can find the serial number under the stand on your Surface device.

- Select Continue and then Download image next to your Windows version.
- Follow any other on-screen instructions to save the file and then extract it inside any preferred folder.
- Insert an empty USB flash drive with enough capacity (check the instructions on the Recovery Image download webpage) into the computer.
- Search for
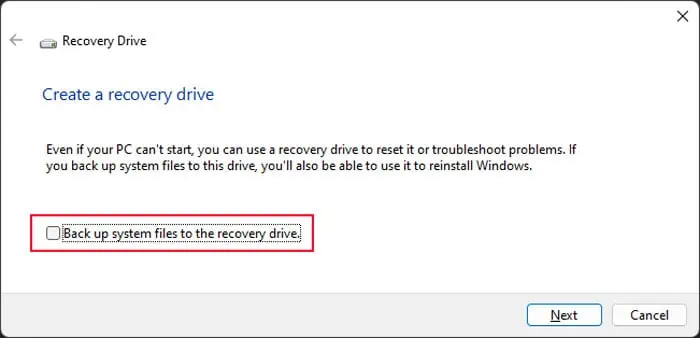
Recovery Driveon the search bar and open the app. - Uncheck Back up system files to the recovery drive and tap Next.

- Pick your USB flash drive and select Next and then Create.
- Click Finish after the process finishes.
- Copy the contents you extracted earlier to this drive. Overwrite everything.
- Shut down your Surface and insert the USB recovery drive here.
- Press and hold the Volume-down button and press the power button once to boot using the recovery drive.
- Set your preferred language and keyboard layout.
- Go to Recover from a drive or Troubleshoot > Recover from a drive. If it asks for a recovery key, select Skip this drive.

- Then, choose Just remove my files and then Recover.
Check Screen Panel and Connections
If you don’t get any display from the very start (not even the Surface or Windows logo) and force restarting doesn’t work, it indicates something is wrong with your display panel or cables.
Disassembling your Surface is a very delicate process as you need to heat the sides of the screen and then pry it out. And prying the screen without any prior experience runs a great risk of damaging it.
So, we highly recommend taking the Surface to a service center or hardware specialist to check the internal components instead. You can also seek help from Microsoft Support or submit a service order to Microsoft to diagnose this issue.
