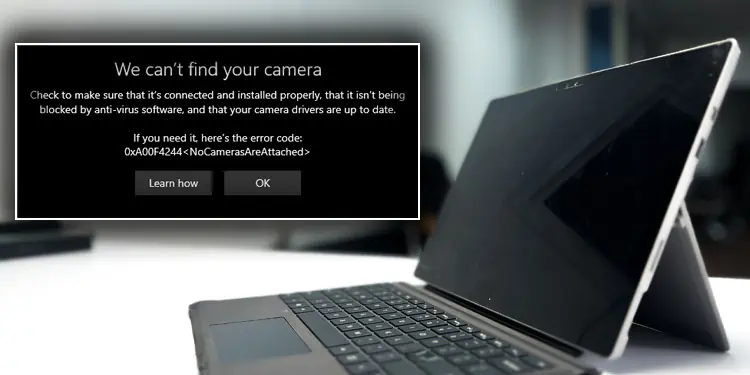
In Surface laptops, you will find several settings that control camera access—it includes camera settings both in UEFI and Windows. If the camera settings are disabled either at the firmware or software level, Windows cannot access the Camera and you will get a black screen when using the Camera.
Even when the camera is enabled, several issues like corrupted or outdated driver/Windows, and camera application errors could stop the Surface camera from working. In rare cases, antivirus software could also be limiting the camera access.
Check Camera Switch/Slider
First, check if the laptop has a Camera switch that enables or disables the camera. This switch could be a key on your keyboard or even a physical switch on the laptop. The laptop could also have a slider that hides the camera. If so, simply slide the slider to access the camera.
If that does not work, you might need to allow camera access.
Allow Camera Access
Any application needs to have permission to use the camera on your system. If you want any application to access the camera, you first need to enable camera access.
- Open Windows Settings by pressing the Windows and I key simultaneously.
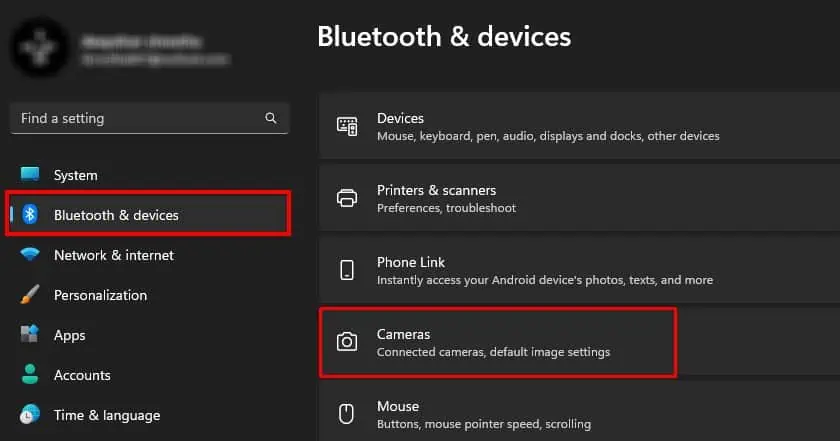
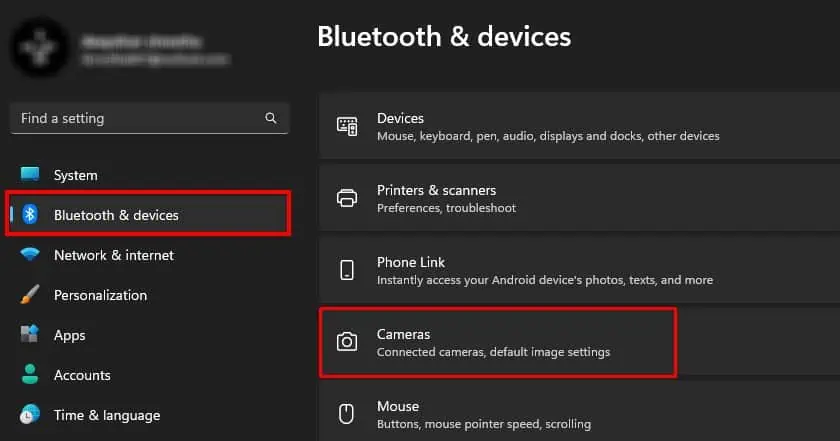
- On the left panel, click on Bluetooth & Devices.
- Click on Cameras.

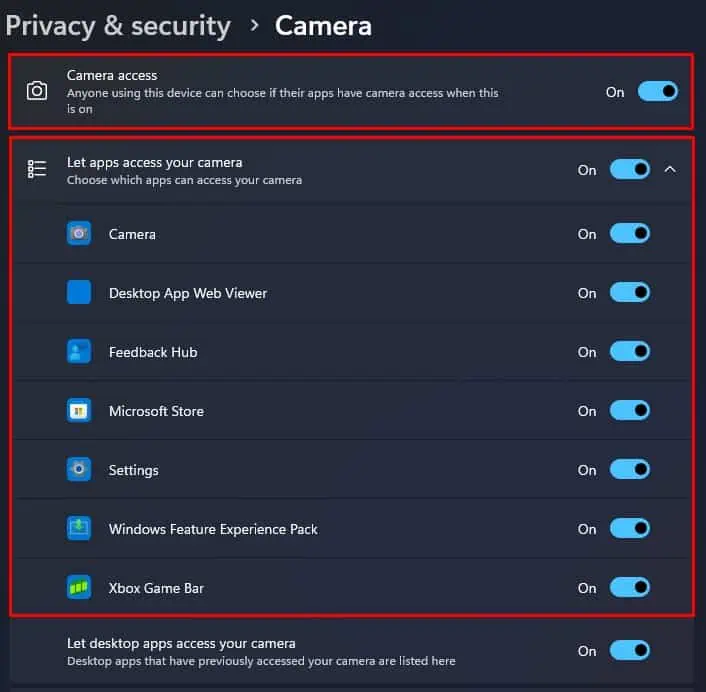
- Select Camera privacy settings.
- Enable the toggle icon on Camera access and Let apps access your camera.
- Under Let apps access your camera, make sure that the application that you are trying to use has camera access.

- Now check if the camera works.
Enable Camera from UEFI
If the camera does not work or gives you an error message, “Camera not found”, it could be that the front and rear camera is disabled from Surface UEFI settings. To fix this, you need to enable the camera from Surface UEFI firmware settings.
- Turn off the Surface laptop.
- Hold the volume up key and press the power button once.
- Once you see the Surface or the Microsoft logo, release the volume key. The laptop should boot into Surface UEFI settings.
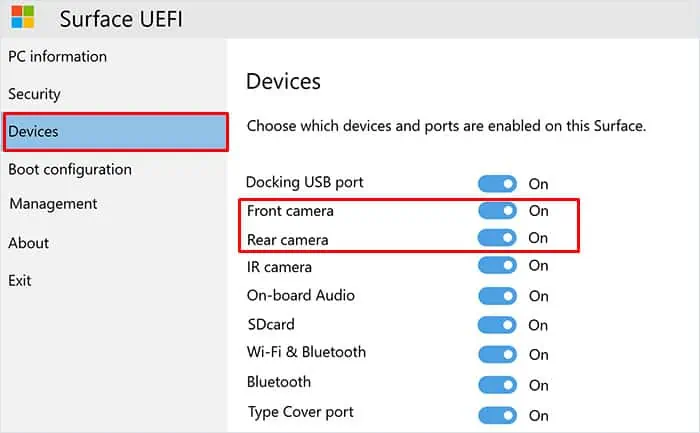
- On the left panel, select Devices.
- Now on the right panel, enable Front Camera and Rear Camera.

- Again, on the left panel, select Exit, and then Restart now.
- Once the Surface laptop boots into Windows, run the Camera application and check if it works.
Run Hardware Troubleshooter
The hardware troubleshooter scans the hardware component connected to the system for issues and suggests you to change Windows settings to fix the said issue. The hardware troubleshooter should fix the issue with the surface camera.
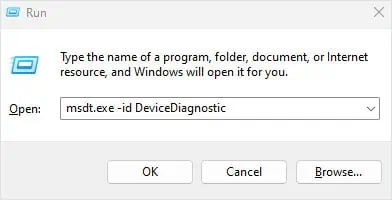
- Open Run by pressing the Windows + R key.
- Type
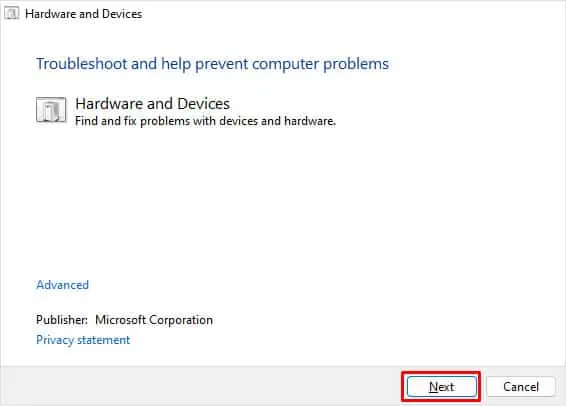
msdt.exe -id DeviceDiagnosticand then press Enter. This will open the Hardware troubleshooter window.
- Click on Next to start the troubleshooting process.

- If the troubleshooter finds any issue, it will recommend some settings.
- Apply said settings and check if the camera works.
Disable and Re-enable Camera
When the Surface laptop is using the camera, the driver loads the necessary functions to display the information from the camera onto your screen. A laggy system and insufficient physical memory could stop the camera driver from loading the driver.
In such cases, restarting the camera device should work.
- Open Windows Settings.
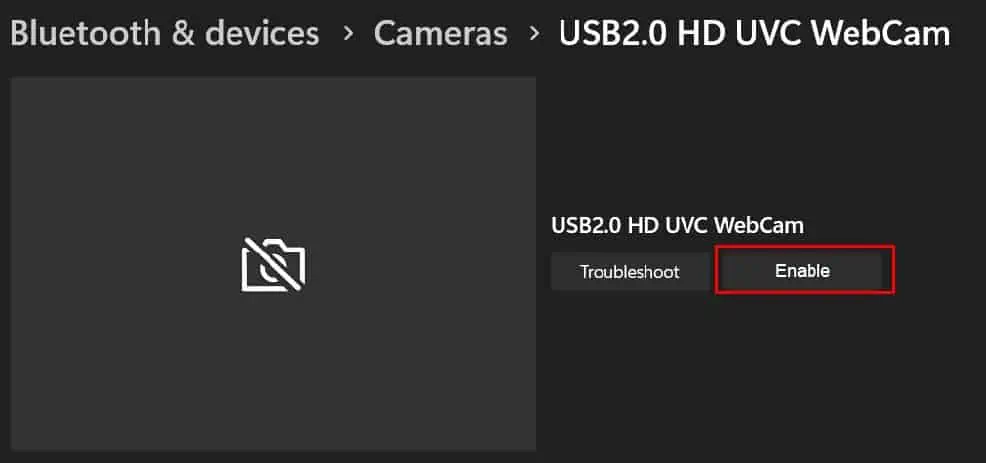
- Go to Bluetooth and Devices > Cameras.

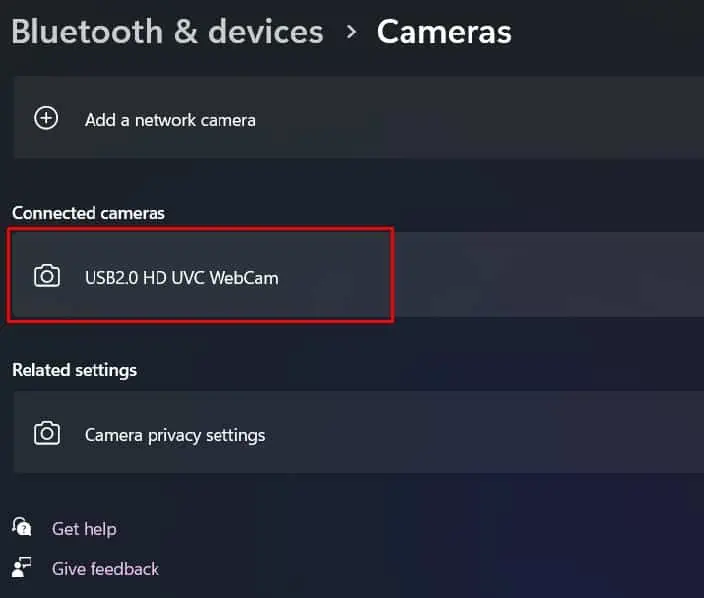
- Under Connected cameras, click on the camera that is not working.

- Click on Disable.
- Wait a few minutes and click Enable.

Alternatively, you can also restart the device from Device Manager.
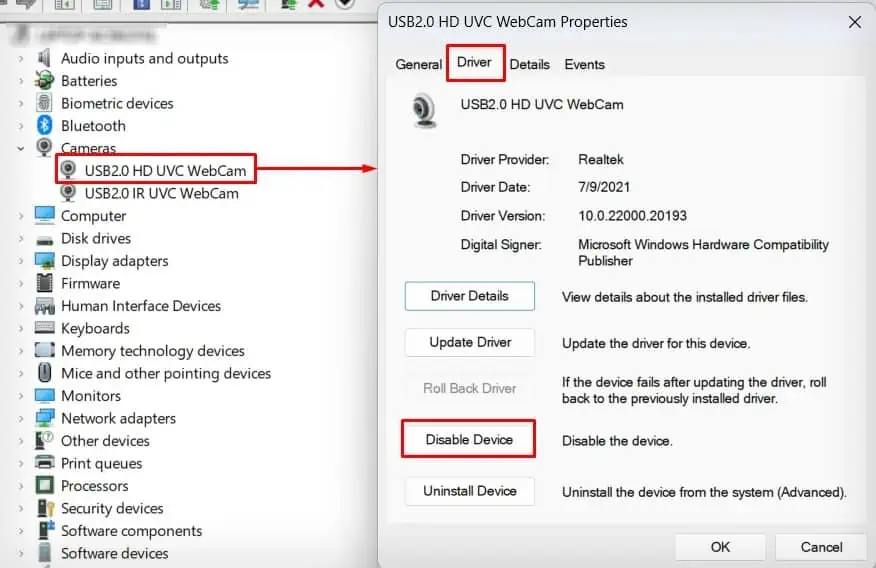
- Press the Windows + X key and select Device Manager.
- Expand Cameras to get the list of camera devices connected to the system.
- Double-click on your camera device to open its properties.
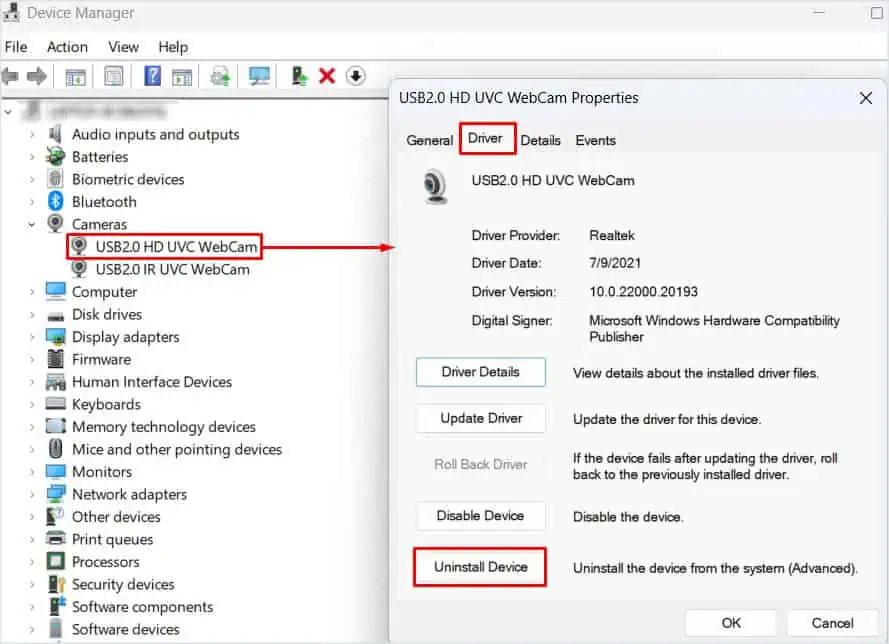
- Go to the Driver tab and click on Disable Device.

- Click on OK.
- Wait a few minutes and open the camera device properties.
- Click on Enable Device.
- Now try opening the Camera application to see if it displays anything.
Repair/Reset Camera Application
If disabling and re-enabling the Camera does not work, you can try repairing the application from Windows Settings. By repairing, Windows checks its application files for issues and repairs them if necessary.
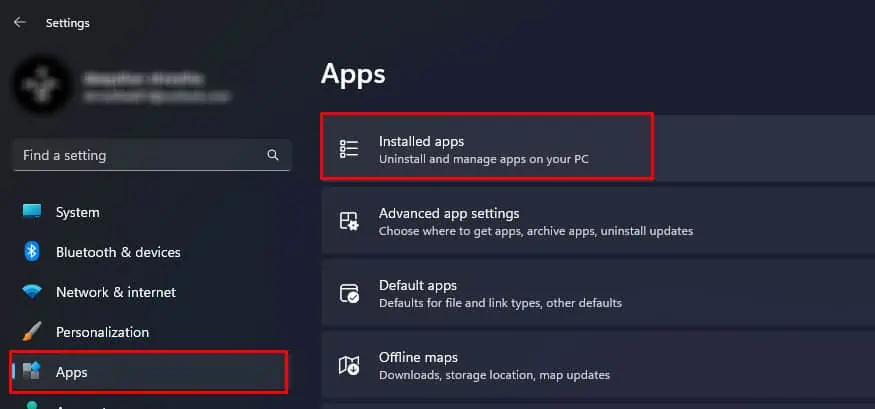
- Go to Windows Settings by pressing the Windows + I key.
- On the left panel, go to Apps.
- Now on the right panel, select Installed apps. Here, you will see a list of application installed on your Laptop.

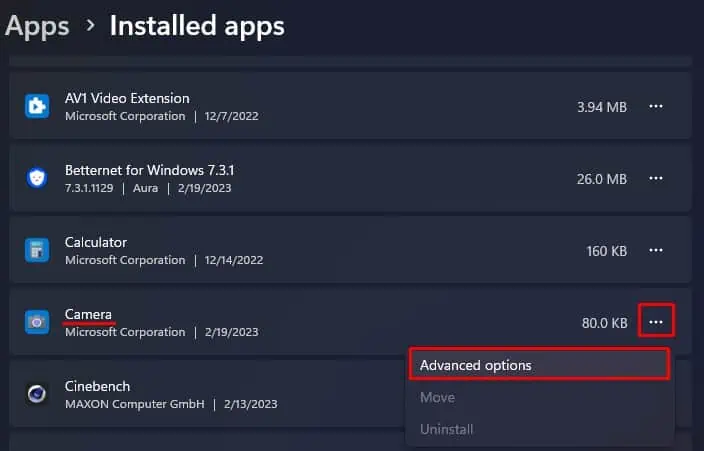
- Scroll down until you see Camera.
- Click on the three horizontal dots on Camera and select Advanced Options.

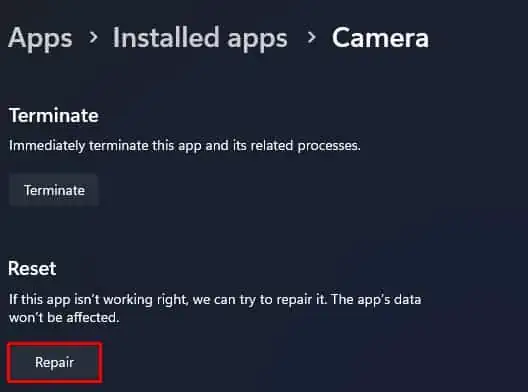
- Again, scroll down to Reset and click on Repair. Wait for the repair process to complete.

- Open the Camera application.
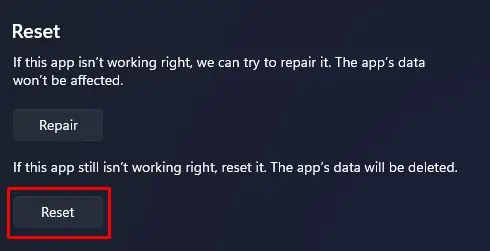
- If it still does not work Reset the application. Resetting the Camera will delete all application data, preference and Sign-in details.

Check Anti-Virus Application
Antivirus applications may block an application/device if it finds any suspicious activity. Even if the application/device does not pose a threat to the system, the Antivirus may restrict it entirely. The same can happen to the camera on your Surface Laptop.
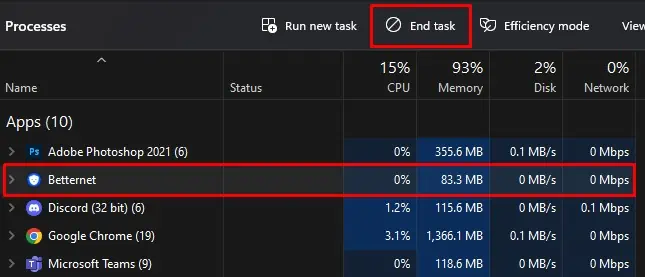
To ensure this is not the case for you, we recommend that you disable any Antivirus in your system. If you cannot disable the antivirus application, you can end its process from Task Manager.
- Open Task Manager by pressing the Ctrl + Shift + Esc keys simultaneously.
- Go to the Processes tab.
- Here, click on the Antivirus application on your system.
- Select End task.

- Try opening the Camera. If it works, you will need to create an exclusion in the antivirus for your camera.
Update/Reinstall Driver
In the case of the Surface camera, three drivers are responsible for making the device function—the camera, Intel Control Logic, and Display adapter driver. Try updating these drivers to see if it fixes the problem with your camera.
- Right-click on the Windows icon on the Taskbar.
- Select Device Manager.
- Expand Camera or Imaging Devices.
- Here, double-click on the camera.
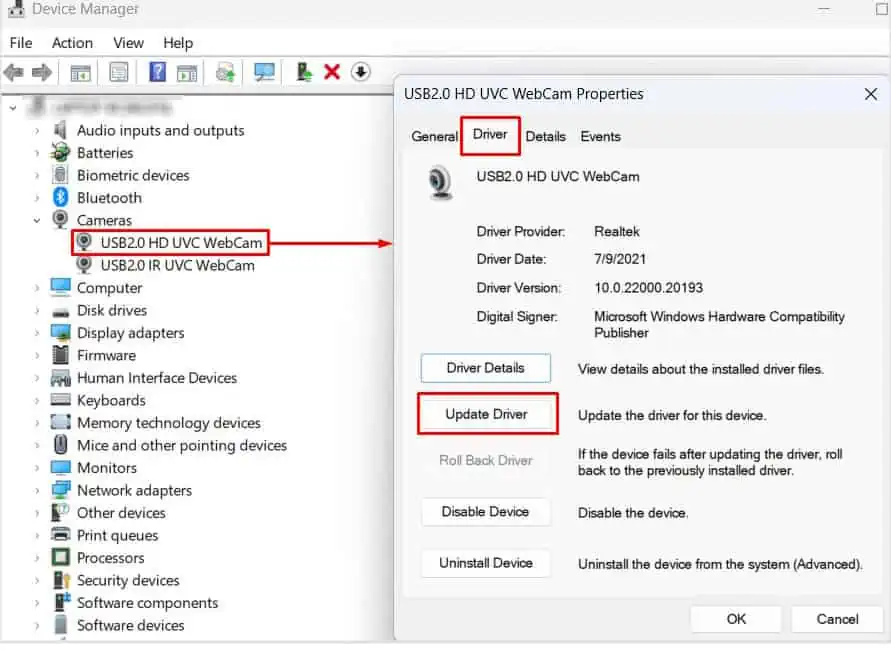
- Go to the Driver tab and click on Update driver.

- Click on Search automatically for drivers and wait for the driver update process to complete.
- Expand Display adapters and update Intel Display Driver.
- Finally, Expand System Devices and update Intel Control Logic.
- Restart the Surface laptop and try using the camera
If updating the camera and display adapter driver does not work, the driver could be corrupted. Try reinstalling the entire driver to remove any corrupted driver files.
- In Device Manager, expand Camera or Imaging Device.
- Open Camera properties and go to the Driver tab.
- Click on Uninstall Device.

- Select Uninstall.
- Similarly, uninstall the display driver and the Intel Control Logic driver as well.
- Now, restart the laptop. The OS will automatically install the necessary drivers.
Update Windows
Microsoft constantly provides updates through Windows updates. Updating your Windows to the latest version should fix any issues with the camera.
- Open Windows Settings.
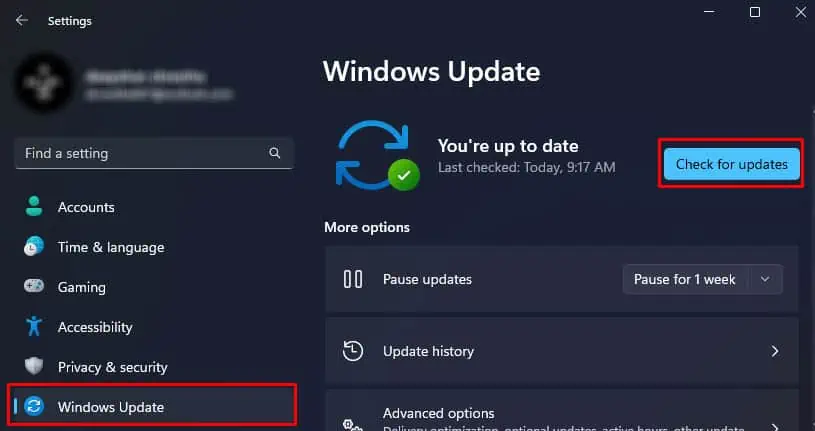
- On the left panel, click on Windows update.
- Now, click on Download and install or Check for updates.

- Once the download is complete, restart your PC to install the updates.

