You may see flickers or distorting lines on your Surface display due to some hardware or software issues. Sometimes these are major flickers that hide all the contents of the screen or they may be minor ones that only distort certain areas of the display.
These issues may surface due to a damaged display or loose display cable. Another possible reason includes a corrupt display driver or other operating system components. However, it can also happen due to temporary screen glitches.
If you are using a Surface Pro 4, the screen panel itself might be exhibiting a “Scramble.” It is a design flaw and it is possible to determine this issue if the flickers are also present on the UEFI screen. You need to seek help from Microsoft support personnel or hardware specialists to replace the device in such cases.
Besides that, if you own other versions of the Surface device, we have you covered in this article.
Use Keyboard Shortcut to Refresh Display
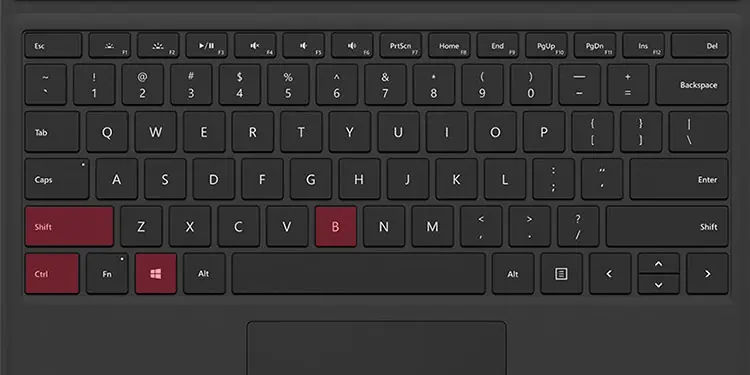
The first thing you should do whenever you encounter any display issues is to restart or refresh your display. You can do so with the key combination Windows + Ctrl + Shift + B after putting your Surface device on laptop mode. Then, you will hear a beep, and your screen will dim and go off before turning on again.
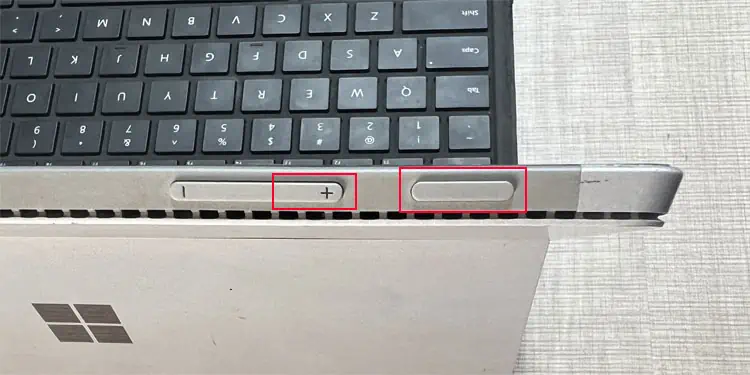
If you are in tablet mode, you may also be able to refresh the screen by pressing the Volume down + Volume up keys three times in a row.
Force Restart Surface Device
Another way to resolve the temporary issues causing the flickers if the shortcut is not effective is by force restarting Surface. Press and hold the power button for 20-30 seconds until a Surface or Windows logo appears on the screen to do so.
Reinstall Graphics Driver
A corrupt display driver or operating system can also cause this issue. You can determine such situations by checking if the display flickers on the UEFI screen.
- Shut down the Surface and wait for a few seconds.
- Press and hold the Volume up button and then press the power button to boot to UEFI.

If the flickers appear on the UEFI display as well, your drivers or operating system are definitely responsible.
In such cases, if you can still view the regular screen through the flickers, you need to reinstall the graphics driver.
- Press Win + R to open Run.
- Type
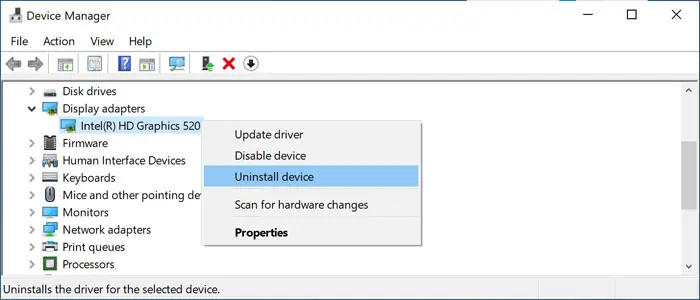
devmgmt.mscand press Enter to open the Device Manager. - Expand Display adapters.
- Right-click on your graphics device and click Uninstall device.

- Check Attempt to remove the driver for this device and select Uninstall.
- Restart your Surface and see if you still encounter the issue.
If the flickers hide the whole display, your only solution is to create a recovery disk and then recover or reinstall Windows from the drive.
Update Windows
If you can see or recognize most of your display, you can also try updating your operating system to take care of any potential system bug causing this screen issue.
- Tap on the Start icon and select Settings (gear icon).
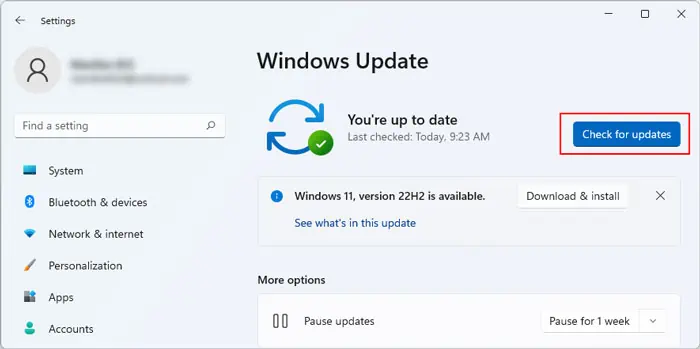
- Go to Windows Update or Update & Security > Windows Update.
- Tap on Check for updates to look for available updates and Install now to install them.

- Restart your PC as necessary and go to the Update Settings again.
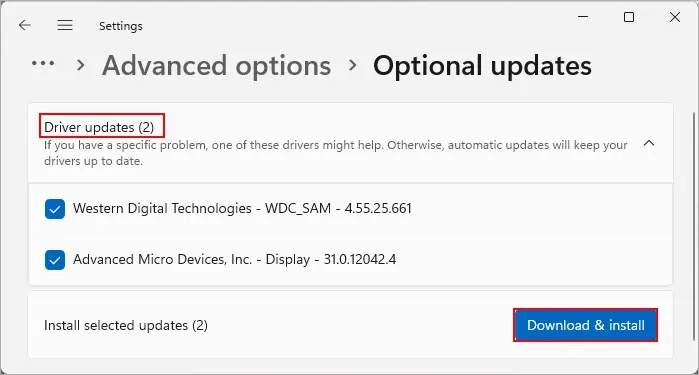
- Then, select View optional updates or Advanced options > Optional updates.
- Expand the categories and check all options available.
- Tap Download and install.

Reset Operating System
If the UEFI screen does not show any flickers but reinstalling the graphics driver didn’t resolve the issue, you need to reset your operating system. Doing so will erase all the data inside your device, so we recommend backing or recovering them first if applicable.
- First, you need to create a recovery disk. Insert a USB drive with at least 16GB capacity into the computer.
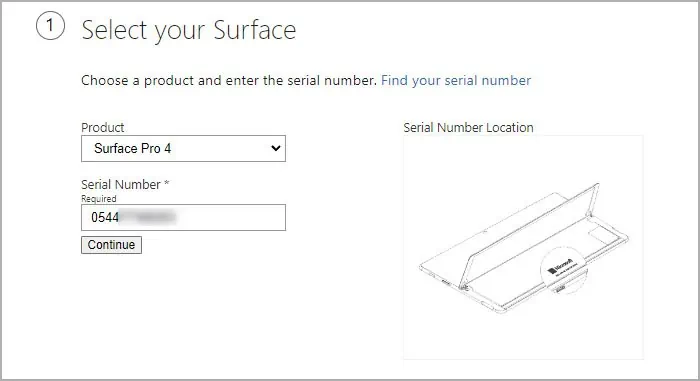
- Visit the official Surface Recovery Image download website.
- Specify the model and the serial number of your device. You can either look under your Surface’s stand to learn the serial number or get this info from the UEFI.

- Click Continue and then Download image next to your OS version. You may need to perform additional steps to download it depending on your browser and download settings.
- Open Recovery Drive by searching for it on the search bar.
- Uncheck Back up system files to the recovery drive and select Next.
- Choose your USB flash drive and click on Next > Create.

- Hit Finish after the process is complete.
- Extract the contents of the archive you downloaded in step 4 to the USB drive while overwriting everything.
- Then, connect this USB Recovery drive to your Surface device.
- Shut down the Surface if you haven’t done so already. Press and hold the Volume down button and then press the power button to boot using the recovery disk.
- Set the language and keyboard layout according to your preference.
- Select Recover from a drive or Troubleshoot > Recover from a drive.

- Follow the on-screen instructions according to your preference.
Replace Screen Panel
It is also possible to experience this issue if your display cables are not connected properly. In such cases, you need to disassemble the device and then reinsert the cables.
However, disassembling your Surface runs a severe risk of damaging the screen and the internal components as they are held together by some adhesive. If you are not used to performing hardware-level troubleshoots on this device, it’s best that you seek help from a technician or Microsoft support personnel for this purpose.
If the Warranty is still valid, you can also submit a service order online to have some official technicians fix the screen for you.
