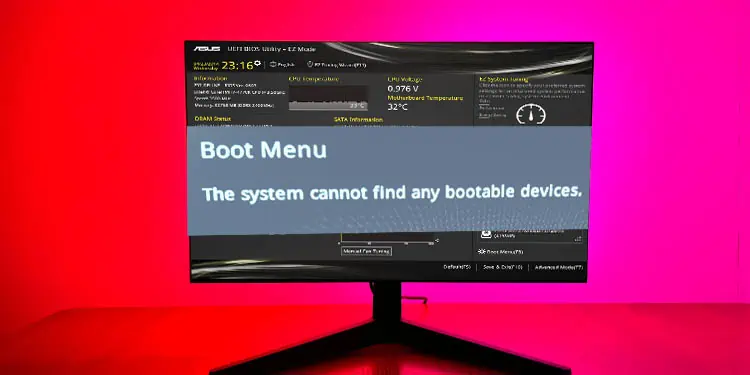
The “System cannot find any bootable devices” error indicates that your computer cannot find a healthy device (containing OS files) to boot into Windows. You’re probably stuck with this error due to an incorrectly configured boot mode, partition style, or even corrupted boot sector.
While these are the most common reasons, you cannot disregard the fact that loose connections, faulty components, and BIOS/Windows corruption can also cause it. Whether you have upgraded the CPU/motherboard, installed a new drive, or got this message unexpectedly, this troubleshooting guide should help you fix it.
Before You Begin
- The ‘System cannot find any bootable devices’ error pops up on the BIOS screen. If you can’t enter the BIOS interface, I recommend checking the physical connection.
- For SATA drives, confirm that both (power and data) cables are securely connected. Check for faulty cables and headers. You can certainly try another SATA header but if a cable is damaged, it’s better to replace it.
- If you’re using an M.2/NVMe SSD, I suggest tightening the screws such that the connection is not loose. When facing problems with bootable devices, it’s always a good idea to reseat/reconnect them.
- If you can access the BIOS, check whether the installed storage devices are detected in the Storage or Disk Information section (varied based on the motherboard).
- Note that some slots might be disabled based on the motherboard and CPU generation you’re using. If that’s the case, your hard drive won’t show up in the BIOS. To check for compatibility, I highly recommend inspecting the Storage specs in your motherboard manual (which should be available online).
- If your system has a built-in HDD or SSD troubleshooter, try running this to check for possible hardware failure. In case you get an error, you might require replacing the storage drive.
Check Secure Boot Settings
Secure Boot is an excellent Windows feature that prevents your computer from malicious codes. It verifies whether each program loaded by the firmware is trusted.
When enabled, your system might not trust the new storage drive and won’t detect it as a trusted bootable source. A simple workaround to this problem is to disable it:
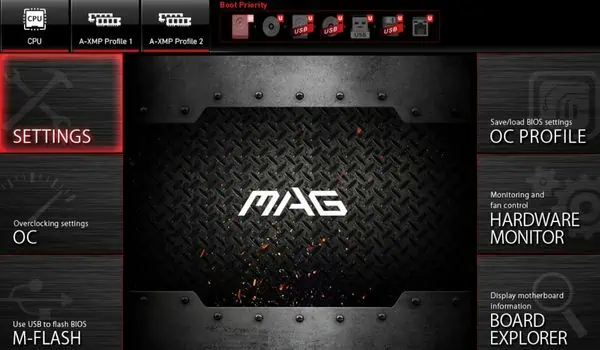
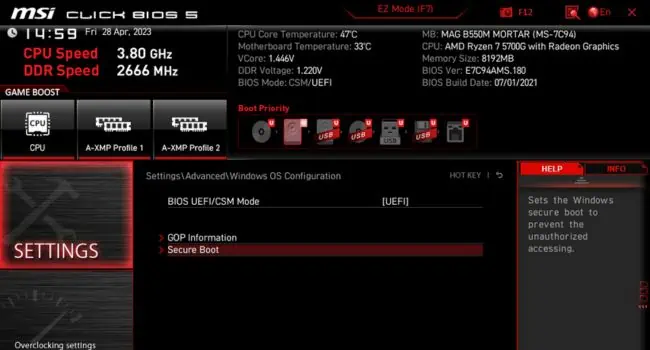
- Based on your motherboard, keep hitting the BIOS key until you get to the interface. Since I’m using an MSI, I’ll be using Del.
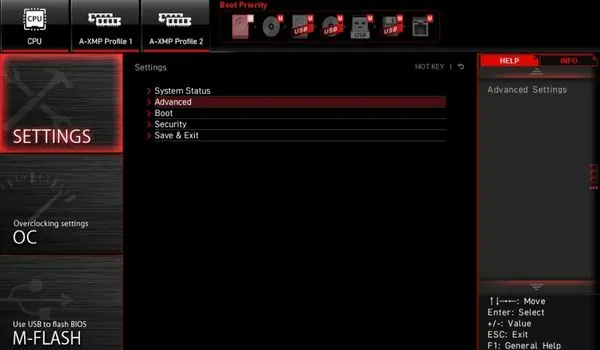
- Get to the Settings section.

- Go to Advanced.

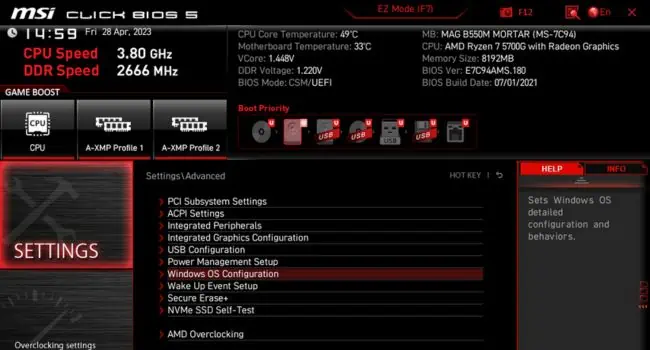
- From the list, choose Windows OS Configuration.

- Now, select Secure Boot.

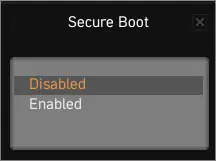
- Then, disable the option as shown below.

- Hit the F10 key to save and exit from BIOS. The shortcut key might be different on your motherboard.
Enable Compatibility Support Module
As the name suggests, the Compatibility Support Module (CSM) adds legacy BIOS compatibility to UEFI firmware.
If your storage drive is partitioned as MBR disk but you have set the boot mode to UEFI, it will certainly not detect it as a viable bootable device. But once you enable CSM, this adds backward compatibility to the current OS and hence you can use your PC as a legacy BIOS.
Note: In some systems, you need to first disabled the Secure Boot option to enable CSM or to set the boot mode to legacy. Also, some have the CSM option greyed out when using integrated graphics (for example, iGPU VBIOS doesn’t support CSM).
In this case, I advise installing a dedicated graphics card to see if this solves your problem.
- Trigger the BIOS menu using the dedicated key.
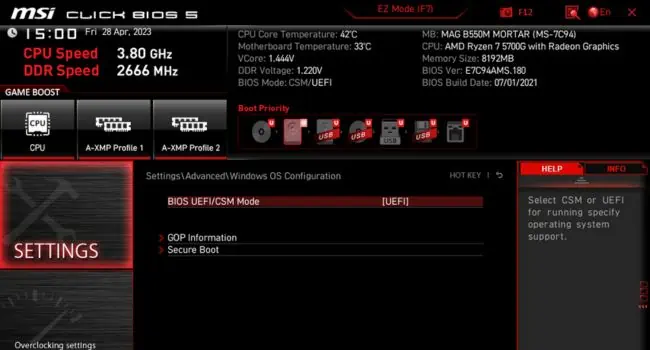
- Then, go to Settings > Advanced > Windows OS Configuration.
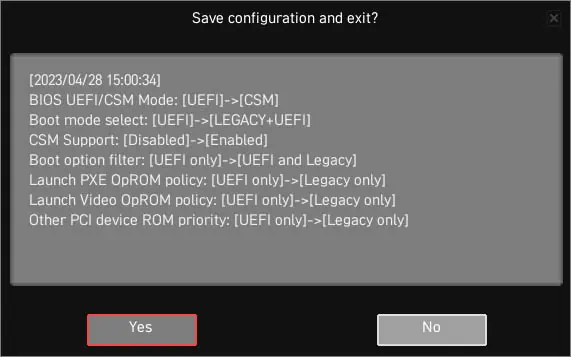
- Here, select the BIOS/CSM mode.

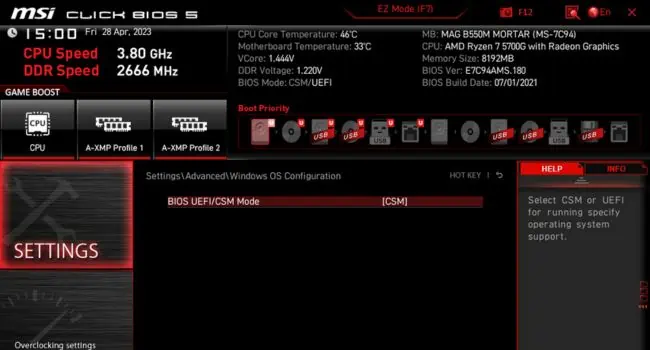
- Now, set the option to CSM as shown below.

- Save this setting and exit from BIOS. Your system should now detect the bootable device.

Try Changing Boot Mode
Not all systems incorporate CSM boot mode. Some even allow you to directly change the boot mode to legacy.
As discussed earlier, whether you have an MBR/GPT partitioned drive but have not configured the appropriate boot option, your system may not detect it. Changing the boot mode involves similar steps with slight variations:
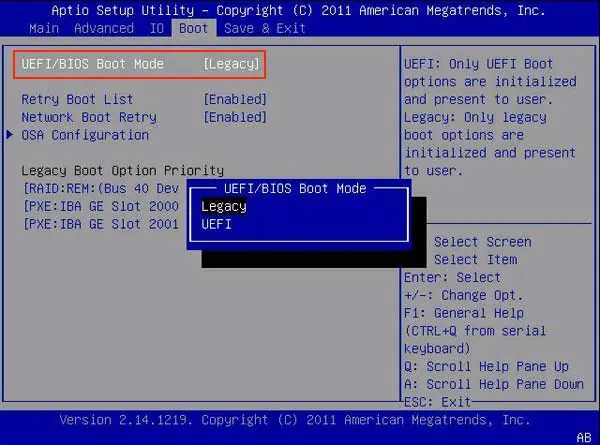
- Get to the BIOS and get into the Boot section.
- Find the UEFI/BIOS Boot Mode and set it to Legacy or UEFI (as per your requirement).

- Save and exit from BIOS. Your PC will now restart and the installed hard drive should be detected.
Make the System Partition Active
If your bootable drive is initialized with MBR, it’s important to have the system partition active. In case yours doesn’t have any active partition, you’ll either meet with the ‘OS not found’, ‘System cannot find any bootable devices’, or similar indications.
Here are the necessary steps to mark your system partition as active:
- Insert a Windows installation Media and boot your computer from it. Don’t forget to change the boot priority first.
- The Windows Setup screen should open up. Ensure the keyboard input and other settings are well configured and hit Next.

- Then, click on Repair your computer located at the bottom-left corner of the dialogue box.

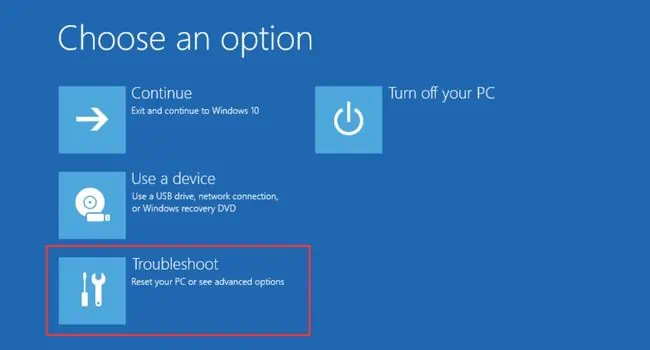
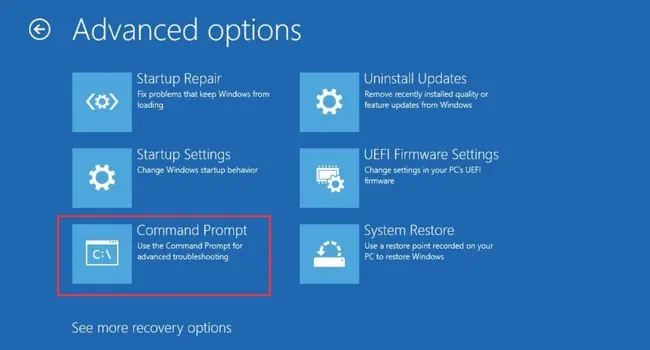
- You should enter the Windows Recovery Environment now. Here, choose Troubleshoot.

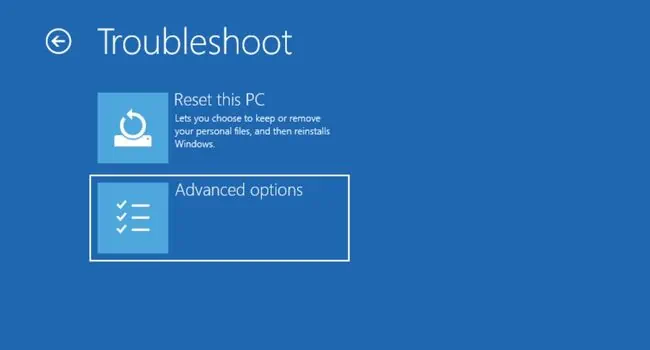
- Then, pick Advanced Options.

- Select Command Prompt and wait for it to open up.

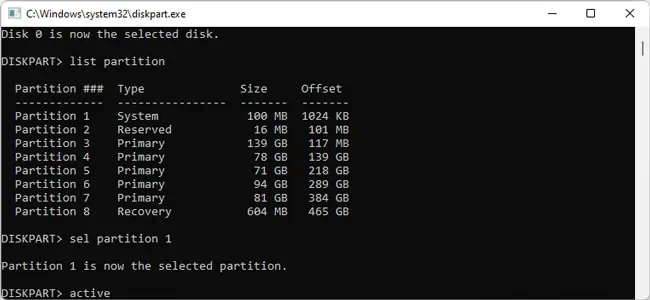
- Now, execute the
diskpartcommand to start the dedicated utility. - Run the following in succession to active the system partition:
list disk(lists all the current drives in your computer)select disk <disk_number>(input the disk number of the drive containing the boot file)list partition(shows all the partitions inside the selected disk)select partition <partition_number>(input the system partition number to make it active)active(sets the selected partition as active)exit(exits Diskpart utility)
- Now, close the Command Prompt or simply run the
exitcommand. - Once you’re in the Choose an Option screen, select Continue.

- Get to the BIOS again and change the boot priority or simply remove the installation media.
- Restart your computer and the bootable device should now be detected.
Check Other BIOS Settings
The above solutions have worked out for most Windows users. If you’re still unable to fix your problem, it could be due to a few misconfigured BIOS settings that could be incompatible with your system.
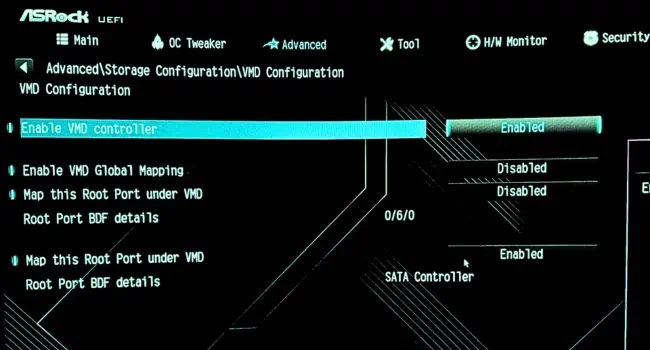
One of them is Intel’s VMD technology which could be causing issues with the boot process. While this is an excellent technology that helps manage and aggregate NVMe SSDs, its drivers could be causing the problem.
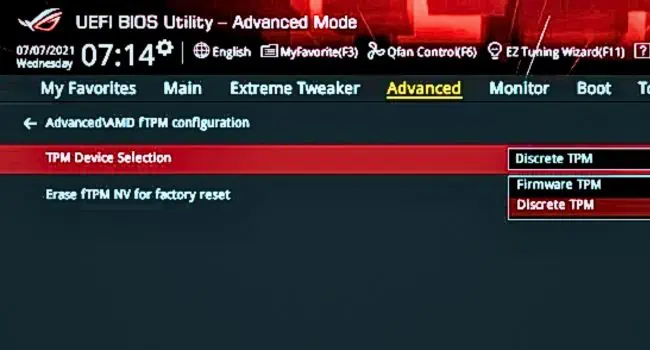
Likewise, if the enabled TPM or the interface operation is not compatible with the bootable device or the OS, they can also trigger the “System cannot find any bootable devices” error.
- Use the appropriate boot key to enter BIOS.
- Switch to the Advanced tab.
- Find the VMD setup menu, Intel VMD, Volume Management Device, or similar options. If you’re unable to locate this, look it under PCI Configuration or System Agent (SA) Configuration.
- Now, set the Enable VMD Controller to Disabled, as shown below.

- Save the BIOS settings and reboot your computer.
- If you’re still getting the “System Cannot Find Any Bootable Devices” error, boot into BIOS again and navigate to the Advanced option.
- Look for TPM, TPM Device Selection, or similar options. If you can’t find it, search for it under the PCH-FW Configuration section.
- Try changing the configured Firmware TPM to Discrete TPM or vice versa.

- Save the setting and restart your PC.
- If you’re unable to fix the problem, try disabling the TPM (if possible) and recheck.
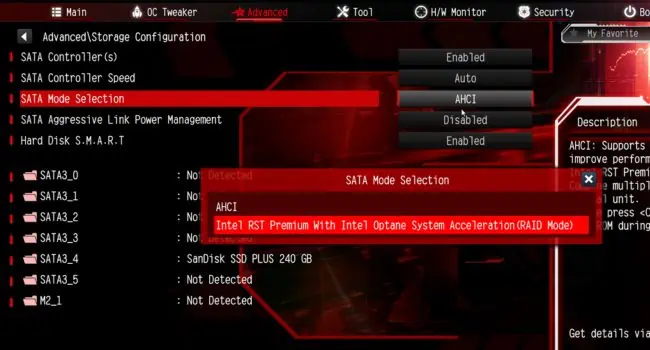
- In case disabling VMD or TPM didn’t help, try changing the interface operation from AHCI to RAID or vice versa.

Note: For Windows 11, it’s necessary that you enable TPM 2.0. So, if you’re trying to boot into Windows 11 or installing this version, do not disable it.
Repair Boot Sector
The boot sector consists of machine codes that instruct the system where to find the OS and how to load it into the RAM. When this section gets corrupted or destroyed, your computer might not be able to find the bootable code or the device itself.
Fortunately, it’s possible to repair the boot sector in both MBR and GPT partitioned drives. But do note that the process to do it is entirely different.
On MBR Disk
- Use the installation media to get into the Windows RE and launch Command Prompt, as discussed earlier.
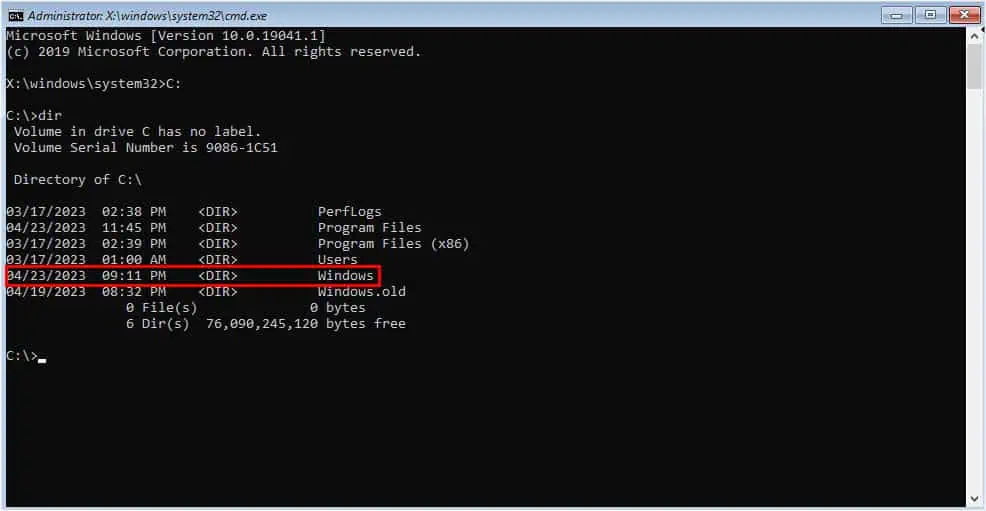
- Since the drive containing your boot files can change in the Windows RE, I advise checking this first. As shown below, I have used the dir command. You can do the same. In case, there’s no Windows directory, check in another drive.

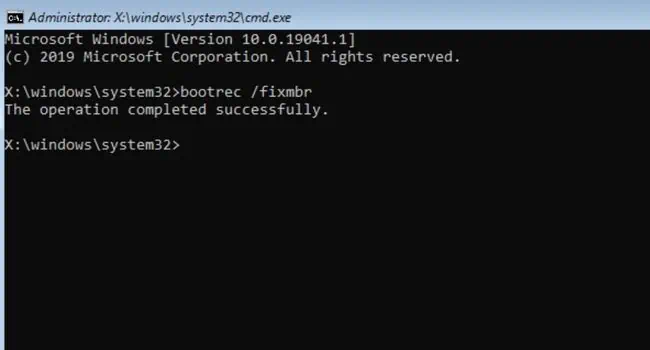
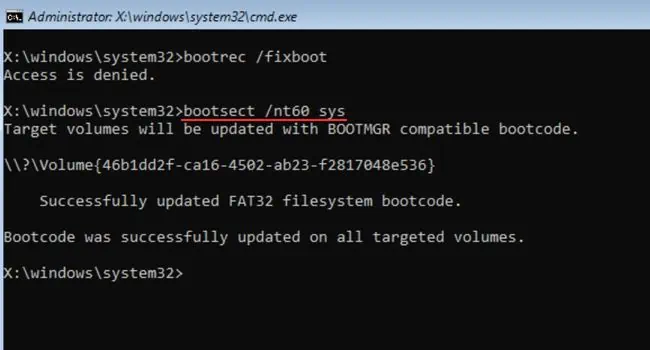
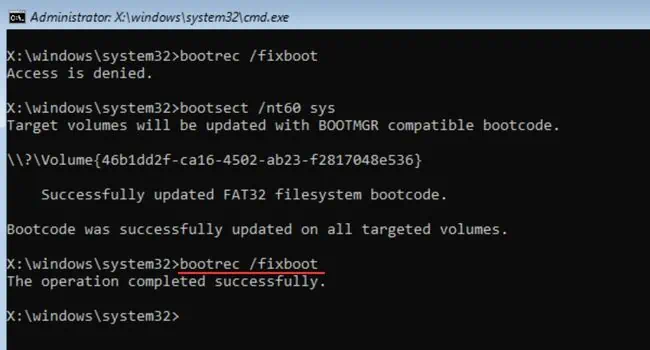
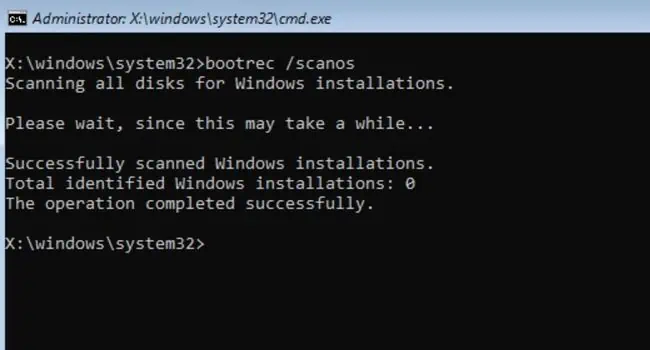
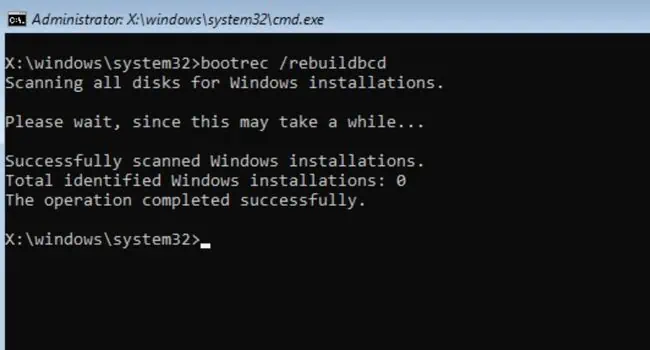
- Once you confirm this, start running the below commands in succession to fix MBR:
bootrec /fixmbr
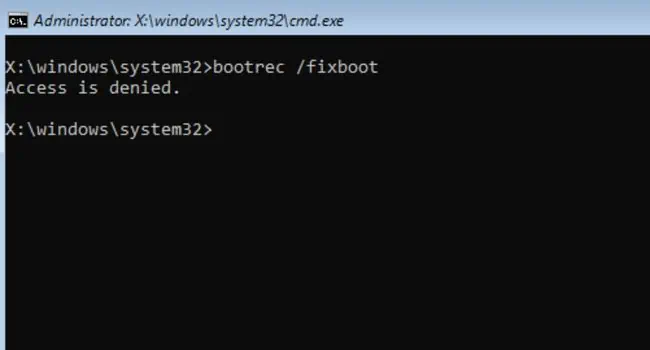
bootrec /fixboot
bootsect /nt60 sysorbootsect /nt60all (if you get the access denied error)
bootrec /fixboot
bootrec /scanos
bootrec /rebuildbcd
exit
- Exit from Command Prompt and hit the Continue button to reboot the computer.
On GPT Disk
- Open up Command Prompt from the Windows RE.
- Use the
diskpartcommand to start the disk management utility. - Then, run the below commands to repair the EFI System Partition (ESP):
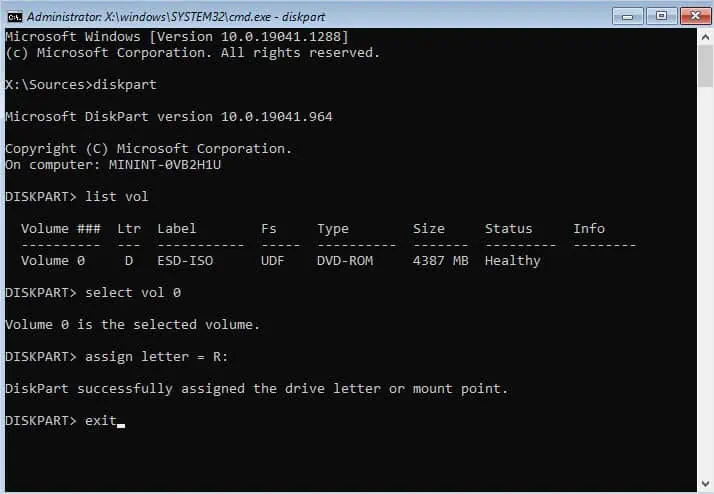
list volselect vol <volume_number>(pick the volume using the FAT32 file system, the Label field says ‘Boot’, and the Info field indicates ‘System’)assign letter=<mount_letter>:(input a letter of your choice but do not choose those that are already assigned)exit
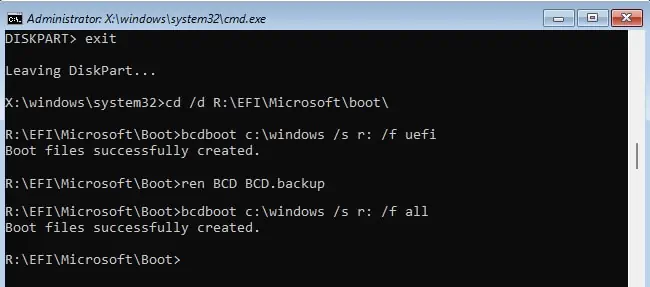
- Once you’ve exited the Diskaprt utility, run the below commands:
cd /d <mount_letter>:\EFI\Microsoft\Boot\(usecd /d <mount_letter>:\Boot\orcd /d <mount_letter>:\ESD\Windows\EFI\Microsoft\Boot\if you get an error)bcdboot <drive_letter>:\Windows /s <mount_letter>: /f UEFIren BCD BCD.backupbcdboot <drive_letter>:\Windows /s <mount_letter>: /f ALLexit
- After the boot files are created, close the prompt, reboot your computer, and check if this fixes the error.
Change the Partition Style
By now, you should have figured out that the main cause of this problem is using the inappropriate boot mode for the current partition style. While it might be theoretically possible to boot your OS with UEFI for MBR drives, Windows doesn’t offer that.
For that reason, the best option would be converting your MBR-partitioned drive to GPT. Likewise, you may switch to MBR if you’re using an older Windows version.
Note that you’ll have to format the hard drive and remove all the partitions. So, make sure you back up all your important files first. After doing this, you’ll need to reinstall Windows.
- Boot your computer using the Windows Installation Media, and from the Windows Recovery Environment, open up Command Prompt.
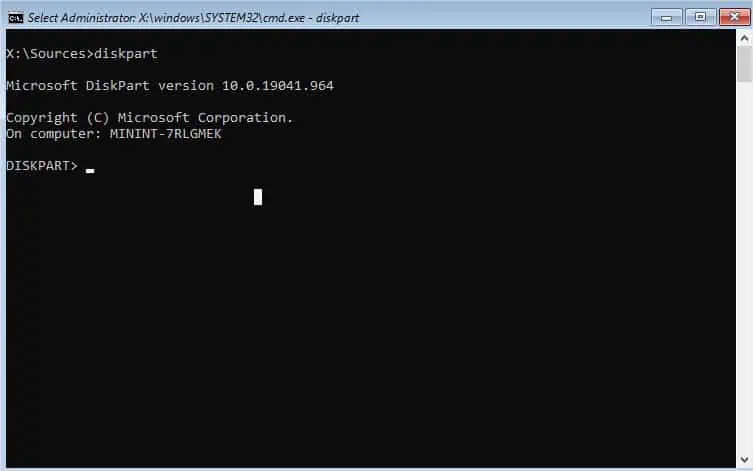
- Start by executing the
diskpartcommand.
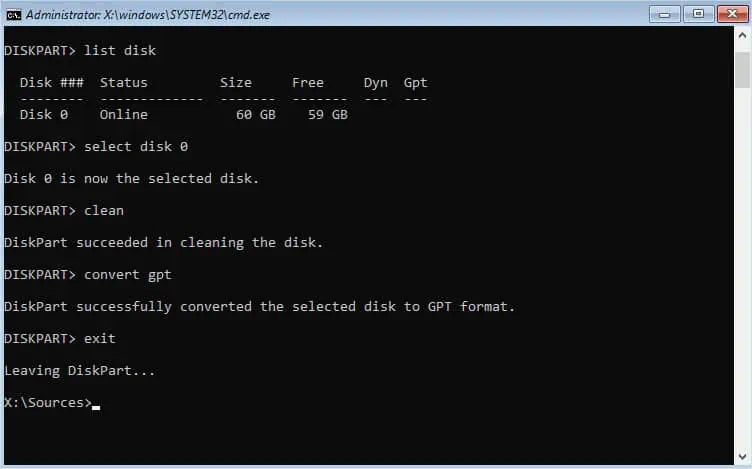
- Now, run each of the commands below in succession:
list disk(Note the GPT column. If there’s an ‘*’, it’s GPT otherwise MBR)select disk <disk_number>cleanconvert mbrorconvert gptexit
- Close the Command Prompt and hit the Continue option to reboot your computer. If there was a partition-style problem, this should solve it.
Additional Tip: You can even opt for a third-party tool if you wish to change the partition style without having to lose your data.
Clean Install Windows
If none of the above tricks worked for you and you’re also using the appropriate boot mode based on the hard drive partition, I do not see any option than clean installing Windows. This way, all the existing OS and user files are completely wiped.
Along with that, the corrupted MBR and boot sector are also replaced. Since this is going to remove all the files, make sure you have backed up the important files before proceeding.
- Boot your computer using the Windows Installation Media.
- In the Windows setup screen, hit Next after configuring keyboard options.
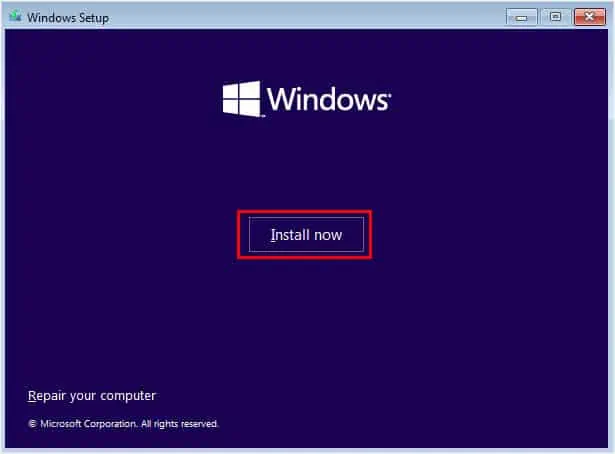
- Then, pick Install Now.

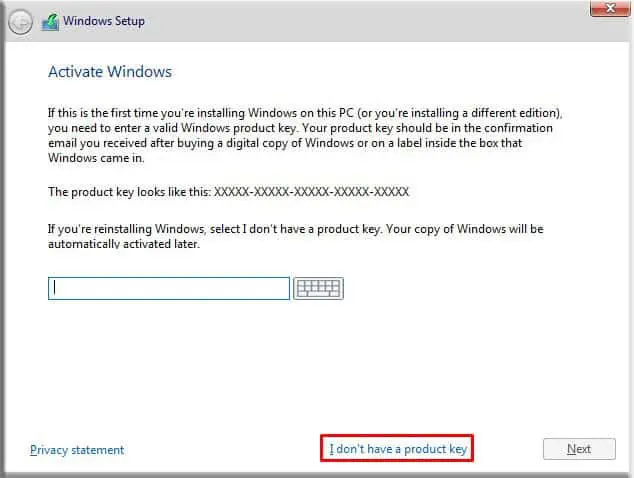
- Add the product key or choose I don’t have a product key option.

- Select the operating system, accept the license terms, and in the installation type screen, choose custom installation.

- Delete all the partitions, allocate the size, and hit Next. A dialogue box might appear to allow the system to create custom partitions.

- Wait for the Windows installation to complete. From here, follow the on-screen instructions. You’ll be asked to sign in to Microsoft and configure a few more options, which are totally based on your preference.

