Imagine getting suited up for a meeting, and your camera isn’t working; you really don’t want the effort to go in vain. The Teams app has been around for quite some time. This has given us enough time to understand why the camera may not be working.
Camera issues can be difficult, however, difficult to understand. The issue can range from being extremely general to specific, so the user may find the diagnosis process a bit tedious.
In this article, we will be listing the causes of why your Teams camera may malfunction and how you can fix it. Stick around to get your camera working in no time!
Why is My Team’s Camera Now Working?
Before you jump to the fixes, skim through the causes and determine the cause most relevant to you. You can find the fixes for each mentioned cause under this article.
Here is a list of causes for why your Teams camera may not be working:
- Inadequate Permissions
- Webcam Used by Other App
- Hardware Problems
- Application Bugs
- Outdated Teams App
- Camera Driver Not Updated
- Operating System Not Updated
How to Fix Teams Camera Not Working?
You can test several solutions to fix the camera issue on Microsoft Teams. Below, we’ve listed both the general and specific solutions to the issue. After you’ve gone through the causes mentioned above, apply any of these fixes.
Run a Test Call
You can start your fix by running a simple test call to ensure that your camera hardware is working properly. If you determine that the issue is actually in your device, you can simply repair or replace your device. However, you can only use this feature if you own the paid desktop version of Microsoft Teams.
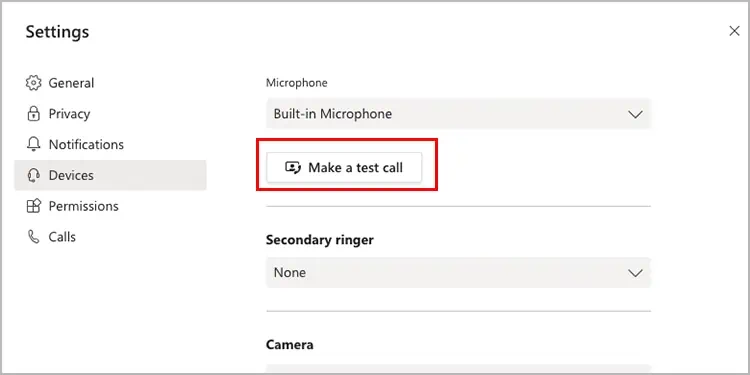
Follow these steps to run a test call in Microsoft Teams to check if your device camera is working properly:
- Open the Microsoft Teams App.
- Click on your profile icon on the top-right corner of the Teams window.
- Select Settings.

- On the sidebar, select Devices.
- Click on the Make a test Call button.

- Follow along with the Teams Eco assistant for further instructions on the call.
Update Teams App
Although the update is automatic for the desktop version of the Teams app; you need to update Teams on your mobile phones and tablets periodically. When you leave the Teams app outdated for a long time, it will fail to establish a connection with your device hardware.
You can visit Play Store to update your Teams app if you own an Android mobile or tablet. For iPhone or iPad users, update the Microsoft Teams app from App Store.
Update Camera Driver
Drivers are essential to bridge the gap between hardware devices and the computer system. If you’re a Mac user, all your drivers are installed and updated automatically while you update your macOS. However, you can manually update drivers if you’re a Windows user.
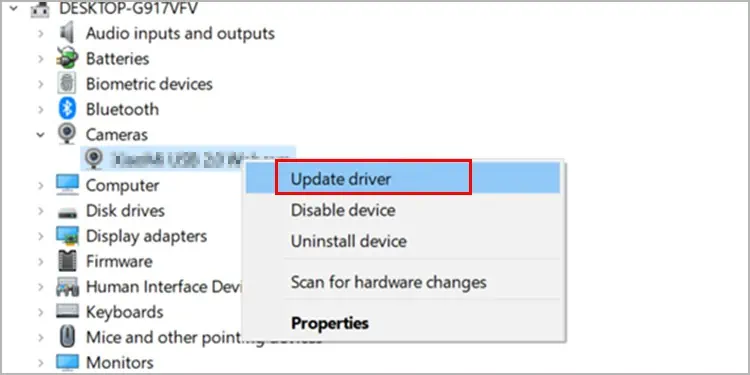
You can update your camera driver from the device manager utility on your Window. Refer to the steps mentioned below to update camera drivers on Windows:
- Launch Start and enter Device Manager on the search bar to open the utility.
- Locate Cameras from the list of hardware and select the drop-down icon next to it.
- Right-click on your device and select Update Driver.

- Select the Search automatically for drivers option on the new window.
- Windows will offer you to update the best driver available for your device; install it.
Close Background Apps
Your camera may not work because another application may be actively using your camera. This can be one of the more probable causes for why Teams may not be registering your video during a video conference call.
Make sure you close all windows that you believe may be using your camera. It’s best to close all applications running in the background. This applies to both the desktop application and mobile application versions of Teams.
On Windows
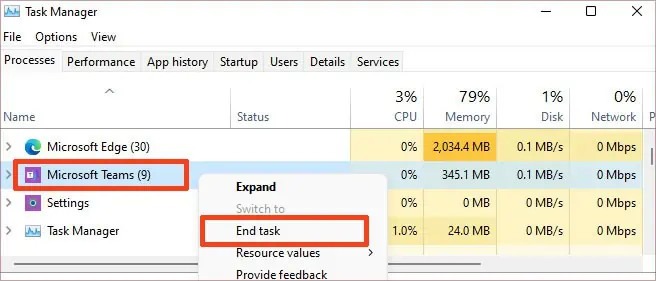
- On your keyboard, hit the combination Ctrl + Shift + Esc to open Task Manager.
- On the Processes tab, locate the app you want to close right-click on it.
- Select End Task.

On Mac
- Enter the shortcut, Option + Command + Esc to open Force Quit Window.
- On the window, select the application you want to close.

- Click on the Force Quit button.
Grant Camera Permissions
Teams cannot access your camera if you haven’t granted the app the necessary permissions. To access devices like your camera and microphone, applications need special permissions for security reasons.
You can grant these permissions from the settings of your device. Using the Teams web version, you can find these permissions in the Site Settings. Refer to the steps mentioned below to grant camera access to the MS Teams application:
On Windows
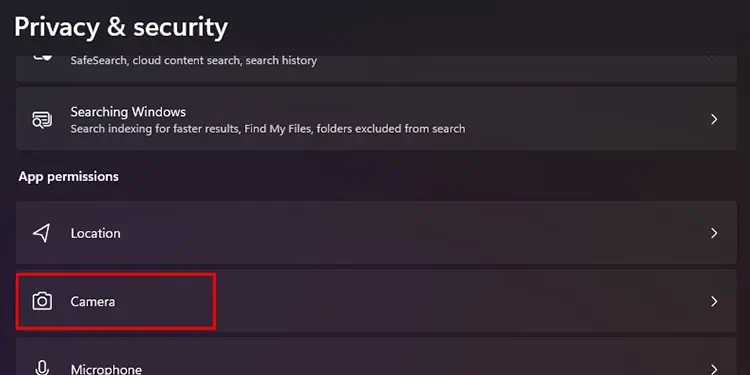
- On your keyboard, hit the combination Windows Key + I to open the Settings application.
- From the sidebar, select Privacy & Security.
- Scroll down to App Permission and select Camera under it.

- Turn the slider next to Let apps access your camera.
On Mac
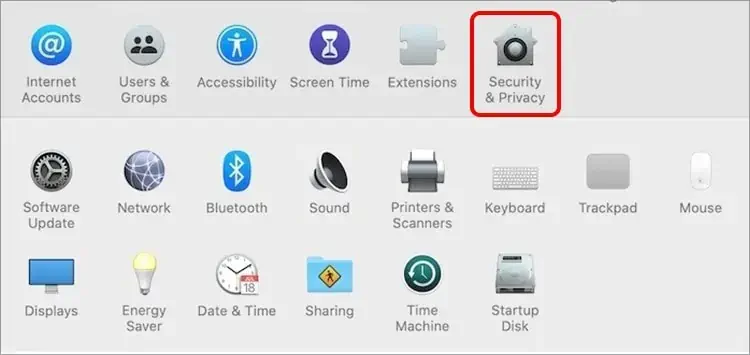
- Launch the Apple Menu
- Select System Preferences > Security & Privacy.

- Hop on to the Privacy tab.
- From the sidebar on the left, click on Camera.

- Click on the padlock in the bottom-left corner.
- Change the camera permissions for MS Teams.
On Browser
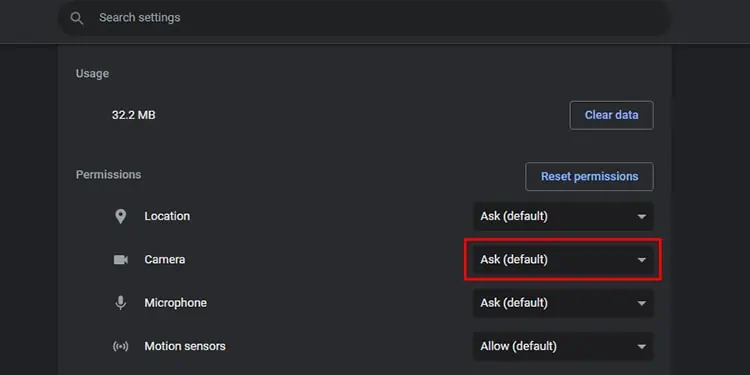
- On the window running the Teams meeting, click on the padlock icon.
- Hop on to Site Settings.
- Under Permissions, drop the menu down next to Camera.

- Select Allow.
Switch Camera Devices
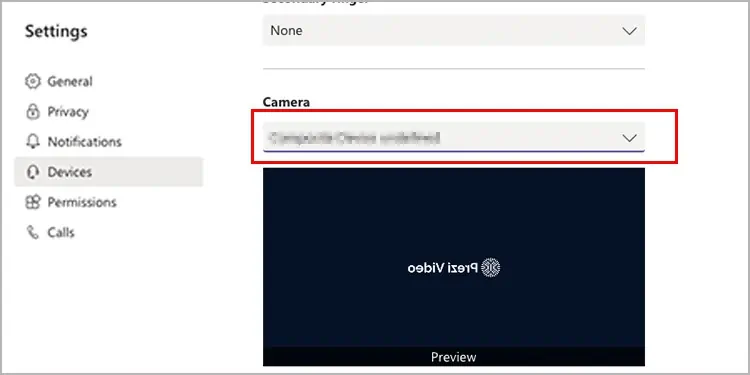
If you have more than one webcam connected to your PC, Teams could be actually using the other peripherals. You need to switch the webcam in use from the device settings in the Teams application.
Here are the steps you can refer to while switching camera devices in MS Teams:
- Open the MS Teams application.
- Select the horizontal three-dot menu and head to Settings.

- Click on Devices from your left.
- Under the Camera section, click on the drop-down menu and select your active camera in use.

Repair/Reset Teams
When some files go missing or corrupt in a program, certain functions in the application malfunction. It is possible that the problem is that the program files for your camera do not work like it should on the Teams app.
You can fix this issue by repairing or resetting the MS Teams application. Repairing the application will scan through the program files for any missing or corrupted files. Windows will replace the corrupted files with a new, functioning one. Similarly, it will add the missing files.
Resetting the application will do the same, except it will also erase all data from the application. This eliminated the chances of any bugs that may be interfering with the features in the Teams app.
This feature is only available in Windows. If you own a Windows and wish to repair or reset your application, follow these steps:
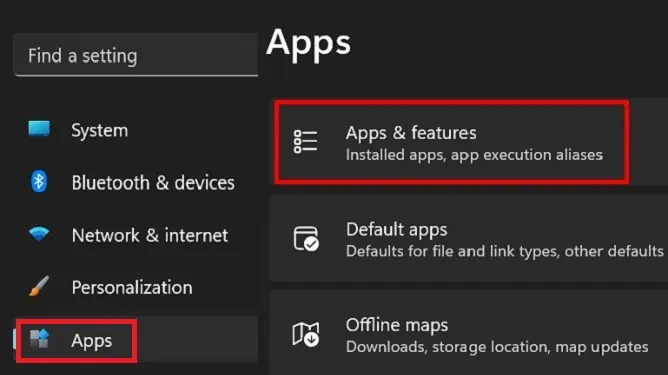
- Launch Start to open the Settings app.
- Hop on to Apps from the navigation panel to the left.
- Click on Apps & features.

- Scroll down to Microsoft Teams and select the vertical three-dot menu next to the app name.
- Select Advanced options.
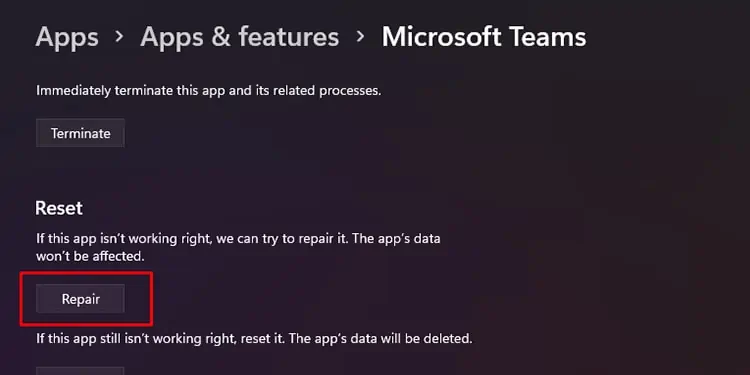
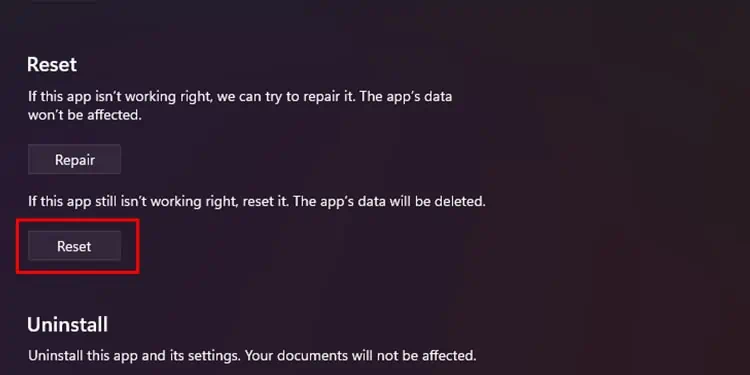
- Scroll down to Reset:
- If you want to repair the app, click the Repair button.

- If you want to reset the app, click the Reset button.

- If you want to repair the app, click the Repair button.
Update OS
When you leave your operating system outdated for long, it will severely impact the system. The system fails to maintain a connection between the software and the hardware. Your camera may not be working because your system may have failed to establish communication with your camera.
You need to update your operating system periodically. When you update your system, it not only maintains your system’s functioning but also protects it from any security vulnerabilities. Additionally, updates generally push resolutions to bugs from the previous update.
Follow these steps to update the operating system on your device:
On Windows
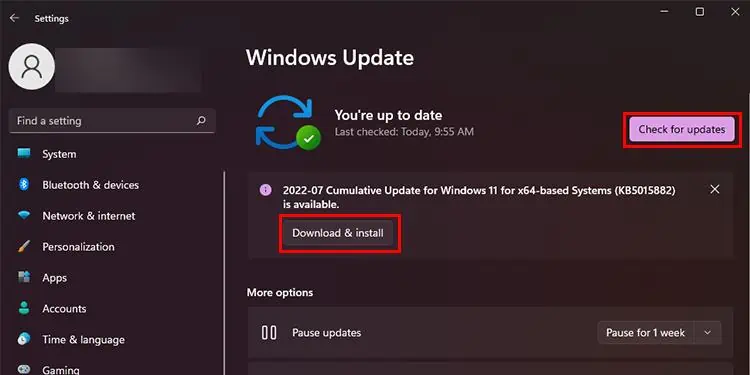
- On your keyboard, use the shortcut Windows key + I to open the Settings app.
- From the sidebar to your left, select Windows Update.
- Click on Check for updates.

- If you see any pending updates, install them.
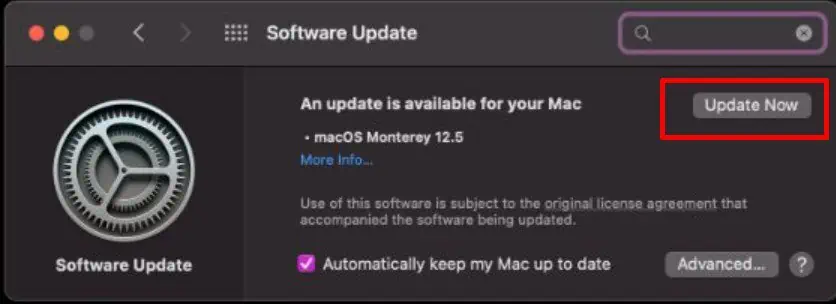
On Mac
- Launch Apple Menu > About This Mac.
- Head to Software Update.
- On the Overview tab, select the Software Update button.
- If you see any pending updates, select Update Now.


