Are you getting the “Failed to send” error message every time you send a message in teams? Or do you notice the “You can’t send a message because you are not a member of the chat” error?
Such error messages most likely appear when there’s a bug on your device or the application. Similarly, slow internet connectivity can also be why the messages are not being sent. So, firstly check if you have a stable internet connection before we get into this article.
Why is Microsoft Teams Message Not Sending?
Let’s look through the list of problems that can cause your MS Teams message to not send before jumping to the fixes.
- Connectivity issues
- Too many apps running in the background
- Outdated version of MS Teams application
- Firewall security
- Corrupted Cache Files
- Outdated Operating System
- MS Teams under maintenance
Sometimes, the channel owner might not allow selective members to send a message in the channel. If you think selecting these members was an error, you can request the owner directly.
How to Fix Microsoft Teams Messages Not Sending?
Restarting your device is always the best troubleshooting option to start. It tends to clear all the data from RAM and make your device perform much smoother. Glitches like not sending messages are common for big platforms such as Microsoft Teams. When this happens, we suggest you use the web version if you’re using the desktop/mobile app version. Following these methods should fix your issue.
Force Quit Microsoft Teams App
When your Teams app isn’t responding properly or showing glitches like a message not sending, we suggest you force quit the application. It shuts down the application and helps it function properly when reopened.
On Windows
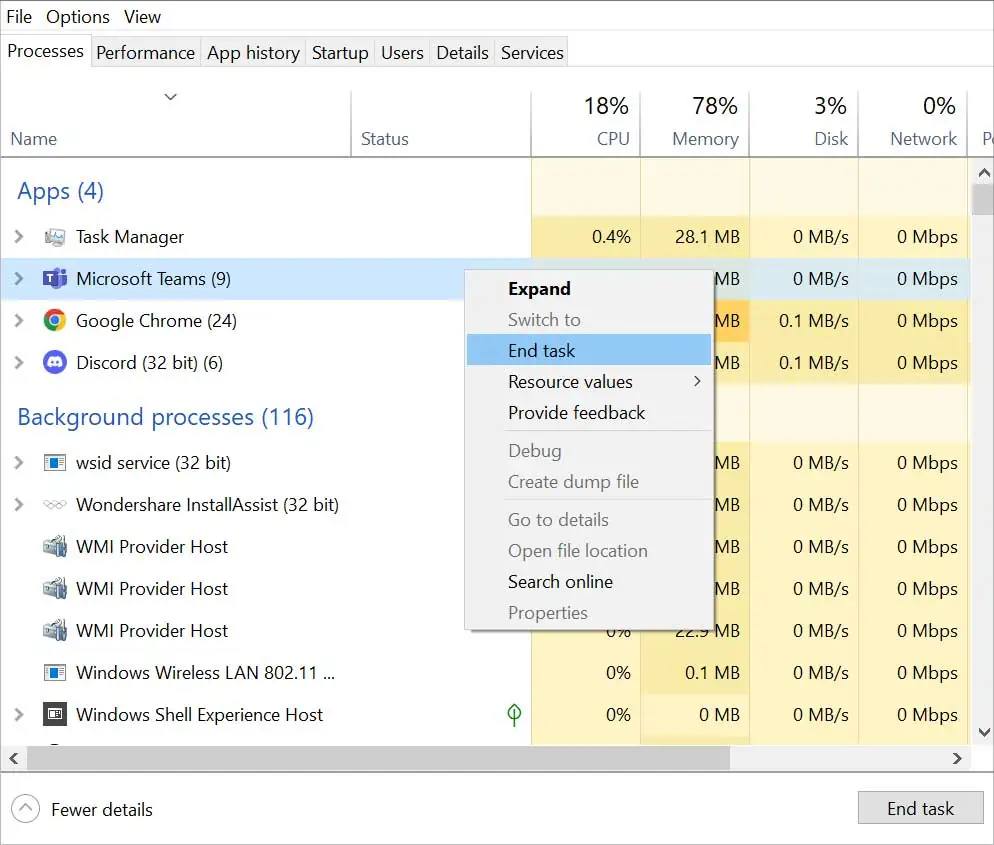
- Place your cursor on the Taskbar and right-click it.
- Select the Task Manager option.
- Right-click on Microsoft Teams and press the End Task option.

On Mac
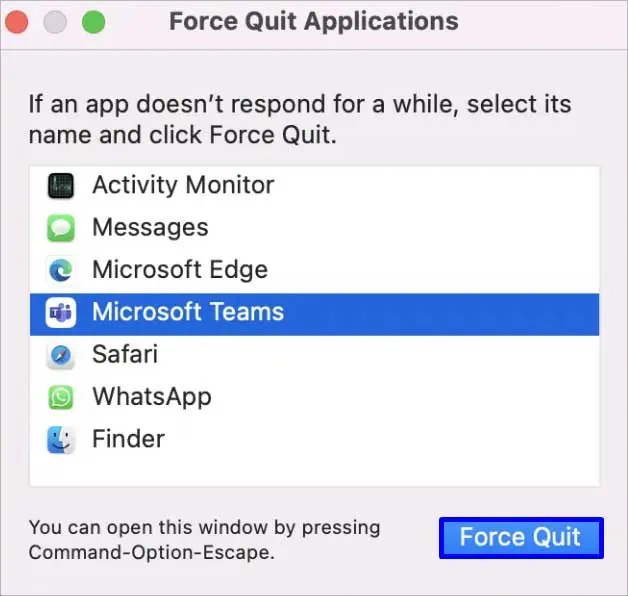
- Click on the Apple Menu and open Force Quit.
- Search for the Microsoft Teams application, select it and click the Force Quit button.

On Android
- Long press on Microsoft Teams app on the homepage.
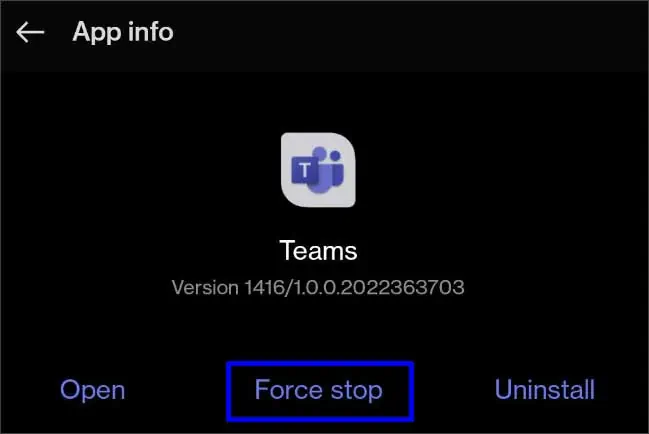
- Press the App Info and tap on the Force Stop button.

- Tap Force Stop on the confirmation box too.
Check For Updates
If you’re using outdated versions of Teams, such errors may appear on your application. If that’s the case, updating the teams app by going to the respective store you got it from should fix this issue.
On PC
Even though applications on the desktop get updated automatically, it is advised for you to check if any updates are available within the application.
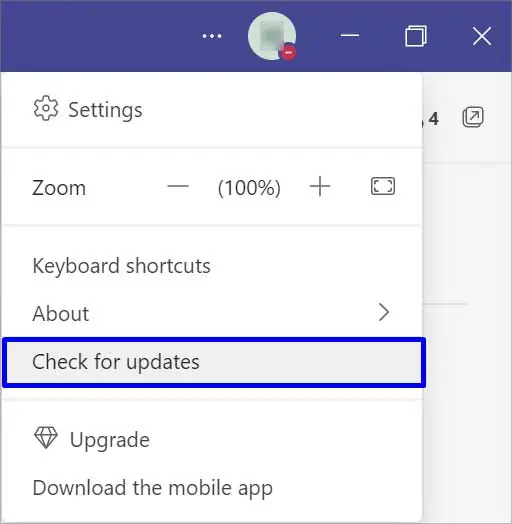
- Open Microsoft Teams.
- Tap on Three Dots and click on Check for updates option.

On Phone
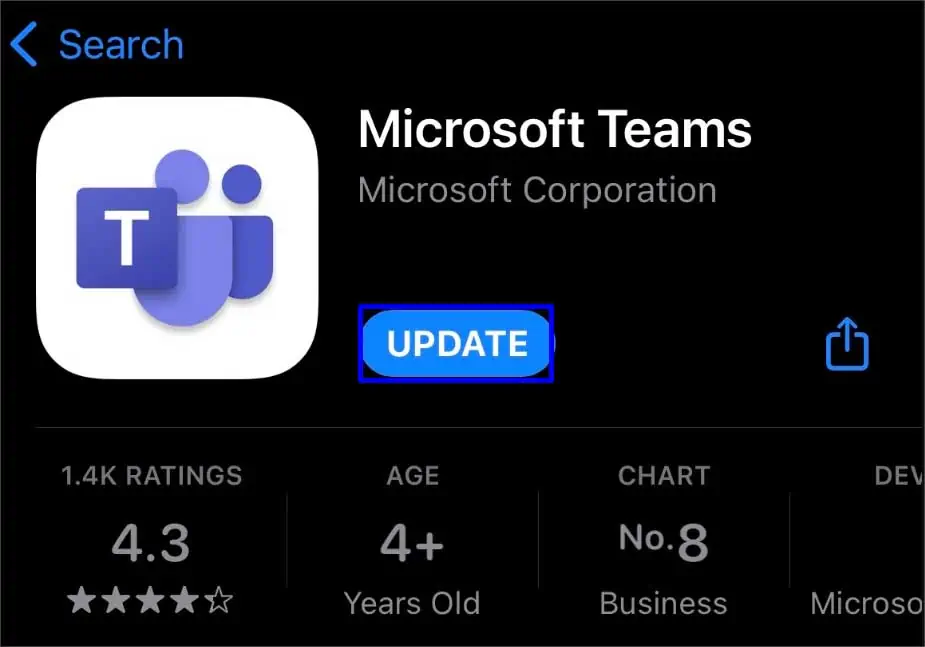
- Go to the App Store/Play Store.
- Search for Microsoft Teams on the search bar.
- Tap on the Update button beside it.

Similarly, you may also update the operating system of your device. Glitches like this are common when the app and your system aren’t updated.
Re-Login
When you log out and log back in, the glitches you were facing are likely to get solved. Here’s how you can log yourself out and log back in.
On PC
This is applicable for both application and web versions.
- Launch Microsoft Teams.
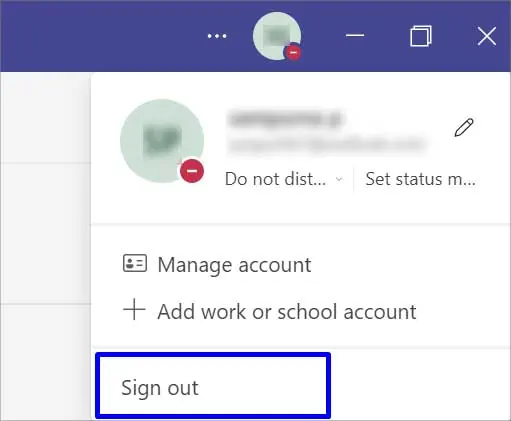
- Tap on your Profile on the top right.
- Click on the Sign Out option.

- Open Teams again and sign in with your login credentials.
On Phone
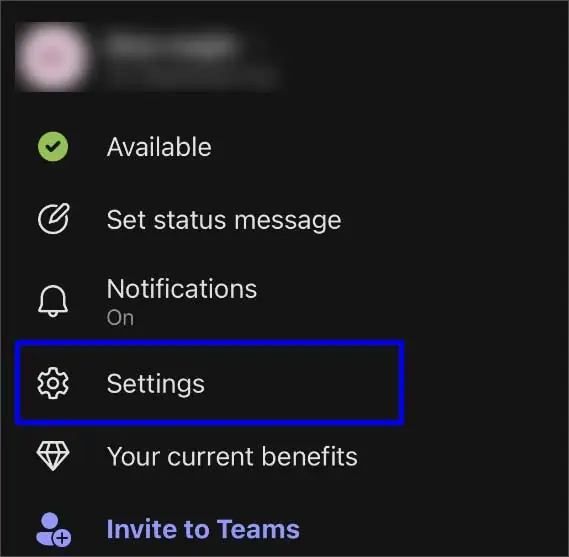
- Open Teams and tap on your Profile on the top left.
- Select the Settings option.

- Scroll down and tap Sign out.
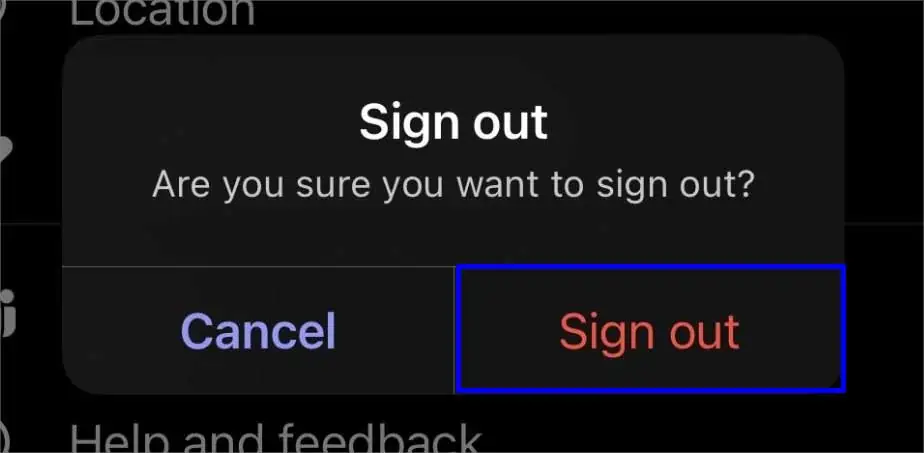
- Select the Sign out option on the confirmation box.

- Similarly, sign in again with your login credentials.
Contact Channel Owner
If you receive the “you can’t send a message because you are not a member of the chat” error while sending a message, you might not be allowed to send a message to that specific channel.
Only owners can make changes to the chat. When this happens, you can send them a message regarding this issue personally in a direct message. Address your situation, and they might make sending texts on that channel possible.
If you are the channel owner, here’s what you can do. You can only perform this for the desktop versions of Teams.
- Open Microsoft Teams and go to the Channel.
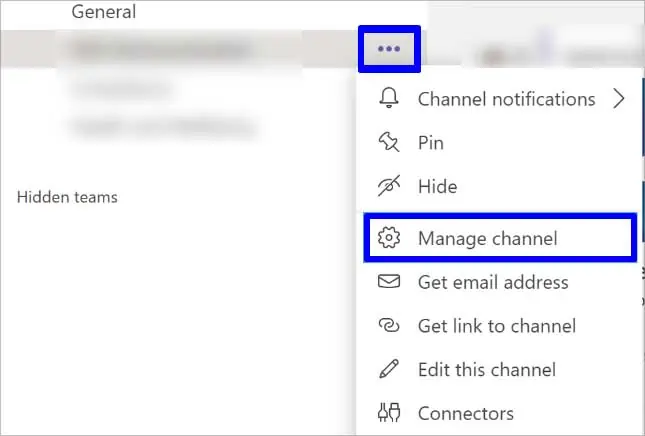
- Click on the Three dots on the left side beside the channel name.
- Select the Manage channel option.

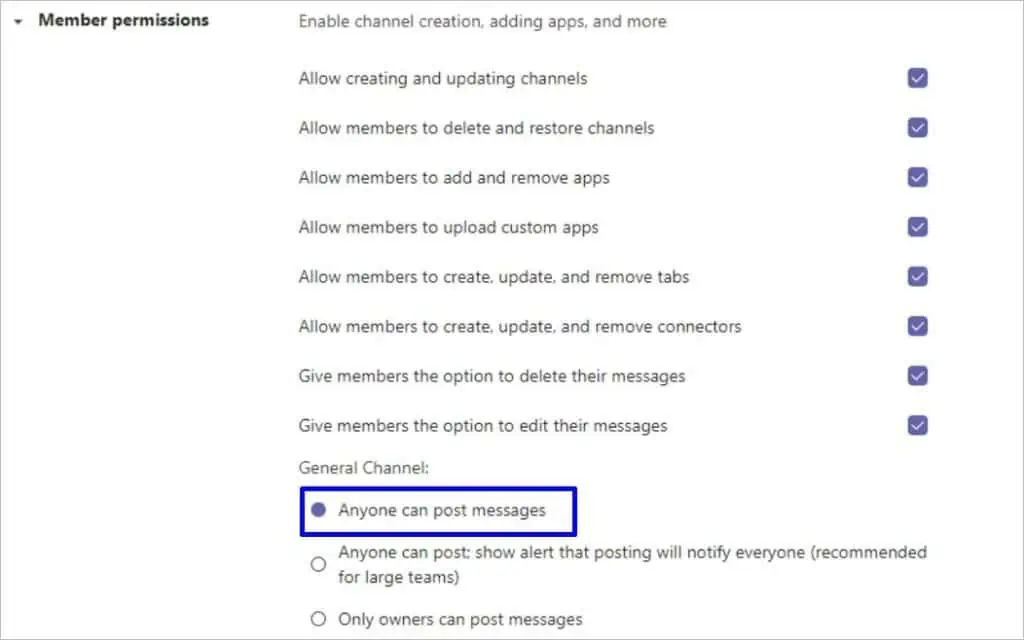
- Under General Channel, on the Permission tab, select “Anyone can post messages.”

Clear Teams Cache Data
Clearing Microsoft Teams cache data helps to solve glitches like not being able to send messages. This is because such data tends to take up a large amount of storage on your device. The data may turn corrupt, which can cause connectivity issues as well as the message not sending problem.
On Windows
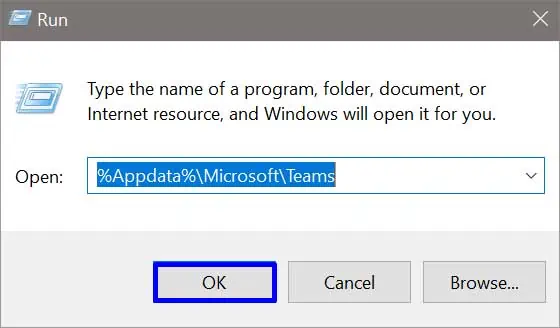
- Click on the Search button on the taskbar and search for Run.
- Click Open and type
%Appdata%\Microsoft\Teamson the search bar. - Click on the OK button.

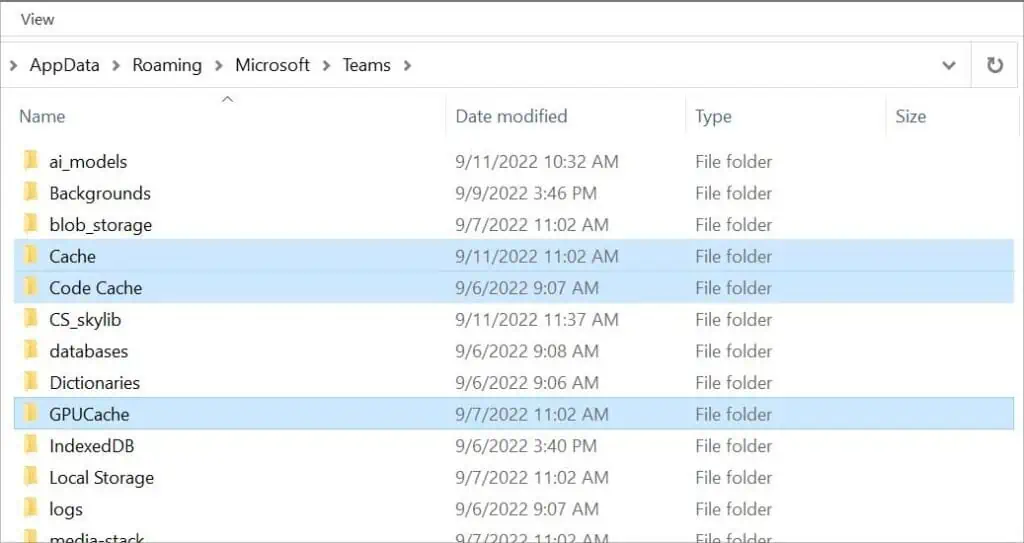
- Select all the Cache Folders while holding down the Ctrl key.

- Right-click it and select the Delete option on the menu.
On Browser
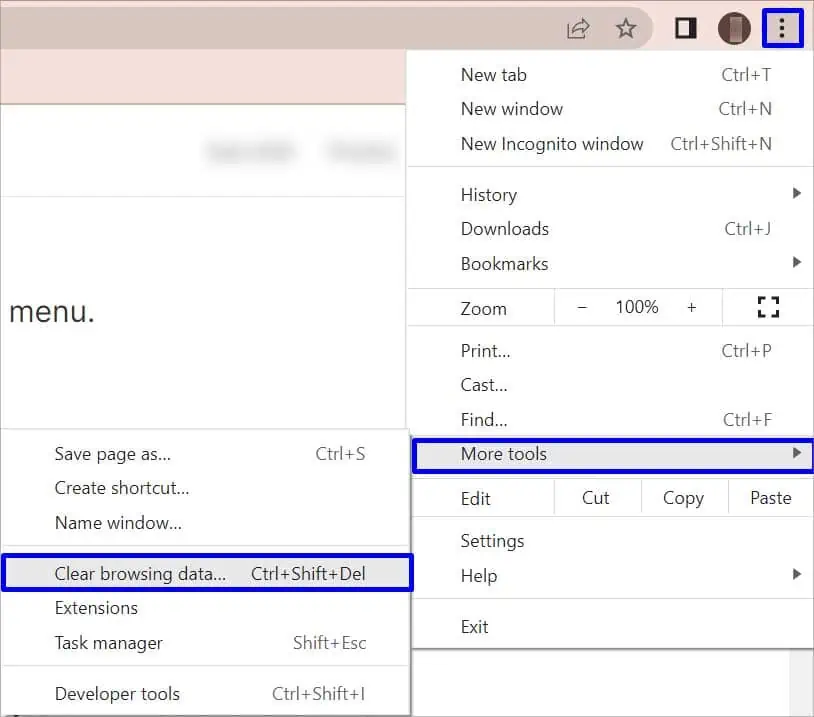
- Open your web browser and click on the Three Dots.
- Select the More tools option.
- Click on the Clear browsing data option.

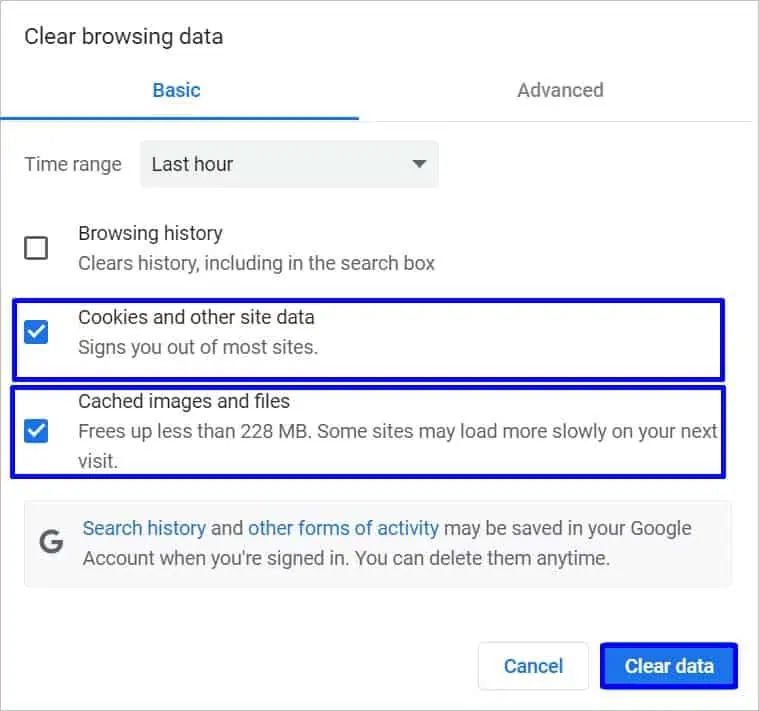
- Select Cookies and other site data, Cached images, and files, and click the Clear data button.

On Android
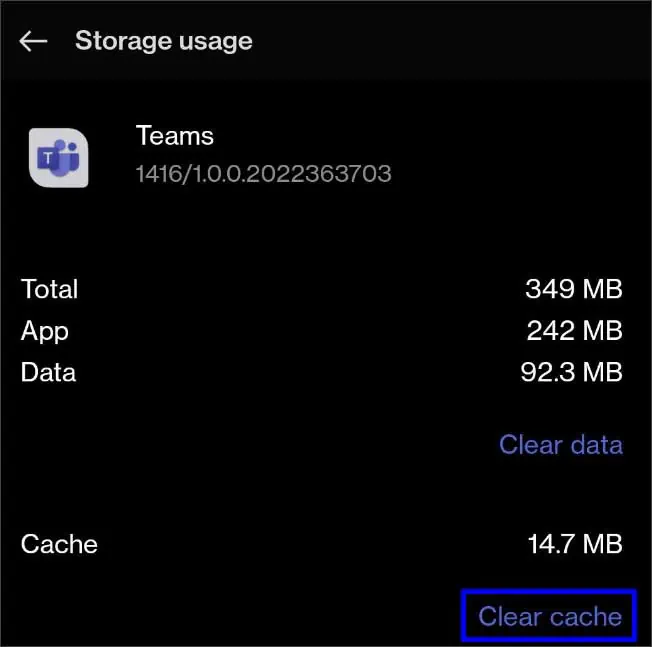
- Go to Settings.
- Select Apps option and search for Teams.
- Tap on storage and press Clear Cache.

On Mac
- Open Finder and click on Go to Folder under the Go menu.
- Type
~/Library/Application Supporton the search bar and press Go. - Search for Microsoft Teams and open it.
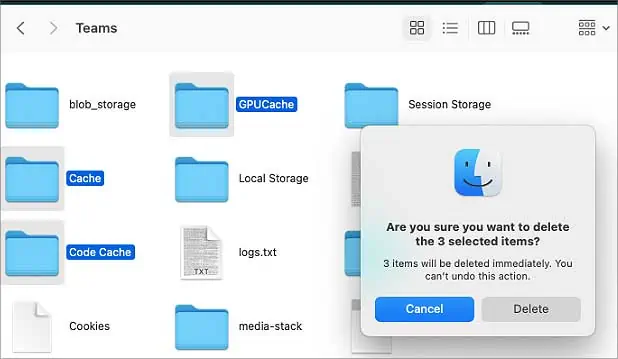
- Select all the Cache Folders and press Command + Option + Delete keys.
- Click on the Delete button when the confirmation box appears.

Type Instead of Using Dictation
Many iOS users seem to have an issue with dictation. The text appears to disappear even after hitting the Send button when users use dictation to send messages. This is a bug in the Teams app itself. In such cases, you could try typing instead of using spoken text. You may also try using the web version if there’s a rush. If this doesn’t work, follow the next step.
Reinstall Teams App
When you remove an app from your device, all the related files will get deleted from the computer’s hard drive. Similarly, when you install them back, all the files will get downloaded as new and fresh ones. Uninstalling and reinstalling the app might fix your messages not sending issues.
On Windows
- Click on the Start button and go to Settings.
- Click on Apps.

- Under Apps & Features and navigate to Microsoft Teams.
- Right-click on it and press the Uninstall button.
- Again, click the Uninstall button and select OK.

- Now, go to Microsoft Store and install the App the same way you got it before.
On Mac
- Click on Go and select Applications.
- Search for Microsoft Teams on the search bar.
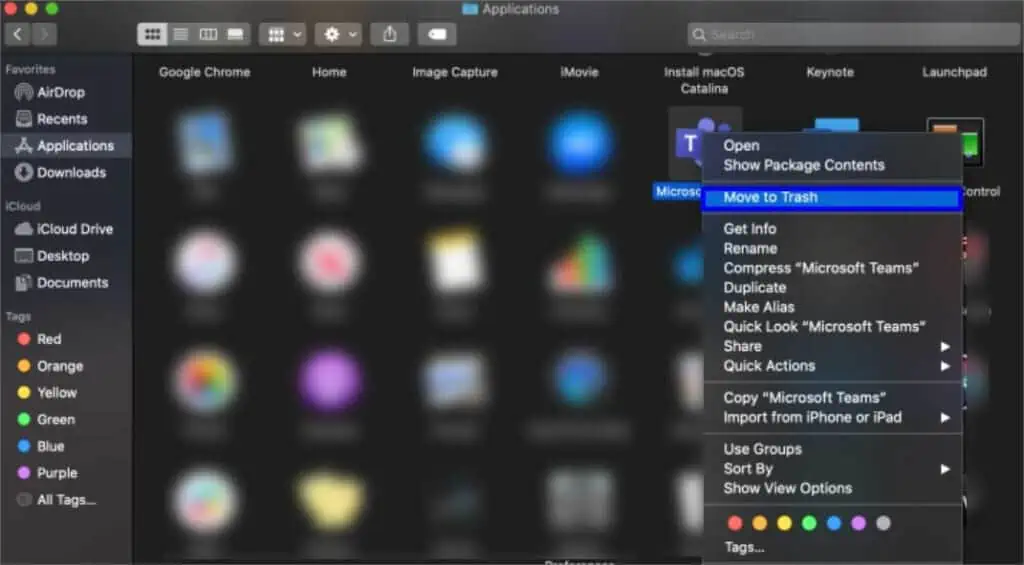
- Right-click it, and press the Move to Trash option.

- Select the Delete option on the confirmation box.
- Now, go to AppStore and install the App the same way you got it before.
On Phone
- Long press on the Teams app on your homepage.
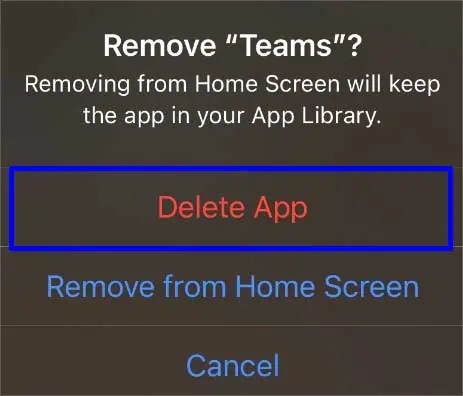
- Press the Uninstall / Delete App option.

- Go to AppStore/Play Store and install it again.
Allow Apps to Communicate Through Firewall
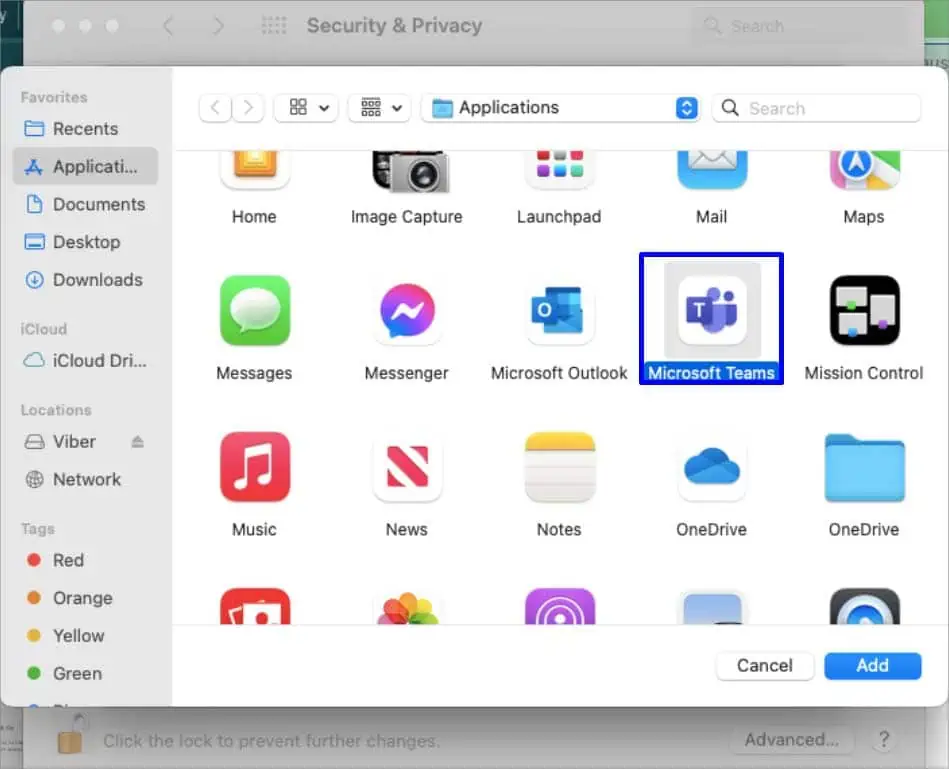
A firewall is a security system between unauthorized network traffic and your computer. Turning this on prevents your device from viruses and threats. However, it might also prevent you from interacting with servers. The permission to allow apps to communicate through the firewall should be granted after installation. If it’s not permitted yet, here’s how you can do it.
On Windows
- Click on the Search bar and search for “Allow an app through Windows Firewall.”
- Click the Open tab.
- Scroll down and select Teams.exe.
- Press the Change Settings option and click Remove.

- Click on the Yes option in the confirmation box.
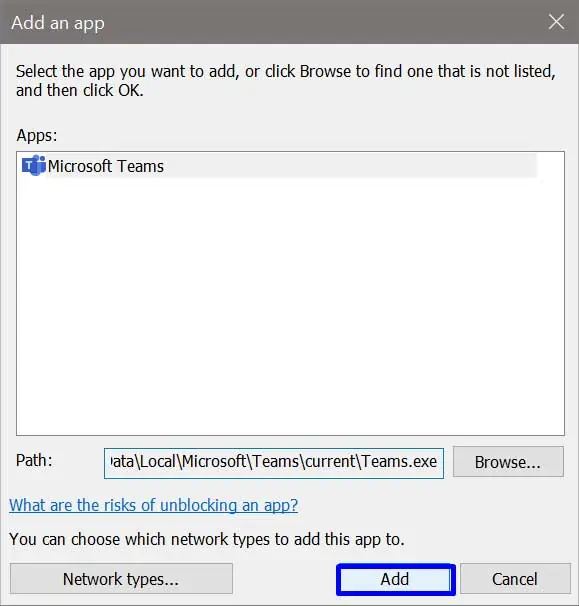
- Then, click on Allow another app right below it.
- Click on the Browse option and search
C:\Users\[your device name]\AppData\Local\Microsoft\Teams\current - Click on the Open button.
- Press the Add option and click on OK.

On Mac
- Go to the Apple menu and click on System Preferences.
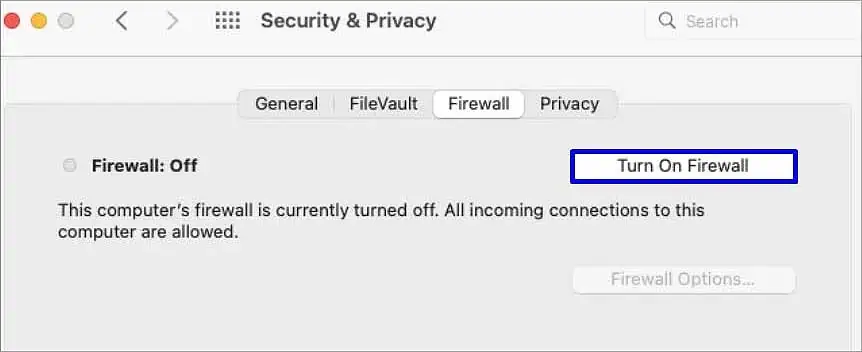
- Click on Security & Privacy and open the Firewall tab.
- Click on the Lock icon on the bottom to enable making changes.

- Type in your Username and Password to unlock the Security & Privacy preferences.
- Press the Unlock button and turn on the firewall by pressing the Turn On Firewall option beside it.

- Then, click on Firewall Options.
- Press the Plus icon and search for Microsoft Teams under the Application tab.

- Select it and click on the OK button.
Troubleshoot the Internet Connection
If you aren’t connected to the internet or don’t have a stable internet connection, messages won’t get sent. So, check your internet connectivity and make sure you have access to high-speed internet.
Firstly, reconnect your Wi-Fi or cellular data. You can also try replugging the cables of your router if the connectivity issue isn’t just on your device.
Alternatively, use an ethernet cable to connect your device directly to the router. Finally, you can contact your service provider and ask for professional help if no solutions work.

