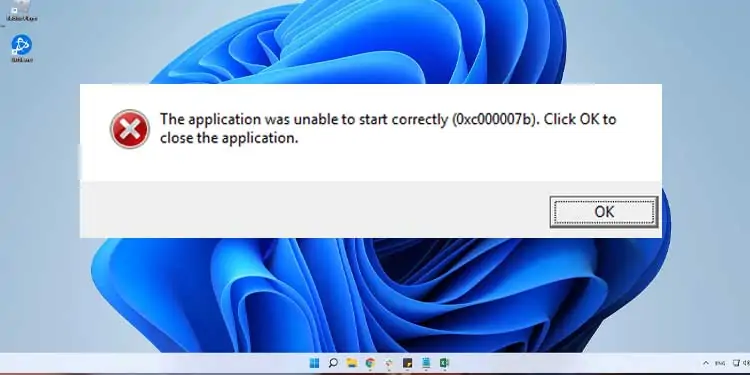
When the error “The application was unable to start correctly (0xc00007b)” pops up, it stops the game or a program you are trying to run. This error usually means that the application you are trying to run is a 32-bit application without a 32-bit DLL (Dynamic Link Library) file. However, incorrect Redistributable on your computer may also activate this error message.
Although you get the error message saying the application could not start correctly, there are some fixes you can try to repair the program. We have listed a few methods you can try to fix the 0xc000007b error.
What Stops an Application from Starting Correctly?
- Error in .net framework
- 32-bit OS trying to run a 64-bit application.
- Corrupted or missing DLL
- Visual C++ Redistributable Runtimes not installed properly
Fixing “Application was unable to start correctly (0xc00007b)” error
Here are a few fixes that you can try to fix the issue “The application was unable to start correctly (0xc00007b)”.
Reinstall Visual C++ Redistributable
The Microsoft Visual C++ Redistributable file is a Dynamic Link Library (DLL) file.
Programs or games created with Microsoft’s Visual Studio software development environment use this file.
The program you are trying to run may use a specific version of VC (Visual C++ redistributable) that may not be available on your computer. Therefore, your program can not start correctly.
We need to install the required VC redistributable that your program requires to fix this problem. We can also download the Visual C++ Redistributable Runtimes All-in-One, containing all the VC runtimes. However, to install the All-in-One Redists, we first need to uninstall all existing VC Redists.
Uninstall Visual C++ Redistributable
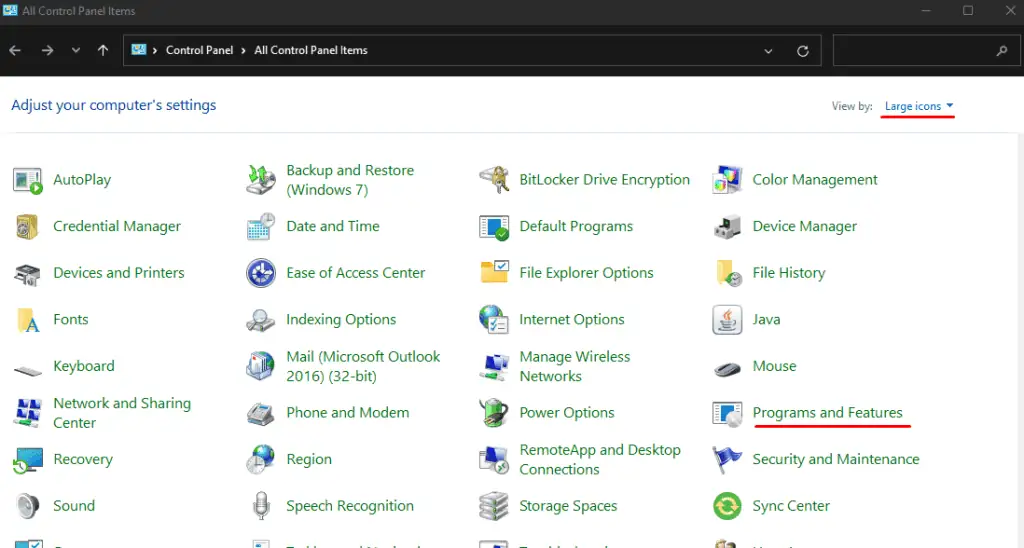
- Click on the Start menu and search Control Panel.
- Select View by as Large icons and click on Program and Features.

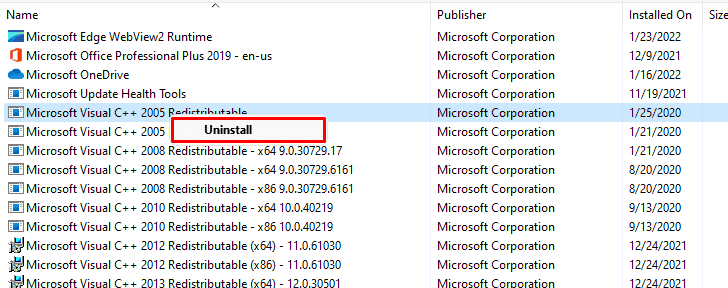
- Here, you will see the list of all the programs installed on your computer. Right-click Microsoft Visual C++ Redistributable and click Uninstall.

- Repeat this step for all VC redistributable.
Clean Cache Files
Once all the VC Redists are uninstalled, clean any leftover cache files using the following command in Command Prompt as Admin.
dism.exe /online /Cleanup-Image /StartComponentCleanup
Restart your computer once the cleanup process is complete.
Install All-in-One Runtimes
Now, to reinstall the VC Redistributable, download the All-in-One Runtimes. Once the download is complete, follow these steps.
- Unzip the file that you downloaded.
- Run the file called install_all.bat as administrator.
- Wait for all the Visual C++ Redistributable installation to complete.
- Restart the computer once you have installed all the Redists files.
If you still can not start the application because of the error message, you may need to ensure the .NET Framework is enabled.
Enable .NET Framework
The .NET Framework is a Microsoft framework for developing and operating Windows applications. Some application uses the .NET Framework to run. Therefore, the program or game will not start until you enable the .NET Framework.
You can follow these steps to enable the .NET Framework.
- Click on the Start menu.
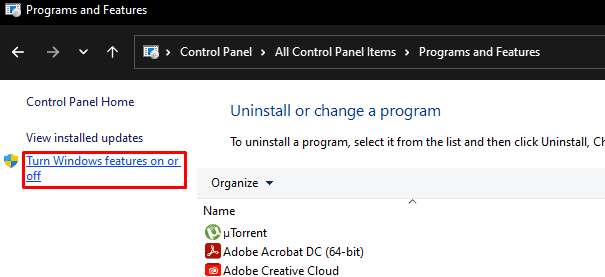
- Go to Control Panel > Program and Features.
- Click on Turn Windows features on or off.

- A Windows Feature Dialog box will open.
- Make sure that all versions of the .NET Framework are checked.

- Click OK.
- It will take a few seconds for Windows Update to download the required files. After it is complete, click on Restart Now to apply the changes.
Now, try to open your application to see if it starts correctly. If you’re still getting the error message, please continue with the steps below.
Install DirectX End-User Runtime
Basically, DirectX allows programs, especially games, to “speak” to hardware at a basic level. Therefore, if the computer has a corrupted DirectX API (Application Program Interface), it may not be able to run the desired programs.
The Microsoft DirectX End-User Runtime installs several libraries from DirectX SDK (Software Development Kit). So, if you have a corrupted DirectX file, installing DirectX End-User Runtime may start your application correctly.
Download the file dxwebsetup.exe from the internet. Once the download is complete, install the executable file and restart your computer.
Register the DLL file
A program will also not start if the DLL (Dynamic Link Library) file it is trying to access is not registered. Sometimes, some DLL files will get installed but not registered during an installation or an update. Therefore, the program cannot start correctly unless we register them. Follow these steps to register the DLL files.
- Press the Windows + R key simultaneously.
- Type “cmd” and press Ctrl+Shift+Enter. This will open Command with admin privileges
- Type the following command.
for %i in (%windir%\system32\*.dll) do regsvr32.exe /s %i
Now, wait for all the files to re-register. After the process is complete, you can restart the computer.
To register a specific DLL file, type the following command.
regsvr32 <path and filename of dll>
Upgrade from 32 to 64-bit
A 32-bit Operation System (OS) cannot run an application that is 64-bit. However, backward compatibility is possible if you want to use a 32-bit application on a 64-bit OS. Therefore, you should definitely upgrade to a 64-bit OS as most applications nowadays are 64–bit.
Run check disk
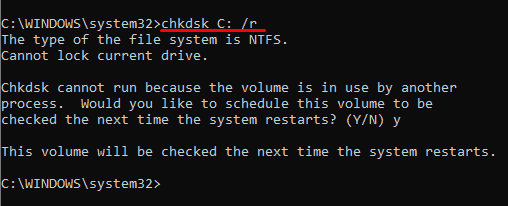
The check disk command is a feature in Windows that lets you scan the hard drive for corrupted files and bad sectors. You can use the chkdsk command on the drive containing the program if it suffers from this error.
Follow these steps to run the check disk command.
- Press the Windows + R key.
- Type “cmd” and press Ctrl + Shift + Enter.
- Now type any one of the following commands according to your requirement.
X should be replaced by the name of the drive you want to scan, like C, D, or E.
- chkdsk X: /f: Fixes errors on the drive.
- chkdsk X: /r: Locates and recovers readable data from damaged sectors. This command also executes /f.
- chkdsk X: /v: Shows path and filename of all files running a check.

Now, you can wait for the process to complete. When the process is finished, you’ll get a detailed report about your hard disk.
Run Program as Admin
When you run a program as an administrator, you get certain privileges when you run the program. These privileges include special access to resources that would otherwise be off-limits.
So, if the application has some access issues and does not start correctly, running the program with admin privileges may fix the problem. To run the program as an administrator, right-click the executable or .exe file (not shortcut file) and click on Run as Administrator.
If this fixes your problem, you can follow these steps to run your program as admin when you open them.
- Right-click on the executable file and click on Properties.
- Click on the Compatibility tab.
- Check the Run this program as an administrator.
- Click on Apply and OK.
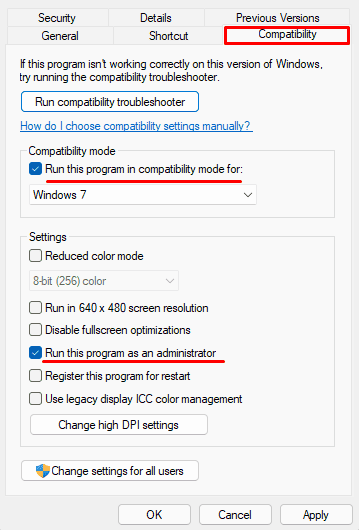
If running the program as admin does not work, try running the program in compatibility mode for Windows 7. In the Compatibility tab, under Compatibility mode, check the Run this program in compatibility mode for. Now, select Windows 7. Click on Apply, then OK.
Update Windows
The application may also get the error message if the windows are not up-to-date. Try running the application in the latest version of Windows to see if it starts. Follow these steps to update Windows.
Press the Windows + I key. Go to Windows Update (Security & update > Windows Update for Windows 10). Click on Check for Updates to download any pending updates. If there are any pending installations click on Install now. Once the installation is complete, you can restart your computer.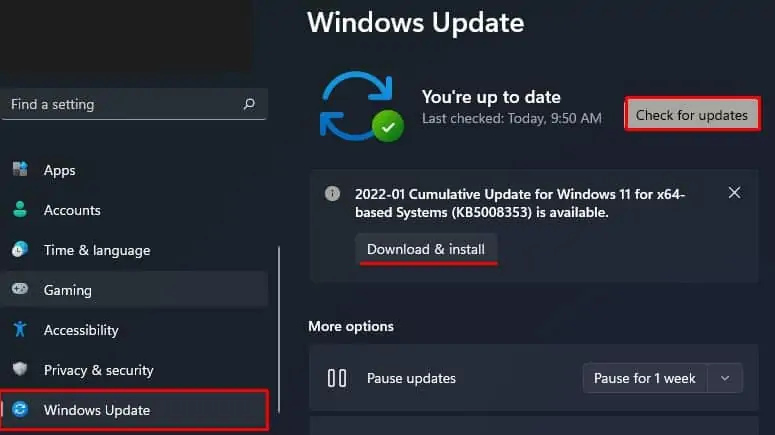
Reinstall Program
If none of the solutions work, uninstall and reinstall the program itself. When you reinstall a program, it installs all required DLL files and Visual C++ Redistributable. Previously corrupted files will also get a clean install, which may fix the problem with the program startup.

