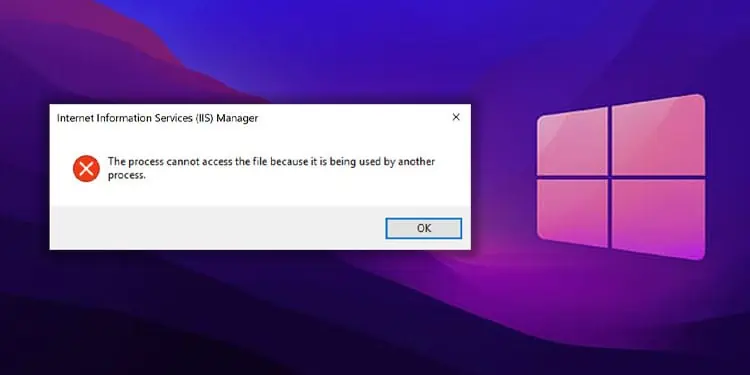
When running an application, it will access required files from the system. If an application tries to access a file that is currently in use by another process, you get this error message.
The error message may pop up during application installation, code compilation, or when running an app. Another common instance where you might see this error message is when starting a website through IIS.
To fix this, you need to close the process that is using the file. However, the problem is finding the process. So, you can first try locating and ending the process using the Resource monitor.
Check Using Resource Monitor
When the error message pops up, it might also give you the name of the file that is in use by another process. If it does, you can use a Windows built-in utility named Resource Monitor to check the process that is using the file.
To check the process using a resource monitor,
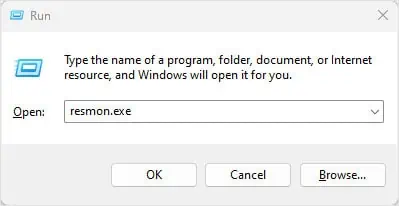
- Press Windows + R, type
resmon.exe, and press Enter.
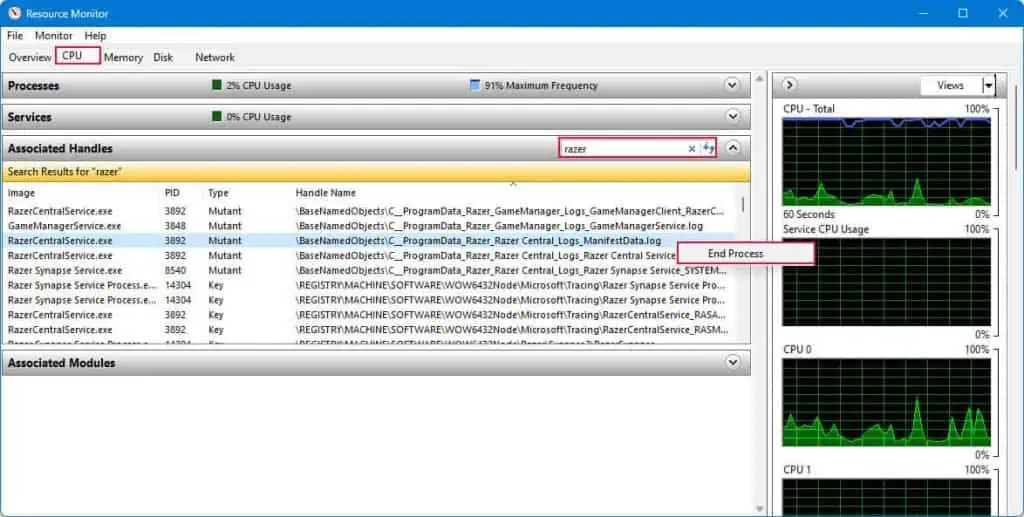
- Make sure that you are in the CPU tab.
- Expand Associated Handles.
- Type the filename in Search Handles. You should be able to see the file in the search result.
- Right-click on the file, and select End process.

- The new process should now be able to access the file.
Close Related Process/Application
The error message may not always display the file name. You might find it difficult to locate the app that is using the file. So, try closing any unnecessary application that could cause conflicts with the process that you are trying to run.
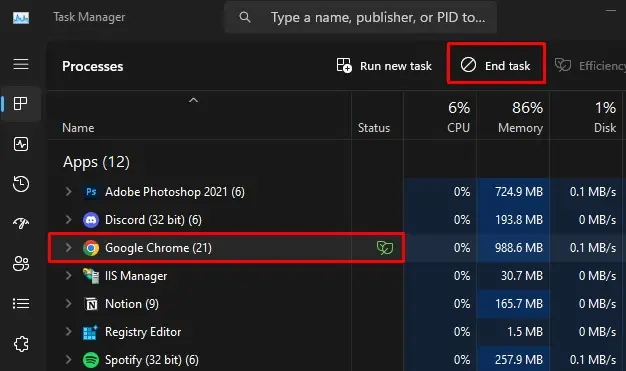
- Press the Ctrl + Shift + Esc.
- Once the Task Manager opens, check any application that might be using the file that you are trying to access.
- Click on the application and select End Task.

Run Application/Process as Admin
Running an application as an admin allows the process to have access to resources that were not available previously. If possible try running the application as admin and check if the error still pops up.
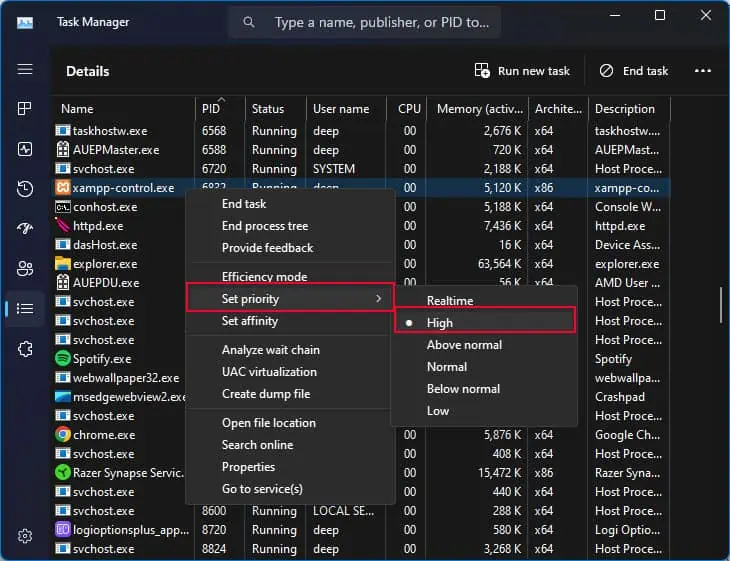
If that does not work, try running the application in high-priority mode. This will also allow the system to allocate more resources to the application which might fix the issue. To do this,
- Open Task Manager.
- Go to the Details tab.
- Right-click on the application/process that is causing the issue.
- Click on set priority and set it to High.

Reinstall Application in Safe Mode
You might also get an error message when trying to install an application. According to most users in Q/A forums, the error message pops up when installing games such as Roblox and Escape from Tarkov.
They’ve also reported that installing the game in safe mode with networking fixed the issue for them.
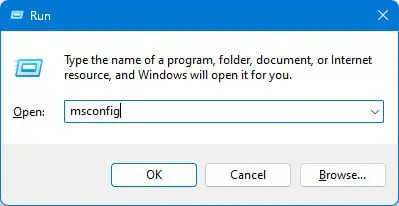
- Press Windows + R.
- Type
msconfigand press enter. This will open System Configuration.
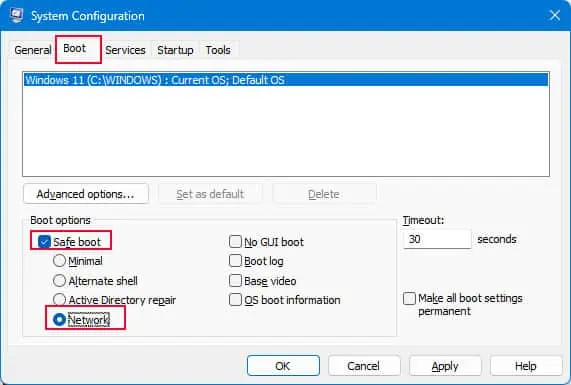
- Go to the Boot tab and check Safe Boot and Network.

- Click Apply and OK.
- Once the PC boots on safe mode, try installing the application.
- Again open System Configuration and disable Safe boot and restart the PC.
Disable Antivirus and Windows Defender
Application or a Process may run into issues when trying to access a file that is currently being scanned through Windows Defender or any other antivirus application. Accessing file might take a long time or might even give you an error message that says the file is in use by another process.
To make sure that this is not the case, try disabling any threat protection on your system. To disable Windows Defender, follow these steps.
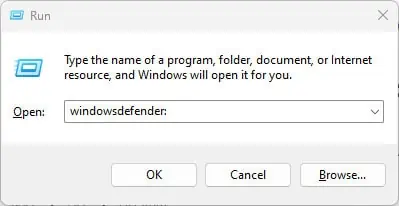
- Open run, type
windowsdefender:and press Enter.
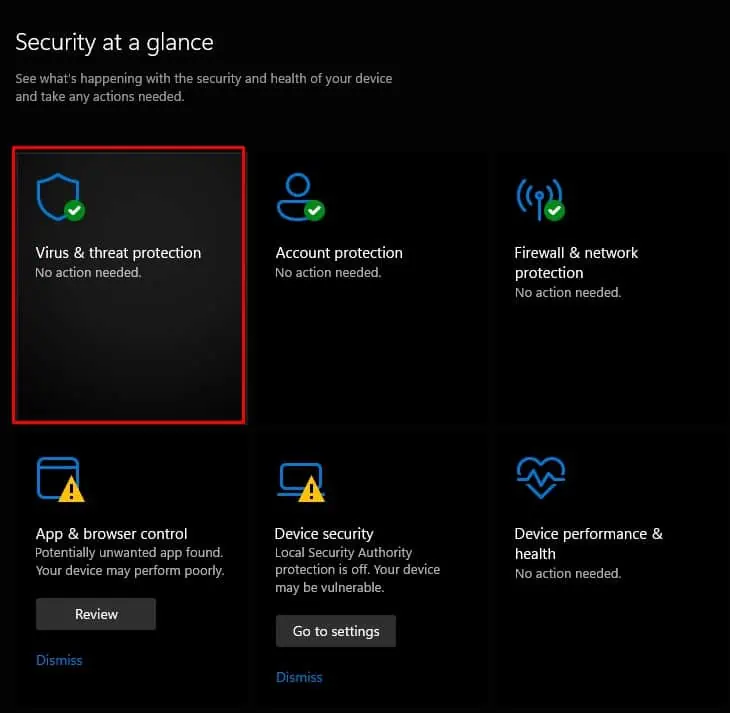
- Click on Virus and threat protection.

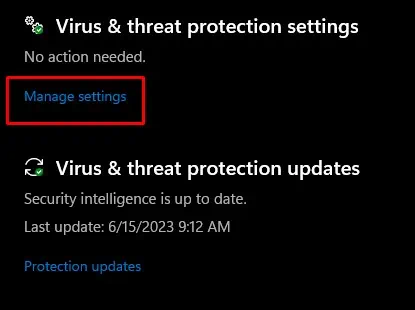
- Under Virus and threat protection settings select Manage settings.

- Disable Real-time protection.

- Similarly, if you have any third-party antivirus applications, disable protection on them as well.
Now try running the process that was causing the issue to see if it can access the file. Once the process completes its execution, make sure that you enable Windows Defender/antivirus.
Reset Network
Several users in Q/A forums have also reported that resetting the network fixed the issue for them. By resetting the network, it reverts all network settings to its default values.
To reset the network,
- Press the Windows + I key.
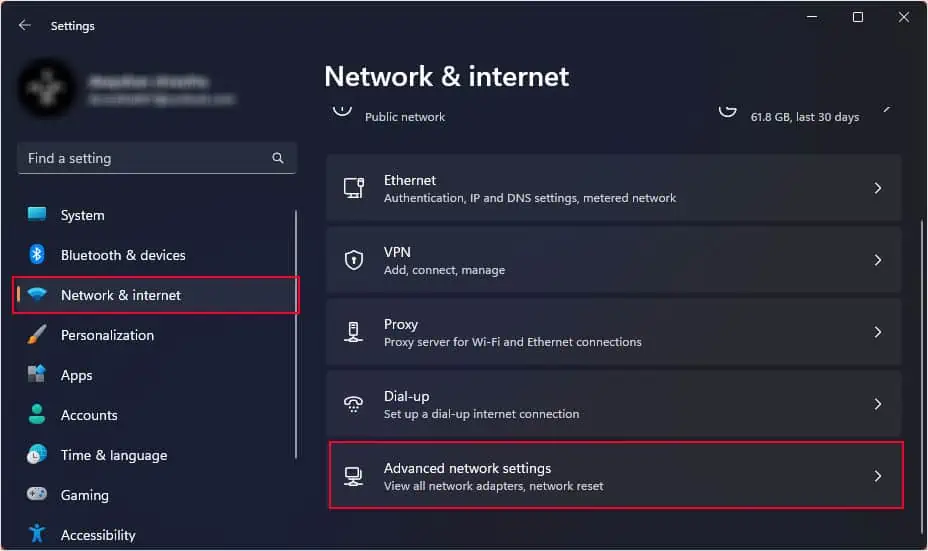
- Navigate to Network & Internet > Advanced network settings.

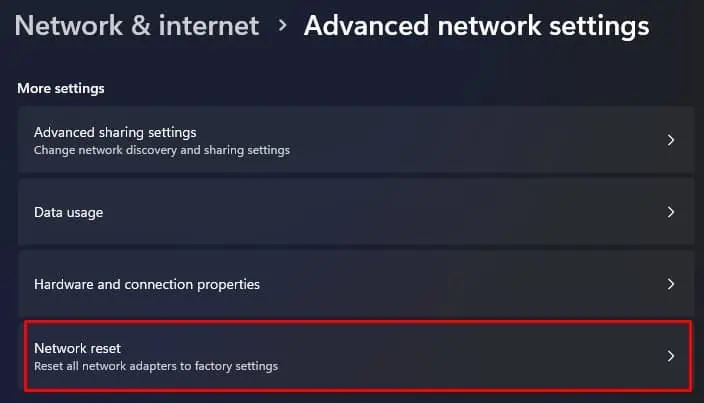
- Click on Network Reset.

- Click on Reset Now. The PC will now restart in 5 minutes.
Fixes for IIS Manager
The issue also occurs when trying to start a website through IIS. In such cases, here are some things that you can try.
Close Processes Using Conflicting Ports
By default, the IIS (Internet Information Service) uses port 80 for HTTP and 443 for HTTPS requests. If there is an application in your system that is also using the same port, you will get the error message when you start the default website.
To fix this, you either need to close the process that is using this port or change the port used for communication in IIS. First, let’s try closing the process that is using port 80 or 443.
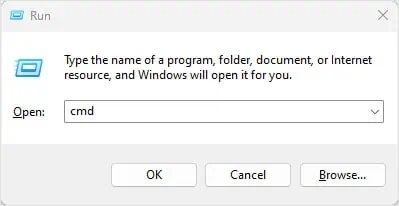
- Press Windows + R and type
cmd. - Press Ctrl + Shift + Enter. This will open the command prompt as admin.

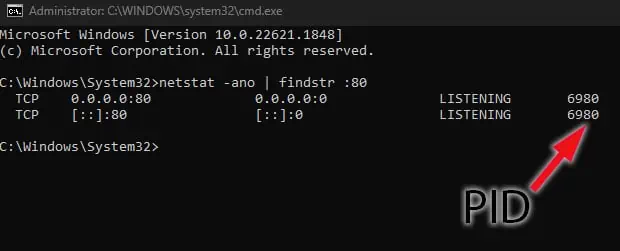
- Type
netstat -ano | findstr :80and press Enter.
- If it displays any result, note the PID. The PID is the number at the end.
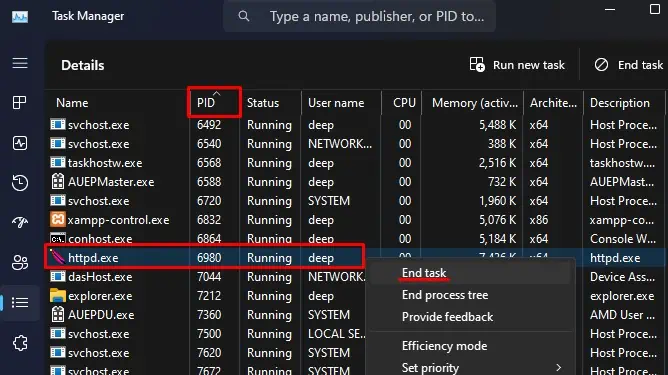
- Now, open the Task Manager and go to the Details tab.
- Search the PID that you noted in step 4.
- Right-click on this process and select the End task.

- Again type
netstat -ano | findstr :443and press Enter. - Now, follow Steps 4 through 7.
Change IIS Default Port
If that does not work or if you cannot stop the process that is using the port, try using another port to host the website from IIS.
- Open IIS.
- On the left panel, expand the item at the top of the list.
- Double-click on Sites.
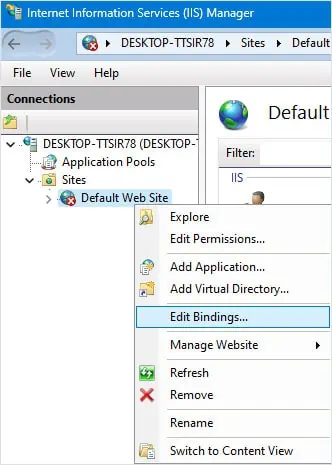
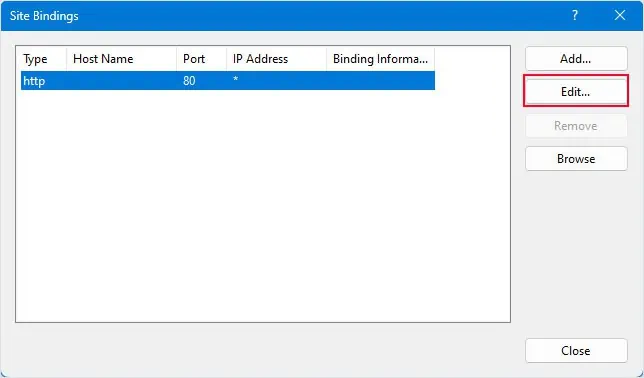
- Right-click on the Default website and select Edit Bindings.

- Select a hostname and click on Edit.

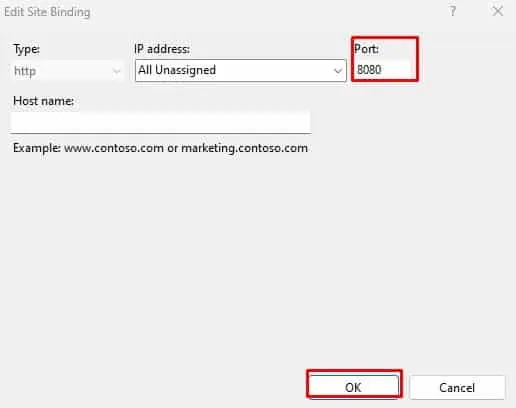
- If it is using port 80, change it to 8081 and if the website is using port 443, change it to 8443.

- Click on OK.
- Close the dialog box and try to start the default website.
- If you are still getting the same error message, you need to change registry settings so that IIS uses the default HTTP address.
Use Default HTTP Address
For IIS to use the default address, you need to change a few registry values. Changing the wrong settings in the registry could cause system instability and sometimes may even cause more problems than before. So make sure that you back up the registry first.
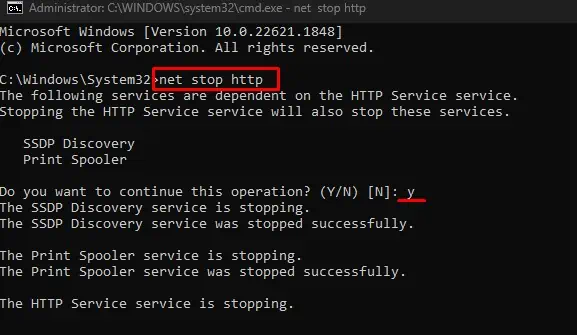
- Open Command Prompt as admin.
- Type
net stop HTTPand press Enter. - Press y and press enter when it asks for confirmation.

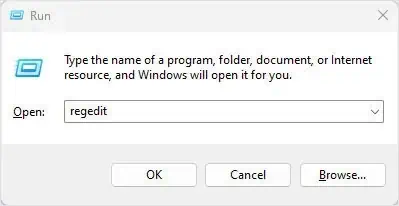
- Now, open Run.
- Type
regeditand press Enter.
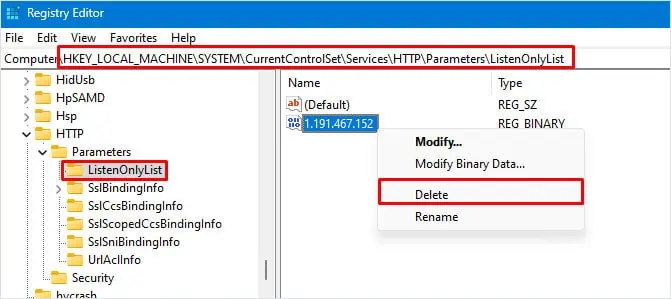
- Navigate to
HKEY_LOCAL_MACHINE\SYSTEM\CurrentControlSet\Services\HTTP\Parameters\ListenOnlyList - If there is no entry named ListenOnlyList, the system is using the default HTTP address.
- If you see an entry named ListenOnlyList, right-click on the IP address with value other than 0.0.0.0 and select Delete.

- Click Yes.
- Delete all other IP addresses except 0.0.0.0
- Again Open the Command prompt in Elevated mode.
- Type
net start HTTPand press Enter.

