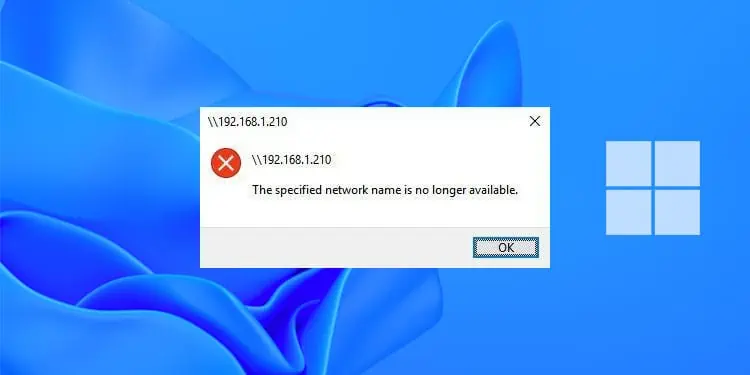
You will encounter the “The specified network name is no longer available” error while trying to access a network resource such as Network Attached Storage, a remote device, or the server/Domain Controller (DC) itself. This issue can also occur on the server side if the controller tries to access such resources, add users to the domain, or while trying to promote the DC.
Usually, it means that the resource is no longer available or the admin has imposed restrictions on your device regarding such access. They may also have taken down the server. But the issue may also occur unintentionally due to various other reasons.
If the network resource is no longer online or available, there’s nothing you can do to access it unless the admin decides to make it available again. However, for the latter case, there are many possible solutions you can try out on your client device or the server side.
What Causes “Specified Network Name is No Longer Available” Error
Apart from the server admin tampering with the network resource, here are some possible causes for the above error:
- The necessary protocol is disabled.
- Required ports not being open.
- Security applications clocking access to the network resource.
- Issues with the user folder of the application, such as incorrect permission, compression, or encryption.
- The domain controller not fulfilling the necessary conditions before promotion.
- Bugs in the network access software.
How to Fix the Specified Network Name is No Longer Available?
Some of the possible solutions below require you to have access to the network server or domain controller. If you don’t have access, you need to contact the system admin and have them perform such operations. Other solutions require you to make changes to your own computer, which you can do without any issues.
Enable SMBv2/v3 Protocol
A network uses the Server Message Block (SMB) protocol to provide access to shared resources attached to the same network. Currently, only SMB v2 or v3 is used, and SMB v1 is already deprecated. So, many devices do not have SMBv1 enabled by default and instead opt to use the later versions.
However, it is possible that these protocols are not enabled on either the client side or the server. So, you need to do so manually to resolve your issue. SMBv3 and v2 use the same stack, so you only need to enable SMBv2 to use either protocol.
On Client Side
- Open Run by pressing Win + R.
- Type
cmdand press Ctrl + Shift + Enter to open the Elevated Command Prompt. - Enter the following commands:
sc config lanmanworkstation depend= bowser/mrxsmb20/nsisc config mrxsmb20 start= auto
- Restart your PC
On Server Side
- Press Win + R to open Run.
- Type
powershelland press Ctrl + Shift + Enter to open Windows PowerShell. - If the operating system in the server is Windows 8 and Windows Server 2012 or higher, enter the command below:
Set-SmbServerConfiguration -EnableSMB2Protocol $true
Then, typeYand press Enter if prompted.
- For earlier versions, you need to enter the following command:
Set-ItemProperty -Path "HKLM:\SYSTEM\CurrentControlSet\Services\LanmanServer\Parameters" SMB2 -Type DWORD -Value 1 -Force
- Restart the PC if you used the Set-ItemProperty command
Check SMBv1 Protocol Status
Just enabling SMBv2 may not be enough. If you have enabled both SMBv1 and v2/v3 on your system, but the server only enables SMBv2/v3, your device may erroneously try using the SMBv1 channel instead.
So, you need to disable it on your client side in such a scenario.
- Open the Elevated Command Prompt.
- Type the following command and press Enter after each:
sc config lanmanworkstation depend= bowser/mrxsmb20/nsisc config mrxsmb10 start= disabled
- Restart your PC to apply the change.
Alternatively, you can enter the following command on the Elevated Windows PowerShell to disable the protocol:Disable-WindowsOptionalFeature -Online -FeatureName SMB1Protocol
In rare cases, the server may only support SMBv1 but have it disabled while enabling SMBv2/v3. So if you can’t resolve the issue after performing all previous steps and the earlier solution, you may need to enable SMBv1 on the server along with your client system.
To enable it on the server,
- Open the Elevated PowerShell.
- For Windows 8 and Windows Server 2012 or older OS, type
Set-SmbServerConfiguration -EnableSMB1Protocol $trueand press Enter. Then, if prompted, typeYand press Enter.
- For previous OS versions, use
Set-ItemProperty -Path "HKLM:\SYSTEM\CurrentControlSet\Services\LanmanServer\Parameters" SMB1 -Type DWORD -Value 1 -Forceinstead.
To enable it on the client,
- Open the Elevated Command Prompt.
- Enter the commands below:
sc config lanmanworkstation depend= bowser/mrxsmb10/mrxsmb20/nsisc config mrxsmb10 start= auto
Open Firewall Ports
You can encounter this issue while accessing the network name through any protocol. Each protocol needs different ports to initiate and continue the connection. So you need to make sure the corresponding ports are open to avoid the above error.
First, search for the ports you need from the internet or official sources. Then, follow the steps below to check these ports:
- Open Run.
- Type
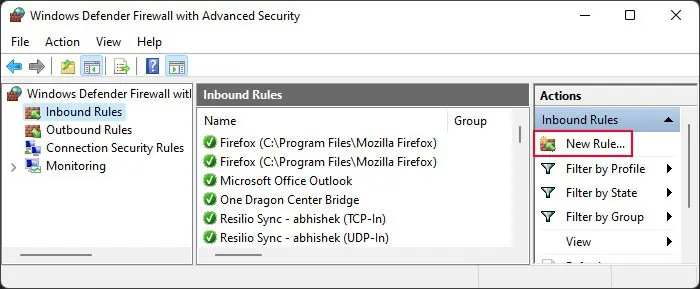
wf.mscand press Enter to open Windows Defender Firewall with Advanced Security. - Select Inbound Rules or Outbound Rules depending on your situation. Then, click on New Rule.

- Check Port and click Next.
- Tick UDP or TCP depending on your scenario, and type the port number under Specific remote ports. You can use multiple ones while separating them with commas.

- Then, click Next.
- Check Allow the connection and hit Next.
- Select the types of the network where this rule applies and select Next.
- Then, enter any name and description you want for the rule and click Finish.
Disable Third-party Security Software
Third-party security software such as antivirus and network scanners can also block access to or from a network resource. You can try temporarily disabling the security on the client side or the host side to prevent this issue.
However, keep in mind that the software is there for the protection of your system. So, you need to make sure that the resource is not really dangerous before disabling the real-time or network security.
On the other hand, you can also add the network resource or user to the exclusion list to resolve the error without disabling such software. If you don’t have access to the server, you can ask the system admin if the server needs to create an exception.
Reset Permissions of AppData Folder
If you are suffering from this issue while using an application, such as Windows Subsystem for Linux, it might be because of some issues with the application’s user folder inside AppData. One of the possible causes is incorrect permission settings. It hinders the app from accessing the user folder and prevents access to a network resource.
You can resolve this issue by resetting the permissions of the AppData folder.
- Open Run.
- Type
cmdand press Ctrl + Shift + Enter to open the Elevated Command Prompt. - Enter the command
icacls %USERPROFILE%\AppData /q /c /t /reset
Decompress or Unencrypt Application User folder
Another possible issue with the application’s user folder involves your system compressing or encrypting the folder. While some applications work in such a scenario, there are many others that do not.
So you need to disable the NTFS compression or encryption from the folder. To do so,
- Open Run.
- Type
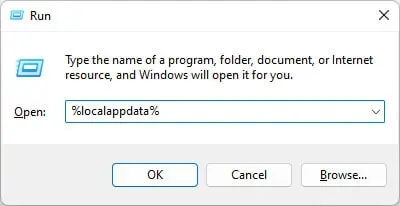
%localappdata%and press Enter to enter the AppData\Local folder.
- Search for the application user folder inside this folder.
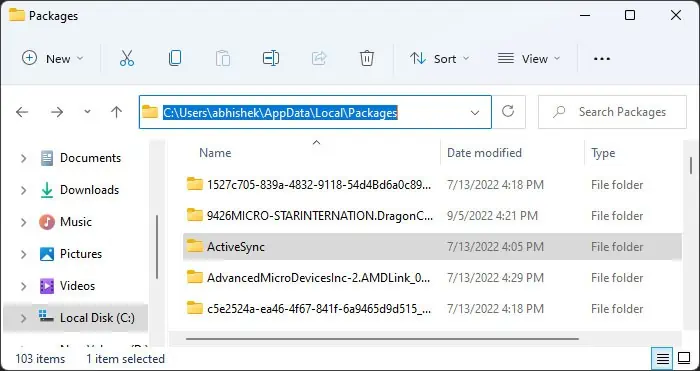
- If it is an app provided by Microsoft, you need to Look inside AppData\Local\Packages. For instance, if you encounter this error while using Windows Subsystem for Linux, the folder name inside Packages will be that of the Linux distros.
- Right-click on the folder and select Properties.
- Click Advanced on the General tab.
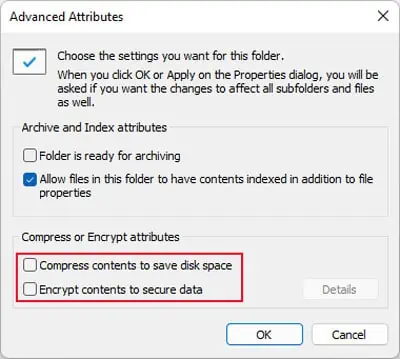
- Uncheck Compress contents to save disk space and Encrypt contents to secure data.

- Click OK > OK to close Properties while applying the changes.
Completely Reinstall Application
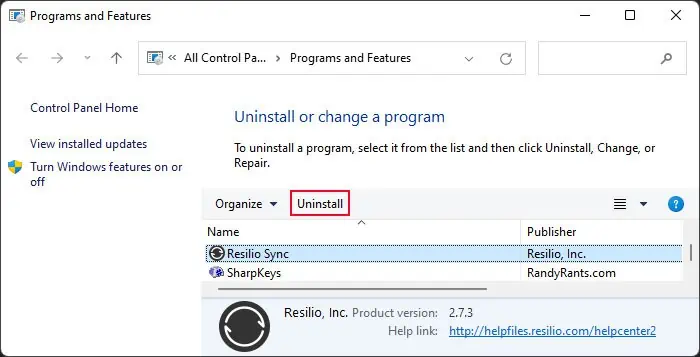
You can also try completely uninstalling the network access apps where you encounter this error and then reinstall the latest version to resolve the issue. Doing so also accounts for any possible bugs present in the app itself.
- Open Run.
- Type
appwiz.cpland press Enter to open Programs and Features. - Look for your application and select it.
- Click
Uninstalland confirm if prompted.
- Follow the instructions in the uninstaller.
- Then, open Run again.
- Type
%localappdata%and press Enter to enter the AppData\Local folder. - Search for the application user folder inside this folder.
- If it is an app provided by Microsoft, you need to Look inside AppData\Local\Packages.

- Delete the user folder.
Now, reinstall the application and see if you still encounter the error.
Migrate from FSR to DFSR
If you encountered this error while trying to promote the Domain Controller on servers older than Windows Server version 1709, it’s because the older File Replication Service (FRS) is no longer supported. You need to migrate from FSR to DFSR, and the domain functional level needs to be 2008 or higher to resolve this issue.
It is not feasible to include all the necessary steps in this article. So, recommend following the dedicated migration guide provided by Microsoft or a Microsoft Tech Community user’s streamlined guide to migrate to DFSR.
Review Your Code
If you encountered this error while running a self-created program that accesses a network resource, it is likely that there’s an issue with your coding.
Since there are many possible places where such bugs can occur, the most common ones are as follows:
- Trying to write into a stream that is already closed by the remote peer will cause this issue. So, you need to make sure not to close the stream or not allow the peer to close the stream unless the data transfer or communication is complete.
- Another reason is the set or default timeout period being too low that the time taken to complete the query or communication. You simply need to extend this period to resolve the issue.
There may also be other errors in your code. We recommend you upload it to forums like StackOverflow and seek help from fellow users.
