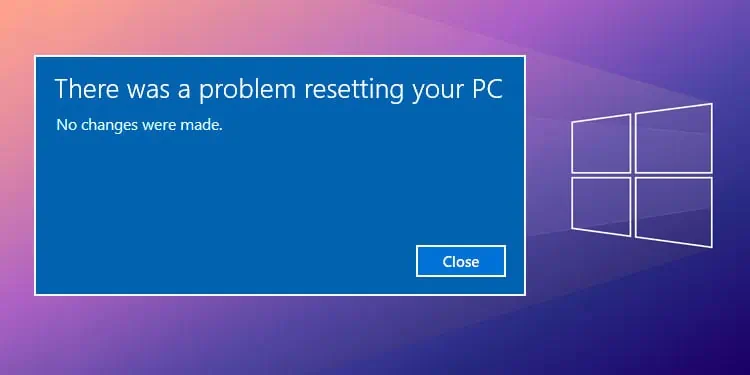
The error message “There was a problem resetting your PC” appears when you try to reset your PC from the recovery options in Windows Setting. This usually happens when the OS has issues accessing desired files to begin the reset process.
When you reset your PC, the system uses a Windows image from the recovery partition. If the image is corrupted or damaged, the PC will run into this situation. So, the fixes for this error message basically revolve around repairing the Windows image.
Run Startup Repair
Startup Repair is a recovery tool in Windows that repairs the operating system when it runs into any issues. It does this by repairing the system files required to load the OS.
If you are facing a problem while resetting your PC, startup repair might fix the issue.
- Open Settings.
- Navigate to System > Recovery.

- Click on Restart Now.

- Once the PC restarts, navigate to Troubleshoot > Advanced options.
- Here, select Startup Repair.

- Wait for the process to complete and boot into Windows.
- Now, try resetting the PC.
Run DISM and SFC
The SFC command repairs all your system files using Windows image. But if the Windows Image is corrupted, running the SFC command does not work.
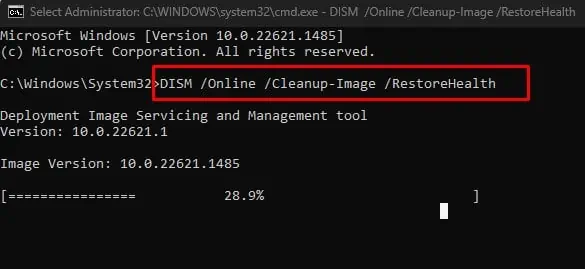
So, it’s better to run the DISM command first to fix the Windows image and then repair the system file using SFC Command.
- Open Command Prompt as Administrator.
- Type
DISM /Online /Cleanup-Image /RestoreHealthand press Enter.
- Wait for the DISM command to complete execution and type
sfc /scannowand press Enter.
- Restart the PC and try resetting the PC.
If the DISM restore health command fails to repair the Windows image, the SFC command also fails to fix any problem with the system files. In such cases, you can use a separate source image file to fix your Windows image.
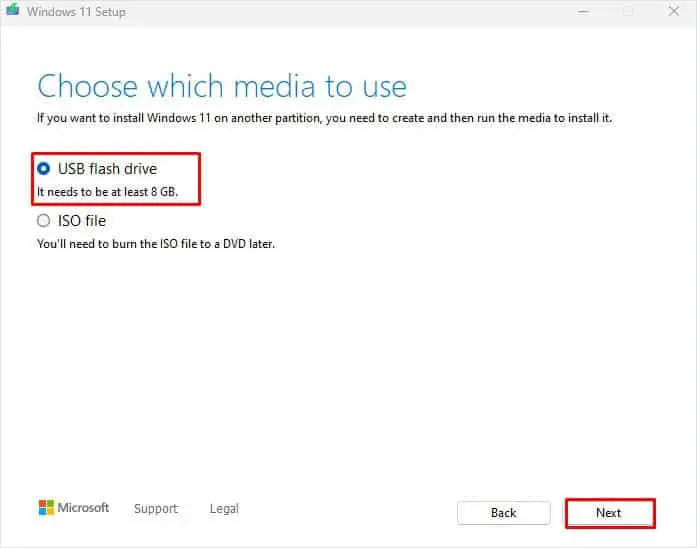
- Insert the USB drive into your computer. Make sure that the USB drive has at least 8GB of free storage space.
- Go to Windows 11 Download center if you have Windows 11 installed and Windows 10 download center if you have Windows 10 installed.
- Under Create Windows 10 Installation media or Windows 11 Installation media depending on your version of Windows, click on Download now.

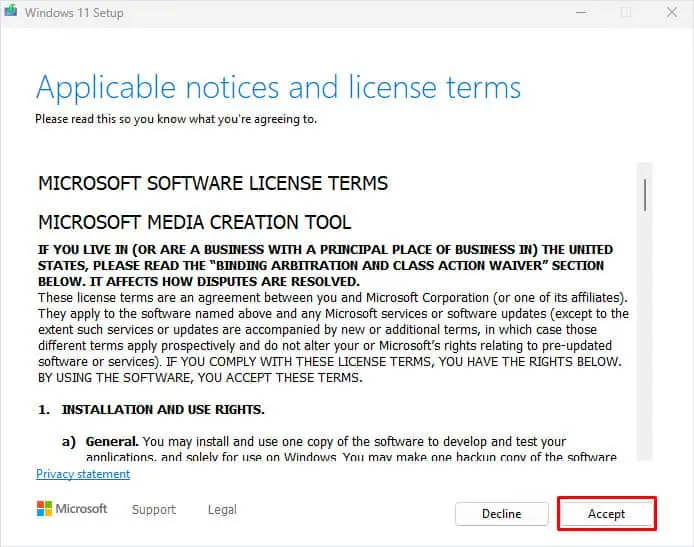
- Open the downloaded executable file.
- Click on Accept.

- Select Next.
- Check USB flash drive and select Next.

- Select the USB drive and click on Next and wait for the process to complete.
Now, turn on the PC that gives the error message, “There was a problem resetting your pc” and follow the steps below.
- Go to the Windows Recovery mode and navigate to Troubleshoot > Advanced options > Command Prompt.
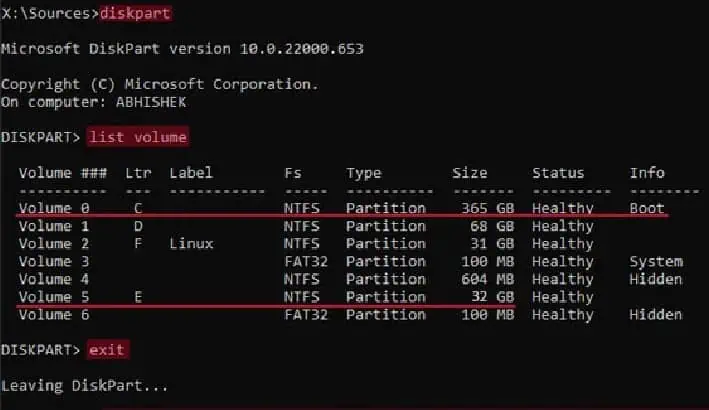
- Type
diskpartand press Enter. - Again, type
list volumeand press Enter. - In the Ltr column, note the drive letter assigned to your USB drive and Primary Drive Letter. You can check the Size column to determine the USB drive and check the Info column for Boot to determine the primary drive letter. In my case the USB drive letter is E and the Primary drive is C.
- Type
exitand press Enter.
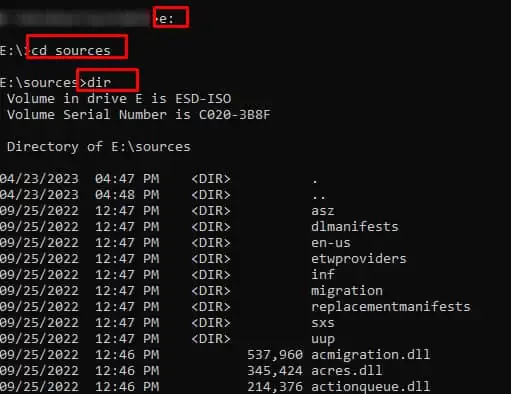
- Now, type
<USB drive letter>:and press Enter. Replace <USB drive letter> with the drive letter that you Noted in step 4. - Type
cd sourcesand press Enter. This will take you inside the sources folder in the bootable USB drive. - Type
dirand press enter to get the list of files and folders inside Sources.
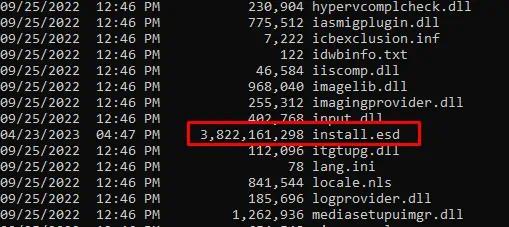
- In the list, check for a large file (around 4GB) and note the name of the file. It is either
install.esdorinstall.wim.
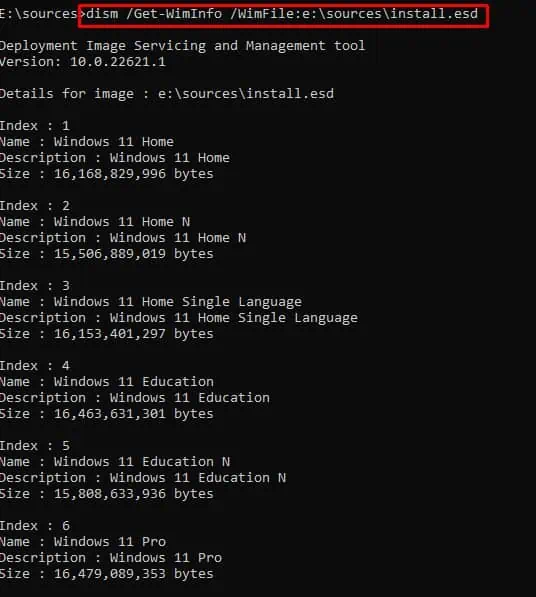
- Type
dism /Get-WimInfo /WimFile:<USB drive letter>:\sources\install.esd(orinstall.wimdepending on the file name from Step 9). Replace<USB drive letter>with the drive letter from Step 4.
- Here, note the Index value for your Windows Edition. I am currently using Windows 11 Pro. So, the Index for me is 6.
- Now, type
dism /image:<Primary drive letter>:\ /cleanup-image /restorehealth /source:<USB drive letter>:\source\install.esd(or install.wim):<Index Number> /limitaccess.
Replace<Index Number>and<Primary Drive Letter>with the index number and primary drive letter you noted in Step 11 and Step 4 respectively. - The final command should look something like
dism /image:c:\ /cleanup-image /restorehealth /source:E:\sources\install.esd:6 /limitaccess.
- Press enter to run the offline DISM command.
Once the DISM command runs, you need to run offline SFC to repair the system image
- Type
bcdeditand press Enter.
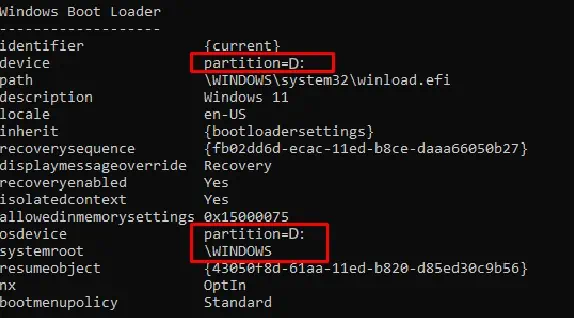
- Under Windows Boot Loader, check values corresponding to device, osdevice, and systemroot.
- Type
sfc /scannow /offbootdir=< device drive letter> /offwindir=<osdevice drive letter>\<systemroot>.
In my case, the command issfc /scannow /offbootdir=D:\ /offwindir=D:\Windows
Perform System Restore
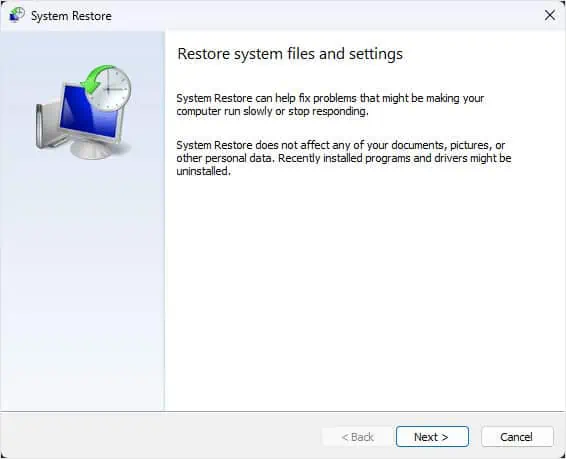
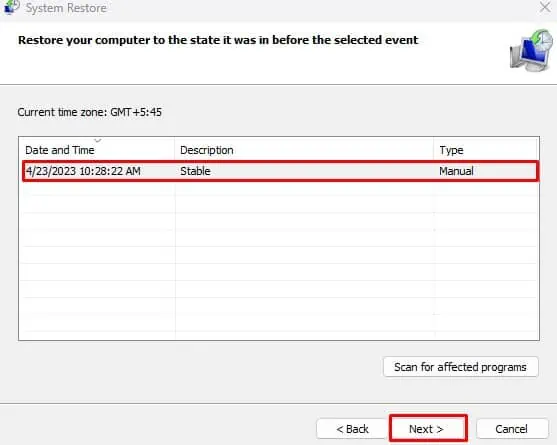
System Restore reverts the current state of the system to the state saved on a Restore Point. When you perform a system restore, problems in the OS should get fixed as long as the system is stable when the restore point was created.
- Open Run, type
rstruiand press Enter. - Click on Next.

- Choose a Restore point and click on Next.

- Click on Finish to confirm the restore point.
- Click on Yes when it asks for confirmation.
Install Windows Using Bootable USB Drive
Finally, if none of the solutions work, you need to clean install Windows using a bootable USB drive. By doing this, the system will install a fresh batch of Operating System files.
Re-installing Windows using a bootable USB drive will delete all files and folders in the storage device. So, make sure that you back up important data before you install a fresh version of Windows.
- Create a bootable USB drive containing Windows 10 or 11.
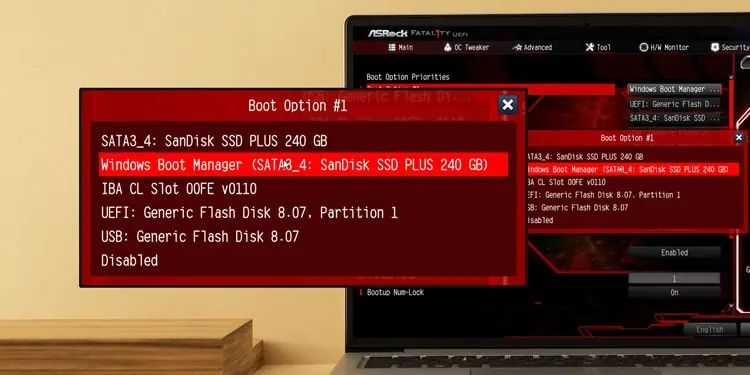
- Go into BIOS and set the USB drive as your primary boot device.

- Restart your PC. You should boot into the Windows Setup screen.
- Now, follow the installation process to install Windows. Make sure that you choose the correct storage device when installing Windows.

